Advertisement
DO NOT attempt or allow
somersaults. Landing on the
head or neck can cause
serious injury, paralysis or
death, even when landing in
the middle of the bed.
WARNING: Users should consult with a physician before beginning any exercise or conditioning pro-
gram.
If user feels faint or dizzy, immediately stop using the rebounder trampoline.
Avoid bouncing when tired. Take breaks often.
Use only in a well lit area by responsible, mature, non-intoxicated persons.
Never use trampoline on an un-level surface. Only use when dry.
Keep away from objects which could interfere with safe use. Clear obstructions underneath, above, or around the
rebounder trampoline. Check for adequate vertical clearance (avoid low ceilings, ceiling fans, light fixtures, etc.) and
lateral clearance (avoid furniture, lamps, walls, other trampolines, etc.).
Inspect before each use. Replace or adjust any loose, worn, defective, or missing parts.
Do not jump on and off the trampoline. Do not use the trampoline as a springboard to or from other objects. Do not
step on the frame when getting on and off the trampoline.
Stop bounce by flexing knees as feet come in contact with the trampoline bed. Learn this skill before attempting oth-
er more advanced moves. Control is more important than bounce height.
For information concerning skill training, contact a qualified fitness trampoline instructor.
Store and protect trampoline from unauthorized use.
For additional information, contact us at JumpSport.com or 1-877-507-1399.
It is the responsibility of the purchaser to become familiar with all of the information in this booklet, to convey the warnings to all
Commercial Use
Only models in our 300 and 500 Series are for commercial use, and are subject to shorter warranty periods (see Warranty section).
How to Adjust
FlexBounce™ Cords
(if applicable)
If you wish to change the
firmness of your rebounder,
turn it upside down. Then pull
cord tighter to different knot,
according to chart. See pic-
ture for firmness settings.
IMPORTANT: Grab cords
with both hands and be sure
to re-position bungee so ten-
sion remains evenly distribut-
ed. Not re-positioning will
cause cord to wear unevenly.
FlexBounce III
= 3 knot
cord
Softer
Soft Setting on all FlexBounce connectors
Medium Setting on every other connector
Medium Setting on every connector
Firmer
Retain address information for future use.
Retain address information for future use.
JumpSport, Inc.
1680 Dell Ave.
Campbell, CA 95008 U.S.A.
Fitness Trampoline™ User's Manual
WARNING
Read these materials prior to assembling
and using this rebounder trampoline
Use trampoline only with mature, knowledgeable supervision.
users, and to enforce JumpSport's rules for safe use.
Soft Setting
(factory setting)
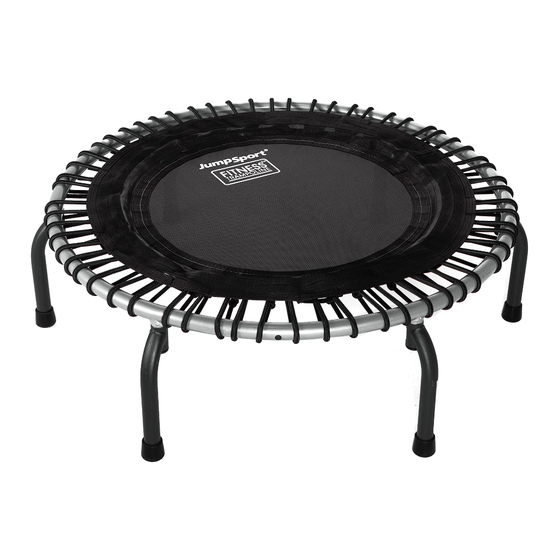
(Pictures are for illustration purposes only and may not match actual product.)
FlexBounce III Configurations
1-877-507-1399
www.fitnesstrampoline.com
Arched Leg, Non-Folding Models
DO NOT allow more than one
person on the trampoline.
Use by more than one person
at the same time can result in
serious injury.
FlexBounce VII
shown here
Medium
Setting
FlexBounce VII Configurations
Soft Setting on all FlexBounce connectors
Medium Setting on every other connector
Soft / Medium / Medium Settings (repeat pattern)
Medium Setting on every connector
Firm Setting on every other connector
Medium / Firm / Firm Settings (repeat pattern)
Firm Setting on every connector
Covered by one or more of the following US Patents: No.6.840,891, No.D666,266, and
No. D680,609. Other US and International Patents Pending
Copyright © 2003-2017, by JumpSport, Inc. All rights reserved.
1
FlexBounce
connector
Firm
Setting
Instruction Manual P/N: INS-P-20764-03I
.
Advertisement
Table of Contents

Summary of Contents for JumpSport Fitness Trampoline
- Page 1 Stop bounce by flexing knees as feet come in contact with the trampoline bed. Learn this skill before attempting oth- er more advanced moves. Control is more important than bounce height. For information concerning skill training, contact a qualified fitness trampoline instructor. Store and protect trampoline from unauthorized use.
- Page 2 If you are going to install an exercise handle, turn to next page for installation. When all legs are installed, turn your rebounder over. IMPORTANT: Bolts may offer resistance when tightening. No The JumpSport Fitness threads of the bolt should be Trampoline is now ready for use! exposed when bolt is properly installed.
- Page 3 ** Installing Exercise Handle Bar ** WARNING: If you have handle Handle Leg legs attached, do NOT attempt to LEG-A-20324-02 use the rebounder without the rest handle pieces properly installed first. IMPORTANT: A hinge must be between the handlebar assembly. The 2 handle legs will be installed in place of the normal legs at the 2 locations shown above.
-
Page 4: Limited Warranty
2) Send the part(s) to the designated Service Center, along with a copy of your original sales receipt and a brief written descript tion of the problem, including how it occurred. You must pay freight and insurance to return the part to JumpSport. At Jump Sport’s sole discretion, we may ask you to send photographs in addition to or in lieu of returning the part.


Need help?
Do you have a question about the Fitness Trampoline and is the answer not in the manual?
Questions and answers