Advertisement
Quick Links
Information on Waste Disposal for Consumers of Electrical &
Electronic Equipment
This mark on a product and/or accompanying documents
indicates that when it is to be disposed of, it must be treated
as Waste Electrical & Electronic Equipment (WEEE).
Any WEEE marked waste products must not be mixed with
general household waste, but kept separate for the
treatment, recovery and recycling of the materials used.
For proper treatment, recovery and recycling; please take all
WEEE marked waste to your Local Authority Civic waste site,
where it will be accepted free of charge.
If all consumers dispose of Waste Electrical & Electronic Equipment correctly,
they will be helping to save valuable resources and preventing any potential
negative effects upon human health and the environment, of any hazardous
materials that the waste may contain.
Please Recycle Your Spent Batteries
Batteries should not be disposed of in unsorted municipal waste, but separately
collected to facilitate the correct treatment and recycling of the substances they
contain. The recycling of batteries ensures the recovery of these valuable
materials and prevents any potentially harmful effects upon both the
environment and human health.
Please contribute to battery recycling by segregating all spent batteries and
actively participating in their collection and recycling. Various battery collection
schemes will be in operation in different areas of the country. However, battery
collection bins will be available at retail stores that sell batteries as well as at
schools, libraries and other public buildings.
Thank you for purchasing our ride on vehicle, we wish your child
enjoy it for years to come. Please read the instruction guide carefully
before using it.
SPECIFICATION
NAME
Spec
Battery
6V7AH
Motor
drive 6V 15W
Age
>37 month
Max. Load
35kg
Size
1000X600X590 mm
Speed
3-4 km/h
Time for use
charge 8-12 hours,use 1-2hours
Charger
output DC6.0V 0.6A
Fuse
20A
NOTES OF CHARGING
1. Before your first driving,charge the battery for 12 hours before the vehicles
first used.
2. Connect the terminal of battery and charger, and then plug the charger into
the 230-240V AC mains socket.
3. Please charge 8-12hrs after driving 1-2hrs, the charging time cannot exceed
20hrs.
4. When the riding speed is slower than the normal level, recharge right
now for 8-12 hrs.
5. If the car has a long time not being used,please fully charge the battery, then
charge once per 3 months,to extend the battery's life.
6. If the charger is hot(but under 71 C)while charging, that's normal.
7. The car must use the special charger supplied with it to avoid damage of the
charger, battery and circuit.
8. Battery charging must be performed by adult!
9. Non-rechargeable batteries must not be recharged.
10.Only batteries of the same or equivalent type as recommended are to be
used.
11.Batteries must be inserted with the correct polarity .
12.Exhausted batteries should be removed from the body.
13.The supply teminals must not be short circuit.
14.Do not mix old and new batteries.
1
front
1.Install steering wheel(P1)
Assemble the Steering wheel Insert the Plug and
Connector together at Steering wheel and Steering
column, then tigthen all wires. Make sure the Steering
接插件
steering wheel
wheel put at correct orientation as picture showed and
fix it by the screw and nut provided. Do not damage or
steering wheel connector
trap the wires during assembly. Do not hit the buttons
on Steering wheel hardly.
2
2.Assemble the front window frame: (p2)
First pull the front window frame outwards and position it
protruding
into the protruding platform,then press the frame into the
platform
fixing slots.When hearing the sound click , it shows that
fixing slot
the frame is in the position.
3
3.Assemble the spoiler:(p3)
Put the side long slot into the "T"- shape bar, and press
spoiler
down. When the click sound heard, it shows that it is
positioned in the right place.
4.Install battery
4
Connect the battery terminal with circuit together, (the
battery
thermal fuse
fuse of this car is thermal fuse, which will protect the car
circuit when there is any circuit failure, and automatically
recover after the failure is cleared.)
cover
battery bracket
5
5.Install seat
seat
Fix the seat over the battery compartment ,and turn the two
screws on the seat to lock position .
6
6.Removing seat
Turn the screws from lock to open position, then pull the seat
out of car .
Trouble Types
Cause Analysis
1.low voltage
2.wheel fixing pin loose
3.battery terminal connector
cannot move
detach
4.battery damaged
5.Electric parts broken
6.motor broken
7.R/C battery no power
1.battery terminal connector
loose
Fail to charge
2.no power
3.charger broken
1.battery is not full
cannot move long
2.battery aging
battery has voice
1.Chemical Reaction
and heat when
charging
1.old battery
2.no power
Speed slow
3.over load
4.road is not level
Noise of gear box
1.gear broken
car shaking
1.loose contact of motor
when moving
2.motor clanage
car moving but
1.loose contact of steering
wheel connector
sound/light
2. sound-light board broken
function bad
cannot stop the
1.Electric part damaged
car
If cannot remove the troubles, please contact for repairing sevice.
o
Removing method
recharge battery
fix the pin again
re-connect
change new battery
repair
repair
change new battery
connect again
connect again
change charger
recharge battery full
change battery
normal
change battery
recharge full
weight should be under
35kg
move on the level road
repair
re-connect
repair
re-connect
repair
repair
With forward and reverse drive
Multi function steering wheel with
sound and light functions
Rubber tread band to prolong life of
tyres and improve grip
PART NAME
MODEL
W431D
AEOLUS
MANUAL FOR ASSEMBLY AND USING
● Full functions remote control for Forward, Backward, Left & Right
● Steering wheel can engage automatically when not in remote
● Auto centralizing function for steering wheels return
● Multifunctiions of Light & Sounds effects
1
2
manual
pin
1
7
car body
hub cap
2
8
front wheel
spacer
3
9
rear wheel
seat
4
10
rim
steering wheel
5
11
6
washer
front window frame
12
7.Assemble the front wheels
7
Put on the washer and front wheel to the front axle,
align the bushing with wheels. Put on the wheel hub,
front wheel
and then insert another washer, lock the snap-pin
rim
onto the hole of wheel axle. Cover the hub cap lastly
washer
and complete the wheels assembly.
snap pin
hub cap
8
8.Assemble the rear wheels
rim
Put on the rear wheel to the front axle, align the
spacer with wheels. Put on the rim, and then
insert another washer, lock the snap-pin onto the
snap pin
rear wheel
hole of wheel axle. Cover the hub cap lastly and
complete the wheels assembly
washer
hub cap
1.forward and backward of car(picture1)
9
1.1:Driver sit steady, power set to "1", pedal gear stick switch
to forward, step on the pedal to ride forward, loose to stop.
1.2:Gear stick switch to backward, step on the pedal to ride
backward,loose to stop.
pedal switch
power
10
2. Emulational car steering wheel, easy to operate, different
horn
music buttons have different music, press the
start button for the sound"the car start,be seated". when
turn right
turn left
press the left/rightbutton, with the sound "turn left/turn tight".
front light
brake
music3
3. Turn the two screws on the seat to unlock position, and
music1
music4
remove the seat. Unplug the terminals of battery and car
music2
start button
circuit; and then connect the terminals of battery and
(the car will go, sit down please"" )
charger, plug the charger to mains afterwards.
11
4. Change fuse. If the fuse broken,open the cover
board, unscrew the fuse socket, and then
change it with new fuse.
1. Must not ride on the street, highway, slope, sand, or any dangerous places.
2. Must ride on even ground.
3. Must ride without overload.
4. Battery charging must be performed by adult..
5. Children's riding must be guided by adults.
6. Do not change the circuit of the vehicle or it's attaching electric equipments.
7. Do not ride in water, or other fluid to the vehicle.
8. Do not push Backward/Forward switch when riding.
9. When meeting barriers, just loose the pedal switch, turn away from the barriers, march
on.
10. Please charge in time when the vehicle runs slowly otherwise life-span of battery will
be reduced.
11. Please charge the battery fully, before keep it for long time then recharge it per 3
months to prolong life-span of battery.
12. Don't ride in a rainy day.
13. Battery, charger, electric wire, plug, enclosure and other parts should be periodically
check for damage, if have damage, need to repair berore use.
14. "Transformers used with the toy are to be regularly examined for damage to the cord,
plug, enclosure and other parts, and that, in the event of such damage, the toy must
not be used with this transformer until the damage has been repaired."
15. The toy is not intended for children under 3 years old.
16. The toy must only be used with the recommended charger.
17. The charger is not a toy.
18. Toys liable to be cleaned with liquid are to be disconnected from the charger before
cleaning.
19.Check the equipped charger periodically and carefully.
20.Check the Harness, Socket, Accessories, and other Components all in good condition
or not, repair or replace them if any problem found.
For the safety of your baby, please take attention about the following:
1. Adult assemble only!
2. Choking hazard small parts,not for children under 3 years old!
3. Don´t give the tool to child in order to avoid open the protector on the top of the
battery.
4. Recharge must be performed by Adult.
5. Keep plastic bags away from child to avoid suffocation.
1.Before assmbling, please check all parts are complete, if there is any lack, please
contact us.
2.Please inspect all function/parts when assemble/use often.
3.Please make cleaning treatment for this product termly and don't destroy any parts.
4.In order to keep your child safe, please inspect and maintain car periodically.
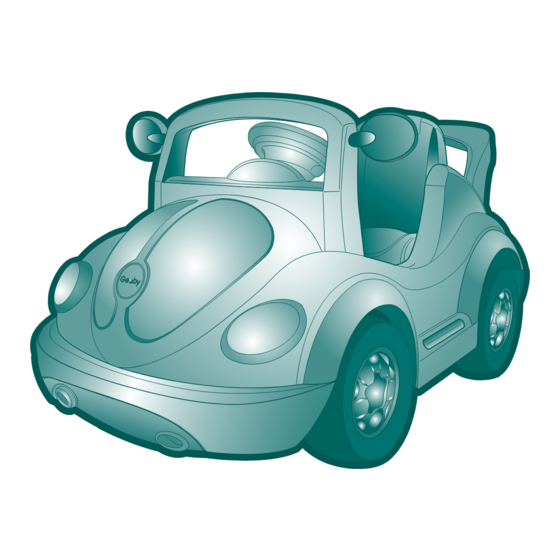
Instruction Manual
Police Car
W 431E
spoiler
13
battery
14
charger
15
.
Advertisement


Need help?
Do you have a question about the Police Car W431E and is the answer not in the manual?
Questions and answers