Table of Contents
Advertisement
Quick Links
1. MOUNTING THE DOCK:
Voyager Pro's dock is made to be bolted to the vehicle.
Use the mounting hardware included in your kit, or use any
AMPs style mount from the popular RAM Mounts manufacturer.
Voyager Pro quickly snaps in and out of the dock for quick
removal when not in use, and can be locked to the dock using a
tiny allen wrench in the side of the dock.
2. VEHICLE SENSORS:
You should install the wheel sensor, ignition sensor, engine
temperature sensor, and vehicle power connection. If you plan
not to use one of these sensors, some abilities of Voyager Pro
may not function.
3. DC POWER:
DC power required.
Do not connect Voyager Pro to AC power
except when using the AC wall charger. Connect to a switched 12V
DC power source so that power to Voyager Pro is cut when the
vehicle is turned off. When connected to the vehicle battery, charging
will begin immediately and Voyager Pro should have full functionality.
On some bikes, erratic tach readings can be fixed by wiring the
power directly to the battery instead of behind the key switch.
There are few menu options to change when Voyager Pro is used
without a connection to vehicle power:
1. Vehicle Profile > Wake Detection, Speed Source, Charge Mode
2. Maps and GPS Setup > AutoLog Source
4. USER MANUAL:
The user manual is embedded in Voyager Pro itself. Access it by
pressing the Menu button and looking for "User's Guide" at the
bottom of the main menu. The manual is available online at
trailtech.net.
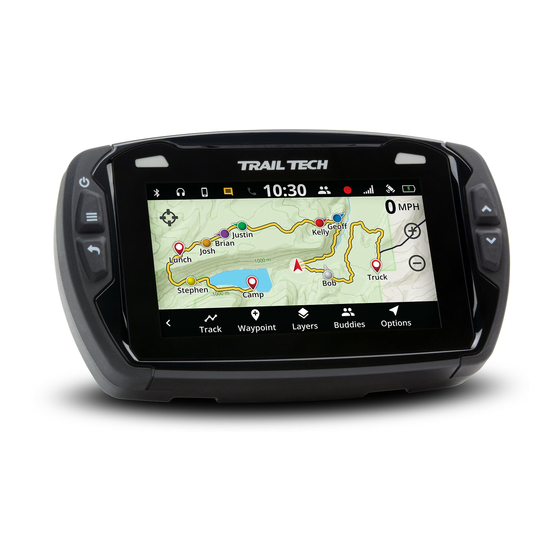
5. MAIN SCREENS:
Voyager Pro has several main screens.
Press UP and DOWN on the buttons to move
between screens. Press the menu button to
open the main menu. On some screens like
the map screen, press the back button to open
a sub-menu with screen-specific options.
6. ENABLE SCREENS:
Voyager Pro has a series of main information screens. Screens
can be enabled/disabled in the settings menu. By default, the
stop watch and satellite screens are hidden. Available screens
include: the gauge cluster screen with a large speedometer, the
tach screen with an animated tach graph, the map screen, the user
definable screen, the stop watch screen, and the GPS satellites
screen.
QUICK-START
Press Here on
Map Screen to
Open Mini-Menu
010-ELV-192
Tech Support: (844) 378-8143
technicalservice@apexproductgroup.com
Press Button to Release
Voyager Pro From Dock
Rubber Pin Protector
Allen Lock
Sensor Wires
Advertisement
Table of Contents

Related Manuals for Trail Tech VOYAGER PRO


Summary of Contents for Trail Tech VOYAGER PRO
-
Page 1: User Manual
Do not connect Voyager Pro to AC power except when using the AC wall charger. Connect to a switched 12V DC power source so that power to Voyager Pro is cut when the vehicle is turned off. When connected to the vehicle battery, charging will begin immediately and Voyager Pro should have full functionality. -
Page 2: Microsd Card Slot
Tracks saved as GPX files on your computer can be placed on the MicroSD memory card, then imported onto Voyager Pro for viewing and route following. This is a great way to share recorded tracks, or for pre-planning trips. Music files saved on the MicroSD card can be played from the Media screen. -
Page 3: Power Connection
DC electrical system. Most carburated MX bikes put out AC power, but Voyager Pro requires DC power. Fuse: Introducing a fuse into the circuit before electronics is always a good idea. Use a 2 amp fuse with Voyager Pro (not provided.) SENSORS:... - Page 4 TEMPERATURE SENSORS AND ANTENNAS INSTALLS TEMPERATURE SENSORS: Most Voyager Pro kits contain a model-specific temperature sensor. Installing the temperature sensor Radiator Fin enables temperature readouts on Voyager Pro’s gauge screens. Alternative sensors are available. Sensor Installation: Vehicles cooled with water use sensors to measure the fluid temperature, while air-cooled machines take Confirm correct size.
- Page 5 WHEEL SENSORS INSTALLS KTM WHEEL SENSOR INVERTED FORK WHEEL SENSOR Trail Tech wheel If the fork is close to sensors work with the the brake rotor, then KTM and Husqvarna the VHB fork sensor OEM install location. can be used. Peel...
- Page 6 WHEEL SENSORS SETUP WHEEL SENSOR TEST: Test for correct sensor/magnet placement before permanently mounting. 1. Set the vehicle on a stand so that the front (left) wheel spins easily. 2. Plug the wheel sensor cable into the computer. 3. Install the magnetic bolt. 4.
Need help?
Do you have a question about the VOYAGER PRO and is the answer not in the manual?
Questions and answers