Table of Contents
Advertisement
Advertisement
Table of Contents

Summary of Contents for Nordic Lab ULT U100
- Page 1 ULT U100 GB Instructions for use...
-
Page 2: Warning
Warning As the appliance contains a WARNING: flammable refrigerant, it is es- Do not damage the refrigerant sential to ensure that the refrig- system erant pipes are not damaged. WARNING: The quantity and type of the Do not use electrical appli- refrigerant used in your appli- ances inside the refrigerated ance is indicated on the rating... - Page 3 Always keep the keys in a sepa- WARNING: ● rate place and out of reach of If a not compatible USB pen children drive is used it can cause a reset of the controller Before servicing or cleaning the ● appliance, unplug the appliance WARNING: from the mains or disconnect the...
-
Page 4: Table Of Contents
Contents Warning ..........2 Get to know your freezer ......4 Unpacking the appliance......5 Before starting the appliance ....6 Electrial connection........ 7 Battery backup system at start-up ..8 Installation and start-up ......9 Maximum shelf load......10 Ventilation guards. -
Page 5: Get To Know Your Freezer
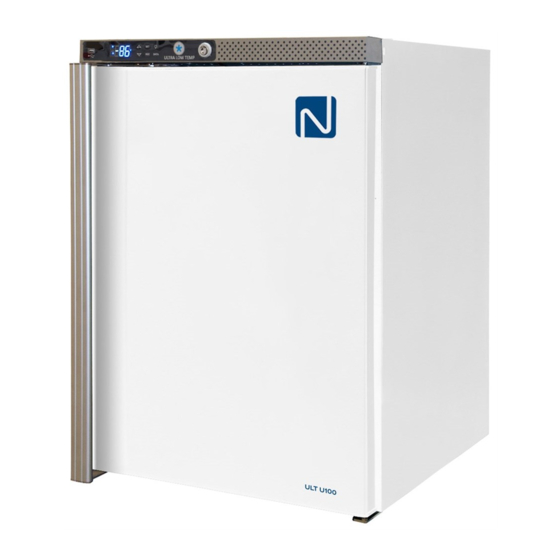
Get to know your freezer: Lock Display/Keyboard LED light Rating plate (on the back side) Adjustable shelf Door handle Vacuum release Adjustable feet fig. 1... -
Page 6: Unpacking The Appliance
Unpacking the appliance The appliance is delivered in a re-usable wooden box. 1. Reusable wooden package 2. Cut the strapex bands or see next page if sealed with plast clips 3. Remove top 4. Remove top foam inlays 5. Remove box and lift down the appliance... -
Page 7: Before Starting The Appliance
Before starting the appliance Before operating your new appliance, please read the following instructions care- fully as they contain important information on safety, installation, operation and main- tenance. Keep the instructions for future reference. On receipt, check to ensure that the appli- ance has not been damaged during trans- port. -
Page 8: Electrial Connection
Electrical connection Room temperature Wiring and connections in power supply systems must been all applicable (local and The climate class is stated on the name national) electrical codes. Consult these plate. This specifies the optimum room codes lengths and sizes prior to cabinet temperature. -
Page 9: Battery Backup System At Start-Up
Battery backup system at start-up This appliance is equipped with a battery back up system. Please activate the battery backup before final placement (see fig. 2) NOTE! The battery backup system does not supply the cooling system with power. When starting up the appliance for the first time it is necessary to switch on the battery backup system. -
Page 10: Installation And Start-Up
Installation and start-up The appliance viewed from Setting up above It is important that the appliance is abso- If the appliance is placed beside a wall, lutely level. It can be levelled by screwing there must be sufficient room for its door to the adjustable feet of the appliance up or be opened wide enough to allow the shelf to down. - Page 11 Side by side In side-by-side arrangements there must be at least 60 mm between each unit on each side of the cabinets, to ensure the doors can be opened freely (See fig. 6) fig. 6 Ventilation guards The two ventilation guards are mounted before moving the appliance to it’s final placement. The guards function is to secure an absolute minimum of ventilation, if the appliance is pus- hed too close up against a wall.
-
Page 12: Maximum Shelf Load
Maximum shelf load The stainless steel shelfs are designed to carry the weight of max. 15 kg each. 15 kg 15 kg Interior fitting Stainless steel shelf The shelfs are demountable and the height position is adjustable. Demounting The shelf is demountable without use of tools: Lift up to release all hooks and pull the shelf to one side. - Page 13 Remounting in new height position The shelf is remount by following a few simple steps: 1. The shelf hooks are smallest in the rear 2. Place one side of the shelf hooks in the edge. new height position Make sure the shelf direction is correct, by ensuring the small punched “half moon”...
-
Page 14: Port Hole
Port hole The freezer is equipped with an extra port hole. Ex. for use of an external sensor. 1. Remove 3 screws in the cover for the 2. Place the cover at the side of the compressor compartment and remove freezer. - Page 15 8. Put in the sensor and push it all way 9. Closed the port hole by using putty through the tube. 10. Close the inside hole by using putty 11. Fasten the cover with the 3 screws...
-
Page 16: Reversible Door
Reversible door 1. For a hingeside change turn off main 2. Loosen and remove visible top screws power and place the appliance on a (use 3 mm allan key + Torx 20 tool) table. Protect top from scratches. 3. Open the door to gain access. 4. - Page 17 7. …and place it upside down on the 8. Loosen 2*M8 screws approx. 5 mm cabinet top (use 5 mm allen key) 9. Loosen pivot nut (use 10 mm spanner) 10. Lift up the top bracket/pivot. Pull out the door and lift it off the bottom pivot 11.
- Page 18 13. Tighten pivot (2,5 mm allen key) 14. Tighten pivot nut 15. Demount fix nut and top handlelock pin 16. Remount the top handlelock pin in the opposite side. Tighten the fix nut again 17. Go to bottom and remove the door 18.
- Page 19 19. Remove bottom handlelock pin plate 20. Loosen bottom pivot nut by loosening two screws (use 4 mm allen key) 21. Loosen door bottom pivot 22. Remount door pivot for use in new hinge side 23. Tighten pivot 24. Remount and tighten pivot nut...
- Page 20 25. Loosen the bottom door bracket screws 26. Loosen the screws in the opposite side in one side (use 4 mm allen key) and rotate the bottom door bracket 27. Then remount and tighten the screws 28. Re-position the door pivot nylon washer in both sides 29.
- Page 21 31. Go to the current door bottom and de- 32. Remove the door closer and keep it mount two screws from the door closer ready for mounting in the “new” door (use Torx 20 tool) bottom 33. Remount the two screws without the 34.
- Page 22 37. Remount the two screws and the door- 38. Re-locate the door on the cabinet in closer is fixed the new hingeside 39. Tighten the two M8 screws in the top 40. Carefully push the toppanel back into bracket position 41.
- Page 23 43. Remount the lock pin 44. Remount the four topscrews 45. The door re-hinging operation is now complete...
-
Page 24: Controller. Operation And Function
Controller. Operation and function User interface LEDS Each LED function is described in the following table. MODE Function Compressor enabled Flashing Anti-short cycle delay enabled An alarm is occurring Recording activated Battery is fully charged Flashing Battery is beeing charged Flashing Charging problem or battery failure °C/°F... - Page 25 Buttons To display target set point; in programming mode it selects a parameter or confirm an operation. To enter fast access menu In programming mode it browses the parameter codes or increases the displayed value. (DOWN); n programming mode In programming mode it browses the parameter codes or decreases the displayed value.
- Page 26 Clock settings and RTC alarm reset RESET 1. Push the UP key once, to acces the menu. 2. The display shows H∩, then push SET. 3. The parameters for setting time and date occurs. To set the parameter push SET, push the UP or DOWN button to change the parameter.
-
Page 27: Defrosting, Cleaning And Maintenance
Defrosting, cleaning and maintenance Defrosting: Thoroughly defrosting: The items stored in the freezer and the When the layer of frost and ice exceeds humidity of the surrounding air gradu- 4-5 mm the freezer should be completely ally cause frost and ice to form inside the defrosted. - Page 28 and prolong service life. Use clean water. After cleaning the sealing strip, check that it continues to provide a tight seal. It is recommended that the wire and tubular condensers on the rear of the appliance be cleaned. The condenser, the compressor and the compressor compartment must also be kept free of dust and dirt.
-
Page 29: Fault Finding
Fault finding Fault Possible cause Remedy Screen of keybord is Power failure; the fuse is blown; Check that power is connected. not lit. the appliance is not plugged in Reset the fuse correctly, the power is cut. Temperature in The ventilation grille is blocked. Ensure unhindered air circulation freezer too high The door is not closed properly. -
Page 30: Warranty, Sparepart And Service
Warranty, spare parts and service Warranty disclaimer Before calling for technical assistance, please check whether you are able to Faults and damage caused directly or rectify the fault yourself. If your request for indirectly by incorrect operation, misuse, assistance is unwarranted, e.g. if the appli- insufficient maintenance, incorrect building, ance has failed as a result of a blown fuse installation or mains connection. -
Page 31: Disposal
Disposal For business users in the Euro- Information for Users on Collection and Disposal of Old Equipment and pean Union. If you wish to discard electrical and used Batteries electronic equipment, please contact These symbols on the products, your dealer or supplier for further packaging, and/or accompanying information. - Page 32 Supplied by STARLAB www.starlabgroup.com Reserving the right to alter specifications without prior notice. Revision date: 21-11-2016 Drawing no.: 80.60.234 rev 04...
Need help?
Do you have a question about the ULT U100 and is the answer not in the manual?
Questions and answers