Table of Contents
Advertisement
Available languages
Available languages
Quick Links
Operating Instructions
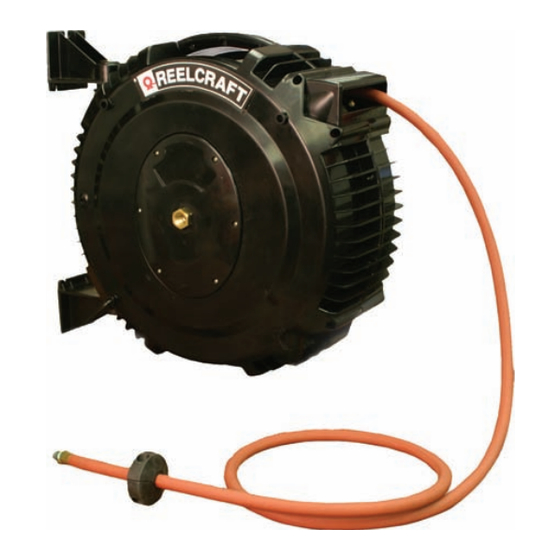
Series S Spring Driven Hose Reels
Low Pressure Model Numbers:
SGA3650 OLP
SWA3850 OLP
SGA3665 OLP
SHA3850 OLP
SGA3850 OLP
SCA3650 OLP
SAFETY
Personal injury and/or equipment damage may result if proper safety
precautions are not observed.
• Ensure that reel is properly installed before connecting input and
output hoses.
• Bleed fluid/gas pressure from system before servicing reel.
• Before connecting reel to supply line, ensure that pressure does
not exceed maximum working pressure rating of reel.
• Remember, even low pressure is very dangerous and can cause
personal injury or death.
• Be aware of machinery and personnel in work area.
• If a leak occurs in the hose or reel, remove system pressure
immediately.
Reelcraft Industries, Inc. • 2842 E Business Hwy 30, Columbia City, IN 46725
Ph: 800-444-3134 / 260-248-8188 • Fax: 800-444-4587 / 260-248-2605
Customer Service: 855-634-9109 • reelcraft@reelcraft.com • www.reelcraft.com
SCA3850 OLP
Dimensions
A
19 1/4"
B
22 3/4"
C
9 1/2"
D
19"
Read this manual carefully before installing,
E
9 1/2"
• A high tension spring assembly is contained within the reel.
Exercise extreme caution.
• Pull hose from reel by grasping the hose itself, not the control
valve.
• Ensure that reel, hose, and equipment being serviced are
properly grounded. Use an ohmmeter to check ground
continuity.
• If reel ceases to unwind or rewind, remove system pressure
immediately. Do not pull or jerk on hose!
• Treat and respect the hose reel as any other piece of machinery,
observing all common safety practices.
IMPORTANT
operating or servicing this equipment.
Form# 1162-1004 Rev: 2/2018
Advertisement
Table of Contents

Related Manuals for Reelcraft Industries, Inc. SGA3650 OLP

Summary of Contents for Reelcraft Industries, Inc. SGA3650 OLP
- Page 1 Operating Instructions Series S Spring Driven Hose Reels Low Pressure Model Numbers: SGA3650 OLP SWA3850 OLP SCA3850 OLP SGA3665 OLP SHA3850 OLP SGA3850 OLP SCA3650 OLP Dimensions 19 1/4” 22 3/4” 9 1/2” IMPORTANT 19” Read this manual carefully before installing, 9 1/2”...
-
Page 2: Installation Instructions
Series S Spring Driven Hose Reels INSTALLATION INSTRUCTIONS HOW TO USE THE REEL floor or under bench mount can be purchased for other mounting positions. Once you have mounted your reel and made the inlet connection you are ready INSTALLING THE INPUT HOSE(S) The optimum height for wall mounting is for operation. -
Page 3: Maintenance And Repair
Series S Spring Driven Hose Reels MAINTENANCE & REPAIR SERVICE OR REPLACE O-RINGS AND SEALS As with normal and scheduled mainte- INSERTING THE LOCKING PIN Note: Do not score or scratch the SERVICE TOOL nance checks, O-rings and seals will need O-ring, seal or sealing surfaces. - Page 4 Series S Spring Driven Hose Reels REPLACE SWIVELS, SLIP-RINGS AND Whenever adding tension only add one remove the four outer screws. O-RING SEALS full turn at a time. Pull the hose all the way out of the Note: There is tension on this cap and it reel and using the service locking tool Before replacing the screws pull the hose will want to spin anti-clockwise so hold...
- Page 5 Series S Spring Driven Hose Reels PARTS BREAK DOWN - MAIN ASSEMBLY 602019 - Side Plate 261907 - Mounting Bracket 261902 - Inlet Side Plate 602018 - Hose Guide 263123 - 3/8” NPT Swivel 261903 - 1/2” NPT Swivel Note: Not all items are sold as individual parts - complex assemblies are sold in sub-assembly kit form.
-
Page 6: Instrucciones De Operacion
Instrucciones de Operacion Series S Carreteles para Mangueras Baja presion modelos y numeros: SGA3650 OLP SWA3850 OLP SCA3850 OLP SGA3665 OLP SHA3850 OLP SGA3850 OLP SCA3650 OLP Dimensiones 19 1/4” 22 3/4” 9 1/2” IMPORTANTE 19” Lea este manual detenidamente antes de 9 1/2”... -
Page 7: Instrucciones De Instalación
Series S Carreteles para Mangueras Instrucciones de Instalación Cómo usar el carrete posiciones de montaje — vea los ejem- plos en la página siguiente. Una vez que usted haya montado su car- Instalación de la manguera de rete y hecho la conexión de entrada, está entrada La altura óptima para el montaje de pared listo para operación. -
Page 8: Mantenimiento Y Reparación
Series S Carreteles para Mangueras Mantenimiento y Reparación Servicio o reemplazo de anillos en ajuste) y deslice la funda de la rótula del forma de “O” y sellos eje de la rótula. Esto expondrá los anillos Inserción de la herramienta de ser- Como con las revisiones de mantenimien- en forma de “O”... - Page 9 Series S Carreteles para Mangueras Reemplazar rótulas, anillos de Siempre que agregue tensión, agregue carrete. Usando un separador en forma de deslizamiento y sellos de anillos en sólo una vuelta completa a la vez Antes de “C” o la herramienta de servicio, sujete la forma de “O”...
- Page 10 Series S Carreteles para Mangueras DESPLIEGUE DE PARTES - ASAMBLEA PRINCIPAL 602019 - Placa lateral 261907 - Soporte de montaje 261902 - Placa lateral de entrada 602018 - Manguera guía 263123 - 3/8” NPT Conjunto giratorio 261903 - 1/2” NPT Conjunto giratorio Nota: No todos los elementos se venden como partes individuales- los conjuntos complejos se venden en forma de grupo de sub-conjunto.
-
Page 11: Instructions D'opération
Instructions D’Opération Série S Enrouleurs de Tuyau Basse pression numéros de modèle: SGA3650 OLP SWA3850 OLP SCA3850 OLP SGA3665 OLP SHA3850 OLP SGA3850 OLP SCA3650 OLP Dimensions 19 1/4” 22 3/4” 9 1/2” IMPORTANT 19” Lisez ce manuel soigneusement avant d’installer, 9 1/2”... -
Page 12: Instructions D'installation
Série S Enrouleurs de Tuyau Instructions d’installation Comment utiliser le dévidoir La hauteur optimale pour un montage mural est celle qui permet au tuyau ou Unr fois que vous avez monté votre dévi- Installation des Tuyaux D’entrés câble d’être tiré sous un angle montant doir et réalisé... -
Page 13: Entretien Et Réparation
Série S Enrouleurs de Tuyau ENTRETIEN ET RÉPARATION Remarque : Prenez soin de ne pas Au cours des vérifications d’entretien normales ou planifiées, les joints toriques marquer ou rayer les surfaces d’étanchéité Insertion de l’outil de service et autres joints d’étanchéité auront besoin des joints toriques et autres joints. - Page 14 Série S Enrouleurs de Tuyau Quand vous ajoutez de la tension n’ajoutez Tirez le tuyau pour le sortir totalement du La première étape est d’enlever la qu’un seul tour complet à la fois. dévidoir et en utilisant l’outil de service de tension du dévidoir.
- Page 15 Série S Enrouleurs de Tuyau Décomposition des pièces - Ensemble principal type 602019 - Plaque latérale 261907 - Support de montage 261902 - Plaque latérale d’entrée 602018 - Guide de tuyau 263123 - 3/8” NPT Assemblée pivotant 261903 - 1/2” NPT Assemblée pivotant Remarque : Toutes les pièces ne sont pas vendues individuellement, les ensembles complexes sont ven- dus sous forme de kit de sous-ensemble.
Need help?
Do you have a question about the SGA3650 OLP and is the answer not in the manual?
Questions and answers