Table of Contents
Advertisement
Advertisement
Table of Contents

Summary of Contents for Stuart SMP50
- Page 1 Melting Point Apparatus SMP50 Instructions for use Version 1.3...
-
Page 2: Table Of Contents
Contents 1. Introduction 2. Safety advice before use 3. General description 4. Preparation for use 4.1 Electrical Installation 4.2 Installation 4.3 Warning 5. Instrument and software controls 5.1 Instrument 5.2 Connecting the accessory printer 6. Melting point determination 6.1 Terminology 6.2 Temperature Settings 6.3 Sample Preparation 7. - Page 3 12. Performing a Rapid Melt 13. Viewing Melt reports and videos 13.1 Manual event tagging 13.2 Opening previously saved Melt reports 13.3. Deleting or copying a melt report 14. Managing measurement files 14.1 File display 14.2 Searching measurement files 14.3 Favourites 14.4 Copying and deleting measurement files 14.5 Editing measurements 15.
-
Page 4: Introduction
1. Introduction Thank you for purchasing this piece of Stuart equipment. To get the best performance from the SMP50 please read these instructions carefully before use. Before discarding the packaging check that all parts are present and correct. For your own safety and that of others please read and understand the safety advice given below before using the equipment. -
Page 5: Preparation For Use
❖ Inadequately rated replacement mains leads, which do not meet the specification above, should not be used. The number of result files that can be stored on the SMP50 is largely dependent upon the runtime and size. -
Page 6: Installation
4.2 Installation Connect the unit to the electricity supply but DO NOT SWITCH ON. Place the unit on a firm, level, non-slip surface ensuring that there is sufficient free space on all sides without coming into contact with anything else during use. Switch the unit ON at the mains On/Off switch at the rear of the instrument. -
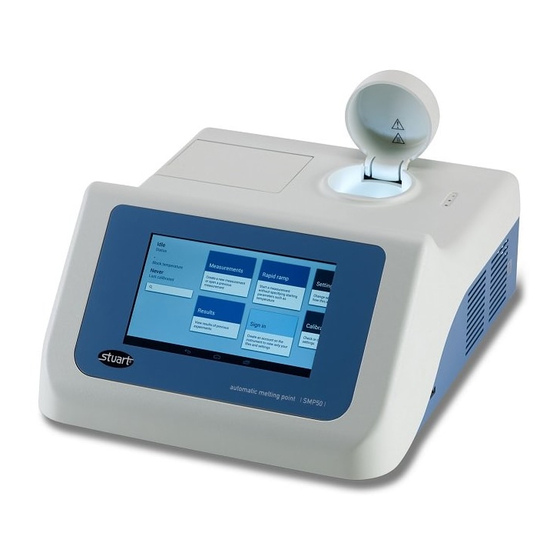
Page 7: Instrument And Software Controls
Also contains the fuse holder. 5.2 Connecting the accessory printer If you are using the accessory printer, SMP50/PRINTER, connect the printer USB cable to the USB port (item 5) of the SMP50 BEFORE turning on the power to the SMP50. -
Page 8: Melting Point Determination
The meniscus point or clear point is commonly used to define the melting point of a substance. The SMP50 automatically reports the clear point, the point at which the sample is a clear liquid and no solid particles remain, as the melting point of a substance. -
Page 9: Sample Preparation
Excessive amounts of sample in the capillary tubes will result in inaccurate melting point determinations. The SMP50 can accommodate up to three sample capillaries. For accurate melting point determinations it is recommended that three samples of the same material are prepared in the same way and analysed at the same time. -
Page 10: Main Menu Screen
7.2 Main menu screen After a short time the main menu screen is displayed. The Stuart SMP50 is controlled solely through the touch screen interface of the instrument and follows a basic Android user interface. If the number of options available in a menu exceeds the number that can be displayed on the screen, use a finger to scroll across or up and down to view all the options. -
Page 11: Navigation Bar
8. Settings Prior to using the SMP50 it is advised to set up the unit to your own preferences and geographical location. For accurate record-keeping, set the date and local time before first use. Touching the Settings card on the main menu screen will open the Settings menu. This consists of device settings, display formats and results settings. -
Page 12: Changing The Settings
Note: The SMP50 can serve as part of a US FDA 21 CFR part 11 compliant system relating to its use to generated results in an electronic format. Results generated on the instrument can be copied to a... -
Page 13: Creating A User Account
US FDA. 9. Creating a user account The SMP50 gives you the option to create your own password-protected user account. When signed into your account you will be able to set up your own user settings profile. - Page 14 Enter and confirm a password for the account You will now be signed in as ‘USERNAME’ and this will be shown at the top of the main menu screen. Once you are signed in to your user account you can edit the settings to your own preferences. These settings will be saved to your user account.
-
Page 15: Setting Up A New Measurement
10. Setting up a new measurement To run a melting point determination you will need to create a measurement profile. This will include the measurement name, start temperature and ramp rate. ❖ Touch the ‘Measurements’ card on the main menu screen to open the Measurements folder. ❖ Create a new measurement by touching the ‘+’... -
Page 16: More Options
❖ Specify a start temperature. This is typically 5-10°C below the expected melting temperature of the substance. Touch ‘Next’ on the keypad. ❖ Specify a ramp rate. The minimum is 0.1°C/min, the maximum is 20°C/min. Touch ‘Next’ on the keypad. 10.1 More options By default, the end of the melting point determination will be detected automatically. -
Page 17: Add Measurement Protection
10.2 Add measurement protection On this card you have options to password protect the measurement for security against changes from other users. A password can be set so that it is required to enter it when you wish to perform one or more of the following operations: ❖ Change (edit) the measurement. -
Page 18: Running A Melting Point Determination
11. Running a melting point determination 11.1 Sample preparation This section provides guidelines for sample preparation before performing a melting point determination. 1. For accurate melting point determinations, ensure the sample is dry. Dry the sample overnight in a vacuum desiccator with desiccant under reduced pressure if necessary. 2. -
Page 19: Starting A Measurement
11.3 Starting a measurement ❖ Place the prepared capillaries in the sample compartment and close the lid. ❖ From the main menu screen select the ‘Measurements’ card. ❖ Swipe up or down the screen to find the required measurement program and touch to open. If the measurement has not yet been defined, please follow section 10, Setting up a new Measurement. -
Page 20: Viewing A Measurement In Progress
11.4 Viewing a measurement in progress Once the command to run has been sent, the run screen will show the camera display and status of the measurement in progress. Run screen status ‘Heating’ 1. File name of the measurement. The back arrow returns to the previous screen. 2. - Page 21 Run screen status ‘Ramping’ During the ramping stage, the samples will begin to melt. The SMP50 will detect the start of the melting process by a change in the image intensity of the capillary tube. The sample status for each capillary will be indicated on the display.
- Page 22 Run screen with sample status ‘Melting’ in all three capillaries Run screen with sample status ‘Liquid’ in all three capillaries A short time after all the samples have become liquid the unit will stop automatically and ‘Finished’ will be displayed on the screen. The unit will automatically start to cool. ❖ When the melting point determination has finished, touch ‘OK’...
-
Page 23: Aborting A Measurement
11.5 Aborting a measurement If for any reason you wish to stop and abort a measurement, touch ‘STOP AND DISCARD’ at any time. The results and video will not be saved. ❖ Touch ‘Discard’ to confirm that you wish to stop the measurement. ❖ To continue with the measurement, touch the ‘Back’... -
Page 24: Viewing Melt Reports And Videos
13. Viewing Melt reports and videos Once a melting point determination has completed the Melt report screen is displayed. Melt report screen 1. File name of the Melt report. The back arrow returns to the previous screen. 2. Measurement and result summary with date and time stamp. 3. -
Page 25: Manual Event Tagging
Each melting point determination may contain events of interest that require highlighting in the Melt report. The SMP50 allows you to review the melt video and add defined event information for each individual capillary tube. Both the automatically determined events and any manually added events are shown in the Melt report. - Page 26 ❖ To add a manual tag at any point in the melting point determination, pause the video playback, select Tube 1, 2 or 3 then touch ‘ADD A TAG’. ❖ Touch the appropriate tag. Manual tag options The manually tagged value will be displayed under the appropriate tube heading. Up to 8 manually tagged values can be added for each capillary.
-
Page 27: Opening Previously Saved Melt Reports
Melt video screen showing a manually tagged event 13.2 Opening previously saved Melt reports Melt reports saved on the SMP50 can be viewed from the Results folder card. ❖ From the main menu screen, touch the Results card. ❖ Select and touch the required Results file to open a preview screen. -
Page 28: Deleting Or Copying A Melt Report
❖ Touch the ‘Overflow’ icon at the top right of the Melt report screen. This will open the options for deleting or copying to USB. Note: A USB flash drive must be inserted into the SMP50 for the ‘Copy to USB’ option to be active. Melt report delete and copy options ❖ Touch ‘Copy to USB’... -
Page 29: Managing Measurement Files
14. Managing measurement files When opening the Measurements card, the Measurements file screen will display a complete list of all measurement files stored on the unit. The action bar across the top of the screen can aid in searching, deleting or copying files. There is also a “favourites” feature which will allow you to easily select the files you use most frequently. -
Page 30: File Display
14.1 File display The file display can be viewed either in detail format or as a grid display. ❖ To toggle between display formats, touch the 'Detail’ or ‘Grid’ view icons. Detail view When in Detail view, touching the header allows Measurement files to be listed in order as follows: ❖ Measurement name, A-Z or Z-A. - Page 31 When in Grid view, the file order can be changed by touching the ‘Sort’ icon. Grid view with ‘Sort’ icon highlighted ❖ Touch the ‘Sort’ icon to change the display order when in grid view. You will have the option to order files by measurement name, start temperature, ramp rate or date created.
-
Page 32: Searching Measurement Files
14.2 Searching measurement files Using the search function will help you to find the Measurement file you require quickly and easily. ❖ Touch the ‘Search’ icon. Measurements folder with the Search icon highlighted ❖ Using the keypad, begin typing the name of the file. Both measurements and results files containing the search term will be displayed. - Page 33 ❖ Touch to select the required measurement. The measurement card will open and show a summary of the measurement details. Card showing details of the selected measurement file The following options are available from the measurement card: ❖ Touch ‘RUN’ to start the measurement. ❖ Touch ‘EDIT’...
-
Page 34: Favourites
14.3 Favourites Measurements which are used frequently can be added to a favourites list so they can be located quickly. ❖ To add a measurement to your favourites list, first open a measurement from the measurement files stored on the instrument. ❖ Touch the ‘Heart’... -
Page 35: Copying And Deleting Measurement Files
14.4 Copying and deleting measurement files Measurement files can be copied for editing or deleted when no longer required. 14.4.1. Copying or deleting single files ❖ Touch a measurement file to open the preview card. ❖ Touch the ‘Overflow’ icon to open the delete/duplicate options. Delete or duplicate a single measurement ❖ Touch ‘Duplicate’... - Page 36 14.4.2 Copying or deleting multiple files ❖ To select multiple files for copy or deletion, touch the ‘Overflow’ action button at the top right of the screen. ❖ Touch ‘Select’. This will open selection buttons next to each measurement file. Note: Touch the ‘Back’...
- Page 37 File is copied Before deleting a measurement, the instrument will display a warning as a check to ensure you wish to continue with the deletion. ❖ To permanently delete the selected files, touch ‘OK’. ❖ To abort the deletion, touch ‘CANCEL’. Warning check before files are deleted...
-
Page 38: Editing Measurements
14.5 Editing measurements Any parameter of a measurement can be easily edited. Note that if measurement protection is in place, a password may be required before the measurement can be edited. ❖ From the main menu screen select the ‘Measurements’ card. ❖ Swipe up or down the screen to find the required measurement file and touch to open. -
Page 39: Managing Results Files
15. Managing results files When opening the Results card, the Results screen will display a complete list of all results files saved on the unit. The action bar across the top of the screen can aid in searching, deleting or copying files. There is also a “favourites”... - Page 40 When in Detail view, touching the header allows Results files to be listed in order as follows: ❖ Measurement name, A-Z or Z-A. ❖ Mean clear point, low to high or high to low. ❖ Standard deviation, low to high or high to low. ❖ Date completed, newest first or oldest first.
-
Page 41: Searching Results Files
15.2 Searching results files Using the search function will help you to find the results file you require quickly and easily. ❖ Touch the ‘Search’ icon. Results folder with the Search icon highlighted ❖ Using the keypad, begin typing the name of the file. Both measurements and results files containing the search term will be displayed. -
Page 42: Favourites
Melt report 15.3 Favourites Results which are viewed frequently can be added to a favourites list so they can be located quickly. ❖ To add a result to your favourites list, first open a result card from the files stored on the instrument. -
Page 43: Copying And Deleting Results Files
❖ Touch a results file to open the preview card. ❖ Touch the ‘Overflow’ icon to open delete/copy options. Note: A USB flash drive must be inserted into the SMP50 for the ‘Copy to USB’ option to be active. Delete or copy a single result ❖ Touch ‘Copy to USB’... - Page 44 Warning check before a file is deleted ❖ To permanently delete the file, touch ‘OK’. ❖ To abort the deletion, touch ‘CANCEL’. 15.4.2 Copying or deleting multiple files ❖ To select multiple files for copy or deletion, touch the ‘Overflow’ action button on the top right of the screen.
- Page 45 Selecting results files for copying or deletion Note: A USB flash drive must be inserted into the SMP50 for the ‘Copy to USB’ option to be active. ❖ Touch ‘COPY TO USB’ to copy the selected files or ‘DELETE’ to delete the selected files.
-
Page 46: Viewing Results Files On A Computer
Results files which have been encrypted are saved as a zip file. The contents of the zip file can be viewed and exported using the companion desktop reader app, available at www.stuart-equipment. com. Encrypted results files cannot be changed or edited. -
Page 47: Printing Results
16. Printing results If you have the accessory printer (SMP50/PRINTER) connected to the SMP50 it is possible to print a Melt report. The Melt report print-out will show the following information: ❖ File name ❖ Date and time ❖ Mean clear point ❖ Standard deviation... - Page 48 Delete or print a Melt report ❖ Touch ‘Print’ to print the Melt report.
-
Page 49: Instrument Calibration
17. Instrument Calibration The SMP50 is factory calibrated to the specifications shown on the certificate supplied with the instrument. To ensure that the instrument is continuing to operate within specification, periodic checks on the accuracy of the temperature readings are recommended. If the accuracy of the instrument is found to deviate from the specification or if it is a requirement of your local quality policy, the user calibration procedure can be used to recalibrate the displayed temperature on the instrument. - Page 50 Calibration summary screen The calibration summary screen displays the following information: Correction: Value of the current correction factor. This will be 0.000 for factory calibration and will be updated when a user calibration is performed. Calibration type: Factory calibrated or user calibrated. Last calibrated: Displays the date of the previous user calibration.
- Page 51 Select the result of the first calibration standard ❖ Choose the result file for calibration by selecting and touching on it. Choose a result for calibration The mean clear point of the selected result will automatically populate the display for ‘First measured temperature’.
- Page 52 ❖ Next, on the line labelled ‘First expected temperature’ type in the certified value as given on the certificate supplied with the standard then touch ‘Next’ on the keypad. First calibration point ❖ If a single point calibration is all that is required, touch ‘APPLY CALIBRATION’. ❖ If another point is to be used, touch ‘ADD A SECOND POINT’.
- Page 53 The calibration summary screen will be updated with the latest calibration details. Note: Touching ‘RESET’ will return the unit to factory calibration and remove the correction factor. Updated calibration summary screen Reset factory calibration ❖ Touch ‘OK’ to reset to factory calibration.
-
Page 54: Calibration Correction Factor
‘APPLY’. Calibration history 17.2 Calibration correction factor Depending on how many calibration points are used, the SMP50 software performs the following temperature adjustments: ❖ Single point calibration: linear curve forced through zero (y = a.x). ❖ Double point calibration: linear curve through the two points specified, not forced through zero (y = a.x + b). -
Page 55: Performing A Software Update
Where applicable, software updates will be available at http://www.stuart-equipment.com/. ❖ To update the SMP50 software, first download the new software version onto a USB flash drive. ❖ Insert the USB flash drive into the SMP50 USB port and open the ‘Settings’ menu. -
Page 56: Maintenance And Servicing
19. Maintenance and servicing WARNING: Ensure the unit is disconnected from the mains electricity supply before attempting maintenance or servicing. This equipment does not require routine servicing and there are no serviceable parts within the equipment. The only user maintenance required is to clean external surfaces using a damp cloth and mild detergent solution. -
Page 57: Cleaning The Sample Block
19.3 Cleaning the Sample Block Occasionally it may be necessary to gain access to the sample block to allow broken capillary tubes or other debris to be removed. Please ensure that the sample block is cooled to room temperature and the instrument’s electrical power supply is disconnected before commencing the following procedure. -
Page 58: Warranty
20. Warranty Stuart warrants this instrument to be free from defects in material and workmanship, when used under normal laboratory conditions, for a period of 3 years. In the event of a justified claim Bibby Scientific Ltd will replace any defective component or replace the unit free of charge. This warranty... -
Page 59: Declaration Of Conformity
23. Declaration of Conformity... - Page 60 Bibby Scientific UK (Group HQ) Bibby Scientific - France Bibby Scientific - Middle East Beacon Road, Bâtiment le Deltaparc Silic pars Nord 2, PO Box 27842 Stone, 7 rue du Canal, Engomi 2433, Staffordshire BP 55437 Villepinte, Nicosia, Cyprus United Kingdom ST15 OSA 95944 ROISSY Charles de Gaulle, Tel: +357 22 660 423 Tel: +44 (0) 1785 812121...
Need help?
Do you have a question about the SMP50 and is the answer not in the manual?
Questions and answers