Table of Contents
Advertisement
Advertisement
Table of Contents

Subscribe to Our Youtube Channel
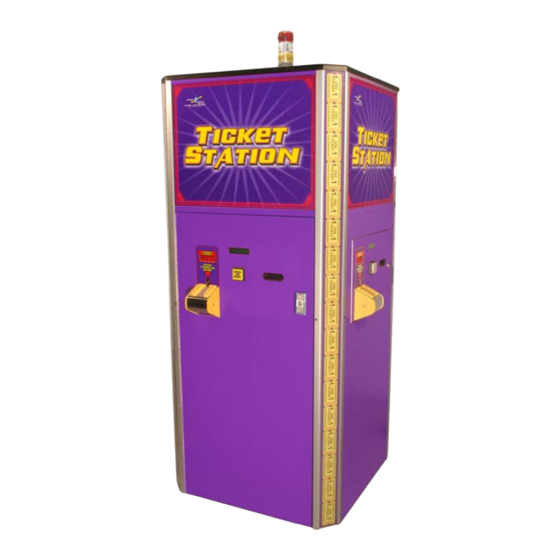
Summary of Contents for Benchmark Ticket Station
-
Page 2: Table Of Contents
Table of Contents General Operation Air Blast Cleaning System Setup Changing Ticket Bags Loading Printer Paper Tower Light Status Ticket Taker General Ticket Taker Overview Ticket Taker Operation Clearing a Ticket Jam Troubleshooting Guide 10-13 Programming Error Codes Parts List 17-18 Schematics 19-20... -
Page 3: Air Blast Cleaning System
(out of paper etc.), a ticket taker problem, and will let you know when the ticket bags are full 5. Low Dust Cutting • The cutters in the Ticket Station are designed to cut the tickets like a pair of scissors for low dust creation, contributing to clean optos and barcode scanners. -
Page 4: Setup
Setup 1. Install Power Cord The power cord can be run down and out the bottom of the machine or up and out the top of the machine. • To run the cord out the bottom of the machine: 1. Feed the power cord1 through the lower power cord hole2 in the bottom of the machine. -
Page 5: Changing Ticket Bags
3. Pull the receipt straight out. Air Blast Cleaning System The Air blast cleaning system in the Ticket Station is comprised of an air pump, a relay, the main air hose plumbing, one air valve per ticket taker, and the local air hose plumbing that is distributed from a manifold after the air valve. -
Page 6: Loading Printer Paper
Loading Printer Paper The printer will take different paper roll sizes. Small paper rolls (usually 7/16” diameter core) should be loaded on the small spindle2 located on the printer assembly. The largest paper roll that can be used on the small spindle is 2-3/4” diameter. Large paper rolls (11/16”... -
Page 7: Tower Light Status
Tower Light Status The tower light located on the top of the Ticket Station will let you know from across the room if something in the machine needs attention. You can further narrow the location of the problem from outside the machine by looking at the LCD display on each door. The door with the problem will have an error code on it. - Page 8 2. Ticket taker top assembly includes: a. Upper urethane roller1 b. Ticket sense opto receiver2 c. Notch sense opto receiver3 d. Upper barcode scanner4 e. Blue flat springs5 3. Ticket taker belt assembly includes: a. Ticket transport belts1 b. Lower barcode scanner2 c.
-
Page 9: Ticket Taker Operation
Ticket Taker Operation When ticket is inserted the ticket taker, the ticket sense opto is interrupted which starts the ticket taker drive motor. The urethane rollers take the ticket(s) to the transport belts which carry the ticket(s) to the cutters. There are blue flat springs in the top assembly that push down on the top assembly keeping the ticket down on the transport belts. -
Page 10: Troubleshooting Guide
Troubleshooting Guide Note: There are (2) power distribution circuit boards mounted to the power supply housing. Each board holds (3) fuses, one 5V & two 12V. If there is a DC power problem, check these fuses. Ticket Taker will 1. Check ticket sense opto pair. LED should come on and power output should pull to ground on the ticket not start sense opto receiver1 when opto is blocked by ticket. - Page 11 Ticket Taker Hall effect pcb1 output not getting to the ticket eater board. runs slowly 1. Check that when the motor is running, the LED2 on the hall effect pcb1 is flashing at least one time per then stops motor revolution. If the LED does not flash: a.
- Page 12 Ticket Taker will 1. Check notch count opto pair. LED on notch opto not count with receiver1 should flash as tickets are fed into ticket taker. Ticket inserted in any direction a. If LED does not flash, check power to the notch opto transmitter2 and notch opto receiver1.
- Page 13 Printer does not 1. Out of paper print 2. Paper installed backwards. The printer will only print on one side of the paper. See “Installing Printer Paper” section of this manual to verify correct installation. 3. Paper guide plate1 pushed up. This plate needs to be all the way in the down position in order for the printer to print.
-
Page 14: Programming
Programming PLEASE NOTE: The lockout switch must be activated for all programming functions to work. Be sure to pull the plunger out to activate power to the ticket taker board before programming. Use caution as the ticket taker now has power. If at any time the message “COMM. - Page 15 cursor to the Day position. Enter the Day using the PROGRAM button. Depressing the NEXT button will move the cursor to the Year position. Depressing the PROGRAM button will increment the Year from 00 to 99. Depressing the NEXT button will move the Cursor the Hour position. The time is set in 24-Hour format. Depressing the PROGRAM button will increment the Hour from 00 to 24 Hours.
-
Page 16: Error Codes
ERROR CODES The LCD Display on the Ticket Station will show common error codes to help in troubleshooting. There are two Types of errors; those associated with the Ticket Eater and those associated with the Printer. The LCD Display will show which type of error it is, “TICKET ERROR”... -
Page 17: Parts List
Parts List 87-ASM-24 87-ASM-25 Ticket Taker Ticket Taker 87-ASM-26 87-ASM-27 Ticket Taker Belt Ticket Taker Assy. Body 87-ASM-28 87-ASM-45 Ticket Cutter Ticket Taker Stepper Motor 87-ASM-46 PCB-020 Solenoid Opto Transmitter Valve Assy. Single PCB-021 PCB-022 Opto Receiver Barcode Single Reader PCB-026 PCB-027 Hall Effect... - Page 18 PCB-028 87-SHM-06 Stepper driver Spring Tab single white Bent series ELM-021 ELM-022 Lockout Switch Tower Light, 3 color PCB-029 ELM-023 5 digit led Printer, Thermal display MOT-004 Air Pump...
-
Page 19: Schematics
12 PIN CONNECTOR DOOR 1 WHITE/BLACK/GREE 12 VOLTS COMMON 22 GA YELLOW BOTTOM GND SIGNAL 22 GA BLACK 12 VOLTS 18 GA YELLOW 22 GA YELLOW/GREEN GREEN/WHITE WHITE/BLACK/RED OK/TICKETS FULL GND 18 GA BLACK GREEN/WHITE 22 GA RED 5 VOLTS MIDDLE GND 18 GA BLACK WHITE/BLK/GREEN... - Page 20 YELLOW 4 PIN MALE MICRO FIT BLUE GREEN 22 GA WHITE/BLACK/GREEN 22 GA GREEN/WHITE 22 GA WHITE/BLACK/RED 12 PIN DOOR CONNECTOR 12 VOLTS COMMON 22 GA YELLOW 2 PIN FEMALE MICRO FIT 2 PIN MALE MICRO FIT 12VOLTS COMMON 22 GA SIGNAL GND BLACK 18 GA WHITE/ORANGE AIR SOLENO PRINTER POWER...
Need help?
Do you have a question about the Ticket Station and is the answer not in the manual?
Questions and answers