
Summary of Contents for IVIE IE-45
- Page 1 May, 2007 Ivie IE-45 Manual IE-45 Audio Analysis System Owner's and Operator's Manual Copyright 2007 Ivie Technologies Inc. Lehi, UT Printed in U.S.A. page...
-
Page 2: Software Options
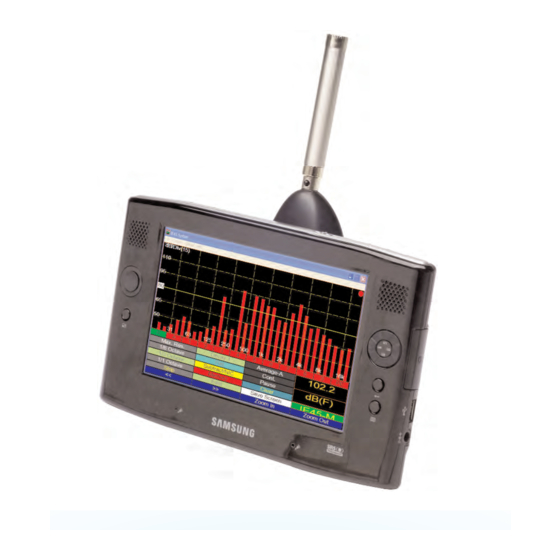
NOT required. The IE-45 software will run on many Windows® XP machines with USB ports for connec- tion to the IE-45 Input Module, as long as they have sufficient processing power and speed to run the software at optimum performance. - Page 3 Ivie IE-45 Manual E-45 Input Module (IE-45 IM) IE-45 M Microphone. The IE-45 M is a Type II, electret microphone. As options, the IE-5P Microphone Preamplifier, with the model 1201, 1/2 inch microphone capsule, or the IE-6P Mic Preamp with the 1133, or 1134 air con- denser capsules are available.
-
Page 4: Hardware Buttons
The pull-down menus add tremendous flexibility to the IE-45. Tapping the "Function" pull-down menu, for exam- ple, allows you to select one of the many functions of the IE-45. Choices include RTA, RTA with an LED display appearance, SPL Monitor, Seat to Seat (SPL variation), Strip Chart function, Polarity measurement, Oscilloscope function, Signal Generator, Volt Meter and RT-60, if the RT-60 software module has been purchased.. - Page 5 SPL Note: The hardware Button controls for the IE-45 are unique to the Samsung Q1 computer. If any other com- puter is used, the IE-45 RTA Software is not intended to support any hardware button functions. The hard- ware buttons of the Samsung Q1 make the operation of the IE-45 more convenient, but they are not required for operation.
-
Page 6: Getting Started
Beginning to Use the IE-45 As shown in the illustrations across the page, firing up an IE-45 is simple. After making sure the USB cable is properly attached between the IE-45 IM and the Samsung® Q1, (or the computer of your choice), plug in the microphone. - Page 7 Getting Started Ivie IE-45 Manual Getting started is as easy as 1, 2, 3..Step 1: Connect the IE-45 IM to the Q1 or IE-45 Shown with optional computer of your choice using the IE-5P Microphone supplied USB cable and turn on Preamplifier and 1201 the computer.
- Page 8 Obviously, this feature should be used when measuring electrical signal, not acoustic signals through the mic. Q1 Buttons: The IE-45 makes use of some of the buttons found on the front of the Q1. Their use is defined as shown across the page. The “joystick” up/down function can be used to quickly adjust the display to bring the signal to the center of the screen.
- Page 9 Real Time Analyzer Controls Ivie IE-45 Manual The RTA can display four different resolutions over its 20 Hz to 20 kHz bandwidth: 1/1 octave, 1/3 octave, 1/6 octave and 1/24 octave. When a memory is stored, all four resolutions are stored. This allows a recalled mem- ory to be viewed or printed in any resolution the user desires.
- Page 10 Preferred Curve Overlay The Preferred Curve overlay is an IE-45 feature that allows the user to create a target overlay which can be dis- played on the screen. This can be a valuable aid to the equalization process. Users often use a target curve to contour the frequency response of a system to a desired result.
- Page 11 Pref. Curve, LED Display, Weighting Ivie IE-45 Manual Entering a Preferred Curve Overlay The Preferred Curve Overlay is a valuable aid in the equalization process. It is the electronic equivalent of draw- ing a Preferred Cure on the RTA screen with a grease pencil. The Preferred Curve provides you with an on- screen target curve for equalization.
- Page 12 Peak Hold Curves The IE-45 will display peak information in addition to real time information in all of the display modes, 1/1 octave through 1/24 octave. The peak curve is shown in violet for the 1/1 octave, 1/3 octave and 1/6 octave displays, and in white for the 1/24 octave display screen, as shown in the illustration across the page.
- Page 13 RTA: Peak Curves, Freq. Detection Ivie IE-45 Manual Displaying the Peak Hold Curve To display the Peak Hold Curve, use the “Options” pull-down menu and select “Peak Hold Curve.” The Peak Hold Curve will be displayed in white for the 1/24 octave display, or in pink for the 1/1 octave, 1/3 octave and 1/6 octave displays.
-
Page 14: Memory Functions
Ivie IE-45 Manual Memory Functions The IE-45 memory system provides all the tools necessary to save various types of files to memory, rename files, load files from memory, examine memory data, and subtract one curve from another. Most memory sys- tem operations are performed using the memory stylus buttons and the memory management screen. - Page 15 RTA: Memory Functions Ivie IE-45 Manual Store a Curve to Memory To store a curve to memory, tap an empty (red in color) Scratch Memory stylus button (1-9). The memory curve will appear on screen and the stylus button will turn blue, indict- ing that it contains data and is displaying it.
- Page 16 NIC rating is determined by the value of the NIC contour at 500 Hz. Once the Source Room and Receiving Room curves are stored, the curve fitting and NIC calculation are all done automat- ically by the IE-45. Only a few taps of the stylus are required to complete the measurement and display the results.
- Page 17 The IE-45 can perform “Real Time” NIC measurements. The real time spectrum measurement in the Receive Room is sub- tracted from the spectrum of the Source Room stored in Memory #1. This measurement mode is unique to Ivie. You can use it as a “sniffer”...
- Page 18 “R” button immediately below the RTA display (see figure on the opposite page). Don’t forget to turn the real-time display back on when you’re done . . . It’ll save you a call to Ivie Tech Support! Storing and Loading an Average Curve: When an Average Curve is displayed on the RTA screen, it is what will be stored when you choose to store a curve.
- Page 19 Average Mode The Average Mode of the IE-45 allows taking samples one at a time, or continuously, as desired. The IE-45 also provides the ability to do an arithmetic average, or a power average. To begin an Average measurement, tap the “Average” stylus button.
- Page 20 An example of the Spectrograph Display is shown across the page. To select the Spectrograph Display, the IE-45 needs to be in the RTA mode. The steps to select the Spectrograph display are: First, tap “Functions” to activate the Functions pull-down menu. Select RTA. Next, from the “Options”...
- Page 21 IE-45 Spectrograph Display In the example above, the spectrograph shown by the IE-45 Spectrograph Display represents an elapsed meas- urement time of one second. The center marker window indicates that the measurement bar of data at the cen- ter of the screen is 0.5 seconds displaced in time from the bottom of the screen (real time).
- Page 22 NC measured in 1 dB increments, although the “official” measurements are in 5 dB increments. To make a “cor- rect” NC measurement using the NC numbers calculated by the IE-45, one need only round up to the nearest 5 dB increment.
- Page 23 RTA: Noise Criteria & Noise Rating Ivie IE-45 Manual Making a Noise Criteria (NC) Measurement Step 1. While in the RTA Function, select “NC” from the Step 2. Read the NC value in the SPL Window. “Options” menu. This will set the RTA weighting to Octave, unweighted, and bring up the NC contour overlay.
-
Page 24: Sound Pressure Level (Spl)
Sound Pressure Level (SPL) Ivie IE-45 Manual Sound Level Measurement Introduction The decibel (dB) scale has been adopted internationally for use with sound level meter testing. The scale begins at a reference of 0 dB in sound pressure level (0 dB SPL) which corresponds to the smallest sound that can be heard by a healthy human ear, and is equal to 2µN/m2, or perhaps more commonly, 20µPa. - Page 25 Making SPL Measurements To make an SPL measurement, turn on the IE-45 and select RTA mode. Using the SPL stylus button, select the desired SPL weighting: “A,” “C” or “Flat”. Using the other SPL Stylus button, select the desired SPL detector response: “Fast,”...
- Page 26 Ivie IE-45 Manual Making SPL Measurements An IE-45, as shown on the opposite page, can make all the SPL measurements required by U.S. and interna- tional standards, including A, C and Z (unweighted, or flat) SPL measurements. In addition to weighting, various detectors, again specified by U.S.
- Page 27 Ivie IE-45 Manual Using the SPL Monitor Mode The large SPL display of the IE-45 in the SPL Monitor mode, combined with a bar graph that changes colors at user definable set points, facilitates SPL monitoring of “live sound” events.
- Page 28 (like tapping a microphone with your finger) which will ele- vate the noise level seen by the IE-45, thus setting a "false" reference level. Once the reference level has been set, walking the venue will clearly indicate the level variation at various locations within the venue.
- Page 29 In the example below, we will assume that the venue is intended primarily for voice reinforcement, so we will set up the SPL Meter accordingly: Step 1. Set the IE-45 Sound Level Meter for “Slow” response and select the 4 kHz octave bandwidth for measuring. We select 4 kHz because speech intelligibility is profoundly effected by accuracy in the 4 kHz octave bandwidth.
-
Page 30: Strip Chart Recorder
Strip Chart The Strip Chart feature of the IE-45 harks back to the days of pen on strip chart paper. We still find this type of visual presentation to be one of the clearest and easiest to “digest” when looking at amplitude over time. With Strip Chart, it is possible to record and review variations in amplitude over times ranging from one minute to eight hours. - Page 31 Strip Chart Recorder Ivie IE-45 Manual Using the Strip Chart Recorder Function of the IE-45 The Strip Chart Recorder function can be selected from the “Functions” menu. After accessing the Strip Chart Recorder function, select the SPL weighting desired and the SPL detector response wanted. Next, choose the recording time required by tapping “Options”...
- Page 32 The IE-45 can help the user to quickly test for correct polarity. In order to test for polarity, a pulse must be gen- erated and sent through the speakers to be tested. The IE-45 can generate the special pulse needed to do the polarity test, though it may be desirable to generate the pulse external to these units (see Tip #2 below).
- Page 33 Neutrik® Minirator MR1, may be used. Step 2. Select “Polarity” from the “Functions” menu of the IE-45 and tap the “Pulse On” stylus button to turn on the pulse. Adjust the level of the sound system so that it is at least 10 dB above the ambient level in room (if sufficient gain is available, 20 dB above ambient is even better).
-
Page 34: Preferences Menu
Trace" inputs need to be selected. Input selection is done in the following manner: Input Select The Input Select menu is located under the "File" pull-down menu. There are several inputs on the IE-45 (a microphone connector, two RCA connectors and an SMA connector). This selection area allows the user to select the desired input or inputs. - Page 35 Preference Menu, Scope & Sig. Gen. Ivie IE-45 Manual Preferences Menu Signal Generator The “Preference” menu (in the “File” pull-down menu) is The output of the Signal Generator is the headphone out- used primarily to select Power or Arithmetic averaging put of the Samsung Q1.
- Page 36 Volt Meter One of the most useful functions of the IE-45 is its ability to measure electrical signals as well as acoustic sig- nals. This can be extremely effective for trouble-shooting and system setup. As an example, pink noise could be fed into the first component of a sound reinforcement signal chain.
- Page 37 Volt Meter Ivie IE-45 Manual Using the Volt Meter Function of the IE-45 CAUTION - To avoid damage to the IE-45, do not exceed the rated input voltage. To Use the Volt Meter Step 1. Under the “Function” menu, select “Volt Meter.”...
- Page 38 “lives” there, not in the computer, so the IE-45 IM remains calibrated even when switching comput- ers. The IE-45 IM is capable of storing up to 6 different microphone calibrations, so, if you use more than one microphone with your unit, you will need to remember to “tell” it which microphone you are using.
- Page 39 Ivie IE-45 IM Ivie IE-2P with 1/2 inch + Vdc Microphone 3.3 kΩ, 1/4 W Capsule Resistor Ground Lug Schematic for Microphone Cable: IE-45 IM to Ivie IE-2P Switchcraft Switchcraft TA4F Shield Connect to Audio (+) Standard Connect to Low-Z Dynamic...
- Page 40 Before You Start the Software Before using IvieXLS-45, you will need to transfer the data files of interest that were measured with the IE-45 to the PC where you have IvieXLS-45 installed. This can be done using the standard Microsoft protocol for trans- ferring data from one PC to another.
- Page 41 Use to enter or edit current job name. Up to ten different data sets may be imported. Use to select data files for importing from the IE-45. Use to select display resolution. Use to “select type of Use to average two of more plot desired.
- Page 42 1/6 octave, or 1/24 octave. Note: The data brought across to your PC from the IE-45 consists of four data sets per memory. All four reso- lutions are stored and transmitted: 1/1 octave, 1/3 octave, 1/6 octave and 1/24 octave. The IvieXLS-45 tem- plate selects the data set for display as you specify.
- Page 43 NC and NR Displays NC and NR gives you the ability to display NC (Noise Criteria) or NR (Noise Rating) overlays on-screen. Read the IE-45 manual (page 24) for more information on NC and NR measurements. A and C Weighting The A Weight and C Weight selection boxes apply A or C weighting to the displayed curve(s).
-
Page 44: Print Chart
The “Strip Chart” function in IvieXLS-45 is used to display the special “.cha” files that are created when using the Strip Chart function of the IE-45. Tapping the Strip Chart button presents the special control panel for this func- tion. - Page 45 Ivie has added a feature to the software that will never be seen unless data is being dropped. When this occurs, a warning window will pop up telling you that data is being dropped and giving you the option to deacti- vate the 1/24 octave filter set.
- Page 46 Dual Trace or XY Measurements --------------------------------------------------------------------------------------------- page 34 Frequency and Amplitude Detection ------------------------------------------------------------------------------------------ page 12 Frequency Detect ---------------------------------------------------------------------------------------------------------------- page 12 Getting Started with Your IE-45 ------------------------------------------------------------------------------------------------- page 6 Hardware Buttons -------------------------------------------------------------------------------------------------------------------- page 4 IE-45 Controls ------------------------------------------------------------------------------------------------------------------------- page 6 IE-45 IM Inputs ------------------------------------------------------------------------------------------------------------------------ page 2...
- Page 47 Ivie IE-45 Manual Index NIC Measurements --------------------------------------------------------------------------------------------------------------- page 16 Nixie Tube Readout --------------------------------------------------------------------------------------------------------------- page 36 Noise Criteria (NC) and Noise Rating (NR) Measurements ------------------------------------------------------------ page 2 Oscilloscope (Scope) ------------------------------------------------------------------------------------------------------------ page 34 Peak Cursor ------------------------------------------------------------------------------------------------------------------------ page 12 Peak Hold Curves ----------------------------------------------------------------------------------------------------------------- page 12...
- Page 48 Notes IE-45 Manual page...
Need help?
Do you have a question about the IE-45 and is the answer not in the manual?
Questions and answers