Advertisement
Advertisement
Table of Contents

Summary of Contents for Salton WALKMILL
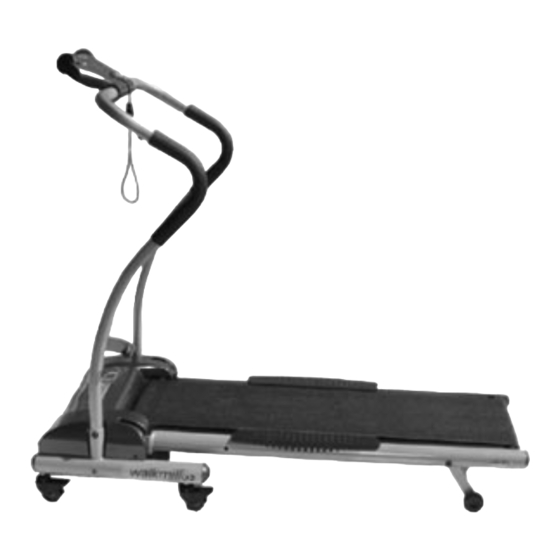
- Page 1 WALKMILL ™ OWNER’S MANUAL & OPERATING INSTRUCTIONS Model WALK1 F I T N E S S...
-
Page 2: Important Safeguards
When using an electrical appliance, basic safety precautions should always be followed, including the following: Read all instructions before using the Walkmill. ™ DANGER - To reduce the risk of electric shock: 1. Always unplug this appliance from the electrical outlet immediately after using and before cleaning. -
Page 3: Additional Important Safeguards
ADDITIONAL IMPORTANT SAFEGUARDS 1. Set up the Walkmill™ on a flat, level surface and clear the area around it, so you can get on and off freely and safely. 2. Always lock all 4 Wheels into place prior to operation. -
Page 4: Grounding Instructions
GROUNDING INSTRUCTIONS This product must be grounded. If it should malfunction or break down, grounding provides a path of least resistance for the current, and will reduce the risk of electrical shock.The plug must be plugged into an appropriate outlet that is properly installed and grounded in accordance with all local codes and ordinances. - Page 5 Congratulations on owning the Walkmill™ by Salton,® the worlds finest totally portable Treadmill.You've just taken the first step towards a healthier lifestyle. If used routinely, the Walkmill™ may make a positive difference in your weight, mood, stress level, blood pressure and risk of disease.
- Page 6 9. Water Bottle Bracket (not shown) (P/N 50557) 10. Water Bottle (not shown) (P/N 50558) ASSEMBLY 1. Carefully remove Walkmill™ and all parts from carton. 2. Insert Right Handrail into the Handrail Supporter in the Frame Base. Using the Allen Wrench, secure the Right Handrail to the unit using the 5/16"...
- Page 7 1/4" x 1 3/4" Round Bolt and the 5/16" Nut. (See Figure 8) Water Bottle Bracket should be snug, but not so snug that it cannot be rotated around the Handrail. 7. Your Walkmill™ is now completely assembled and ready to use. Figure 6 Figure 5...
- Page 8 4. Once the Walking Deck is raised, unlock the Wheels and move the Walkmill™ to the desired workout location. 5. Always grasp the Walkmill™ by the Hand Grips while moving the Walkmill.™ 6. Do not allow the electrical cord to drag on the floor. Secure the electrical cord to the Hooks provided.
- Page 9 However, it is highly recommended that you utilize professional movers for transporting the Walkmill™ up or down stairs, or if you feel the size or weight is beyond your comfort level.
-
Page 10: Operating Instructions
The Walkmill™ is equipped with a Magnetic Safety Button and Clip. For safety purposes always attach the Clip to yourself prior to using the Walkmill. ™ The unit will not operate if the Magnetic Safety Button is not in place, and will shut down if the Magnetic Safety Button is removed during use. -
Page 11: Cool Down
9. Once unit has stopped moving, step off and unplug unit. AFTER YOUR WALKOUT When your workout is done and you've stepped off the Walkmill, ™ take a minute or 2 to gently stretch your legs and lower back.Your muscles will be warmed up and loose and at their most receptive towards a healthy stretch.This will also go a long way towards avoiding... -
Page 12: Display Functions
USING THE ELECTRONIC DISPLAY The Walkmill's™ Electronic Display allows you to vary and monitor your workout with immediate feedback on speed, elevation, calories burned and time elapsed. Designed for ease of use, the large dials allow you to vary your workouts on the go. - Page 13 TARGET HEART RATE ZONE CHART Lower Limit (60%) TARGET HEART RATE Please see Target Heart Rate Zone Chart to determine your target heart rate.This is especially important for people who are over 35 years old, have a preexisting health problem or have been sedentary for some time.
- Page 14 Walkmill™ Programs: “Wave Walking for Maximum Weight Loss”; “The Walkmill™ Quick Fix Program”,“The Easiest and Healthiest Way To Lose Up To 10 Pounds In A Hurry” and “The Walkmill™ Superstar Total Body Workout”, which includes Kathy's body sculpting secrets to the stars.
- Page 15 IF THE BELT HAS SHIFTED TOO FAR TO THE RIGHT 1. Turn on the Walkmill™ and set the speed to 2 miles per hour. 2. Turn the Right Adjusting Bolt 1/4 turn clockwise. 3. Wait 20 seconds and if no change, turn Left Adjusting Bolt 1/4 turn counterclockwise.
-
Page 16: Reset Switch
RESET SWITCH If the Walkmill™ loses power or will not start, check the Reset Switch located on the front of the Motor Cover. If the white tab of the Reset Switch is showing, then the Reset Switch has been tripped. - Page 17 The Walkmill™ requires little maintenance other then periodically applying lubricant. Lubricating under the Walking Belt will ensure superior performance and extend the working life of the Walkmill. ™ To check for proper lubrication, lift one side of the Walking Belt and feel the top of surface of the Walking Deck.
- Page 18 CLEANING Care has been taken to assure that the Walkmill™ has been properly adjusted and lubricated during production. It is not recommended that the user attempt service on the internal components. However, from regular use the outer surface may appear dull or dirty, following the instructions listed below will restore and preserve the original finish.
- Page 19 NOTES:...
-
Page 20: Limited 90-Day Warranty
Repair, replacement or refund shall be the sole remedy of the purchaser under this warranty, and in no event shall Salton be liable for any incidental or consequential damages, losses or expenses. Some states do not allow the exclusion or limitation of incidental or consequential damages, so the above limitation or exclusion may not apply to you.
Need help?
Do you have a question about the WALKMILL and is the answer not in the manual?
Questions and answers