Table of Contents
Advertisement
Advertisement
Table of Contents

Related Manuals for Aim MXm


Summary of Contents for Aim MXm
- Page 1 USER GUIDE 1.00 Made in Italy www.aim-sportline.com...
-
Page 2: Table Of Contents
5.4 Tracks Management 6.2.9 Display settings 5.4.1 Creating a track with MXm 6.2.10 SmartyCam stream setting 5.5 Counters 6.3 Managing a track on MXm with Race Studio 3 5.6 Date and Time 6.4 ECU Driver builder 5.7 Language 6.5 The device window 5.8 System Info... -
Page 3: Mxm In A Few Words
1. MXm in a few words n What is MXm? If the vehicle does not have an ECU? MXm is the new AiM mini logger that In case your vehicle does not have an combines small dimensions, usability ECU, you can anyway connect MXm to an RPM wave to synchronize RPM to and logging capability. -
Page 4: What Is In The Kit
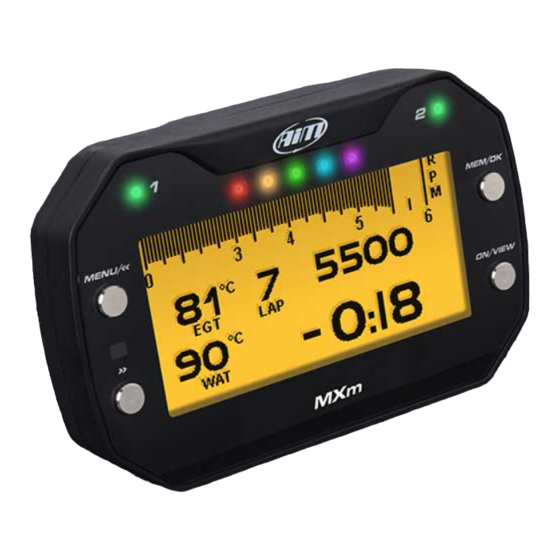
CHAPTER 2 2. What is in the kit? MXm kit includes: 37 pin connector harness 4 pins connector kit CD for software installation... - Page 5 CHAPTER 2 Alarm Led 1 RGB Shiftlights Integrated GPS Alarm Led 2 37 pins connector 4 pins connector Light sensor Wide Graphical display Pushbuttons Nylon body...
-
Page 6: Installation, Powering And Accessories
4. At power on When switched on MXm shows satellite page. MXm is powered connecting the 37 pins connection harness you find in the kit to the vehicle master switch. This way MXm will switch on/off with the vehicle engine. -
Page 7: What You Can Do Via Keyboard
You can set MXm backlight as “AUTO”(Default setting), “ON” or “OFF”. settable via keyboard as explained here below. Press “MENU” and this page shows Thanks to the light sensor, placed left front of MXm, “AUTO” setting switches the backlight on/off according to the ambient light conditions. -
Page 8: Unit Of Measure
To calculate these data the system needs to know the start/finish line coordinates. MXm comes with a long list of the world main tracks. The list is constantly updated by our technicians and it updates on your PC when you run Race Studio 3 software and a connection to the internet is available. -
Page 9: Creating A Track With Mxm
5.4.1 Creating a track with MXm n scroll to Status and press“CHANGE”to switch from“Active”to“Stop”and vice-versa If you are running in a track NOT included in MXm database the device switches to n scroll to clear and press “CHANGE” to reset an odometer (left image below) “learning”... -
Page 10: Language
MXm. To connect MXm to the PC via USB use the USB cable you find in the kit: plug it in the cable labelled “USB” of MXm 37 pins connector harness and in the PC USB port. -
Page 11: Wi Fi Configuration
Both levels allow you to use different strategies. A PC in WLAN, for example, can see several AiM devices but can communicate only with those he knows the password of. If you forget the password you can reset Wi-Fi configuration from MXm menu as explained before. -
Page 12: Configuring Mxm As An Access Point Ap
To set other parameters create a unique password to protect your device/your net- mode, ideal if you want to communicate with one MXm using one PC. It is free and work. With a password the communication is safe and encrypted using WPA2-PSK so completely accessible by anyone. -
Page 13: Adding Mxm To An Existing Network
Allowed characters are all letters, capital too, all digits and these characters: ‘+ - _ () [] {}!. MXm can have its password that adds another security and privacy level to the net- work. “Space” type can be used provided that it is not the first one because it can cause in- comprehension in some WindowsTM versions. - Page 14 To obtain connectivity on the device the PC has to be authenticated to the same network as shown here below. When the PC is authenticated to the network called “AiM” it can see all devices you configured to access the same network. In the image below two AiM devices are connected to the same “AiM”WLAN.
-
Page 15: Wi Fi Network Settings
Here below is an example of configuration. It means that the WLAN network name is “Network_1. ” A PC has to be authenticated in this network to interact with any AiM device of this network. n Gateway address: 192.168.0.1 primary DNS server: 0.0.0.0 secondary DNS server: 0.0.0.0... -
Page 16: The Internet Connectivity
Parallels. 6.1.6 Connection issues It can occur that MXm is correctly connected to Race Studio 3 via Wi-Fi but the user interface does not show it. This may be because Wi-Fi port setting is set with a static IP. To switch it to dynamic (DHCP): n open “Network and sharing centre”... - Page 17 CHAPTER 6 To ensure that the communication To enable Race Studio 3 correctly working on a Mac with virtualized Windows works select n press Wi-Fi icon “Open Network preferences…” menu. n select “Wi-Fi Settings…” icon Verify that the status in the window that shows up is “Connected” and that the IP address associated is, for example, 10.0.0.10 (could be 10.0.0.11, 10.0.0.12, or generically 10.0.0.x).
-
Page 18: Connected Device Visualization Issues
It may occur that using Race Studio 3 on an iMac with virtualized Windows the device “Channels”layer opens; all channels are disabled by default. Here you can set all MXm connected via Wi-Fi takes some time to be shown in the network or is not shown at channels. -
Page 19: Ecu Connection And Configuration
MXm can be connected to your vehicle ECU. When possible documents explaining sampling frequency, unit of measure and display parameters, you can choose: how to connect your MXm to your vehicle ECU are published on our website n Function: Vehicle speed, Angular velocity, Speed, Turbo RPM www.aim-sportline.com. -
Page 20: Lcu One Can Setting
Here you can create math channels; available options are: n Bias: considering a relation between two mutually compatible channels it male Binder connector of LCU one in the female one of MXm 37 pins harness cable labelled “EXP”. n Bias with threshold: it needs the user to set a threshold value for the considered computes which one is prevailing (typically used for suspensions or brakes);... -
Page 21: Status Variables Setting
CHAPTER 6 6.2.5 Status variables setting Here you can set Status variables. In the example below the user created a Status variable called “Water Temp Alarm”. Status variables are user defined conditions that can be used in different situations. The status variable can also be logged checking “add to the device logged channels” This means that when setting an alarm in “Shift lights and Alarm page”... -
Page 22: Parameters Settings
Start data recording conditions; standard conditions (default setting) make MXm start recording when RPM is higher than 500 or speed is higher than 10 km/h and switches MXm Wi-Fi off custom conditions: you can set two conditions and decide if making MXm start recording when only one of them is reached (“ANY”) or when both are satisfied (“ALL”);... - Page 23 LED. Assuming you fill in “0.1” and your lap time is impro- ving of 0.3 sec toward the reference lap, your MXm will switch on 3 LEDs green; if, on case you need to fill in max gear number and set LEDs colours and threshold values the contrary, your lap time is worsening the LEDs will switch on red.
- Page 24 “Create New Alarm Panel” (1) As for any AiM logger you can import/export alarms using the related buttons but n press the arrows you find on the left of “Create new alarm “ panel (2) you can also create new ones.
-
Page 25: Power Outputs Setting
Bottom of the page an Alarm summary is shown. Right clicking on the setting icon, MXm features 2 Power outputs, that can drain up to 15 Amp each. The power outputs right of the alarm row you can edit to modify or delete the alarm. -
Page 26: Display Settings
MXm can have up to eight pages to be set via software. Each page can have from 1 to 4 fields and can be set as you prefer. -
Page 27: Smartycam Stream Setting
When the page has been selected two setting panels appears bottom of the page: n on the left a panel that shows as many rows as the fields to be set MXm can be connected to AiM SmartyCam to show the data you wish on SmartyCam video. To set each channel:... -
Page 28: Managing A Track On Mxm With Race Studio
(highlighted in red below), where: long name is the name you see in bold in each track box short name is the track name shown on the display of your MXm and is the name you find top right of each track box n all the tracks listed in Race Studio 3 database. - Page 29 CHAPTER 6 When your MXm is connected it is shown on the left bottom part of the page as said The keyboard you find above the central column allows you to: before. Clicking on it all the tracks it contains are shown in the right column of the page.
- Page 30 CHAPTER 6 As said before, your MXm detects if the track it is racing on is not included in its da- A page for adding some useful information appears. It may be useful to know that: n “Track name short” is the name you will see on your device tabase and it starts recording in “learning”...
-
Page 31: Ecu Driver Builder
AiM website at www.aim- sportline.com, documentation area software/firmware section. Clicking your MXm bottom left of the software page you enter the device window and have these options: n Live Measures: to check all MXm channels;... -
Page 32: On The Track
At very first switch on, when you quit track page MXm shows by default Laptime Page; afterwards it will show the last page you displayed. As said before, MXm can show up to eight custom pages to be configured using Race Studio 3 software; use “>>” button to scroll among them. -
Page 33: Data Download
Moving the cursor left and right you can see all laps and the difference ver- sus the best lap of that test. Once MXm-PC connection is established activate “Download” tab to download sam- pled data Lap page shows lap time with speed max/min values. -
Page 34: Data Analysis
CHAPTER 10 10 Data Analysis When data have been downloaded press Analysis icon and Race Studio Analysis soft- Select your file double clicking on it and start analysing it. A lot of pages, graphs and ware will open showing this page. images will help you analysing your data in the best way. -
Page 35: New Firmware Upgrade
Click it and freely download the new applications. To get the RPM from the ECU you only need to connect your MXm to the ECU and it will automatically sample that value. 12.2 RPM via a 5-50V square wave or coil (150-400V) If your vehicle has no ECU you need to connect the wire labelled ”... - Page 36 CHAPTER 12 In case the vehicle ignition system has no output you need to connect MXm to the Once MXm connected to RPM signal you can set its parameters in channels page of low voltage of the coil as shown in the following images.
-
Page 37: Connection With Smartycam And Lcu One
CHAPTER 13 13 Connection with SmartyCam and LCU-One Your MXm can be connected to AiM SmartyCam HD, SmartyCam GP HD and LCU- To connect MXm to SmartyCam GP HD connect SmartyCam CAN cable to the cable One CAN as shown in the images below. -
Page 38: Technical Specifications And Drawings
Pushbuttons Metallic n Connectors 37 pins motorsport connector + 4 pins power connector n Body Glass fiber reinforced Nylon n Weight 330g n Dimensions 137x88,4x31,9 mm n Waterproof IP65 n Analysis software Race studio analisys freely downloadable from www.aim-sportline.com... - Page 39 MXm Pinout MXm 37 pins Deutsch connector harness...
- Page 40 Our web site, www.aim-sportline.com is constantly updated. Please, refer to it for downloading the last release of our documentation.
Need help?
Do you have a question about the MXm and is the answer not in the manual?
Questions and answers