Table of Contents
Advertisement
Quick Links
Advertisement
Table of Contents

Subscribe to Our Youtube Channel
Summary of Contents for Salton FSCM100 SPECIAL SELECT
- Page 1 SPECIAL SELECT USE & CARE INSTRUCTIONS 10 CUP PROGRAMMABLE COFFEEMAKER FSCM100...
-
Page 2: Important Safeguards
IMPORTANT SAFEGUARDS When using electrical appliances, basic safety precautions should always be followed to reduce the risk of fire, electric shock, and/or injury to persons, including the following: 1. Read all instructions. 2. Do not touch hot surfaces. Use handles or knobs. 3. -
Page 3: Additional Important Safeguards
4. DO NOT leave empty Carafe on Warming Plate when appliance is turned ON, as the Carafe may crack or become otherwise damaged. 5. Always use fresh, cool water in your Coffeemaker. Warm water or other liquids, except as listed in cleaning section, may cause damage to the appliance. -
Page 4: Polarized Plug
POLARIZED PLUG This appliance has a polarized plug (one blade is wider than the other). To reduce the risk of electric shock, this plug is intended to fit into a polarized outlet only one way. If the plug does not fit fully in the outlet, reverse the plug. -
Page 5: Getting To Know Your
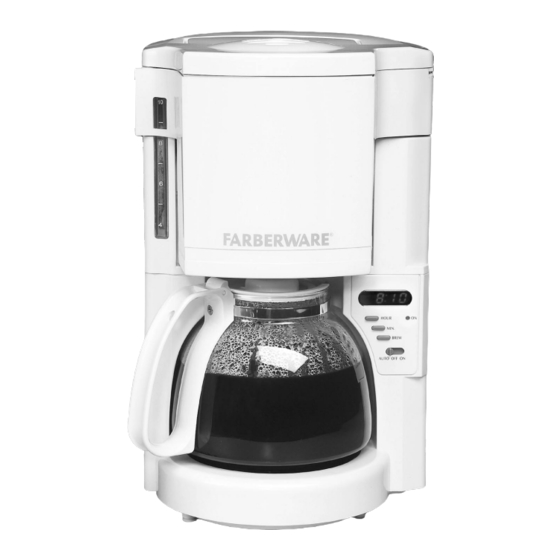
GETTING TO KNOW YOUR 10 CUP COFFEEMAKER (inside) 1. Water Reservoir Lid (P/N 30654) 2. Swing-Out Filter Basket (P/N 30651) 3. Water Reservoir 4. Carafe Lid (P/N 30652) 5. Control Panel 6. Polarized Plug 7. Warming Plate 8. Carafe w/Lid (P/N 30653) 9. -
Page 6: Getting To Know Your Coffeemaker
GETTING TO KNOW YOUR COFFEEMAKER CONTROL PANEL AM/PM AUTO ON REMOVABLE FILTER BASKET Drip Stop Assembly To remove the Removable Filter Basket for cleaning, pull Basket straight up and out of the machine. After cleaning, the Removable Filter Basket must be pushed all the way into the Swing-Out Filter Basket. -
Page 7: Instructions For Use
3. When all the water has brewed into the Carafe, slide the AUTO/OFF/ON Switch to OFF. 4. Allow the Coffeemaker to cool for 10 minutes, discard the water from the Carafe, then repeat steps 2 and 3. 5. After the second pot of water has cooled, discard the water and thoroughly wash the Removable Filter Basket (see illustration on page 5), Carafe and Carafe Lid in warm, soapy water. -
Page 8: Automatic Shut-Off Feature
Feature. During the brewing cycle, the Carafe can be removed to pour a cup of coffee from the Carafe. The Drip Stop Feature will prevent the Coffeemaker from continuing to brew coffee for up to one minute until the Carafe is returned to its proper position. - Page 9 FARBERWARE PROGRAMMABLE COFFEEMAKER CAUTION: Use this product with proper AC voltage rating only. Be sure to unplug the power cord when Coffeemaker is not in use for extended periods of time. 1. Lift the Carafe Lid. Fill the Carafe with cold water to the level for the desired number of cups (1-10).
-
Page 10: Brewing Coffee
NOTE: The LED in the upper-left corner of the Display indicates the P.M. hours. (See Figure 3.) 2. To program the Coffeemaker for Automatic Start-Up, push and HOLD the BREW Button. While holding the BREW Button, push the HOUR Button to the desired start-up time hour. - Page 11 IMPORTANT: When using the Drip Stop Feature while the Coffeemaker is still brewing, the Carafe must be replaced on the Warming Plate, under the Filter Basket in less than a minute to prevent the Filter Basket from overflowing.
- Page 12 BREWING COFFEE 7. To brew a second pot of coffee, turn the Coffeemaker off for 10 minutes and allow it to cool. Empty used coffee grounds and repeat steps for brewing coffee.. CAUTION: Failure to allow Coffeemaker to cool may cause water to overheat and spray hot steam.
-
Page 13: User Maintenance Instructions
1. To clean your Coffeemaker after brewing coffee, be sure the Coffeemaker is turned OFF and is cool. Discard the paper filter. 2. Wipe the outside of your Coffeemaker with soft, damp cloth and dry.Do not use abrasive soaps or scouring pads. - Page 14 6. Discard the vinegar and the paper filter. 7. To flush out all the traces of vinegar, pour a Carafe full of tap water into the Coffeemaker. Turn it on, and allow it to cycle through. 8. Discard the water and turn the Coffeemaker OFF. Repeat steps 7 and 8.
- Page 15 DECALCIFYING DECALCIFYING YOUR CARAFE Hard water can leave a whitish mineral deposit inside your Carafe. Coffee discolors these deposits, sometimes leaving a brownish stain inside the Carafe. To remove these stains, follow these simple steps: 1. Use a solution of equal parts white vinegar and hot water. 2.
-
Page 16: One-Year Limited Warranty
Return the appliance to: ATTN: Repair Department, FARBERWARE® 708 South Missouri Street, Macon, MO 63552 Any questions or comments can be directed to Salton, Inc. at the above address or by calling or E-Mailing the following: TOLL FREE: 1-888-881-8101, Mon. - Fri., 7:30 a.m. - 6:00 p.m. CST E-mail: farberware-electric@saltonusa.com...


Need help?
Do you have a question about the FSCM100 SPECIAL SELECT and is the answer not in the manual?
Questions and answers