Table of Contents
Advertisement
Available languages
Available languages
Quick Links
USING THE HOOD
Controls . . . . . . . . . . . . . . . . . . . . . . . . . . . . . . . . 5
Chef Connect . . . . . . . . . . . . . . . . . . . . . . . . . . . 6
CARE AND CLEANING
Filters . . . . . . . . . . . . . . . . . . . . . . . . . . . . . . . . . . 7
Surfaces . . . . . . . . . . . . . . . . . . . . . . . . . . . . . . . . 8
Lights . . . . . . . . . . . . . . . . . . . . . . . . . . . . . . . . . . 8
. . . . . . . . . . . . . . . . . . . . . . . . 18
Write the model and serial
numbers here:
Model # _________________
Serial # _________________
You can find them on a label on
the inside of the hood.
GE is a trademark of the General Electric Company. Manufactured under trademark license.
. . . . . . . . . . . 3
. . 9
. . . . . . . . 17
. . . . . . . . . . . . . . . . . . . . . 19
. . . . . . . . . . . . 20
OWNER'S MANUAL &
INSTALLATION
INSTRUCTIONS
UVC7300
ESPAÑOL
Para consultar una version en
español de este manual de
instrucciones, visite nuestro sitio de
internet GEAppliances.com.
49-80797 01-18 GEA
Advertisement
Chapters
Table of Contents

Related Manuals for GE UVC7300


Summary of Contents for GE UVC7300
-
Page 1: Table Of Contents
Model # _________________ instrucciones, visite nuestro sitio de internet GEAppliances.com. Serial # _________________ You can find them on a label on the inside of the hood. GE is a trademark of the General Electric Company. Manufactured under trademark license. 49-80797 01-18 GEA... - Page 2 THANK YOU FOR MAKING GE APPLIANCES A PART OF YOUR HOME. Whether you grew up with GE Appliances, or this is your first, we’re happy to have you in the family. We take pride in the craftsmanship, innovation and design that goes into every GE Appliances product, and we think you will too.
-
Page 3: Safety Information
IMPORTANT SAFETY INFORMATION READ ALL INSTRUCTIONS BEFORE USING WARNING WARNING TO REDUCE THE RISK OF FIRE, TO REDUCE THE RISK OF INJURY ELECTRIC SHOCK OR INJURY TO PERSONS, TO PERSONS IN THE EVENT OF A RANGE TOP OBSERVE THE FOLLOWING: GREASE FIRE, OBSERVE THE FOLLOWING*: A. - Page 4 IMPORTANT SAFETY INFORMATION READ ALL INSTRUCTIONS BEFORE USING C. When cutting or drilling into wall or ceiling, do not WARNING TO REDUCE THE RISK OF A damage electrical wiring and other hidden utilities. RANGE TOP GREASE FIRE: D. Ducted fans must always be vented to the outdoors. A.
-
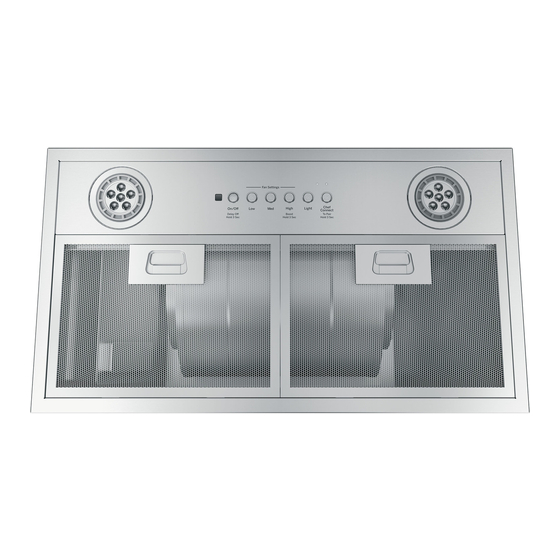
Page 5: Controls
Controls 1. Rangehood Control Panel: 5. Chef Connect: The control panel This is a Bluetooth pairing feature ® is located on the front of the canopy. The position for use with other compatible Chef Connect enabled and function of each control button are noted below. products on a cooktop or range. -
Page 6: Chef Connect
Chef Connect Chef Connect Operation Bluetooth Connection ® To pair with another device: Default Sync Settings: The factory default setting for the light will be the To start the pairing process on the hood, press and hold brightest. the Chef Connect button for 3 seconds. The backlight for the Low-Med-High-Light-Chef Connect buttons will The factory default setting for the fan sync will be OFF. -
Page 7: Filters
Filters Be sure the circuit breaker is off and all surfaces are cool before cleaning or servicing any part of the vent hood. The metal filters trap grease during cooking. The filter must ALWAYS be in place when the hood is in use. The grease filter is dishwasher-safe and should be cleaned every month, depending on the usage of the hood. -
Page 8: Surfaces
To receive a coupon for a trial sample of Bar Keepers Friend Soft Cleanser™ follow the link below or scan the QR Code. www.barkeepersfriend.com/ge Lights CAUTION Allow lights to cool before touching. 1. Before attempting to replace the lights, make sure that the light switch is turned off. -
Page 9: Installation Instructions
Installation Custom Insert Hood Instructions UVC7300 “If you have questions, call GE Appliances at 800.GE.CARES (800.432.2737) or visit our website at: GEAppliances.com” BEFORE YOU BEGIN WARNING TO REDUCE THE RISK OF FIRE, Read these instructions completely and ELECTRIC SHOCK OR INJURY TO PERSONS, carefully. - Page 10 Installation Preparation PRODUCT DIMENSIONS INSTALLATION CLEARANCES This vent hood must be installed between the 24" required minimum and 36" recommended maximum above the cooking surface. instructions for product-specific clearances. NOTE: Installation height should be measured from the cooking surface to the bottom edge of the cabinet surface.
- Page 11 Installation Preparation TOOLS AND MATERIALS REQUIRED (NOT SUPPLIED) Needle-nose pliers Aluminized Electric drill and duct tape appropriate bits Pencil and tape measure Step ladder Safety glasses Level 8" ducting and Flashlight caps as needed Tin snips Wire cutter/ Phillips and flat-blade Strain relief for UL listed wire nuts Gloves...
- Page 12 Installation Preparation ADVANCE PLANNING ADVANCE PLANNING (CONT.) Duct Install Planning Custom Cabinet Frame Planning The custom canopy or cabinet should have a rectangular hole to accommodate the custom through the ceiling. Use a 8" round duct. Use hood insert by itself. This hole is the same locally supplied elbows to vent horizontally size for both a wall installation and an island through the rear wall.
- Page 13 Installation Preparation POWER SUPPLY PREPARE FOR CABINET INSTALLATION IMPORTANT – (Please read carefully) WARNING NOTE: This bracket must be removed prior to installation. Remove 2 back (rear) and 2 bottom FOR PERSONAL SAFETY, THIS APPLIANCE screws per illustration bellow. MUST BE PROPERLY GROUNDED. Remove house fuse or open circuit breaker before beginning installation.
- Page 14 Installation STEP 1 INSTALL HOOD LINER STEP 2 INSTALL THE HOOD (Cont.) (If Used) 3. Fasten with 8 screws (A), 4 in the front and 2 on each side, toward the back of the hood. 1. The rectangular opening in framing or custom It is recommended to start with one corner cabinet must be sized for the liner outside and and fasten screws diagonally to ensure unit...
- Page 15 Installation ELECTRICAL CONNECTION 1. Remove the electrical junction box cover. 2. Remove the electrical box knockout. Electrical Box Knockout with Strain Relief 3. Feed the Power Supply Cable through the hole and secure with a strain relief. 4. Attach the white lead of the power supply (A) to the white lead of the range hood (D) with a wire nut.
- Page 16 Installation STEP 3 RECIRCULATION KIT (If Used) 1. Cut a hole into the soffit for the exhaust duct. 2. Install the vent grill over the exhaust duct. 6-15/16" 3. Seal the duct joints with duct tape. Visit GEAppliances.com to order the optional recirculation kit. Hood Center Line 90°...
-
Page 17: Troubleshooting Tips
Using smaller duct pipe will cause reduced venting. Minimize the duct run length and number of transitions and elbows. GE Appliances service technicians cannot correct this issue if installed improperly. Fan fails to circulate Obstructions in duct work. -
Page 18: Warranty
This warranty is extended to the original purchaser and any succeeding owner for products purchased for home use within the USA. If the product is located in an area where service by a GE Appliances Authorized Servicer is not available, you may be responsible for a trip charge or you may be required to bring the product to an Authorized GE Appliances Service location for service. -
Page 19: Accessories
Accessories Looking For Something More? GE Appliances offers a variety of accessories to improve your cooking and maintenance experiences! Refer to the Consumer Support page for phone numbers and website information. The following products and more are available: Parts Power Cord Kit... -
Page 20: Consumer Support
Have a question or need assistance with your appliance? Try the GE Appliances Website 24 hours a day, any day of the year! You can also shop for more great GE Appliances products and take advantage of all our on-line support services designed for your convenience. - Page 21 Escriba los números de modelo y de serie aquí: Nº de Modelo ____________ Nº de Serie ______________ Los encontrará en una etiqueta dentro de la campana. GE es una marca registrada de General Electric Company. Fabricado bajo licencia de marca. 49-80797 01-18 GEA...
- Page 22 GRACIAS POR HACER QUE GE APPLIANCES SEA PARTE DE SU HOGAR. Ya sea que haya crecido usando GE Appliances, o que ésta es su primera vez, nos complace tenerlo en la familia. Sentimos orgullo por el nivel de arte, innovación y diseño de cada uno de los electrodomésticos de GE Appliances, y creemos que usted también.
- Page 23 INFORMACIÓN IMPORTANTE DE SEGURIDAD LEA TODAS LAS INSTRUCCIONES ANTES DE USAR ADVERTENCIA ADVERTENCIA PARA REDUCIR EL RIESGO PARA REDUCIR EL RIESGO DE DE INCENDIO, DESCARGA ELÉCTRICA O LESIONES A LESIONES A PERSONAS EN CASO DE UN INCENDIO PERSONAS, CUMPLA CON LOS SIGUIENTES PUNTOS: DE GRASA SOBRE UNA ESTUFA, CUMPLA CON LOS SIGUIENTES PUNTOS*: A.
- Page 24 INFORMACIÓN IMPORTANTE DE SEGURIDAD LEA TODAS LAS INSTRUCCIONES ANTES DE USAR C. Al cortar o perforar una pared o un cielorraso, no dañe el ADVERTENCIA cableado eléctrico y de otros servicios ocultos. PARA REDUCIR EL RIESGO DE UN INCENDIO DE GRASA SOBRE UNA ESTUFA: D.
-
Page 25: Controles
Controles Panel de Control de la Campana Extractora: Chef Connect: Ésta es una función de emparejamiento El panel de control está ubicado en el frente de la base. de Bluetooth para uso con otros productos compatibles ® La posición y función de cada botón del control aparece con Chef Connect en una superficie de cocción o una cocina. -
Page 26: Chef Connect
Chef Connect Conexión de Bluetooth al Funcionamiento de Chef Connect ® Para emparejar con otro dispositivo: Configuraciones de Sincronización por Omisión: A fin de iniciar el proceso de emparejamiento, mantenga La configuración por omisión de fábrica de la luz será la más presionado el botón Chef Connect durante 3 segundos. -
Page 27: Filtros
Filtros Asegúrese de que la energía eléctrica esté apagada y que todas las superficies estén frías antes de limpiar o arreglar cualquier pieza de la campana de ventilación. Los filtros metálicos atrapan la grasa durante la cocción. Filtro debe estar SIEMPRE en su lugar cuando la campana esté en funcionamiento. El filtro de grasa es apto para lavavajillas y debe limpiarse cada 6 meses, o según sea necesario. -
Page 28: Superficies
Para recibir un cupón para una muestra de Bar Keepers Friend Soft Cleanser™, ingrese al siguiente link o escanee el Código QR. www.barkeepersfriend.com/ge Lámparas PRECAUCIÓN Espere a que las lámparas se enfríen antes de tocar las mismas. -
Page 29: Instrucciones De Instalación
Instrucciones Campana de Inserción Estándar de instalación UVC7300 “Ante cualquier duda, llame a GE Appliances al 800.GE.CARES (800.432.2737) o visite nuestro sitio Web en: GEAppliances.com” ANTES DE COMENZAR ADVERTENCIA PARA REDUCIR EL RIESGO Lea estas instrucciones por completo y con DE INCENDIO, DESCARGA ELÉCTRICA O LESIONES A... - Page 30 Preparación para la instalación DIMENSIONES DEL PRODUCTO ESPACIOS PARA LA INSTALACIÓN Esta campana de ventilación deberá ser instalada entre el mínimo requerido de 24” y el máximo recomendado de 36” sobre la superficie de cocción. Siempre consulte las instrucciones de instalación de la estufa o cocina en relación a los espacios específicos del producto.
- Page 31 Preparación para la instalación HERRAMIENTAS Y MATERIALES REQUERIDOS (NO SUMINISTRADOS) Cinta aislante Alicates de punta larga de aluminio Perforadora eléctrica y Lápiz y cinta métrica brocas correspondientes Escalera de mano Nivel Gafas de seguridad Conductos de 8" Linterna y tapas según sea necesario Alicate Tijeras para...
- Page 32 Preparación para la instalación PLANIFICACIÓN PREVIA PLANIFICACIÓN PREVIA (CONT.) Planificación para la Instalación con Conducto Planificación de la Estructura del Gabinete Estándar Esta campana está diseñada para ventilarse en forma vertical a través del cielorraso. Use un conducto circular agujero rectangular para ubicar por sí sola la de 8”.
- Page 33 Preparación para la instalación SUMINISTRO DE ENERGÍA PREPARACIÓN PARA LA INSTALACIÓN DEL GABINETE IMPORTANTE – (Tenga a bien leer cuidadosamente) ADVERTENCIA NOTA: Este soporte deberá ser retirado antes de la instalación. Retire los 2 tornillos traseros y los 2 PARA SEGURIDAD PERSONAL, ESTE APARATO DEBE inferiores, de acuerdo con la siguiente ilustración.
- Page 34 Instalación STEP 1 STEP 2 INSTALACIÓN DEL INSTALACIÓN DE LA COBERTOR DE LA CAMPANA (Cont.) CAMPANA (Si se Usa) 3. Ajuste con 8 tornillos (A), 4 en el frente y 2 a cada lado, hacia la parte trasera de la campana. Se 1.
- Page 35 Instalación CONEXIÓN ELÉCTRICA 1. Retire la tapa de la caja de empalmes eléctricos. 2. Retire el tablero de la caja eléctrica. Tablero de la Caja Eléctrica con Amortiguador de Refuerzo 3. Alimente el Cable de Suministro Eléctrico a través del agujero y asegure el mismo con un amortiguador de refuerzo.
- Page 36 Instalación STEP 3 KIT DE RECIRCULACIÓN (Si se Usa) 1. Haga un agujero en el sofito para el conducto de salida. 2. Instale la parrilla de ventilación sobre el conducto de salida. 6-15/16" 3. Selle las uniones del conducto con cinta para conductos. Para ordenar el kit de recirculación opcional, visite GEAppliances.com.
-
Page 37: Consejos Para La Solución De Problemas
óptima. El uso de un conducto más pequeño hará que la ventilación se reduzca. Minimice la longitud del conducto y el número de transiciones y codos. Los técnicos de GE Appliances no pueden corregir este problema si hay una instalación inadecuada. -
Page 38: Garantía
Para realizar el servicio técnico de su electrodoméstico, se podrá requerir el uso de datos del puerto de abordaje para su diagnóstico. Esto da al técnico del servicio de fábrica de GE Appliances la habilidad de diagnosticar de forma rápida cualquier problema con su electrodoméstico, y de ayudar a GE Appliances a mejorar sus productos al brindarle a GE Appliances la información sobre su... -
Page 39: Accesorios
Accesorios ¿Busca Algo Más? GE Appliances ofrece una variedad de accesorios para mejorar sus experiencias de cocción y mantenimiento! Para acceder a números telefónicos e información de sitios Web, consulte la página de Soporte para el Consumidor. Estos y otros productos están disponibles:... -
Page 40: Soporte Para El Consumidor
En EE.UU.: GEAppliances.com/register Servicio Programado El servicio de reparación de expertos de GE Appliances está a sólo un paso de su puerta. Conéctese a través de Internet y programe su servicio a su conveniencia cualquier día del año. En EE.UU.: GEAppliances.com/service o comuníquese al 800.432.2737 durante el horario de atención comercial.
Need help?
Do you have a question about the UVC7300 and is the answer not in the manual?
Questions and answers