Table of Contents
Advertisement
Quick Links
Advertisement
Table of Contents

Summary of Contents for Magnum Dimensions ME-BMK
- Page 1 ME-BMK/ME-BMK-NS Battery Monitor Kit Owner’s Manual...
- Page 2 Restrictions on Use The ME-BMK/ME-BMK-NS battery monitor may only be used in life support devices and systems with the express written approval of Sensata Technologies. Failure of this product can reasonably be expected to cause failure of that life support device or system, or to affect the safety or effectiveness of that device or system.
- Page 3 Safety Information Conventions used in this Manual Safety Symbols To reduce the risk of electrical shock, fi re, or other safety hazard, the following safety symbols have been placed throughout this manual to identify dangerous situations and important safety instructions. WARNING: This symbol indicates failure to take a specifi...
-
Page 4: Table Of Contents
Network Connections using the ME-RTR Router ....10 Using the BMK ............11 How the BMK Battery Monitor Operates ......11 Monitoring the Battery Bank using the ME-BMK .....12 Using LED Indicator to Determine BMK Status .... 14 Specifi cations ............15 Limited Warranty.............16 How to Receive Repair Service ........17... -
Page 5: Introduction
The ME-BMK is easy to install and is designed to be networked with a Magnum inverter/charger using a Magnum remote or router to display information about your battery bank. -
Page 6: Advantages Of Using A Battery Monitor
State Of Charge (SOC) under all discharge and charge conditions. These devices have both advantages and disadvantages based on accuracy and ease of use. Magnum’s ME-BMK battery monitor combines advantages these... -
Page 7: Installation
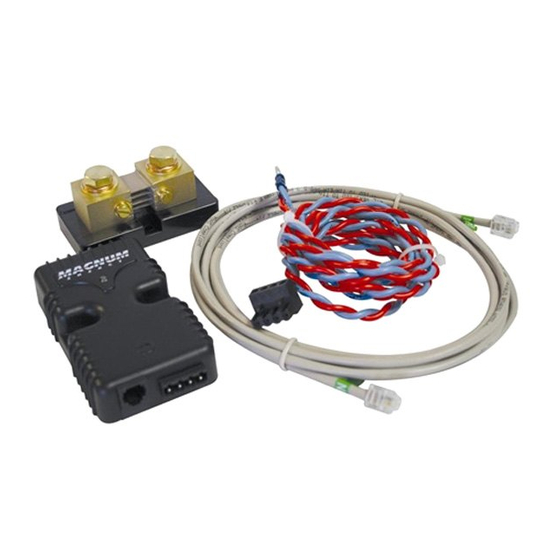
Review all safety information on page ii. The ME-BMK sense module is connected to the inverter using the 10’ communications cable, and is connected to the DC shunt using the 5’ twisted-pair signal wire. Before installing and connecting any wires, determine the communications cable’s route to the inverter... -
Page 8: Figure 2-1, Me-Bmk Basic Installation Diagram
(ME-BMK/ME-BMK-NS) DC Fuse (2 amps) battery side DC Positive *NOTE: The ME-BMK-NS Battery model does not include a Distribution Bank DC shunt. The shunt must be provided in the system. Figure 2-1, ME-BMK Basic Installation Diagram © 2016 Sensata Technologies... -
Page 9: Installation Procedure
Installation Procedure Select a location that is dry and away from extreme temperatures to mount the ME-BMK sense module and DC shunt. Ensure that you can access the shunt’s screws and bolts, view the sense module’s LED, and have access to the 4-port terminal block and the RJ14 communication port. -
Page 10: Figure 2-2, Dc Shunt Connections
Installation Sense wire with ring terminal (x2) 3/8"-16 bolt (x2) - to sense module with 9/16" head Flat Split-lock washer (x2) washer (x2) Flat washer (x2) Split-lock Cable (x2) – ring washer (x2) lug 3/8" opening 8-32 x 3/8" screw (x2) DC Shunt Figure 2-2, DC Shunt Connections Communications... -
Page 11: Me-Bmk Sense Module Connections
Installation 2.2.2 ME-BMK Sense Module Connections Once the ME-BMK is mounted, connect as follows (see Figure 2-3): 1. Connect one end of the communication cable to the inverter’s network port, and then connect the other end to the network port on the BMK sense module. See Figure 2-1. -
Page 12: Connecting Multiple Network Devices
IN V E R T ER S H O R E A G S ME T ER S ET U P T EC H ME-AGS-N ME-BMK Phone-splitter Small Magnum inverters Remote Control (ME-RC50 or ME-ARC50) FAU L T Inverting REMOTE 12.6V... -
Page 13: Figure 2-5, Multiple Network Devices - Daisy Chain
(see Figure 2-5). If using this confi guration, the fi rst device connected to the inverter’s network port* must be the ME-AGS-N—followed by the ME-BMK. * Note – The MM/MMS Series use the Remote (blue) port as the network port. -
Page 14: Network Connections Using The Me-Rtr Router
Magnum Router (ME-RTR) Magnum Inverter/Charger ME-BMK Figure 2-6, BMK Directly Connected to Router • Direct to Inverter – In this arrangement, the router and the BMK devices are each directly connected to the inverter via separate ports. -
Page 15: Using The Bmk
Operation Using the BMK This section explains how the ME-BMK battery monitor works. IMPORTANT: Please refer to your remote/router owner’s manual for detailed instructions on adjusting the charge effi ciency and amp- hour size, and monitoring the various BMK meters. -
Page 16: Monitoring The Battery Bank Using The Me-Bmk
10000 Time [minutes] Figure 3-1, Ending Battery Voltage Verses Time Monitoring the Battery Bank using the ME-BMK You can monitor your battery bank using the BMK menu items from a Magnum remote/router. The remote/router has two adjustable BMK menu options: charge effi ciency and amp-hour (AH) size; and also provides numerous read-only BMK meters to monitor your batteries (e.g., DC volts, DC amps, AH I/O, rAH Out, tAH Out, etc.).*... - Page 17 Auto setting, or can be manually programmed by the user (using a Magnum remote/router). The ME-BMK is shipped with the charge effi ciency set to Auto. This allows the battery monitor to automatically calculate variables that affect the charging effi ciency, such as: battery type, battery age, and how the batteries are maintained—which is not always constant.
-
Page 18: Using Led Indicator To Determine Bmk Status
B) If the RC50 remote display is on, ensure the remote display is Revision 2.0 or higher. RC50 remote displays with revisions prior to 2.0 are not compatible with the ME-BMK. The power-up sequence failed. Unplug the sense module’s 4-port terminal block and check for correct DC voltage on pins 3 &... -
Page 19: Specifi Cations
Specifi cations Specifi cations Sense Module DC Shunt (2.4 cm) 1" 15" 3" (3.8 cm) (6.0 cm) 3" 1" (3.2 cm) (4.4 cm) 1" (8.2 cm) 1" 1" 5" (3.2 cm) (10.3 cm) 3/8-16 x 5/8" bolts (9/16" head) (8.4 mm) 3"... -
Page 20: Limited Warranty
Warranty and Service Info Limited Warranty Sensata Technologies warrants the ME-BMK to be free from defects in material and workmanship that result in product failure during normal usage, according to the following terms and conditions: 1. The limited warranty for this product extends for 12 months beginning from the product’s original date of purchase. -
Page 21: How To Receive Repair Service
Warranty and Service Info How to Receive Repair Service If your product requires warranty service or repair, contact: • Sensata Technologies (Magnum Energy-branded products) at: Telephone: 425-353-8833 Fax: 425-353-8390 Email: MagnumWarranty@Sensata.com If returning your product directly to Sensata for repair, you must: 1.
Need help?
Do you have a question about the ME-BMK and is the answer not in the manual?
Questions and answers