
Related Manuals for Glow-worm 20040796

Summary of Contents for Glow-worm 20040796
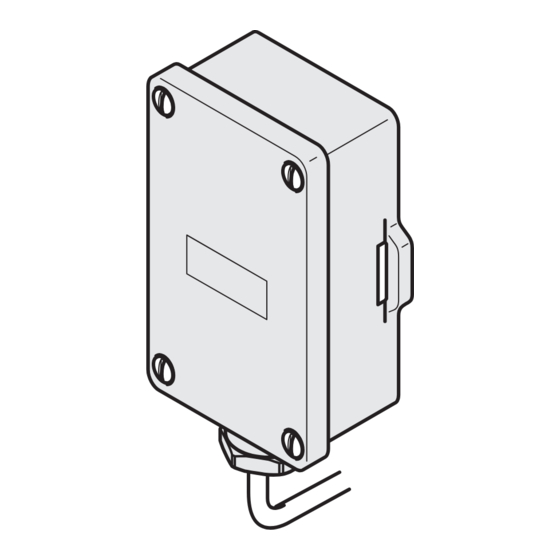
- Page 1 Installation and Instructions for Use Outdoor Sensor To b e l e f t w i t h t h e u s e r www.glow-worm.co.uk...
- Page 2 Scheme. Visit www.central heating.co.uk for more information. Please read these instructions and follow them carefully for the safe and economical use of your boiler. On completion of installation leave the instructions with the user. www.glow-worm.co.uk...
-
Page 3: Table Of Contents
Configuring the outdoor sensor interface controls or the interface of an with external Glow-worm Climapro external Glow-worm Climastat or Climapro or Climastat controls room control (if fitted). Optimum comfort and efficiency is achieved when used in conjunction with a Climastat or Climapro (in modulating mode). -
Page 4: General Information
We accept no liability in case of damage due goes inside the outdoor sensor. to the non-compliance of these instructions. Do not use any abrasive cleaning product as they could damage the housing or plastic case. www.glow-worm.co.uk... -
Page 5: Kit Contents
Glow-worm. Kit contents Any alteration not approved by Glow-worm, Refer to diagram 1. could invalidate the certification, appliance Kit part number 0020040796. warranty and may also infringe the current issue of the statutory requirements. - Page 6 The installation of this outdoor sensor must be carried out by a competent person in accordance the rules in force in the countries of destination. Manufacturer’s instructions must not be taken as overriding statutory requirements. www.glow-worm.co.uk...
-
Page 7: Installer Important Information
Depth 86mm (including gland) should not be installed sheltered from wind or draughts, nor directly exposed to the sun. The sensor should be placed at least 1 metre from openings and away from permanent or occasional emissions of hot air. www.glow-worm.co.uk... -
Page 8: Outdoor Sensor Location
(A) Outdoor sensor location OUTDOOR SENSOR 1 / 3 POSITION (For buildings three floors or less) OUTDOOR SENSOR POSITION 2 / 3 (For buildings higher than three floors) OUTDOOR SENSOR POSITION (For buildings three floors or less) Diagram 2 www.glow-worm.co.uk... - Page 9 Choose the location of the outdoor sensor, seal and electrical sealing gland. refer to page 6. Fit the back box to the wall, see diagram 4. BACK BOX BACK BOX SEAL COVER ELECTRICAL SEALING GLAND Diagram 3 Diagram 4 www.glow-worm.co.uk...
-
Page 10: Installation
ELECTRICAL the boiler, polarity is not important, refer to SEALING diagram 6. GLAND Note:Ultracom hxi & Flexicom hx open vent Diagram 5 system models only. The edge connector will need to be fitted, see diagram 7. www.glow-worm.co.uk... - Page 11 (A) Installation OTC 1 and OTC 2 Diagram 6 www.glow-worm.co.uk...
- Page 12 (A) Installation Refer to diagram 8, fit and secure the seal and cover. EDGE CONNECTOR SEAL COVER Connection at X41 on main PCB Diagram 7 Diagram 8 www.glow-worm.co.uk...
- Page 13 (B) Configuring the Outdoor Sensor NOTE: Configuration of the outdoor sensor If a Glow-worm Climapro or Glow- achieved through the Appliance interface worm Climastat is fitted, please refer to controls on the boiler, see diagram below. section C to configure the outdoor sensor.
-
Page 14: Configuring The Outdoor Sensor
Consider the level of heat loss in of the heating appliance from the Heating comparison to typical UK heat loss e.g. flow temperature (°C) axis. For example this (double glazing, loft insulation and cavity wall could be 82°C. insulation). www.glow-worm.co.uk... - Page 15 Press and hold the mode button. When the screen is lit orange and displays ‘0’, release the mode button. Using the domestic hot water +/- button, scroll through to ‘35’. Running screen is displayed Press mode button. www.glow-worm.co.uk...
- Page 16 Using the domestic hot water +/- button load for the appliance (it will be different change the value to ‘6’. for various kW output boilers). Press mode button once. For example this could be ‘18’, ‘38’. www.glow-worm.co.uk...
- Page 17 (B) Configuring the Outdoor Sensor Default curve Minimum outdoor Factory default room temperature temperature (ºC) setpoint, for weather compensation www.glow-worm.co.uk...
- Page 18 ‘d.46’. Refer to the following diagrams and text to do this. Method with example. Press and hold the mode button. When the screen is lit orange and displays ‘0’, release the mode button. www.glow-worm.co.uk...
- Page 19 In the top centre of the screen, where the pressure or temperature is normally shown, is displayed the heating part load for the appliance (it will be different for various kW output boilers). For example this could be ‘18’, ‘38’. www.glow-worm.co.uk...
- Page 20 D.46 provides a means to offset from the default 20°C room set point. For example to increase the target room temperature to 22°C set d.46 to the value 2. Range of value d.46: -10 to 10. www.glow-worm.co.uk...
- Page 21 (C) Configuring the Outdoor Sensor with external Glow-worm Climapro or Climastat controls Choosing and Setting Sensor Method with example. Heating Curve. The following example describes the process. The temperatures quoted should A gradient must be chosen from the range be substituted with real values to find the shown on page 17, labelled 0.2-4.
- Page 22 Climastat or Climapro/ Climapro RF roomstat. Making Adjustment on Climapro/ Climapro RF For systems with a Glow-worm Climapro. To adjust the room ambient set point Refer to your Climapro/Climapro RF temperature, refer to sections, Setting the Commissioning Instructions. The heating “Comfort”...
-
Page 23: Configuring The Outdoor Sensor
(C) Configuring the Outdoor Sensor with external Glow-worm Climapro or Climastat controls Recommended for UK Default curve Outdoor temperature (ºC) Factory default room temperature setpoint, for weather compensation www.glow-worm.co.uk... - Page 24 Because of our constant endeavour for improvement, details may vary slightly from those shown in these instructions. Glow-worm, Nottingham Road, Belper, Derbyshire. DE56 1JT...
Need help?
Do you have a question about the 20040796 and is the answer not in the manual?
Questions and answers