Advertisement
Quick Links
Model: SW-M23
Instruction Manual (English)
Date: Jan 9, 2013
Print color : Black text on white paper
Size: 178W x 178H mm
IMPORTANT
Read before proceeding
If you have any questions regarding the operation or use of this product, please visit www.ekids.com to view answers to
frequently asked questions.
To learn more about this and other iHome products, please visit us online at www.ihome.com
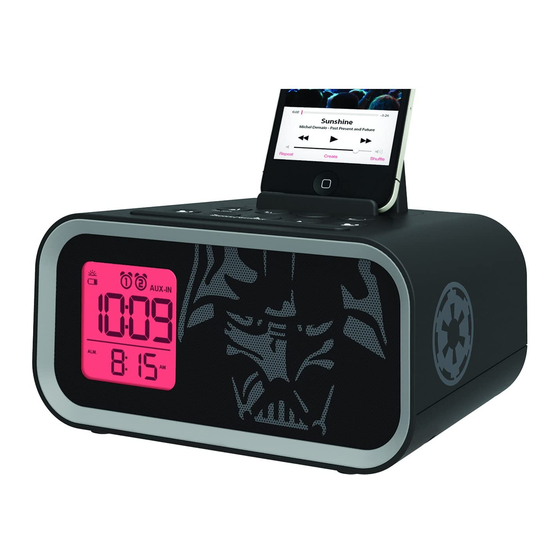
SW-M23.2
Dual Alarm Clock
Speaker System
for MP3 players & smartphones
Advertisement

Related Manuals for eKids Star Wars SW-M23

Summary of Contents for eKids Star Wars SW-M23
- Page 1 IMPORTANT Read before proceeding If you have any questions regarding the operation or use of this product, please visit www.ekids.com to view answers to frequently asked questions. To learn more about this and other iHome products, please visit us online at www.ihome.com...
-
Page 2: Table Of Contents
Table of Contents Quick Start / Installing the Backrest ..........................1 Controls and Indicators ..............................2 Unit display / Install Clock Backup Battery ........................3 Using the Unit ................................4-6 A Consumer Guide to Product Safety ........................... Trouble Shooting ................................Warranty Information ............................... - Page 3 FCC Information This device complies with Part 15 of the FCC Rules, operation is subject to the following two conditions: (1) This device may not cause harmful interference, and (2) this device must accept any interference received, including interference that may cause undesired operation. •...
-
Page 4: Quick Start / Installing The Backrest
Quick start 1:power 2:time/date SLEEP AUX-IN RESET TEST 5V 2A ALM. • Press & hold the Clock Adjust button on the back of the unit until the display flashes. Press the button to set the time. • Press the Clock Adjust button again and use the button to set the Attach AC adaptor cable to jack on back of year. -
Page 5: Controls And Indicators
Controls and Indicators Top Panel Lower Volume Button Sleep Button Raise Volume Button Alarm Reset / Power Button Forward Button Alarm 2 Button Alarm 1 Button Play/Pause Button Reverse Button Snooze/Dimmer Button Rear Panel DC Jack DST switch USB Charging port Clock Adj. -
Page 6: Unit Display / Install Clock Backup Battery
Unit Display Alarm 1 & Alarm 2 Indicators DST indicator SLEEP Sleep Indicator AUX-IN Battery Low Indicator Aux-in Indicator PM Indicator Time Display Alarm time AM/PM Indicator ALM. YEAR Year/Date Indicator DATE Alarm Time/Date Display Installing Clock Backup Batteries The unit uses 3 AAA batteries for backup to provide continuous alarm operation and clock settings in the event of a power failure. -
Page 7: Using The Unit
Using the Unit Setting Time and Calendar 1. Press and hold the Clock Adjust Button located on the back of the unit until the current time flashes on the display. Press the Button to adjust to correct time (holding the button for a few seconds will advance or reverse rapidly). 2. - Page 8 Using the Unit Snooze Operation 1. Press and hold the Snooze/Dimmer Button for a few seconds during normal operation (alarm is not sounding) to set snooze time. Press the Button to set the snooze timer from 1 to 29 minutes. 2.
- Page 9 Using the Unit Sleep Operation Sleep mode lets you sleep to your audio device until the unit shuts off at a selected time. 1. Press the Sleep Button to enter sleep mode. The Sleep Icon will appear on the display to indicate it is in sleep mode. 2.
-
Page 10: A Consumer Guide To Product Safety
A Consumer Guide to Product Safety When used in the directed manner, this unit has been designed and manufactured to ensure your personal safety. However, improper use can result in potential electrical shock or fire hazards. Please read all safety and operating instructions carefully before installation and use, and keep these instructions handy for future reference. -
Page 11: Trouble Shooting
Trouble Shooting Symptom Possible Problem Solution Unit doesn’t respond AC adaptor isn’t plugged to a wall outlet or Make sure the AC adaptor is properly connected to a working (no power) the connector is not plugged into the power wall outlet and to the power supply jack on the unit supply jack on the back of the unit Wall outlet is not functioning Plug another device into the same outlet to confirm the outlet is working... -
Page 12: Warranty Information
Should this fail to resolve the matter and service still be required by reason of any defect or malfunction during the warranty period, eKids will repair or, at its discretion, replace this product without charge. This decision is subject to verification of the defect or malfunction upon delivery of this product to the Factory Service Center authorized by Customer Service.
Need help?
Do you have a question about the Star Wars SW-M23 and is the answer not in the manual?
Questions and answers