Advertisement
Quick Links
Heating Solutions
HA308N and HA308S1
PROGRAMMABLE OR MANUAL THERMOSTAT
Programmable Settings: Manual / Timing On/Off / 5+2 Day Programmable
SPECIFICATIONS
Sensing element : NTC
Display: LCD
Power consumption:<2W
Set-point range: Room Temp: 5
Accuracy: ± 1
℃
Button: Touch pad
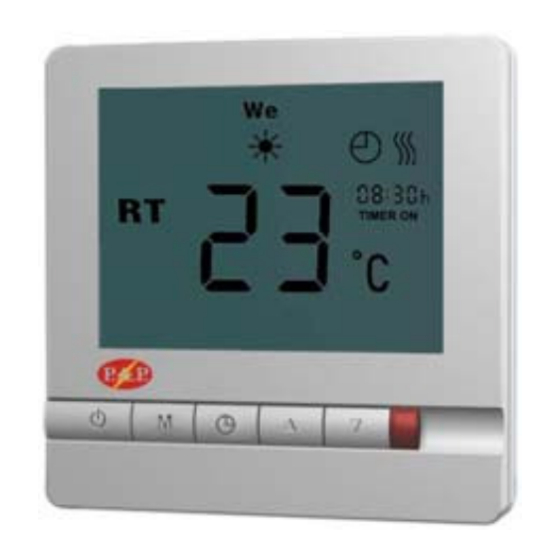
BUTTON DESCRIPTION
HA308N-Room or Air Temperature
HA308S1-Floor Temperature
Day of the Week
Heating On
On/Off
Mode
Down
Clock
Up
MOUNTING
1. Open the main con-
trol panel: put a
3.5mm screwdriver
into the opening
slots, at either side of
the base. Prise up,
opening the clips.
℃
to 35
℃ ( N )
Floor Temp: 5
℃
to 90
℃
(S1)
3. Connect wiring to
2. Fix the backing
the terminals, as per
plate to the wall
the wiring diagram -
mounting bracket
refer drawing above
Switch current rating: < 16A (resistive load)
Power supply: AC85
Dimensions: 86 × 86 × 13 mm (W × H × D)
Fixing screw width: 60mm
Housing: ABS + PC Flame Retardant
Operating rating: 0
condensing)
TUV CE Certification
WIRING DIAGRAMS
HA308N
HA308S1
4. Fit the connected
thermostat onto the
backing plate, then fix
it with the two sup-
plied screws
P.A.P. Heating Solutions Pty Ltd
23 Winchcombe Court
MITCHELL ACT 2911
Ph: 02 6242 9310
www.papheatingsolutions.com.au
< 6A (inductive load)
~
2 60V, 50/60 Hz
~
4 0
℃
, 5
~
9 5%RH (non-
L-Line In
L-Load Active-16amp, 3800w
N-Load Neutral
N-Neutral In
L-Line In
L-Load Active-16amp, 3800w
N-Load Neutral
N-Neutral In
Remote Floor
Sensor
5. Sit the cover at a 30
degree angle then
push down into place,
ensuring the two clips
at the bottom are se-
cure
Advertisement

Summary of Contents for P.A.P. Heating Solutions HA308N
-
Page 1: Specifications
P.A.P. Heating Solutions Pty Ltd 23 Winchcombe Court MITCHELL ACT 2911 Ph: 02 6242 9310 Heating Solutions www.papheatingsolutions.com.au HA308N and HA308S1 PROGRAMMABLE OR MANUAL THERMOSTAT Programmable Settings: Manual / Timing On/Off / 5+2 Day Programmable SPECIFICATIONS Sensing element : NTC Switch current rating: <... -
Page 2: Operating Instructions
WHAT THE E1 SYMBOL MEANS RT = For HA308-S1, in the operational mode, RT indicates This means that the floor sensing probe is not connected or is the Floor Temperature. For HA308N , RT indicates the faulty room air temperature SET = Pressing the...
Need help?
Do you have a question about the HA308N and is the answer not in the manual?
Questions and answers
I have a symbol flashing on the display that is not in manual Bottom left corner
@Jai Not sure if photo went through