Table of Contents
Advertisement
Quick Links
Advertisement
Table of Contents

Summary of Contents for Grafco GF-TX5
-
Page 2: Table Of Contents
CONTENTS It is recommended that you read this entire manual thoroughly before using your GF-TX5 stimulator........Introduction ......... Cautions ......... Warnings ......General Description ........Construction ....Technical Specifications ........Accessories ..Attachment of Electrode Lead Wires ..... Lead Wire Maintenance ...... -
Page 3: Introduction
INTRODUCTION What is Pain ? pain perception. T.E.N.S. does not cure any physiological problem; it only helps control the Pain is a warning system and the body's method pain. T.E.N.S. does not work for everyone; of telling us that something is wrong. Pain is however, in most patients it is effective in important;... -
Page 4: Cautions
CAUTIONS WARNINGS 1) Read operation manual before use of 1) Caution should be used in applying T.E.N.S. T.E.N.S.. to patients suspected of having heart disease. 2) We emphasize that any patient with an Further clinical data is needed to show there implanted electronic device (for example, a are no adverse results. -
Page 5: General Description
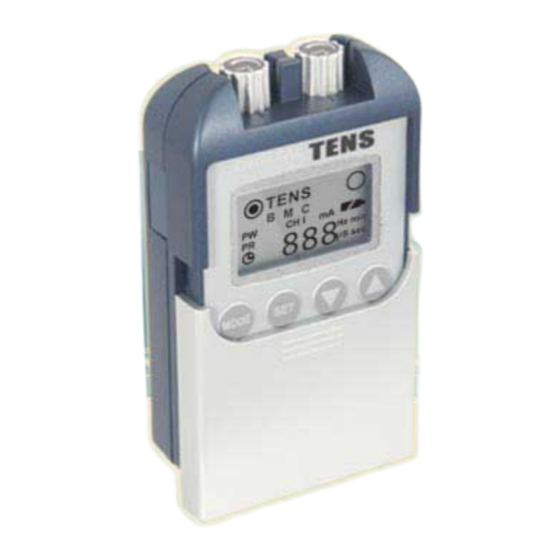
GENERAL DESCRIPTION CONSTRUCTION The GF-TX5 is a battery operated pulse generator that sends electrical impulses to electrodes to the body and reach the nerves causing pain. The device is provided with two controllable output channels, each independent Channel I ON/OFF... -
Page 6: Technical Specifications
TECHNICAL SPECIFICATIONS The technical specification details of GF-TX5 Display : Showing all chosen are as follows. function and indicating the condition of the Power source : One - 9 volt DC battery battery (alkaline recommended) Timer : 1-60 min. (1min./step) -
Page 7: Accessories
ATTACHMENT OF ACCESSORIES ELECTRODE LEAD WIRES Each set GF-TX5 is complete with: 1) Connect the wire and main unit The wires provided with the system insert into 1) Adhesive electrodes 4 pieces the jack sockets located on right side of the... -
Page 8: Lead Wire Maintenance
LEAD WIRE MAINTENANCE 3) Connect the wire and electrode Clean the wires by wiping with a damp cloth. After connecting the wires to the stimulator, Coating them lightly with talcum powder will attach each wire to an electrode. Use care reduce tangling and prolong life. -
Page 9: Electrode Placement
ELECTRODE PLACEMENT The placement of electrodes can be one of Contiguous placement : the most important parameters in achieving success with T.E.N.S. therapy. Of utmost This is the most common placement technique. importance is the willingness of the clinician It involves placing the electrodes alongside the to try the various styles of electrode placement area of localized pain site, in such a way as to to find which method best fits the needs of the... - Page 10 enervated area and/or placing one electrode stimulate the pain site in a contiguous manner; (or set of electrodes) at the pain site and the other channel can be placed along the another electrode (set) at the point where the involved dermatome or utilized for point therapy. nerve root joins the spinal cord.
-
Page 11: Tips For Skin Care
APPLICATION OF RE-USEABLE TIPS FOR SKIN CARE SELF ADHESIVE ELECTRODES To avoid skin irritation, especially if you have Application : sensitive skin, follow these suggestions: 1) Clean and dry the skin at the prescribed 1) Wash the area of skin where you will be area thoroughly with soap and water prior placing the electrodes, using mild soap and to application of electrodes. -
Page 12: Adjusting The Controls
OFF. patient use only. 4) If irritation occurs, discontinue use and The GF-TX5 can be easily adjustable to your consult your clinician. comfort and relief of your pain by two intensity 5) Read the instruction for use of self-adhesive control knobs. - Page 13 By turning the controls clockwise, the power 5) Pulse Rate Control will be switched On. A symbol will be revealed Pulse rate is adjustable. Its value is visible on on the LCD as soon as the stimulation is the LCD. This buttons determine how many commenced.
-
Page 14: Operating Instruction
OPERATING INSTRUCTION Decrease Button 1) Turn the device "On" by turning channel 1 When pressing this button, the pulse rate will or channel 2 amplitude knobs located on decrease gradually the top of the unit clockwise. 2) Push the top slide cover from up to down to 7) The device will store the mode that is expose the Mode control section. -
Page 15: After Use
AFTER USE 7) Battery power indicator : 1) Turn the intensity control OFF full-scale battery, power full Turn the intensity control in anticlockwise to half-scale battery, power low OFF. 8) Adjust channel amplitude : Turn channel 1 or 2 clockwise. The indicator 2) Disconnect wire and electrode will light up as long as the unit is in stimulation. -
Page 16: Removing Electrodes/ Leadwires
REMOVING ELECTRODES/ MAINTENANCE, TRANSPORTATION LEADWIRES AND STORAGE OF T.E.N.S. DEVICE It is strongly recommended to leave the lead 1) Non-flammable cleaning solution is suitable wires plugged into the unit to lessen the for cleaning the device. possibility of breakage. If it is necessary to Note : Do not smoke or work with open lights unplug them, turn both Channel controls to (for example, candles, etc.) or while working... -
Page 17: Safety-Technical Control
SAFETY-TECHNICAL CONTROLS TROUBLE SHOOTING For safety reasons, check your unit each week If your GF-TX5 appears to be functioning based on the following checklist. improperly, use the chart below to determine what may be wrong. 1) Check the device for external damage. -
Page 18: Malfunctions
MALFUNCTIONS WARRANTY Should any malfunctions occur while using the All GF-TX5 devices carry a warranty of one GF-TX5, check year from the date of delivery. The warranty applies to the stimulator only and covers both 1) whether the parameters are set to the parts and labor relating thereto. - Page 19 Manufactured for : Graham-Field Health Products. Atlanta GA 30360 Made in Taiwan www.grahamfield.com...


Need help?
Do you have a question about the GF-TX5 and is the answer not in the manual?
Questions and answers