Table of Contents
Advertisement
Quick Links
Advertisement
Table of Contents

Summary of Contents for Panoscan MARK TWO
- Page 1 PANOSCAN MARK TWO OPERATION MANUAL V1.1...
- Page 2 IMPORTANT ADDENDUM This manual was written before the OS-X version 6.0.3 was released. Most of the features and operation are identical in OS-X. There are a few things that you will need to be aware of when using OS-X with this system. Using the Firewire Converter with OS-X The drivers for the Firewire converter are built into OS-X 10.2 or newer.
- Page 3 Scanning to RAM under OS-X On page 20 of this manual there was a recommendation to scan to RAM with OS-9. This was due to the fact that the file transfer mode in the ViewFinder 5 did not work correctly with the FireWire converter.
-
Page 4: Table Of Contents
Table of Contents Introduction Parts List Connector Identification Installing and Configuring the ViewFinder™ Software Memory Requirements Scan to RAM Mode System Requirements Setting Up the System Making Your First Scans The Focus Tool Saving Scans Using the File Manager Changing Filters Cleaning the CCD Focus Chart... -
Page 5: Introduction
Your Panoscan MK2 camera system is the result of a cooperative development project between Panoscan Inc. and Better Light Inc. Mamiya-Sekor also contributed lenses and advice to the project. Without the cooperation of these partners the MK2 could not have been developed. Panoscan would like to thank our partners for their help with the MK2 camera and this manual. -
Page 6: Parts List
Your Panoscan MK2 camera system comes with the following parts. The standard configuration should have included a wheeled hard case, which is not shown in the picture below. If you notice that any pieces are missing please contact Panoscan immediately for assistance. -
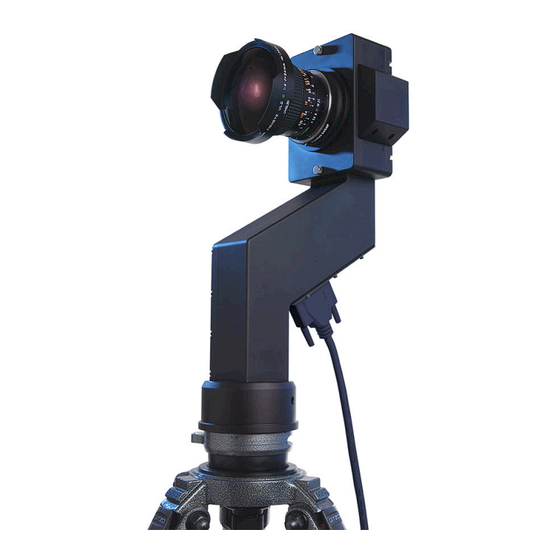
Page 7: Connector Identification
Connector Identification There are two main parts to your camera system. There is the main camera body shown on the bottom and the processor module shown on the top. The camera contains the CCD and an electronics bay that drives the pan motor and shutter motor. The camera is powered through the DB-25 cable that connects the camera to the Processor. - Page 8 Care must be taken to avoid blocking the fan and air vents. The case provided by Panoscan is designed to allow air to flow correctly around the processor module so you do not need to remove it from the storage case during use.
-
Page 9: Installing And Configuring The Viewfinder™ Software
Panoscan will test and verify compatibility with the MK2 before posting any new versions. Beware any versions that have not been specifically tested by Panoscan for use with your MK2 camera. The ViewFinder software maintains a preferences file, named “ViewFinder Prefs”, which must be in the same folder as the application itself. -
Page 10: Memory Requirements
Mac OS 9.2 or OS-X 10.2 or later. (Classic mode in X NOT supported.) 24-bit color graphics display and video card with 1024 x 768 minimum resolution SCSI-2 Interface (HD-50), or Firewire converter provided by Panoscan. 128 MB RAM minimum (additional RAM required for Scan to RAM operation) -
Page 11: Setting Up The System
Setting Up the System 1. To begin we will make a few recommendations about your tripod. The Panoscan MK2 must remain completely rigid while the scan is in progress. And flex or shake in the tripod can blur or distort the image. For this reason we recommend that you use a heavy duty tripod fitted with a ball level head like those found on video and motion picture tripods. - Page 12 The lens alignment mark for the Panoscan camera is at the 6:00 position. This is to ensure that the corner notches on the fisheye lens align to allow the lens to see the 12:00 and 6:00 positions without obstruction.
- Page 13 3. Connect the camera to the control unit Plug the male end of the insert connector into the DB-25 socket on the camera control unit into the (marked as “DB-25 Camera Connector” in the connector identification image. Make sure the plug is firmly seated in the socket before securing it to the connector with the two connector screws.
- Page 14 In most cases you will be using the Processor with the FireWire converter provided by Panoscan. Begin by connecting the SCSI connector to the processor, always being careful to mate the connector squarely and firmly into its fully locked position. Avoid stress on this connector, which might damage the locking tabs or cause poor connections.
- Page 15 You should AVOID using the Adaptec 1480/1460 SlimSCSI PC cards. The Adaptec SlimSCSI cards will not work reliably on any Macintosh systems. 7. Connect the power source to the processor module. It’s a good idea to connect the battery because it can provide backup power in the event of an accidental power failure. (ie. Kicking the cord out of the wall.) The battery connector is keyed to insert only in one position.
- Page 16 The picture below shows how the camera is typically set up for a location shot. Notice the storage case is located under the tripod to keep it out of your scene. Also notice the storage case is used as a table for the laptop. When used in this configuration be sure to prop something in the lid to keep the case from pinching the cords and to allow for some air circulation.
- Page 17 9. You are now ready to turn on the power to the camera system. Flip the switch upward and the system will start up. The status indicator on the processor will glow orange then red then the LED should go out. The status LED on the camera body should be flashing green to indicate the camera is ready to scan.
- Page 18 12. Once the LED is glowing a steady green you may launch the Viewfinder camera software. You should see a display that looks something like the screen below. Pay careful attention to the camera indicator. It should say it has a Panoscan connected. If not you need to check you connections, and repeat the start-up procedures.
- Page 19 Before we start scanning we need to check a few preference settings. If your controls are not showing along the bottom of the image we recommend doing so now. It is crucial that the Base ISO setting be set to 200. It is a good idea to create a specific image folder where you camera will save scans.
- Page 20 OS-X Users We recommend that you use the camera’s hard drive for saving images. Scanning to RAM under OS-X is somewhat speed limited and the 125 shutter speed may corrupt large scans. OS-9 Users We recommend for most situations that you scan to the host computer’s RAM. This allows you to save the images on the host computer’s hard drive.
- Page 21 Another preference that can affect your ability to set correct exposure is the computer’s monitor gamma setting. Macintosh computers come with the screen gamma set to a very bright 1.8 setting. Most other computers, like Windows machines, use a darker gamma setting of 2.2. Since you images will most likely be viewed on a Windows machine at some point we recommend settung the Macintosh’s screen gamma to at least 2.2.
-
Page 22: Making Your First Scans
Making Your First Scans Now that you have successfully set up your camera and configured your preferences we can begin scanning images. 1. Begin by setting a reasonable focus and aperture setting for your lens. Don’t make things too difficult for your first scans. Start with a wide aperture setting like F 4.0. 2. - Page 23 slow shutter speed selected. After the calibration the shutter will open and the camera will begin rotating to make the scan. The status indicator will blink yellow and red alternately during the scan. You should see your first preview scan wipe across the preview screen. Note: a scan may be canceled at any time prior to completion by pressing the Command-period key combination .
- Page 24 9. Now lets work on the color. In this case our first preview scan looks too blue. To balance the color you will need to click on the color tab. Then select the digital spot meter tool at the top of the screen.
- Page 25 When you hit the “Auto Balance” button the software will average the white balance across all of the points you selected. The image will update to show the new white balance. It is important to understand that the color balance interacts with the ISO settings somewhat. The auto balance button looks at the targets you have selected and calculates the necessary gain adjustments to the CCD to balance the color.
- Page 26 After determining the desired color balance, you may wish to save the new values, either as the startup preferences, or as part of your custom settings. Select the “New Setting” option from the “Color Balance” popup menu at the bottom of the Color tab panel. Enter the name for the new color balance setting and click the OK button.
- Page 27 Just like the color settings tonal curves can be saved and recalled in the pull down menu. Your Panoscan MK2 camera also offers two methods for producing high bit depth images. The first method saves the “raw” (but pixel-corrected) digital data, without the application of any tone curve.
- Page 28 than the system’s internal disk drive can store it, which can lock up the camera and require a restart. Current testing indicates that the current drive can support the following fastest line times at full resolution; lower resolution settings may allow faster line times: MK2 Camera HD or Host RAM 24-bit color, 8/16-bit mono 1/120 sec (up to 2.2 MB/sec) MK2 to Camera HD 48-bit color 1/80 sec (up to 2.8 MB/sec) MK2 to Host RAM 48-bit color 1/60 sec (up to 2.2 MB/sec)
-
Page 29: The Focus Tool
The Focus Tool The ViewFinder software has a tool to assist you with focusing the camera. To utilize digital focus verification, first take a pre-scan of the subject, preferably with a reasonably proper exposure and approximate focus. After any pre-scan, click on the Focus tab panel, located on the main control window. - Page 30 texture can usually be used successfully for focus verification, whether it is brightly lit or in the shadows. You can read more about this feature in the Better Light ViewFinder manual.
-
Page 31: Saving Scans
Once the scan is started, a scan may be canceled at any time prior to completion by pressing the Command-period key combination. The Panoscan MK2 system features a dedicated internal disk drive for image storage (in the processor module). By default this is where the images are stored as they are scanned. The fastest scans, and the most efficient use of computing resources, can be accomplished by using the digital processor module’s internal disk drive as the initial destination for image data. -
Page 32: Using The File Manager
Using the File Manager Images stored on the digital camera’s internal disk drive can be accessed by using the camera control software’s File Manager dialog, which is started from the File menu, or by typing its keyboard shortcut Command-F. When this dialog window is displayed, the camera is queried as to the contents of its internal disk drive and this information is then shown in a standard list format. - Page 33 computers. Transfer rates vary with the performance of the host computer, from one to several MB per second. Retrieved files are stored as standard TIFF files, and include the image notes described previously.
-
Page 34: Changing Filters
The release button should be on top. (Away from the motor.) Note: The CCD is aligned to your specific lens mount at the Panoscan lab with the release button on top. If you put the front plate on upside down the CCD may not maintain perfect alignment with the fisheye lens causing a distortion at the top of your spherical images. -
Page 35: Cleaning The Ccd
Cleaning the CCD The MK2 camera is designed with a protective shutter door that seals the CCD inside a dust free environment. In most cases, cleaning should not be required for many years. To test your camera for dust we suggest stopping the camera down to F22 with the longest lens you own. Lay the camera on it’s back so the lens is pointed at the sky.. - Page 36 After cleaning repeat the sky test. The streaks should be gone. If you still see a problem contact Panoscan for more advise. In some cases it may be best to send the camera in to Panoscan for professional cleaning.
Need help?
Do you have a question about the MARK TWO and is the answer not in the manual?
Questions and answers