
Related Manuals for Litecraft DMX Master 2416


Summary of Contents for Litecraft DMX Master 2416
- Page 1 DMX Master 2416 ICA-2416W USER GUIDE PLEASE READ THESE INSTRUCTIONS CAREFULLY BEFORE USE...
-
Page 2: Table Of Contents
CONTENTS 1. Features………………………………………………………………………………2 Page 2.General Instructions…………………………………………………………………3 Page 3.Overview……………………………………………….………………………………2 Page 3-1.Front View…………………………………………………………………….……4 Page... -
Page 3: Features
1. Features A. 384 DMX channels B. 16 fixtures of each with 24 DMX channels C. 24 scenes and 16 chases(Max.1000 steps) programmable D. 8 faders for manual control E. Auto programs(scenes and chases) under control by Wait Time sliders(or Tap Sync) and Fade Time sliders F. -
Page 4: Overview
NEVER use the unit under the following conditions: In places subject to excessive humidity. In places subject to vibrations or bumps. In places with a temperature of over 45 C/113 F or less than 2 C/35.6 F. Protect the unit from excessive dryness or humidity (ideal conditions are between 35% and 80%). -
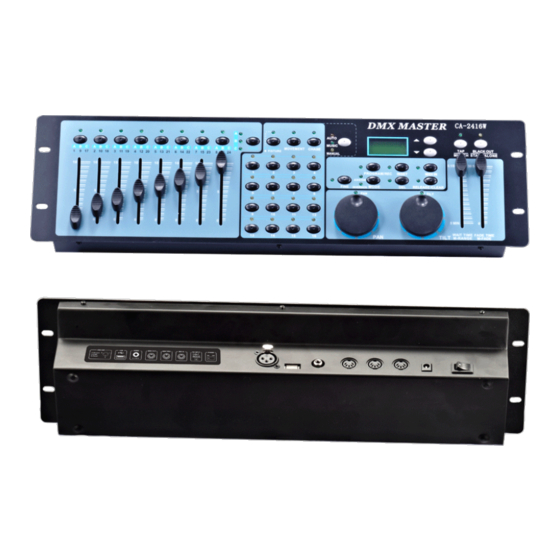
Page 5: Rear View
17. Insert Button Add a step to a chase 18. MIDI IN Receive MIDI signal 19. RELEASE/CLEAR Clear out the output for faders or clear all the outputs or Reverse mode 20. Del Delete scenes or chases. 21. TILT Wheel This jog wheel is used to control the Tilt of the scanner or for programming. -
Page 6: Program Enable
Data 151 DMX value(000-255) WT: 1M36S The current Wait Time is 1 minute and 36 seconds TP: 5.32S The time of the last two taps is 5.32 seconds FT: 10.5S Fade Time is 10.5 seconds ASS 07 08 Assign DMX channels 7 and 8 RES 10 13 Reverse DMX Channels 10 and 13 SN 6... -
Page 7: 4-2.2 Scanner Copy
Note: After finishing the current programming operation, you can hold RELEASE/CLEAR button to clear all the output before next step operation. 4-2.2 Scanner Copy This function allows you to copy the settings of one scanner to another. 1. Press PROGRAM/REC button to enter program mode. 2. -
Page 8: 4-3.1 Insert A Step
1. Press PROGRAM/REC button to enter program mode. 2. Press the CHASE button to enter chase programming mode, the LED indicator above it will light up. The fixture1-16 flashing, that means there is chase stored in it, then press the 1-16 chase buttons, all the Led indicator will quench out. -
Page 9: 4-3.2 Delete A Chase
Note: After finishing the current programming operation, you can hold RELEASE/CLEAR button to clear all the output before next step operation. 4-3.2 Delete a Chase 1. Press PROGRAM/REC button to enter program mode. 2. Hold DEL button, then tap the CHASE button which you want to delete; all related LED indicators will flash three times briefly indicating this chase has been deleted. -
Page 10: 4-4.2 Reverse Dmx Channel
6. Holding the MODE button, tap the Scene button1-8, all LED should flash briefly indicating the DMX channel is assigned.( Scene button 1 stands for DMX channel 1, Scene button 2 stands for DMX channel 2, and so on.) 7. Continue steps 2-6, you may assign 16 fixtures for the PAN/ TILT movements. Under ASSIGN MODE, PAN / TILT can be set both in page A and page B and page C. -
Page 11: 4-4.4 Display Dmx Channel
4-4.3 Delete a fixture of DMX channels 1. Press PROGRAM/REC button to enter program mode. 2. Hold the FINE and MODE button at the same time till to enter into Assign or Reverse mode 3. Tap the fixture1-16 to select the fixture you wish to delete. 4. -
Page 12: Running Scenes
3. Hold down the fixture 1 button and then press for 3 seconds to enter Stand-Alone mode. The LCD display will show “STAND ALONE” on it. 4. You can use the UP/DOWN button to choose the fixture which you want to address. That will show on the LCD display. -
Page 13: Running Chases
You can also run the MOVEMENT, pressing 1-16 to select the built-in movement: 1. Press the fixtures you would like to run the movement, then press MOVEMENT button to select the movement, turn the PAN/TILT to adjust the fixtures to the right place. 2. -
Page 14: 4-7.3 Music Mode
2. Press the chase button1-16 to select the chases that you want to run. The LED indicator of the selected ones will light up. 3. Tap the Auto/Music/Manual button to activate Auto mode. The Auto LED lights indicating Auto mode is active. -
Page 15: Midi Operation
Before you do the below operation, you should insert the USB memory to the unit first. UPDATE Power off the unit, hold PROGRAM/REC, MODE and DOWN these three buttons at the same time, then power on the unit, after 3 seconds, the word “write success” will show on the LCD display, then you can release the button and restart the unit, the unit has been updated successfully. - Page 16 FLASH:0x9n kk 127 + 0x8n kk 000 1 FADER1AND FLASH1 Page A 00 0‐127 2 FADER2 AND FLASH2 Page A 01 0‐127 3 FADER3 AND FLASH3 Page A 02 0‐127 4 FADER4 AND FLASH4 Page A 03 0‐127 5 FADER5 AND FLASH5 Page A 04 0‐127 6 FADER6 AND FLASH6 Page A 05 0‐127 7 FADER7 AND FLASH7 Page A 06 0‐127 ...
-
Page 17: Factory Dedault
50 CLEAR BUTTON 125 0/127 51 BLACK OUT BUTTON 126 0/127 4-9 FACTORY DEFAULT Be careful, factory reset will delete all the settings! 1. Power off the unit. 2. Hold the MODE and DEL button at the same time and then power on the unit, all the corresponding LED indicator will flash fast for 3 times, that mean you have made the operation successfully. - Page 18 Litecraft is continuously developing and improving all its products. We reserve the right to change specifications without prior notification. Images are representing but not necessarily a precise product reference. Litecraft shall be under no liability for any loss, damage or injury for direct or indirect dependence on the information contained in this guide.
Need help?
Do you have a question about the DMX Master 2416 and is the answer not in the manual?
Questions and answers