Table of Contents
Advertisement
Advertisement
Table of Contents

Subscribe to Our Youtube Channel
Related Manuals for DiabloSport Trinity 2

Summary of Contents for DiabloSport Trinity 2
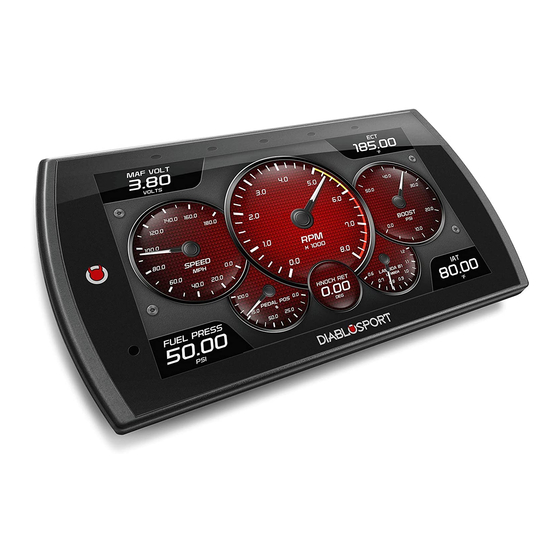
-
Page 2: Table Of Contents
Table of Contents Read Me Safety Warning & Caution Safety Guidelines FCC Compliance Quick Start In-Cab Display Accessories Cable Installation Windshield Mount Installation Touch Screen Main Menu Update Software Downloading Ignition Product Updates Tuning Tune Vehicle EX Devices Only Restore Vehicle Custom Tuning (EX Platinum) Performance Tests 0-60, 0-100, 1/4 Mile, &... -
Page 3: Read Me
POWERTEQ IS NOT RESPONSIBLE FOR AND SHALL HAVE NO LIABILITY TO YOU FOR ANY CLAIMS ARISING OUT OR OR RELATING TO ANY MISAPPLICATION OF THE TRINITY 2, CUSTOM TUNES, IMPROPER USE OF CALIBRATIONS, MALFUNCTION OR LACK OF LEGAL COMPLIANCE FOR CUSTOM PROGRAMS CREATED BY THIRD PARTIES. -
Page 4: Safety Guidelines
Safety Guidelines WARNING Before using device, read and understand the user manual, including these additional safety instructions. Failure to do so could result in DEATH or SERIOUS INJURY. • Do not exceed legal speed limits on public roadways. Violating traffic laws is dangerous and could result in injury or vehicle damage or both. -
Page 5: Fcc Compliance
Warning: Changes or modifications to this device not expressly approved by DiabloSport, LLC could void the user’s authority to operate the equipment Note: This equipment has been tested and found to comply with the limits for a Class B digital device, pursuant to Part 15 of FCC Rules. - Page 6 RF Exposure This equipment complies with radiation exposure limits set forth for an uncontrolled environment. This equipment is in direct contact with the body of the user under normal operating conditions. This transmitter must not be co-located or operating in conjunction with any other antenna or transmitter.
-
Page 7: Quick Start
Quick Start In-Cab Display LEDs Light Touch Screen Sensor HDMI Port USB Port Mount Receptacle... -
Page 8: Accessories
Accessories Windshield Suction Mount Alcohol Wipe Iso- propyl OBDII to HDMI Cable HDMI OBDII Zip Ties USB Cable... -
Page 9: Cable Installation
Cable Installation 1 Locate the OBDII port. The connector is typically found directly below the driver side dash console. 2 Plug the OBDII connector into the vehicle port. 3 Route the HDMI end up the driver side dash. (On most vehicles, the side panel may be removed to expose the underside of the dash for easier... -
Page 10: Touch Screen
Touch Screen Use these gestures to navigate and control the display. Press/Select Vertical Swipe Select options, input val- Drag up or down menus, and ues, enter menus, etc. scroll through menu items. Horizontal Swipe Double Tap Scroll through gauge screens Enter sub-menus such as or change option values. -
Page 11: Main Menu
Main Menu The Main Menu displays each of the menu options available on your device. While navigating the menus, you will notice the Main Menu icon. Press this icon to take you directly back to the Main Menu. To navigate to one of the 6 menu options, simply select an option icon. -
Page 12: Update Software
7 Refer to the next section for performing product update. NOTE: DiabloSport makes updates available periodically to add coverage and features. Updates could include a new version of update software. When you elect to update, please refer to “Download” tab and follow instructions for T2... -
Page 13: Product Updates
8 Click the Place Order button to complete you order. 9 If a purchase was made, follow steps 1-3 above to complete the update. NOTE: A warranty is available to protect the hardware and mechanical components of your Trinity 2 device in the Online Store. -
Page 14: Tuning
Tuning Tune Vehicle While in the Main Menu, select the Tuning icon. The tune vehicle option provides a list of tunes selected for your vehicle’s engine and transmission (transmission tunes available only on certain applications). 1 Select the Tune Vehicle option. Scroll up/down to browse the available tunes. - Page 15 WARNING Do not program the vehicle while parked in unsafe locations including heavy traffic or places without cell phone service and the internet (if possible). 5 Once your vehicle has been successfully tuned, press Continue to return to the main menu. Customization 6 Refer to steps 1 &...
-
Page 16: Restore Vehicle
10 Next, choose Accept and Install. The programming sequence will begin. 11 Once your vehicle has been successfully tuned, press Continue to return to the main menu. Restore Vehicle Use this option to return the vehicle back to it’s stock tune. 1 While in the Performance Tuning menu, select the... -
Page 17: Custom Tuning (Ex Platinum)
Custom Tuning (EX Platinum) In order to apply custom calibrations using the custom tuning option, you will need to contact a professional calibrator (dealer) with access to our custom tuning software. For more information, contact our Technical Support department or visit our website. To get started, the dealer will request a stock file. - Page 18 Once you have a custom tune file ready to load onto the device, refer to the following instructions: 1 Connect the device to a computer using the supplied USB cable. 2 Browse the file explorer and locate the t2 drive. 3 Paste custom tune file into the main t2 drive folder as shown.
- Page 19 8 Select the custom file then click Install. 9 Choose Accept and Install to continue. The programming sequence will begin. 10 Once your vehicle has been successfully tuned, press Continue to return to the main menu.
-
Page 20: Performance Tests
Performance Tests 0-60, 0-100, 1/4 Mile, & 1/8 Mile Tests While in the Main Menu, select the Performance Tests icon. A list of tests will appear. Use the following information to learn more about each test. 1 Select the Performance Test that PERFORMANCE TESTS you would like to start. - Page 21 From Stop 4 Switch methods by clicking the middle 00:00 button. 5 When the vehicle is in place, release the brake and proceed to START accelerate. TIP: Select the back arrow to return to the main 00:00 menu. NOTE: Once the speed has been reached, the test will stop and the results will be displayed.
-
Page 22: Settings
Settings Display & Audio Settings While in the Main Menu, select the Settings icon. A list of settings will appear. This section explains what these settings are and how to use them. 1 Select the Display SETTINGS Settings option. Help/Info 2 Modify each setting Display Settings by adjusting it’s... -
Page 23: Wifi Setup
WiFi Setup This device is equipped with the ability to connect to and update over a secure WiFi connection. For more information on how to check for updates, refer to the Check for Updates section of this manual. 1 Select the WiFi Setup option. -
Page 24: Check For Updates
Check for Updates If the device is connected to WiFi, click this option to look online for updates. If updates are available, the device will provide the option to perform the update. 1 Select the Check for Updates option. SETTINGS WiFi Setup If connected to Check for Updates... -
Page 25: Unit Of Measure
Unit of Measure Use this setting to globally modify the device to determine whether it uses Imperial or Metric units. 1 Select the Unit of Measure option. SETTINGS WiFi Setup Check for Updates Unit of Measure Restore Default Settings EXIT 2 Select the applicable unit of measure. -
Page 26: Restore Default Settings
Restore Default Settings Use this setting to restore the device back to the factory settings. NOTE: This will NOT restore your vehicles’ factory data or unmarry the tool from your vehicle. 1 Select the Restore Default Settings SETTINGS option. Unit of Measure Restore Default Settings 2 Press continue to restore all user... -
Page 27: Alert Settings
Alert Settings Use this setting to globally turn on/off gauge alerts 1 Select the Alert Settings option. SETTINGS Unit of Measure Restore Default Settings Restore Default PIDs Alert Settings EXIT 2 Turn the setting ON or OFF using the toggle switch. 3 Select Exit to return to the Settings menu. -
Page 28: Gauges & Logging
Gauges & Logging Gauge Layouts While in the Main Menu, select the Gauges & Logging icon. The first of 3 gauge layouts will be displayed. To toggle between screen layouts, swipe the screen Left/Right. To edit the Gauge Layouts: 1 Open the pull down menu by swiping downward starting from the top of the screen. - Page 29 3 Once the Layout Editor is open, select one of the 3 layouts. TIP: Select the Trash Can icon to delete the current layout settings. TIP: The Reset Layout option resets the layout to the factory default, including pid selections. 4 Toggle through the screen style options by either swiping the image up/down, or selecting the...
-
Page 30: Theme Settings
Theme Settings Change and modify individual gauge element colors & transparency. 1 While the Gauge Screen is in view. Open the pull down menu by swiping downward starting from the top of the screen. 2 Select Theme Settings. 3 The following editor will show. Modify each of the available items by clicking on it and selecting a new color. -
Page 31: Wallpaper
Wallpaper Change the background image displayed on the device. 1 While the Gauge Screen is in view. Open the pull down menu by swiping downward starting from the top of the screen. 2 Select Wallpaper. 3 Toggle through the available background images by either swiping up/ down on the image, or using the up/down arrows. -
Page 32: Individual Gauge Setup
Individual Gauge Setup Each gauge within a gauge layout can be modified individually. Settings such as Unit of Measure, PIDs, Alert Settings, & Tick Marks may be modified. PID Selection: 1 While the gauge screen is in view, Double Tap the individual gauge to be modified. - Page 33 Alert Settings: 1 Select the icon. 2 Use the (3) toggle buttons to toggle each option on/off. Alerts On/Off Alert sounds On/Off TIP: Select the back arrow to return to the gauges. Warning areas On/Off 3 To adjust the warning and alert values for the PID, use the respective sliders.
-
Page 34: Recording
DataViewer Download This windows software allows OBDII data logs that were recorded with the DiabloSport tuner to be opened and viewed. This software can be downloaded from the DiabloSport website. 1 Go to website. 2 Click the DOWNLOADS tab located at the top of the page. -
Page 35: Dataviewer
DataViewer After a recording session, unplug the device from the vehicle and follow these instructions. 1 Double-Click the DataViewer icon located on your computer desktop. 2 Connect the device to the PC using a USB connector. 3 Select the icon and browse to the T2 drive. -
Page 36: Diagnostics
Diagnostics Trouble Codes While in the Main Menu, select the Diagnostics icon. The trouble codes screen will appear. If any codes have been initiated, they will show in the list as a P###. NOTE: Trouble codes are created when an issue is detected by vehicle sensors. -
Page 37: Help/Info
Help/Info Device Info While in the Main Menu, select the Info icon. The device info described below assists our Tech Support team when support is needed. HELP/INFO Device Info Tutorials F.A.Q’s Tech Support TIP: Select Exit to return to the main EXIT menu. -
Page 38: Tutorials
Tutorials All of the available tutorials are stored here and can be accessed at any time. 1 Select the Tutorials option. HELP/INFO Device Info 2 View each tutorial Tutorials by swiping left/right. F.A.Q’s 3 Select Continue to Tech Support return to the Help/Info menu. -
Page 39: Tech Support
Tech Support This option is to be used only when Tech Support requests information. NOTE: When a menu item is selected, a set of “keys” will be given. Tech Support will use these keys to produce a code that you will use to access the menu items functionality.
Need help?
Do you have a question about the Trinity 2 and is the answer not in the manual?
Questions and answers