
Summary of Contents for Itek HMC001
- Page 1 SMART HOME HD WIFI CAM HOME MONITORING CAMERA HMC001 INSTRUCTION MANUAL PLEASE READ ALL INSTRUCTIONS CAREFULLY AND RETAIN FOR FUTURE USE...
- Page 2 Getting Started • Remove the Camera and it’s accessories from the box. • Please retain all packaging until you have checked and counted all the parts and the contents against the parts list. Package Contents • Smart Home Monitoring Camera • USB Power Cord • 1 Wall Mounting Plate • 2 Wall Plugs • 2 Screws • 1 Release Pin • Instruction Manual Key Features • SMARTCAM makes it simpler to keep an eye on home • Easy to install and set-up •...
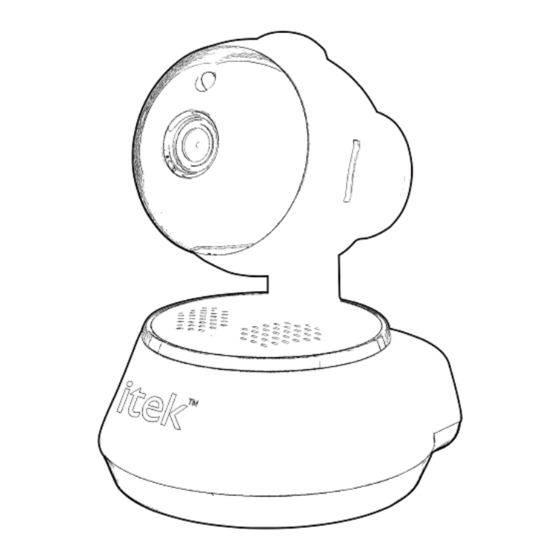
- Page 3 Description of Parts Instructions for use Quick Start Guide 1. Connect the USB power cord to the USB input power port of the camera and insert the other end into a suitable USB power source. 2. It will take about 1 minute for the camera to start up. Compatibility This SMART HOME MONITORING CAMERA is compatible with the App – “itek-cam” This SMART HOME MONITORING CAMERA and App is compatible with the devices using iOS 8.0 and above or Android 5.0 and above, with Wi-Fi option.
- Page 4 Operating Instructions First Time Installation: 1. Turn on Wi-Fi of your phone, and then connect to the local/home network. 2. Turn on the “itek-cam” App, create your new Account and Password by using ‘Sign Up’. Insert your Phone number or Mailbox, press ‘Get Code’ to obtain the code for registration on your phone or from email address. Insert the code and press ‘Sign Up’ to complete the sign up process.
- Page 5 3. Key-in your Account and Password to Log In, select ‘Add My Camera(recommended)’.
- Page 6 4. Power on the unit: press ‘RESET’ button that is on the back of SMART HOME MONITORING CAMERA with the release pin (included) until you hear beep sound, and voice message “restore factory settings, please don’t power off”. 5. Wait for about 40 seconds until you hear voice message “System starting up, waiting to be configured”. Hold your phone near the SMART HOME MONITORING CAMERA, and click ‘Next step’. Select the same Wi-Fi local/home network, and key-in your Wi-Fi password for searching the camera to connect.
- Page 7 6. After successful connection, create, confirm your New Password and rename for the connected camera.
- Page 8 7. Press the camera ‘Online’ to start viewing. 8. You can use your finger tip to touch the phone screen, and slide left/right to move the camera head turning right/left, or slide up/down to move the camera head rotating down/up respectively for seeing other position. You can press (Full screen) to show full screen viewing. Also, press the other function icon of the screen, including (Listen), (HD resolution), (Screen display), (Video), (Small screen), (Speak), (Snapshot) for desire purpose:...
- Page 9 Listen): Tap on the “Listen” option on your screen in order to listen to the sound § around the camera. (HD resolution): Tap on the “HD resolution” option on your screen in order to § change to (Standard resolution), or vice versa. (Display option): Tap on the “Display option” on your screen in order to use other § display option. Video): Tap on the “Video” option on your screen in order to record a video of §...
- Page 10 9. On (Setting) page, you can check/edit some functional settings. REMARK: a. When you open the “itek-cam” App next time, you need to login again. You may use your finger tip to touch the phone screen, and slide down for refreshing the connected SMART HOME MONITORING CAMERA, and press the camera ‘Online’ to start viewing. b. While you want to install/use a TF card for storing video files, you can unplug the power supply to the SMART HOME MONITORING CAMERA, insert the TF card into the TF card slot of the SMART HOME MONITORING CAMERA and then re-connect the power supply for using again.
- Page 11 Add New Camera on your existing App Open the “itek-cam” App & Tap on “+” icon Repeat the same steps as outlines in the “First Time Installation” section above Specifications – Size: 85.7mm (L) x 101.6mm (H) x 87.3mm (D) (camera head at lowest position) Weight: 170g (without the USB Cable) Power source: USB 5V Care and maintenance Read the following recommendations before using the product. • Don’t use abrasive cleaning solvents to clean the camera. • Don’t expose the camera to extremely high or low temperature as this will shorten the life of electronic devices, destroy the battery or distort certain plastic parts. • Don’t dispose of the camera in fire as it will result in an explosion. • Don’t expose the camera to contact with sharp objects as this will cause scratches and damage. • Don’t let the camera fall on the floor. The internal circuit might get damaged. • Don’t attempt to disassemble the camera as it may get damaged if you are not professional.
- Page 12 Limited Warranty: This manufacturer’s product warranty extends to the original consumer purchaser of the product. Neither the retailer nor any other company involved in the sale or promotion of this product is a co- warrantor of this manufacturer warranty. WARRANTY DURATION: All the materials and workmanship are warranted to the original consumer purchaser for a period of one (1) year from the original purchase date. WARRANTY COVERAGE: This product is warranted against defective materials or workmanship. This warranty is void if the product has been damaged by accident, in shipment, unreasonable use, misuse, neglect, improper service, commercial use, repairs by unauthorized personnel or other causes not arising out of the defects in material or workmanship. This warranty is effective only if the product is purchased and operated in INDIA, and does not extend to any units which have been used in violation of written instructions furnished by manufacturer or to units which have been altered or modified or, to damaged products or parts thereof which have had the serial number removed, altered, defaced or rendered illegible. WARRANTY DISCLAMERS: This warranty is in lieu of all warranties expressed or implied and no representative or person is authorized to assume for manufacturer any other liability in connection with sale of our products. WARRANTY PERFORMANCE: During the above one (1) year warranty period, a product with defect will be either repaired or replaced with a reconditioned comparable model (at manufacturer’s option). The repaired or replacement product will be in warranty for the balance of the warranty period or thirty (30) days which ever is longer. WARRANTY LIMIT: The maximum liability of the company shall not exceed the actual purchase price paid by the purchaser. SERVICE AND REPAIR: If the service is required for the product, the purchaser should contact Acetron Enterprise Pvt Ltd Customer Service at support@acetron.in or by calling 1800 22 2468. Disputes if any shall be subject to Mumbai Jurisdiction only.
Need help?
Do you have a question about the HMC001 and is the answer not in the manual?
Questions and answers
the app states off line. Accelerate cctv camer is switch on but itek app states off line thanks