Table of Contents
Advertisement
Available languages
Available languages
Advertisement
Table of Contents

Related Manuals for NuWave BruHub 45011


Summary of Contents for NuWave BruHub 45011
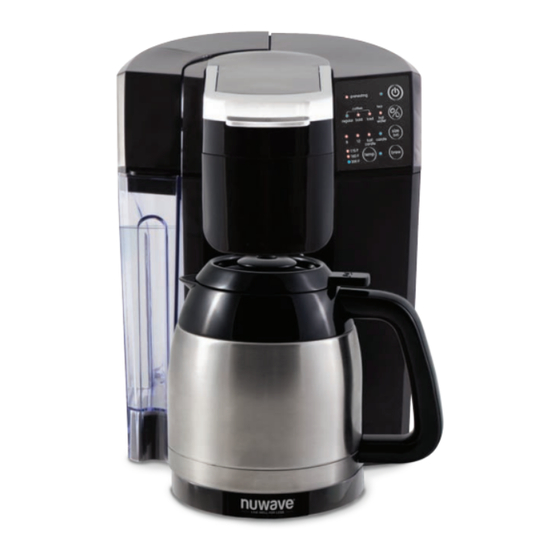
- Page 1 NuWave BruHub 3-in-1 Coffee Maker Owner’s Manual...
- Page 2 NuWave Brio 6-Qt NuWave NuWave PIC ® ® Digital Air Fryer Oven Pro Plus (Precision Induction ® Cooktop) Super-heated air cooks Cook healthier Cook faster, safer, your food to crispy, meals faster and and more efficiently tender perfection. more efficiently...
- Page 3 NuWave Nutri-Pot NuWave Medley ® ® Digital Skillet Digital Pressure Cooker Easily cook rice, poultry, vegetables Coated with Duralon Healthy ® and more all with the press of a Ceramic Non-Stick coating button! The Nutri-Pot’s safety release for easy cleanup. Includes a...
- Page 4 NuWave Flavor-Lockers NuWave Duralon Healthy ® ® Ceramic Non-Stick with Vacuum-Seal Technology Cookware Keep food fresh for up to 21 days! Slow the growth of mold by removing Coated with Duralon Healthy trapped oxygen with a few easy pumps. Ceramic Non-Stick coating for...
- Page 5 NuWave Nutri-Master Slow Juicer ® The Nutri-Master, with a low 48 RPM, is both incredibly quiet and powerful enough to extract juice from nuts and hard vegetables. www.nuwavenow.com 1-877-689-2838...
-
Page 6: Table Of Contents
TABLE OF CONTENTS OWNER’S MANUAL Important Safeguards ...................6-7 Save These Instructions .................. 7 Parts......................8-9 Before First Use .....................10 Assembly ....................11-14 Functions ....................15-16 Insert & Beverage Selection Charts ............... 17 Cleaning and Maintenance ...............18-20 Troubleshooting ..................21-22 Limited Warranty ..................22-23 Spanish......................24-43 IMPORTANT SAFEGUARDS When using electrical appliances, basic safety precautions should always be followed including the following:... -
Page 7: Important Safeguards
IMPORTANT SAFEGUARDS (CONT.) 10. Do not use appliance for other than intended use. 11. Do not let cord hang over edge of table or counter or touch hot surfaces, including stove. 12. Do not place coffee maker on or near a gas or electric burner or in an oven. 13. -
Page 8: Parts
PARTS FOR YOUR NUWAVE BRUHUB Insert Chamber Charcoal Filter Holder Tank Lid Part #: 451205 Stainless Steel Carafe Water Tank Mug Tray Part #: 45131 Part #: 451201 Part #: 451214 Carafe Base Screen BruHub Base Part #: 45131A Part #: 45110... - Page 9 PARTS FOR YOUR NUWAVE BRUHUB (CONT.) Hot Water Insert Custom Brew Insert with Filter Basket Part #: 451203 Part #: 451204 Custom Brew Insert Hot Water Cap Single Serve Insert Custom Brew Cap Part #: 451202 Coffee Scooper Custom Brew Filter Basket Part #: 45129 Owner’s Manual...
-
Page 10: Before First Use
BEFORE FIRST USE Before first use or when the appliance has not been used for an extended period of time, run a cleansing brew at least once with water only: 1. Fill the Water Tank to the MAX Fill Line. •... -
Page 11: Assembly
CHARCOAL FILTER HOLDER ASSEMBLY For additional water purification, use the supplied (optional) Charcoal Filter Holder with Filter. Note: The coffee maker will still operate without Charcoal Filter Holder installed. 1. Flush Filter by running under cold tap water for 1-3 minutes before initial use. - Page 12 WATER COMPARTMENT ASSEMBLY Fill water directly in the Water Tank when attached, or remove first. To fill directly in the Water Tank: 1. Lift the Water Tank Lid up and pour in water to appropriate fill line. 2. Close the Water Tank Lid. •...
- Page 13 Insert Chamber. 3. Fill with appropriate amount of coffee grounds. 4. Close lid. • Use “8”, “12”, “half carafe” and “carafe” for Custom brew option. • Always use NuWave’s customized carafe when using the Custom Brew Insert. Owner’s Manual...
- Page 14 ASSEMBLY FOR INSERTS (CONT.) Hot Water Insert Line up dots with each other and place Hot Water Insert directly down into Insert Chamber. Close lid. • Use Mug Tray on Tray Base for smaller cups and mugs. • Use “8”, “12”, “half carafe”, and “carafe” for Hot Water Insert.
-
Page 15: Functions
FUNCTIONS FOR THE NUWAVE BRUHUB Power Button: 1. Press “Power” button once to turn the unit on. There will be a blue light next to “Power” button to indicate it is on. • When you press the “Power” button, there will be a red light next to “preheating”. - Page 16 FUNCTIONS FOR THE NUWAVE BRUHUB (CONT.) Coffee/Hot Water selection function: This lets you select your favorite beverage with the push of a button. 1. Default is set for “regular”. 2. Press the “beverage selection” button once and the blue light next to “bold”...
-
Page 17: Insert & Beverage Selection Charts
INSERT & BEVERAGE SELECTION CHARTS INSERT SELECTION: 12oz ½ Carafe Full Carafe Inserts 21oz 42oz Single Serve Insert Custom Brew Insert Hot Water Insert * You must use carafe with this insert. BEVERAGE SELECTION: Scooper holds 8 grams of coffee grounds when leveled. Adjust the strength of coffee by using more or less grounds. -
Page 18: Cleaning And Maintenance
CLEANING AND MAINTENANCE To clean Hot Water Insert, pull up Hot Water Cap to separate and clean insides of both parts. • Hot Water Insert and Hot Water Cap are dishwasher safe, top rack only. • Hot Water Cap snaps back on after it’s cleaned. For Custom Brew Insert, lift up Custom Brew Lid to clean inside. - Page 19 CLEANING AND MAINTENANCE (CONT.) Cleaning needle under Lid: The needle is located under the Lid. To clean needle, use a thin piece of metal or metal wire brush to free the part and area with any blockage. The Mug Tray is detachable and can be removed and cleaned.
- Page 20 CLEANING AND MAINTENANCE (CONT.) Cleaning Carafe: To clean the Carafe, use warm soapy water and rinse thoroughly. Use a soft foam brush with a long handle to reach the bottom. • The Carafe Lid is removable and is dishwasher safe, top rack only. External Cleaning To clean the exterior of your coffee maker, wipe with a damp, soapy, soft cloth.
-
Page 21: Troubleshooting
TROUBLESHOOTING When unit is powered on and no water is in the unit: • Unit will beep, and within 15 seconds it will shut off. • If you press “brew” and there is no water, a continuous beep will sound for up to 15 seconds until you add water. - Page 22 The BruHub™ 3-in-1 Coffee Maker THE MANUFACTURER WARRANTS The NuWave BruHub 3-in-1 Coffee Maker, including the BruHub Base, the Water Tank Lid, the Water Tank, the Drip Tray Base, the Mug Tray, the Screen, the Charcoal Filter Holder, the Stainless Steel Thermal Carafe, the Hot Water Insert, the Single Serve Insert, and the Custom Brew Insert with Filter Basket are to be free from manufacturer defects.
-
Page 23: Limited Warranty
MANUAL. IF YOU STILL HAVE ANY QUESTIONS ABOUT OPERATION OR WARRANTY OF THE PRODUCT, PLEASE CONTACT NUWAVE, LLC. READ YOUR OWNER’S MANUAL: If you still have any questions about operation or warranty of the product, please contact NuWave, LLC at: 1-877-689-2838 or email help@nuwavenow.com. Owner’s Manual... - Page 24 NuWave BruHub Cafetera 3-en-1 Manual del Usuario...
- Page 25 MEDIDAS DE SEGURIDAD IMPORTANTES Al utilizar unidades eléctricas, siempre deben tomarse precauciones básicas de seguridad, incluyendo las siguientes: 1. Lea todas las instrucciones. 2. Cuando una unidad sea usada por o cerca de niños, debe haber una supervisión cercana. 3. No toque las superficies calientes. Debe tenerse cuidado ya que se pueden provocar quemaduras al tocar las partes calientes de la cafetera.
- Page 26 GUARDE ESTAS INSTRUCCIONES Más Información de Seguridad para el Usuario Este aparato está diseñado para uso doméstico solamente. a) Incluye un cable corto de alimentación (o un cable de suministro de energía desmontable) para reducir los riesgos derivados de enredarse o tropezar con un cable más largo.
- Page 27 PARTES DE SU NUWAVE BRUHUB Tapa del Depósito Compartimento de Portafiltro Insertos Parte: 451205 Parte: 45110 Depósito de Agua Charola de la Jarra Jarra de Acero Inoxidable Parte: 451201 Parte: 451214 Parte: 45131 Base BruHub Pantalla Base para Jarra Parte: 45110...
- Page 28 PARTES DE SU NUWAVE BRUHUB (CONT.) Inserto para Agua Caliente Inserto de Preparación con Filtro Parte: 451204 Parte: 451203 Tapa para el Agua Caliente Inserto de Preparación Personalizada Inserto de Medida Individual Tapa del Inserto de Preparación Parte: 451202 Personalizada Cuchara para Café...
- Page 29 ANTES DEL PRIMER Para una mayor purificación del agua utilice el Portafiltro con filtro de carbón proporcionado (opcional). Llene el tanque de agua hasta la línea de llenado MAX. Línea de • El tanque de agua puede llenado máxima llenarse mientras está en la unidad o desconectado.
- Page 30 MONTAJE DEL PORTAFILTRO Para una mayor purificación del agua utilice el Portafiltro con filtro de carbón proporcionado (opcional). Nota: La cafetera seguirá funcionando sin el portafiltro instalado. 1. Enjuague el filtro colocándolo bajo el chorro de agua fría durante 1-3 minutos para su uso inicial. Después de enjuagar, deje escurrir por completo.
- Page 31 COMPARTIMENTO DE AGUA Llene con agua directamente el Depósito de Agua cuando esté colocado o retírelo primero. Para llenar directamente el Depósito de Agua: 1. Levante la Tapa del Depósito de Agua y vierta el agua hasta la línea de llenado apropiada.
- Page 32 MONTAJE PARA INSERTOS Con la Cafetera NuWave™ BruHub 3-en-1 se puede elegir entre tres diferentes insertos para personalizar su experiencia como consumidor de café. Inserto de Medida Individual 1. Alinee los puntos entre sí y coloque el Inserto de Medida Individual dentro del Compartimento de Insertos.
- Page 33 MONTAJE PARA INSERTOS Inserto para Agua caliente Alínee los puntos entre sí y coloque el Inserto para Agua Caliente directamente dentro del Compartimento de Insertos. Cierre la tapa. • Utilice la charola de la jarra en la base para las tazas y jarras más pequeñas. •...
- Page 34 FUNCIONES PARA LA NUWAVE BRUHUB Botón de Encendido: 1. Presione el botón “Power” una vez para encender la unidad. Habrá una luz azul al lado del botón “Power” para indicar que está encendida. • Cuando presione el botón “Power”, habrá una luz roja junto a “Preheating”.
- Page 35 FUNCIONES PARA LA NUWAVE BRUHUB (CONT.) Función de Selección de Tamaño: Esta le permite elegir la cantidad de bebida que desee preparar. size 1. El predeterminado está establecido para “8”, que es 8 onzas. (oz) 2. Presione el botón “size selection” una vez y la luz azul al lado del “12”...
- Page 36 TABLA DE SELECCIÓN DE INSERTOS Y BEBIDAS INSERT SELECTION: 12oz ½ Carafe Lleno Carafe Inserts 21oz 42oz Inserto de Medida Individual Inserto de Preparacion Personal Inserto para Agua Caliente * Debe utilizar la jarra con este inserto. SELECIÓN DE BEBIDAS: La Cuchara contiene 8 gramos de café...
- Page 37 LIMPIEZA Y MANTENIMIENTO Para limpiar el Inserto para Agua Caliente, jale hacia arriba la Tapa de Agua Caliente para separar y limpiar el interior de ambas partes. • El inserto de agua caliente y la tapa de agua caliente son aptos para el lavavajillas Sólo en el rack superior. •...
- Page 38 LIMPIEZA Y MANTENIMIENTO (CONT.) Para limpiar la aguja debajo de la tapa: La aguja se encuentra debajo de la tapa. Para limpiar la aguja, use una fina pieza de metal o un cepillo de alambre metálico para liberar la pieza y el área de cualquier bloqueo.
- Page 39 LIMPIEZA Y MANTENIMIENTO (CONT.) 4. Lave a mano el Depósito de Agua con un paño suave, jabonoso y húmedo y enjuague bien. 5. Deje que el Depósito de Agua se seque al aire antes de regresarlo a la base. Limpieza Carafe: Para limpiar la Jarra, use agua tibia y jabonosa y enjuague bien.
- Page 40 LIMPIEZA Y MANTENIMIENTO (CONT.) 13. Coloque el Depósito de Agua en la unidad y llénelo con agua cerca de la línea de llenado máximo.14.Ejecute el mayor tamaño de preparación de la unidad. 14. Ejecute la opcion mas grande para la temperatura y ciclos de preparación en la unidad.
- Page 41 SOLUCIÓN DE PROBLEMAS (CONT.) Si al utilizar la unidad y el precalentamiento, la preparación no funciona: • Compruebe si la tapa está abierta. Cierre la tapa. El aparato no precalentará si la tapa no está cerrada. Granos de café se pasan al café preparado: •...
- Page 42 Fabricante proporcionará las partes necesarias y mano de obra para reparar cualquier parte de la Cafetera NuWave BruHub 3-en-1en el Departamento de Servicio de NuWave, LLC. Una vez vencida la garantía, el costo de mano de obra y las partes será responsabilidad del propietario.
- Page 43 DUDA SOBRE EL FUNCIONAMIENTO O LA GARANTÍA DEL PRODUCTO, CONTACTE A NUWAVE, LLC. LEA SU MANUAL DEL USUARIO: Si tuviera alguna duda sobre el funcionamiento o la garantía del producto, contacte a NuWave, LLC al: 1-877-689-2838 o escriba a help@nuwavenow.com. Manual e Instrucciones...
- Page 44 For patent information please go to: www.nuwavenow.com/legal/patent Designed & Developed in USA by: NuWave, LLC 1795 N. Butterfield Road Libertyville, IL 60048, U.S.A. Customer Service: 1-877-689-2838 • help@nuwavenow.com Item No. BM45011 Made in China Rev. 03TH ©2018 NuWave, LLC • All Rights Reserved. 03-19-2018...
Need help?
Do you have a question about the BruHub 45011 and is the answer not in the manual?
Questions and answers