Table of Contents
Advertisement
Advertisement
Table of Contents

Related Manuals for CENTURION SYSTEMS RDO II

Summary of Contents for CENTURION SYSTEMS RDO II
- Page 1 - 1 -...
-
Page 2: Important Safety Recommendations
Properly lubricating the springs will help to minimise the effect of seasonal temperature changes in operating friction of your garage door. If possible, install the RDO II at least 2 meters or more above the ground. Adjust the Manual Release Cord so that it hangs approximately 1.8 meters from the ground. - Page 3 Make sure that the garage door reverses when it makes contact with an obstruction. 15. Never use the RDO II unless the garage door is in full view and free from objects such as cars, children and/or adults.
- Page 4 4. Has been repaired by any workshop and / or person NOT previously authorised by the manufacturer. 5. Has been repaired with components not previously tested, passed or authorised by Centurion Systems (Pty) Ltd, South Africa or one of its subsidiary companies.
- Page 5 Fig 1 Fig 2 Fig 2A Fig 3 Fig 3A - 5 - INSTALLATION MANUAL – RDO...
-
Page 6: Requirements Prior To Installation
C. RDO II to garage door compatibility If, for whatever reason, the plastic forks of the RDO II do not fit into or align with the slots in the garage door drum, or you wish to reinforce a structurally unsound drum, a special adaptor plate can be purchased from Centurion Systems (Pty) Ltd. -
Page 7: Battery Charger
F. Left / Right-Hand Installation The RDO II has been factory-set to be installed on the right-hand end of your garage door (when viewed from inside the garage looking out). Flip dipswitch 6 to the ‘ON’ position for a left-hand installation, and to the ‘OFF’... -
Page 8: Installation Instructions
The suitability of the prop should be determined by a technically qualified person. No claims for door damage will be recognised under the terms of the RDO II’s guarantee when using an unsuitable prop. Fig 7... -
Page 9: Adjusting Release Cord
Having ensured that the prop is stable and firmly in position, remove the garage door mounting bracket from the wall. If not already disengaged, disengage the RDO II Drive Unit by pulling once on the release lever (Fig.11) - the forked drive gear should now rotate freely Orientate the Drive Unit as per Fig.9... -
Page 10: Engaging And Disengaging The Drive Unit
4. Engaging and Disengaging The Drive Unit To disengage the Drive Unit from the garage door pull down on the Red Release Cord. (Fig.11) To engage the Drive Unit to the garage door pull down once more on the Red Release Cord. Important Note: Always disengage the Drive Unit with the garage door in the fully closed position. -
Page 11: Settings And Adjustments
SETTINGS AND ADJUSTMENTS Fig 14 Fig 15 Door Travel Adjustment – Open Direction With the Drive Unit in disengaged mode, move the door up by hand to the fully open position. Remove the limit cover to expose the Limit Adjust Cams (Opening and closing limit cams - Fig.14 and 15). Slightly loosen the three cam locking screws (to the extent that you can rotate the cam by hand with a firm push) Rotate the Open Limit (Lower) Cam (Item 2 Fig.15) by hand, in the direction of the Open Limit (Lower) Switch, until you hear the switch “click”. -
Page 12: Safety Obstruction Force Adjustment
• Fig. 16 Functionality In order to learn the required run time and drive force values, the RDO II will be required to complete five • (manually activated) uninterrupted open and close cycles (commencing from the Close Limit Point) •... - Page 13 A Forced Learn may be initiated by holding down the “Learn” Button for three seconds – LED Indicator will begin to quick flash Cycle the RDO II through five complete uninterrupted strokes (commencing from the close limit point) in order •...
- Page 14 • applied force If too little or too much force is required to make the RDO II stop, rotate the (green) Open / Offset Adjustment Pin • five degrees in the appropriate direction (clockwise to increase force, anti-clockwise to decrease force) and then...
-
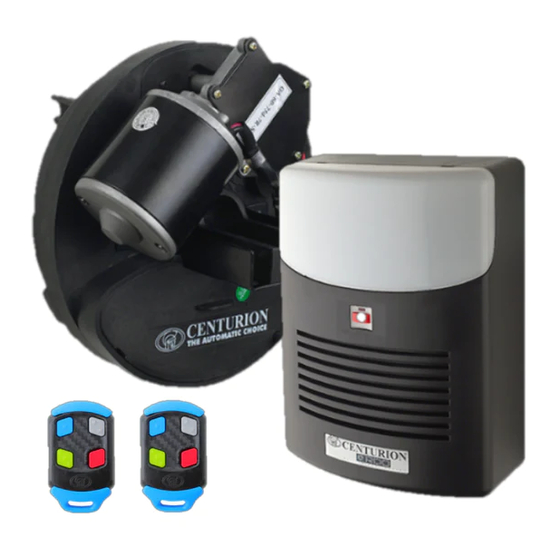
Page 15: Remote Controls
12. Remote controls The RDO II offers four menu levels pertaining to four different functions that can be activated via the two four-button NOVA code-hopping remote controls supplied with this kit. Depending on individual preference, one remote can be kept in the user’s car, while the other remote is mounted against the wall and used as a pendant, or the extra remote can simply be kept as backup. -
Page 16: Operation
Learning a button to Function Two will enable that button to switch the Courtesy Light on and off. Operation Momentarily press the associated transmitter button to either switch the courtesy light on or off. If the light has been switched on, it will time out as per the maximum current timer of 2 minutes. Learning procedure Press the Learn button TWICE to select Function Two Learn, if the operator is still in Learn Mode, the Learn button need only be pressed once. - Page 17 12.3. Function Three – Holiday Lockout Learning a button to Function Three will enable that button to electronically lock the controller for use. In other words, no transmitters or inputs will be able to trigger the operator. Operation To engage Holiday Lockout Mode, the button learned to engage this function must be pressed for three seconds before Holiday Lockout Mode will engage.
-
Page 18: Options And Features
13. Options and Features 13.1. Accessory connections Four Output Terminals are provided to support the connection of the most common external accessories • The Output Terminals can be accessed by removing the Courtesy Lamp and Control Box Covers. • Connection Diagrams •... - Page 19 13.3. Courtesy lamp The built-in Courtesy Lamp will switch on each time the RDO II is activated and then switch off automatically 90 • seconds after receiving the last remote control or run signal. In order to conserve remaining battery power the Courtesy Light will not function once battery voltage falls below •...
- Page 20 Momentary press Table 4 13.9. Safety Beams The CENTURION i5 or other four-wire Safety Beams may be connected to the RDO II (For two-wire beams, set • the jumper to 2W. For four-wire beams, set the jumper to 4W (Figure 19)) The installation of Safety Beams greatly enhances safety by constantly monitoring for persons or objects which •...
- Page 21 RDO II and garage door and provide smooth and quiet operation 13.12. Soft stop By intelligently reducing the speed of the garage door as it approaches a limit point, the RDO II ensures quieter •...
-
Page 22: Troubleshooting Guide
13.14. Holiday Lockout mode During Holiday Lockout mode all functionality is disabled and the RDO II will only function upon receiving a • signal from a pre-learned remote control • Holiday Lockout Mode will not function unless at least one remote control has been previously learned with this function 13.15. - Page 23 Notes - 23 - INSTALLATION MANUAL – RDO...
- Page 24 - 24 - INSTALLATION MANUAL – RDO...
Need help?
Do you have a question about the RDO II and is the answer not in the manual?
Questions and answers
Where is the battery situated in the centurion RDO II garage door system.
The battery in the CENTURION SYSTEMS RDO II garage door system is located inside the control box. The red (positive) battery cable must be connected to the positive battery terminal inside the control box during installation.
This answer is automatically generated
What type of battery does it use
There are light a red light