Table of Contents
Advertisement
Quick Links
Download this manual
See also:
User Manual
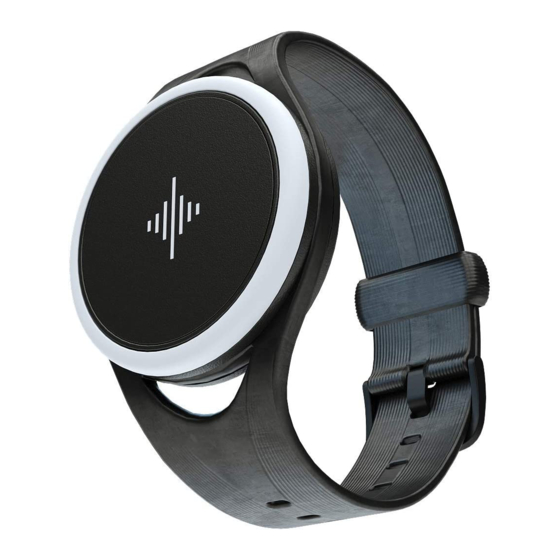
How to install the bands
1
Find the gap around the edge of
the Soundbrenner Pulse
2
Insert one side of the Soundbrenner
Pulse into the band
3
Using your other hand, pull up on
the opposite side of the band until it
snaps into place
Note: Make sure you grasp the Soundbrenner Pulse and
band firmly. You may need to use your thumb to help it
seat in the band completely.
3
SEE IT ON VIDEO
SNBR.IO/U11
Charging the battery
The Soundbrenner Pulse comes with a magnetic charging
station that uses a standard Micro USB cable. You can plug
it into any computer USB port or use a USB wall adapter,
including those that ship with a smartphone or tablet.
Charging
While charging, the
logo will slowly pulse
in an orange color.
.
Fully Charged
When charging is
complete, the logo will
turn solid green.
Note: After you take the Soundbrenner Pulse
out of the box, charge it for at least 30 minutes.
A full charge can take up to 2.5 hours.
.
On average, a full charge will get you up to 6
hours of use.
Get the apps
For even more power and customization, you can download
Soundbrenner's native mobile companion apps. Search for
"Soundbrenner" in the iOS App Store or the Google Play
Store, or visit www.soundbrenner.com/start and follow the
links to the correct download for your device.
www.soundbrenner.com/start
Go
We've also created Soundbrenner DAW Tools
for Mac OS X. It works with every major DAW
suite – including Avid Pro Tools, Ableton Live,
and Logic Pro X – and lets you synchronize
tempo between the Soundbrenner Pulse and
your favorite DAW.
To get started with Soundbrenner DAW Tools,
visit soundbrenner.com/dawtools.
System Requirements
Devices
iPhone 4S / iPod touch 5 / iPad 3 and later
Most modern Android phones and tablets
Operating Systems
iOS 8.4 and later
Android 4.3 and later
Devices
Any Mac desktop or notebook with Bluetooth 4.0
Operating Systems
OS X 10.10 Yosemite and later
Where to wear it
Depending on you and the instrument that you play, where
you place the Soundbrenner Pulse on your body can have a
big impact on your experience.
For your first few sessions, try out both of the included
bands and move the Soundbrenner Pulse to different
locations to see which feels best. Remember to keep the
strap tight – the tighter the strap, the stronger the vibrations.
Tip: Try to wear the Soundbrenner Pulse on a part
of your body that you don't move too much while
playing. Movement distracts you from the vibrations.
The hooks on the long
band allow you to easily
slide it over your arm.
Feeling the beat
Using a vibrational metronome is much different from using
a normal click.
When you first start using the Soundbrenner Pulse, it's
almost like learning to keep the beat from scratch. Don't
give up – you'll get better over time, just like learning to
practice with a traditional metronome.
The biggest difference comes in how you perceive each
beat. Some people react differently to vibrations than they
do to an audible click; over time, the vibration can even
become a subconscious feeling that helps you keep the
beat without thinking about it.
The length and intensity of the vibrations make a big
difference.
The Soundbrenner Pulse supports nine different haptic
profiles – you can choose from one of three vibration
intensities for short, medium, and long duration beats.
Since everyone feels vibrations in their own way, it's
important that you choose vibration styles that work for
you. Once you've set up your Soundbrenner Pulse, visit
the Haptics section of the Settings menu for your unit to
experiment with different vibrations.
You can assign different styles of vibration to
different beats.
SEE IT ON VIDEO
SNBR.IO/U12
TM and © 2016 Soundbrenner Limited. All Rights Reserved. SBP2-UM01
Advertisement
Table of Contents

Related Manuals for Soundbrenner Pulse

Summary of Contents for Soundbrenner Pulse
- Page 1 Find the gap around the edge of station that uses a standard Micro USB cable. You can plug Soundbrenner’s native mobile companion apps. Search for you place the Soundbrenner Pulse on your body can have a a normal click. the Soundbrenner Pulse it into any computer USB port or use a USB wall adapter, “Soundbrenner”...
- Page 2 Turn it on and off Interactions Status Alerts Troubleshooting To turn the Soundbrenner Pulse on or off, first twist the ring Play and Pause BPM Tap Low Battery If your Soundbrenner Pulse is not responding, restarting the at least 1/4 turn – in either direction – and then touch the unit will usually help.
Need help?
Do you have a question about the Pulse and is the answer not in the manual?
Questions and answers