Table of Contents
Advertisement
Advertisement
Table of Contents

Related Manuals for Axium AX-1250


Summary of Contents for Axium AX-1250
-
Page 3: Table Of Contents
Contents PREFACE - Contents …………………………………………………………………………………………. PREFACE Important Information …………………………………………………………………. 4 Graphical Symbols in this Guide……………………………………………. 4 Graphical Symbols on the Device………………………………………….. Safety Instructions………………………………………..……………………………. 5 Precautions..………………………………………..………………………………… Declaration of Conformity..………………………..………………………………… Supplied Accessories………………………….………………………………….…… 8 Warranty………………………………………………………………………………… 8 SECTION 1 – Quick Install Guide……………….…………………………………………….. 9 SECTION 2 –... -
Page 4: Preface
Important Information PREFACE - Graphical Symbols in this Guide Warning and Important paragraphs draw your attention to important safe practices and additional information which may help you avoid injury, death, or loss of material or time. WARNING! This indicates a potentially hazardous situation that, if not avoided, may result in death or serious injury. -
Page 5: Safety Instructions
Safety Instructions PREFACE - 1. Read these instructions. 2. Keep these instructions. 3. Heed all warnings. 4. Follow all instructions. 5. Do not use this apparatus near water. 6. Clean only with dry cloth. 7. Do not block any ventilation openings. Install in accordance with the manufacturer’s instructions. 8. -
Page 6: Precautions
5. Never Touch This Unit With Wet Hands – Never handle this unit or its power cord while your hands are wet or damp. If water or any other liquid gets inside this unit, have it checked by your Axium dealer. -
Page 7: Declaration Of Conformity
Declaration of Conformity PREFACE – We declare under our sole responsibility that this product, to which this declaration relates, is in conformity with the following standards: EN60065, EN55013, EN55020, EN61000-3-2 and EN61000-3-3. Following the provisions of Low Voltage Directive 2006/95/EC and EMC Directive 2004/108/EC, the EC regulation 1275/2008 and its frame work Directive 2009/125/EC for Energy-related Products (ErP). -
Page 8: Supplied Accessories
The warranty is for One Year from the date of purchase by the original consumer. Any products returned to either Audio Engineering Ltd or the Axium Distributor and found to be defective within the warranty period will be repaired or replaced at no charge. The warranty does not cover costs... -
Page 9: Section 1 - Quick Install Guide
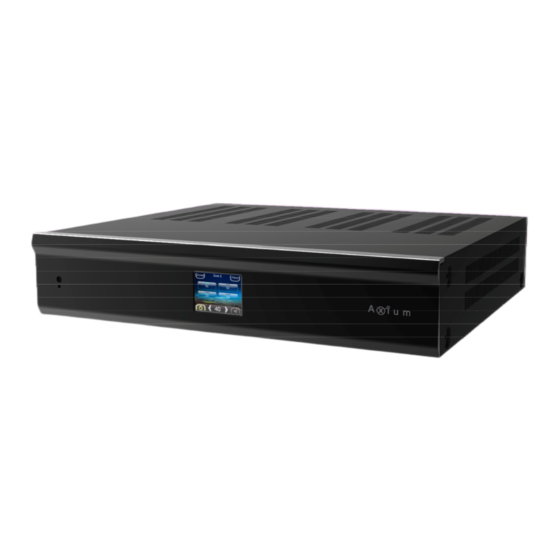
Quick Install Guide SECTION 1 - Thank you for purchasing an Axium AX-1250 Multi-Zone Amplifier. Please read this manual thoroughly before making connections and plugging in the unit. Following the instructions in this manual will enable you to obtain optimum performance and listening enjoyment from your new Multi-Zone Amplifier. -
Page 10: Features
– or Media Renderer – and is controlled by output level (+14dB gain). a UPnP controller, which is typically the Axium Each zone has controls for bass, treble, balance, App running on an iPad or Android Tablet, but can loudness, gain, mono and maximum volume be any generic UPnP player. - Page 11 Introduction; Features SECTION 2 - Zone Linking Door Bell A zone may be programmed to link multiple Up to 10 seconds of 44.1 KHz 16 Bit stereo zones. Zone linking ties the source selection sounds may be generated as part of a page together.
-
Page 12: Front Panel
Introduction; Front Panel Guide SECTION 2 - Front Panel 2.4” Colour LCD Touch Panel display Solid Aluminium front Panel LCD Touch Panel display for menu guided control and programming. The display is dimmed to “Off” after 15 Infra-Red Receiver Receiver for front panel IR control – Used minutes of inactivity. -
Page 13: Rear Panel
Introduction; Rear Panel Guide SECTION 2 - 14 15 AC Inlet Zone Preamplifier Outputs IEC socket. Zone 7 & Zone 8 analog audio L/R outputs. Speaker Terminals 10 Analog Input Terminals Plug in terminal clamp connectors accept 1.5mm² Source S1 – S8 analog audio L/R inputs. speaker wires. -
Page 14: Section 3 - Installation Typical Configuration
Installation; Typical Configuration SECTION 3 – Zone 1 AX-KPE Zone 2 Study Active Subwoofer AX-KPC Zone 3 Lounge TABLET Speakers in other Zones - not shown CD CHANGER MEDIA SERVER NETWORK WIFI ROUTER TUNER INTERNET BLU-RAY FIG 1... - Page 15 Zone 3 – The Lounge: Tablet • featuring both coax and Optical inputs. A zone may select from any of the connected The Axium Keypad’s may be plugged into any of the sources. eight Controller ports. Someone in the Lounge may be listening to the...
-
Page 16: Multiple Amplifier Stack
Multiple Amplifier Stacks SECTION 3 - To Next AX·1250 Multi-Zone Amplifier CD CHANGER MEDIA SERVER NETWORK WIFI ROUTER INTERNET TUNER BLU-RAY FIG 2 In large installations where multiple AX·1250 amplifiers are required Ethernet conveys amplifier control, and link to other Media sources if connected to the Home network Router or Switch. FIG 2 shows a stack of AX·1250’s with Source connections to first amplifier where they are converted to Digital audio, buffered and sent to the next amplifier in the stack. -
Page 17: Controllers
Ethernet to other local amplifiers or controllers. CONTROLLERS: Conveys +12VDC, IR and Data between the AX·1250 and Axium keypad controllers, connected using CAT5 cables. The Ports may be setup to be Zone assigned i.e. A Controller connected to Port 1 controls only Zone 1 etc. -
Page 18: User
– if connected – otherwise the source selection loops back to the Start, i.e. S1 – S4. Conditional Sources are: Media Player: Ethernet connection to server Internet Radio: Tune in – Internet connection Streamed sources linked to other networked Axium amplifiers. - Page 19 Menu Navigation: User SECTION 4 - More Functions Page When the “More” button is pressed and held for >1second a More functions Page opens. There are four Zone specific functions that when selected navigate to setup pages: • Levels • Zones •...
- Page 20 Menu Navigation: User SECTION 4 - Levels Setup Page The Levels setup page provides status & control for the selected zones: Maximum Volume Limiting – can be • reduced over the range from 100 to the minimum of 2 using the slider or Up/Down buttons.
- Page 21 Menu Navigation: User SECTION 4 - Zones Setup Page Zones setup page provides the means to set the Zone coding. There are also Buttons for Zone Linking setup and Zone Name editing. To change the Zone allocation simply make the adjustment using the Up/Down button.
-
Page 22: System
Menu Navigation: System SECTION 4 - System Page The System settings page opens when the System button is selected in any of the ‘More function pages’ for longer than 5 seconds. The System settings are Zone independent functions. The page displays the internal amplifier heatsink temperature. - Page 23 Menu Navigation: System SECTION 4 - Setup lockout Page You may lock the user out from making critical installation setting changes by enabling the Setup lockout. Once set the user can not access the System Settings menus. Select ‘Yes’ to enable this option, or ‘No’ to return to the previous menu.
- Page 24 Presets Page There are 14 possible presets. It is easier to set up the presets using a connected PC running the Axium Design Portal program. However Presets can be setup using the Menu navigation. The first 8 presets are accessible on the opening page.
- Page 25 Preset, or by Restore default. Select ‘Set up’ to enable the Preset Setup Mode. An Axium splash page is displayed followed by the Home Page. When in the Preset Setup mode Navigate through all the zones and make appropriate changes to the standby, volume and source selections etc.
-
Page 26: Monitor And Control
WEB Application: Monitor and Control SECTION 5 - The Axium AX·1250 amplifier has a WEB application which may be used for configuration, control and monitoring of amplifier functions. In a Browser enter either the connected amplifiers default NetBIOS name or the IP address which is assigned by the connected Router. - Page 27 WEB Application: Monitor and Control SECTION 5 - Zone Settings Page The Zone Settings Page provides status & control of: Bass: Slider or Up/Down button • Treble: Slider or Up/Down button • Loudness • Mono • Balance: Slider or Left/Right button •...
-
Page 28: Configuration
This allows you to rename the audio Sources on the amplifier – the names will appear on connected keypads and Tablets or Mobiles running the Axium Application. Source names have a maximum of 15 characters (less when using exotic characters). - Page 29 WEB Application: Configuration SECTION 5 - Zones Configuration Page All Axium amplifiers on the network are listed. The MAC address is displayed to show which unit is being configured. Axium amplifiers have a MAC address label fixed either to rear panel or cover.
- Page 30 WEB Application: Configuration SECTION 5 - IR Routing Configuration Page IR signals received on any one of the IR inputs do not need to be transmitted on every IR output. Use of the IR Routing feature enables control over which IR outputs transmit an IR signal depending on its origin and optionally the currently selected source.
-
Page 31: Section 6 - Specifications
Specifications SECTION 6 - Amplifier Section Rated Output Power: 55 Watts / channel Loads, all channels driven, 1% THD: 75 Watts / Channel Loads, all channels driven, 1% THD: <0.1% (50 Watt, 8 load) THD (Total Harmonic Distortion) Damping Factor (8 Load) 4 - 8 Speaker Impedance (Z1 –... - Page 32 OR SERVICES; LOSS OF USE, DATA, OR PROFITS; OR BUSINESS INTERRUPTION) HOWEVER CAUSED AND ON ANY THEORY OF LIABILITY, WHETHER IN CONTRACT, STRICT LIABILITY, OR TORT (INCLUDING NEGLIGENCE OR OTHERWISE) ARISING IN ANY WAY OUT OF THE USE OF THIS SOFTWARE, EVEN IF ADVISED OF THE POSSIBILITY OF SUCH DAMAGE.
Need help?
Do you have a question about the AX-1250 and is the answer not in the manual?
Questions and answers