
Subscribe to Our Youtube Channel
Related Manuals for B&K CT300


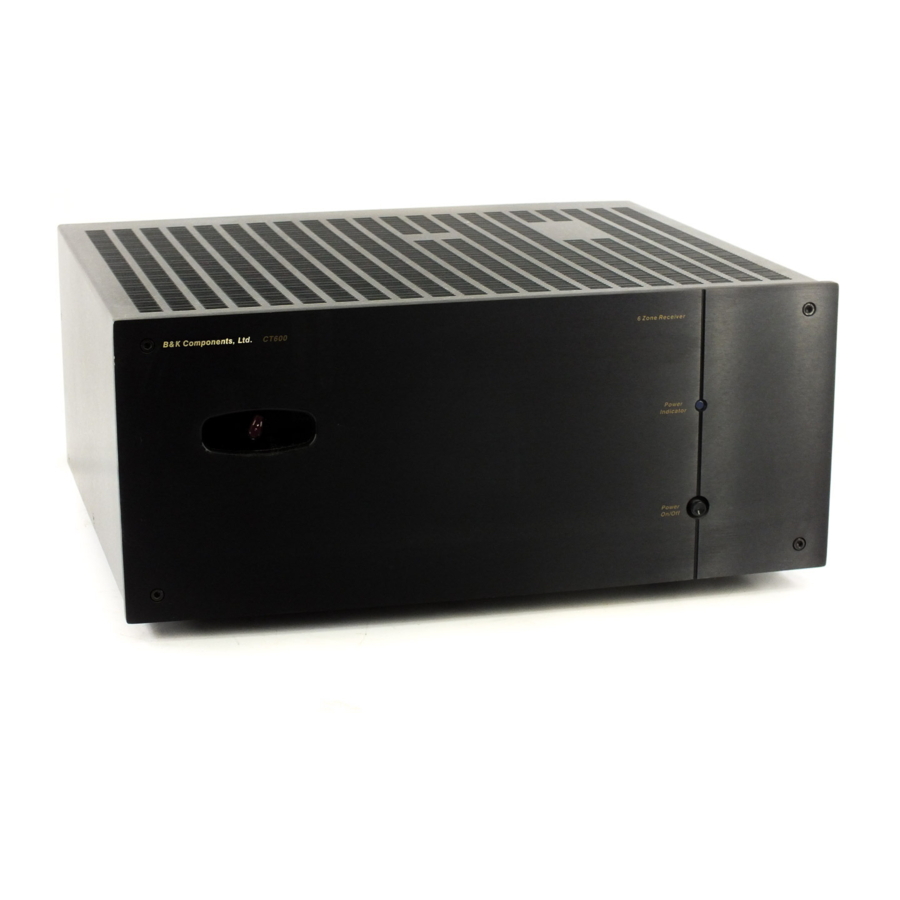
Summary of Contents for B&K CT300
- Page 1 K Components, Ltd. & User Manual CT610 CT310 CT602 CT600 CT300 Multi-Zone Audio/Video Receivers 13226 0905...
-
Page 2: Accessories Included
COMPLETE USER MANUAL - CT R ECEIVER © 2005 B & K Components, Ltd. All rights reserved. The information in this manual is copyright protected. No part of this manual may be copied or reproduced in any form without prior written consent from B & K Components, Ltd. B &... -
Page 3: Table Of Contents
Table Of Contents Introduction / Overview CT Receiver Features and Benefits CK1.2 Keypad Features and Benefits Parts and Accessories Guide CT Receiver Front Panel CT Reeiver Back Panel CK1.2 Front Panel / Back Panel MZ-128 Remote Control CT-1 System Integrator RJ-45 to 5 position Phoenix Adapter DB-9 to RJ-45 Adapter BK Toolbox CD-ROM... - Page 4 Groups / Code Sets / Zones - Tab 2 Groups with Mono Zones Input Settings - Tab 3 Power On Titles - Tab 4 Power-On Preferences - Tab 5 Input Configuration - Tab 6 Page / Event - Tab 7 Display - Tab 8 12V Control - Tab 9 IR Flasher Settings - Tab 9...
-
Page 5: Introduction / Overview
Introduction / Overview The Finesse and Power To Please A Household... The Receiver family serve the same goals; to bring to the entire house the same performance and sound quality B & K has brought to audiophile home theaters and music listening rooms. A level of performance that up to now could only be achieved by a stack of B &... -
Page 6: Ct Receiver Features And Benefits
Twin AM/FM Tuners Allow Simultaneous Listening to Two Radio Stations The CT Receiver Family offers a combination of internal AM/FM tuner configurations. The CT610 and CT310 include two internal tuners. The CT602 also includes two internal tuners. The CT600 and CT300 include one internal AM/FM tuner. -
Page 7: Ck1.2 Keypad Features And Benefits
CK1.2 Keypad Features and Benefits CK1.2 Keypad Features and Benefits Automation Everywhere! Keypads Automate the Central System with Local TVs and Components The CK1.2 keypad can accommodate control of up to twenty devices with four pages of custom labeled but- tons per device. -
Page 8: Parts And Accessories Guide
CT610 / CT310 Front Panel B & K C o m p o n e n t s , L t d . Headphone Sleep The front panel Vacuum Florescent Display (VFD) displays what zone you are controlling. The Volume Control adjusts volume of the displayed zone. Stereo headphones with a standard ¼... -
Page 9: Ct Reeiver Back Panel
C O N T R O L & + 1 2 V G N D IMPLY ETTER! R S 2 3 2 X M I T B&K Components, Ltd. B&K Components, Ltd. D ATA I N Made in the U.S.A. Made in the U.S.A. -
Page 10: Ck1.2 Front Panel / Back Panel
The CK1.2 Keypad Front Panel LCD Buttons - Names on the screen change depending on what activity has been selected. For example, when CD is the activity, you’ll see the button names change to Play, Stop etc. so that the source can be controlled. -
Page 11: Mz-128 Remote Control
MZ-128 Remote Control & IMPLY ETTER! -
Page 12: Ct-1 System Integrator
CT-1 System Integrator The CT-1 is used to link multiple CT products together using IR as the communication interface. One CT-1 can accommodate 3 CT products, 9 shared sources, a CK1.2 Keypad and one home theater piece. The CT-1 makes operation of shared identical sources possible between multiple CT products, it also makes future expansion of a system simple. -
Page 13: Installation And System Diagrams
Installation and System Diagrams Installation and System Diagrams Zone D Zone C Zone B Zone A Zone E Sources Keypads Zone F CT602 Zone Speaker Connections Zone F Zone E Zone D Zone C Zone B Zone A See the following pages for details describing &... -
Page 14: Basic System Hookup
Basic System Hookup Keypads connect to the Zone Control terminals on the CT Receiver using CAT-5 cable and/or phoenix connectors. Composite video is used for video distribution, usually RG-6 or better. Video IR Flashers for A/V components are connected to the IR flasher outputs corresponding the their A/V Input number. -
Page 15: Installation Considerations
Placement and Ventilation The CT Receiver incorporates built in power amplifiers and requires at least 3" of free air space above the unit. If built into a rack, please insert at least one rack space of vent panel immediately above the unit. Default Operation The factory default of a B &... -
Page 16: Ac Power And Line Fuse
Phoenix connector or via 5 way binding posts for premium speaker wire. The CT310 Zone A amplifier is 150 watts per channel, CT300 Zone A ampli- fier is 55 wats per channel. The CT300 does not include binding posts. Power Connections If you need to check the fuse, follow this procedure: Power off the unit and unplug the power cord. - Page 17 CT Receiver Speaker Connections Example CT Receiver Six Zone Speaker Connections Z O N E L I N E O U T P U T S C O N T R O L & + 1 2 V G N D IMPLY ETTER! R S 2 3 2 X M I T...
-
Page 18: Ck1.2 Keypad Connections
Keypad Connections Keypads connect to the CT Receiver at the Control Terminals. There is a five position phoenix terminal for each of the hardware Zones labeled A-F on the six zone receiver and A-C on the three zone receiver. Termination of the Keypad cables to the Control Terminals can be done in one of two ways: Strip the keypad cable and terminate five wires to the five terminals of each Zone. - Page 19 If the cables have already been terminated in RJ-45 plugs, order the accessory "RJ-45 to 5 Position Phoenix" (P/N 21419) separately from B & K . Plug the RJ-45 plug into the adapter and screw the adapter in place on the phoenix plug.
-
Page 20: Adding Additional Keypads In The Same Zone
Adding Additional Keypads in the Same Zone. When rooms are interconnected or are open to each other (for example: interconnecting family room, kitchen, and dining areas are common in many homes) you may opt to expand a zone to include several rooms. Many keypads can be connected in a daisy chain from the master keypad in that zone. -
Page 21: Shared Source Connections
Example Shared Source Connection to a CT Receiver Any source that is desired to be shared throughout the system should be connected to one of the 9 A/V Source Inputs. Up to nine sources can be "shared" throughout any zone in the entire system. Internal tuners in the CT receiver products do not utilize an input. -
Page 22: Buffered Outputs
IR Flasher Emitter Output Each of the nine shared sources can be controlled from any zone in the system using the CT Receiver built in IR routing circuitry. When the IR Flasher outputs are set to “selected input,” (Default) IR is routed from the keypads in each zone to the corresponding source according to the input selected for that zone. -
Page 23: Zone Line Outputs
Zone Line Outputs Zone Line Outputs Zone line outputs are used to run the audio and/or video into each zone. Composite video outputs supply video to monitors in each zone. Zone A's video output provides access to the on screen display for unit setup. -
Page 24: Changing Line Level Outputs From Fixed To Variable
Changing Line Level Outputs From Fixed to Variable An internal jumper is used to change the output between line level fixed or variable. This adjustment is typi- cally useful when using additional external amplification. Open the chassis and locate the blue jumper on the audio card for the Zone Line Outputs. -
Page 25: Local Source Ir Control
Local Source IR Control Local IR Source Control Local source control is accomplished by connecting IR emitters to the Alternate Master [IN] of the keypad. Local control is not limited to one source, as many as four IR emitters can be wired in series directly from the keypad. -
Page 26: Common Control Triggers
Common Control Triggers Common Control Triggers The B & K CT receiver line incorporates common control triggers that can be used for whole house events such as telephones and doorbells. Two common controls on the six zone receiver (one on the three zone) allow up to 24VAC or DC voltage sensing. -
Page 27: Additional Connections
RF Remote IN This connection is unsupported. AM Loop Antenna Two internal AM/FM tuners included in CT610,310 & 602. The tuner requires a single coaxial FM antenna oriented for best tuner frequency reception. The signals are internally split to eliminate the need for dual antennas. -
Page 28: System Expansion
There are many ways to expand upon a CT system. The pages in this section will highlight simple methods for adding zones to a CT system. For some installations, simple back and forth IR communication will be needed, other installations will require the use of the CT-1. General guidelines for expanding a CT system are as follows: If identical sources are being installed, a CT-1 will be required for system expansion. -
Page 29: Connecting Two Ct Receivers
Coupling Two CT Receivers - Maximum 12 Stereo Zones Two CT Receives can be coupled together using IR for some simple installations. The following diagram depicts a system for up to 12 stereo zones, with NO identical sources, and two-way communication. IR is simply being allowed to flash both receivers regardless of which keypad generates the IR command. -
Page 30: Adding A 7Th Zone Using The Avr507/505/50 Second Zone
Adding a 7th Zone Using The AVR507/505/50 Second Zone Sometimes a simple seventh zone is needed for a CT install. If a B&K Home Theater is also being installed, then the independent second zone can be used for the audio/video switching. for the seventh zone. -
Page 31: Swap Cable Construction
Swap Cable Construction A swap cable is used for communication of RS-232 (BKC-DIP, Device Interface Protocol) data between units by swapping transmit and receive pins. A swap cable can be used between a CT Receiver and a home the- ater or a swap cable can be used between CT Receivers. A swap cable is intended for one-way communi- cation between the sender and recipient. -
Page 32: Basic Expanded System Using A Ct-1
Basic Expanded System Using a CT-1 Up to 18 stereo zones can be added using a single CT-1. A basic expanded system consists of one, two or three CT Receivers, up to nine shared sources, one CT-1 and one Home Theater product. A basic system can require the use of one CT-1, it allows up to three CT Receivers (or 18 stereo zones) to communicate with one another while also sharing and communicating with common sources. - Page 33 Source Control Using a CT-1 CT IN MASTER HOME THEATER CT 3 IR FLASHER IN / [ CHAIN OUT ] S E R I A L # RS-232 ROUTING SENSOR XMIT 1 2 3 FLASHER OUT PLAY 8:33 PLAY 8:33 Chan 169 05 1:23:45 CT-1 Power Connection - 12VDC...
-
Page 34: Adding A Home Theater
CT-1 Expansion Adding a Home Theater B&K manufactures Home Theater preamplifier/processors and receiver/processors. Any of these products can be combined to share sources in a CT system. Depending on which form of control communication you wish to use (IR or RS-232), B&K can accommodate either or both. Typically only one form of communication is needed, however for some advanced installations, both forms may be required. -
Page 35: Using A Swap Cable To Control A Theater
System Expansion Using a Swap Cable to Control a Theater To simply add a B&K home theater to a CT distributed audio system, a swap cable will provide control func- tions such as power, input, volume, etc. The buffered outputs from the CT Receiver will provide the analog audio and composite video signals from any shared source. -
Page 36: Setup Using A Pc And Bkcsuite
Setup Using a PC and BKcSuite Setup Using a PC and BKcSuite B & K Tool Suite can be installed using the CD-ROM included with the CT Receiver. You may also obtain this software online at www.bkcomp.com. Your PC should be equipped with a CD-ROM or DVD drive. B & K Tool Suite includes software for setting up B &... -
Page 37: Rj-45 Pin Out
Connection to a PC Note that many modern laptops do not come equipped with a DB9 style serial port. If your computer only has a USB style serial port, you'll need to obtain a USB to DB9 Serial port adapter cable. B &... -
Page 38: Bkcsuite Setup And Overview
BKcSuite Setup and Overview BKTask automatically installs a shortcut icon on the desktop [BKTask icon (grey)]. Make sure all other applications which use the serial port are closed before opening the taskbar. B & K has the capability to connect in real-time (live) to any of our receivers or preamplifiers. However, it is recommended that all setup be done virtually to avoid system errors. -
Page 39: Bkcsuite Task Bar Explained
BKcSuite Task Bar Explained Once you have chosen the product you wish to configure, BKcSuite will display the tool bar of applications within the Suite. A single click of the mouse on any of the icons in the tool bar will activate the appropriate application. -
Page 40: Basic Setup Menu
Basic Setup Menu Basic Setup Menu The basic setup menu in BKcSuite has been created to simplify the setup process. It is meant for stream- lined setup of basic systems operating with B & K keypads. Tab 1 in the Basic menu allows users to name zones, configure power on preferences, and name sources. -
Page 41: Advanced Setup Menu
Advanced Full Setup Menu The advanced setup menu in BKcSuite is designed with the intention of displaying the features found in the on screen setup menu using thirteen defining tabs. Each tab allows the user to customize different features found within the CT Receiver. Setup should proceed in the numerical order of the tabs. Remember, it is always best to save frequently. -
Page 42: Hardware Zone Settings - Tab 1
Hardware Zone Settings - Tab 1 1. Since a CT610/602 has six hardware zones, BKcSuite will display a zone button corresponding to each of the six zones. (If you are programming a CT310/300, three zone buttons appear). Select the zone you wish to adjust the settings of. - Page 43 4.Maximum Level (Limits the Output whether Fixed or Variable) Each zone can have the volume limited to a particular maximum level. Adjust the slide bar to limit the maxi- mum volume level for each zone. When the zone is set to fixed, slide the bar to the desired fixed volume level.
-
Page 44: Sub-Zoning
Sub-Zoning Splitting a Zone To Mono Once a zone has been split into mono it has the ability to have a discrete IR Code-Set assigned to it and therefore the user is given the capability to control volume, mute, and power in the split zone independently. For more information on Code-Sets, see the section labeled Groups/Code-Sets/Zones. -
Page 45: Code-Set Description And Overview
Code-Set Description and Overview B & K uses discrete code-sets to control any or all of its audio/video zones. Code-sets range from code 0-0-0 (zero zero zero) to 1-2-8. This is the same practice that satellite manufacturers use so that one remote con- troller could control three identical satellites. -
Page 46: Groups / Code Sets / Zones - Tab
Groups / Code Sets / Zones - Tab 2 1. Groups: You can program a maximum of 18 groups for each CT Receiver labeled a - r for your refer- ence only. Group 0 cannot be changed, it is pre-programmed with code-set 0-0-0 (controls ALL CT Zones). Each group can control any or all zones within one CT Receiver. - Page 47 When a zone is split to mono, two columns of check boxes appear representing the right and left channel of the split zone. Splitting a zone to mono allows independent ability to control power and volume on each side of the zone. The left or the right channel can then be controlled with a discrete code-set from the keypad, or from an external volume control (in wall).
-
Page 48: Input Settings - Tab
Input Settings - Tab 3 1. Shared Source Input Names: Title each input with a user friendly name (up to a 5 letter name). Inputs 1 through 9 can be selected in every zone, thus they are shared inputs. This is the same name that will display on the keypad when zone status is recalled by pressing the backlight button on the CK1.2 Keypad. -
Page 49: Power On Titles - Tab 4
Power On Titles - Tab 4 Power-On titles will only appear on the front panel of a CT610 or CT310 only. & IMPLY ETTER! -
Page 50: Power-On Preferences - Tab 5
Power-On preferences describe a specific state in which a zone or group of zones will power on every time the zone or group is powered on. 1. Select Code Set: All of the Code-Set #'s that were programmed previously appear on this list with their names. On this tab, program what will happen when each Code-Set is used to power on a zone or group of zones. -
Page 51: Input Configuration - Tab 6
1. Select the Zone Dedicated Input you wish to setup. 2. Video No / Yes: If “NO” is selected, the CT Receiver will keep the video input selection from the last selected video source. 3. Input Mode: Mono or Stereo - Select the best mode for the source connected to this Input. When set to mono, the right and left input signals are summed. -
Page 52: Page / Event - Tab
Page / Event - Tab 7 A Page/Event is an action triggered by a 1-24VAC or DC trigger (Common Control), RS-232 command, or Audio Video Sense. 1. Action: When this Event is triggered, choose between switching to one of the nine shared sources, changing the vol- ume or no action at all (OFF). -
Page 53: Turn Off Delay
3. Level: Set the Volume desired for this event. When the event is triggered, the volume will be switched to this level in any zone set to respond to the page/event. Built in intelligence "remembers" the previous state the zone was in before the Page/Event occurred thereby returning the zone or zones to their previous state. -
Page 54: Display - Tab
Display - Tab 8 Note: Display setup for a CT610/310 only. 1. Front Panel Brightness: Select Off, Dim, Medium or Bright from the list box. When set to OFF the display will turn on briefly when a change occurs and then revert back to off. 2. -
Page 55: Zone Control
1. Zone Control: Click one of the zone buttons A thru F to setup control settings for the desired zone. 2. Zone Control Out: Control Out is a switchable 12VDC 200mA control voltage useful for status lights on keypads, power strips, external amplifiers or any other voltage sensing device. -
Page 56: Ir Flasher Settings - Tab
Zone Rear Data In Setting: Allows the IR data input port for each zone control terminal to be switched off. When set to OFF, any key- pads or IR sensors connected to the back panel the CT Receiver will be rendered inoperable because no IR will be allowed to pass through the IR data input for the selected zone. -
Page 57: Security - Tab 10
1. Front Panel Buttons: When you disable the front panel buttons, the only button that still has any affect is the master power ON/OFF switch. A touch of any other button brings the word "Locked" to the display. 2. Front Panel IR: Disabling the front panel IR prevents B &... -
Page 58: Rs-232 Communication - Tab
For detailed information on BKC-DIP and RS-232, please refer to the documentation folder located in [c:/program files/B & K Components Ltd/BKcSuite/documentation] or visit our website at www.bkcomp.com. 1. RS-232 Port Enable: When disabling the RS-232 port, RS-232 strings will be neither transmitted or received through the main RJ- 45 jack. - Page 59 6. RS-232 Feedback Selection (Continuous Reply): Disabled (Default)= No BKC-DIP Update or Reply is generated. Update = A change affecting a logical zone from the Front Panel or B & K IR generates an update message representing the specific Front Panel button or B & K IR command. The CT receiver must then be polled to determine the current status.
-
Page 60: Preset Operation - Tab
1. Recall Volume In Preset: If set to YES all of the presets you program will recall the saved volume setting. If set to NO, none of your presets will change the volume. When you recall a preset, the volume will stay the same. 2. -
Page 61: Keypad Feedback - Tab 13
In the advanced setup tab 13, you can set the keypad feedback positions more precisely than in Basic Setup. Keypad input feedback is triggered upon the acknowledgment of an input change from a zone or group of zones. When a zone is powered on or the input is changed, the keypad will jump to the page corresponding to the input the user has selected. -
Page 62: Preset Editor
Preset Editor Features and Benefits Presets are a powerful feature that can instantly recall commonly used parameters instantly. B & K preset settings can be recalled with the press of a single button. Parameters such as independent audio/video inputs, bass, treble and volume levels, loudness and tuner frequencies can be recalled with one touch access. -
Page 63: Editing Presets
The Preset Editor Window This shows the presets contained within the CT Receiver preset editor file. If a "Virtual" setup is being used, default presets will be displayed on the preset editor table. If a live con- nection has been established, the unit's internal presets will be displayed on the preset editor table displayed below. -
Page 64: Rs-232 Serial Macro Editor
RS-232 Serial Macro Editor RS-232 Serial Macro Editor The RS-232 serial macro editor allows a CT Receiver to control other RS-232 devices. Specific examples could include other B & K products, the CK1.2 keypad, or light controllers. The serial macro editor works by using an IR trigger command to fire out RS-232 messages. -
Page 65: Ck1.2 Keypad
For B & K CT product with hardware version code 2.00 or earlier, it is recommended you save your files fre- quently. For this reason, the following warning will display when running 2.00 version code or earlier: The CK1.2 keypad is B & K 's answer to a wall mounted user interface. The CK1.2 keypad stores IR source codes from its expansive database built in to the PC based software. -
Page 66: Setup Using The On Screen Display
Setup Using the On Screen Display 1 Z Z one O O peration 2 Z Z one F F avorite P P resets 3 A A udio/Video 4 C C ontrol S S ystem S S etup 5 M M emory B B ackup/Restore 6 S S ystem S S tatus It is possible to completely program the CT Receiver via the on-screen menus or the front panel dis- play. -
Page 67: On Screen Menu Tree Diagram
On Screen Menu Tree Diagram & IMPLY ETTER! -
Page 68: On Screen Menu Operation With The Mz-128
Using a Remote Control The on screen display’s are navigated by use of the MZ-128 remote controller, however any remote can be used once it is set to the zone A Code-Set. Zone A is default code set to 0-1-1. Using The Remote Control and On-Screen Menus Tapping the MENU button on the remote control brings up the On-Screen MAIN... -
Page 69: Front Panel Buttons
5. The VOLUME control acts as the Left Right arrow keys, enabling you to increase/decrease or next/previ- ous select. CT602 / CT300 (No front panel operation) B & K C o m p o n e n t s , L t d . -
Page 70: On Screen Main Menu
Main Menu When programming using the front panel, it is difficult to identify where you are in the menu since only one line at a time is displayed. Page 63 Use the MENU button to step back one level to discover what is being adjusted. Using the ENTER button will select the choice displayed. -
Page 71: Zone Favorite Presets Menu
Z Z O O N N E E 4 4 U U p p s s t t a a i i r r s s O O P P E E R R A A T T E E P P o o w w e e r r O O f f f f A A u u d d i i o o F F M M... -
Page 72: Audio/Video System Setup
Z Z o o n n e e 3 3 D D o o w w n n s s t t a a i i r r s s F F A A V V O O R R I I T T E E P P R R E E S S E E T T S S P P r r e e s s e e t t 5 5 ‘... -
Page 73: Zones Menu
SETUP I I NPUT F F 1 1 N N a a m m e e 2 2 L L e e v v e e l l 3 3 M M o o d d e e 4 4 V V i i d d e e o o 5 5 S S e e l l e e c c t t i i o o n n 6 6 T T u u r r n n O O f f f f D D e e l l a a y y n n e e x x t t i i t t e e m m... -
Page 74: Zone Power On Settings
Z11 Z Z one A A 1 1 A A u u d d i i o o 2 2 V V i i d d e e o o 3 3 V V o o l l u u m m e e 4 4 B B a a s s s s 5 5 T T r r e e b b l l e e 6 6 L L o o u u d d n n e e s s s s... -
Page 75: Control System Menu
S S E E T T U U P P C C O O N N T T R R O O L L S S Y Y S S T T E E M M 1 D D isplays 2 2 Z Z o o n n e e C C o o d d e e S S e e t t s s / / N N a a m m e e s s 3 3 Z Z o o n n e e C C o o n n t t r r o o l l I I / / O O 4 4 C C o o m m m m o o n n C C o o n n t t r r o o l l I I / / O O... -
Page 76: Zone Control I/O
Zone Code-Sets/Groups and Group Titles continued... S S E E T T U U P P G G R R O O U U P P a a C C O O D D E E S S E E T T S S 1 1 N N a a m m e e 2 C C ode S S et 3 3 I I n n c c l l u u d d e e Z Z o o n n e e A A... -
Page 77: Common Control I/O
COMMON C C ONTROL 1 C C ontrol 1 1 Zone 2 C C ontrol 2 2 Zone 3 F F lasher O O ut S S elected I I nput 4 I I R t t o f f lasher o o ut control o o ut 1 1 w w ill b b e o o n when a a ny z z one i i s o o n n n e e x x t t i i t t e e m m... - Page 78 C C O O M M M M O O N N C C O O N N T T R R O O L L 1 1 C C o o n n t t r r o o l l 1 1 2 2 C C o o n n t t r r o o l l 2 2 3 3 F F l l a a s s h h e e r r O O u u t t S S e e l l e e c c t t e e d d I I n n p p u u t t...
-
Page 79: Presets Setup
M M E E N N U U s s e e t t u u p p c c o o n n t t r r o o l l Power On Titles only appear on the front panel display of a CT610 or CT310 when any zone powers up. CT602/CT300 has no power on display. Control System Menu... -
Page 80: Security Options
SECURITY O O PTIONS 1 S S etup M M enu 2 M M emory 3 F F ront P P anel B B uttons 4 F F ront P P anel I I R n n e e x x t t i i t t e e m m M M E E N N U U s s e e t t u u p p c c o o n n t t r r o o l l Memory There are two options that can be selected. -
Page 81: Memory Backup
EEPROM. If the system has never been backed up, selecting RESTORE will restore the unit to factory default. Refer to page 23 & IMPLY ETTER! for CT602/CT300 reset procedure. -
Page 82: System Status
S S Y Y S S T T E E M M S S T T A A T T U U S S 1 1 U U n n i i t t I I n n f f o o r r m m a a t t i i o o n n 2 2 A A u u d d i i o o S S t t a a t t u u s s 3 3 D D e e t t e e c c t t o o r r S S t t a a t t u u s s... -
Page 83: Zone Planning Worksheets
CT Receiver Zone Planning Residence Zones Name of Zone How Many Keypads? Master Slave #1 Slave #2 Slave #3 Zone TV? Stereo / Stereo Mono Mono ? Number of Speakers External Amplifier Variable Line Level Output Fixed If Fixed- # of Volume Controls Dedicated Source? - Page 84 Residence IN 1 IN 2 Shared? Shared? Identical? Identical? Cable Calculation Source Additional Cables for Home Theater or Local TV’s and Components: # of Emitters : Input Planning Worksheet CT Receiver Input Planning Project Manager IN 3 IN 4 IN 5 Shared? Shared? Shared?
- Page 85 Power On Preferences and Presets CT Receiver Preferences and Presets Residence NAME ZONE Project Manager Zone Power On Preferences AUDIO FROM VIDEO FROM Last Used Last Used Last Used Last Used Last Used Last Used Last Used Last Used Last Used Last Used Last Used Last Used...
-
Page 86: Troubleshooting Guide
Troubleshooting Guide For BKcSuite Make sure your PC meets the requirements outlined in the BKcSuite Section of this manual. Page 32. Make sure the CT/CK/SR product is connected to the PC’s serial port. (DB-9, nine pin) Be sure to select “Local Com” in the BKcSuite software, as “Network” is not currently supported. If the unit will not communicate through RS-232, perform a factory reset. -
Page 87: Limited Warranty
B & K Components Ltd., referred to herein as B & K , warrants your B & K equipment against all defects in material and workmanship for a period of five years from the date of purchase. This warranty applies only to the original purchaser and only to equipment in normal residential use and service. -
Page 88: Specifications
7.50” (7.62”) 7.50” (7.62”) 17.00” (17.12”) 17.00” (17.12”) 15.50” (16.62”) 15.50” (16.62”) 55 lbs. 55 lbs. CT310 CT300 3 Stereo 3 Stereo 6 Mono 6 Mono Zone A =150 Watts All Zones Zones B-C = 55 Watts 55 Watts / Ch...
Need help?
Do you have a question about the CT300 and is the answer not in the manual?
Questions and answers