
Summary of Contents for RF Explorer 3G Combo
- Page 1 RF Explorer ® Signal Generator User Manual Updated to Firmware Version 1.17 – 1.19...
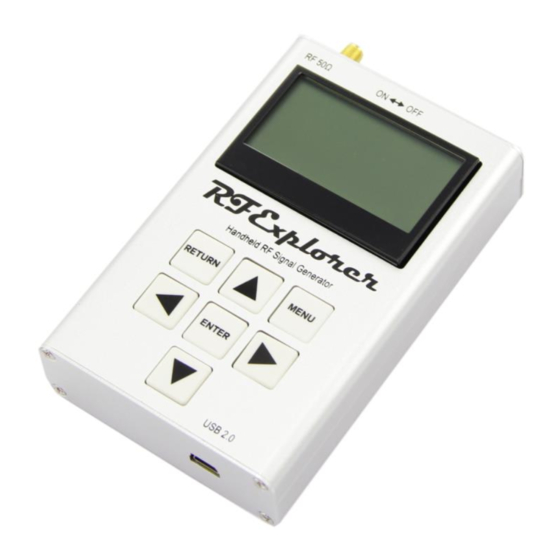
- Page 2 RF Explorer ® RF Explorer is an affordable Handheld Spectrum Analyzer and Signal Generator family of products with a growing list of features. This little powerful unit is the tool you need to reduce the implementation time and cost of your next wireless project.
-
Page 3: Table Of Contents
Introduction ................................. 5 Description of main features ..........................6 Feature ................................6 Specification ................................ 6 Connecting RF Explorer Signal Generator ......................8 Signal Generator CW mode - Main Screen ......................9 Using menus ..............................12 Operational Mode menu ........................... 14 Frequency Menu.............................. - Page 4 SMA Termination – 50 ohm dummy load ..................... 36 Connecting RF Explorer to a computer ......................37 API programming specification for RF Explorer ....................37 RF Explorer for Windows open source code ..................... 37 Specifications ..............................38 Acknowledgments ............................. 38 FCC and CE regulations ............................
-
Page 5: Introduction
Introduction RF Explorer Signal Generator has been designed to be intuitive and easy to use. There is no need to read large user manuals to get advantage of its advanced functionality. For simple actions, only a keyboard click is needed to start transmitting signals. For most advanced features like Tracking SNA, the RF Explorer for Windows software will easily guide through steps required so analyzing RF devices becomes a few minutes task for even the most novice users. -
Page 6: Description Of Main Features
As a standalone unit, RFE6Gen can generate CW and Sweep signals by selecting embedded menu options. When connected to a PC, it can be fully programmed with the RF Explorer for Windows software tool. Furthermore, the unit can work as a powerful Tracking Generator when used with RF Explorer Spectrum Analyzer connected to the same PC, offering full Scalar Network Analyzer (SNA) capabilities. - Page 7 Functional modes: o CW signal generator at any frequency in the range o Tracking generator functionality working together with RF Explorer when connected to the same PC. o Sweep generator between any to frequencies in the range, with selectable step size and speed ...
-
Page 8: Connecting Rf Explorer Signal Generator
USB cable is connected. The internal battery will not charge when the power switch is in the OFF position. Note: There are a number of SMA adapters to easily interface RF Explorer SMA connector to any other standard RF connector format, including BNC, N, RP-SMA, etc. For more information of adapters available see section RF Explorer accessories in page 30. -
Page 9: Signal Generator Cw Mode - Main Screen
Signal Generator CW mode - Main Screen Upon start, RF Explorer Signal Generator goes to this mode automatically. The RF output power is disabled by default and it is important to connect a LOAD in all cases before enabling the RF port. - Page 10 If you switch the transmitter ON without a proper load, you may damage the RF module of your RF Explorer Signal Generator, as the power amplifier will not have a load to feed. Think of the equivalent to an audio amplifier running at full power with no speakers connected: you are likely damaging the power transistors.
- Page 11 Using MENU key goes to the last used menu. Note: if the RF power was enabled, MENU will automatically disable it to avoid unattended power signal to be active. You can re-enable power once you get back from MENU configuration. RF Explorer User Manual page 11...
-
Page 12: Using Menus
Using menus There are several menus in RF Explorer Signal Generator. They are organized on different screens, which you can iterate through by using the [Menu] key. If you click [Menu] button multiple times, you will visit every one of them: Optionally, you can use the [Left] and [Right] keys to go from one screen to another. - Page 13 The first time you click on [Menu] button in a RF Explorer session, Frequency Menu will open. This may change as we will see later, so every time you click on [Menu] from Signal Generator main screen, you actually re-open the last menu you were working with. In this way you save time by not having to navigate through all the menus to go the same place you were before.
-
Page 14: Operational Mode Menu
Battery includes details on internal battery charge level, and assist you on charging the unit when connected to USB. For more details read section Charging the internal battery in page 23. RF Explorer User Manual page 14... - Page 15 About displays information about installed firmware and versioning. Use any key to get out of this screen. RF Explorer User Manual page 15...
-
Page 16: Frequency Menu
[Enter] to edit that option, [Left] or [Right] to go to the digit you want to change, and [Enter] to confirm or [Return] to cancel. In above example screen: CW frequency is 3,767.020 MHz Frequency sweep will run from 1,100.000 MHz to 1,200.000 MHz with a 5 MHz step and 1 second delay RF Explorer User Manual page 16... -
Page 17: Power Menu
To navigate through the menu, just use [Up] and [Down] keys to go to the option you want, then click on [Enter] as many times as required to change the power value. The Power Steps setting is not editable (automatically calculated). RF Explorer User Manual page 17... -
Page 18: Understanding Rf Power Modes
Tracking mode. The exact power level available on each frequency point is available on screen, as well as in the RF Explorer for Windows application. If you need more details or power level accuracy is important to you, please contact us. -
Page 19: Configuration Menu
However, this is not recommended as the connection will go really slow, so do this only if there is a good reason to. The port speed in the RF Explorer and PC Client settings must match to properly establish a connection. -
Page 20: Frequency Sweep Mode
Frequency Sweep mode The RF Explorer Signal Generator Frequency Sweep mode allows iterative hops over Start Frequency and Stop Frequency defined by a Step Frequency and a Step delay. To start the Frequency Sweep, press ENTER key. The Sweep will be active until ENTER is pressed again. -
Page 21: Fm Modulation
FM modulation RF Explorer Signal Generator RFE6GEN does not directly create FM or AM modulation signals, but can be easily used to produce low rate modulation including SINAD signals using Frequency Sweep. For a FM modulation of 1 KHz tone typically used for SINAD, proceed as follows: ... -
Page 22: Amplitude Sweep Mode
Amplitude Sweep Mode The RF Explorer Signal Generator Amplitude Sweep allows iterative amplitude change at CW frequency using Step delay. To start the Amplitude Sweep, press ENTER key. The Sweep will be active until ENTER is pressed again. Using LEFT and RIGHT buttons the frequency can be decremented/incremented manually, as well as using the Frequency Menu where Step Delay is also configurable. -
Page 23: Rf Explorer Internal Battery
The power switch is a true hard switch connecting the battery in ON position, fully isolating the battery in the OFF position. As the battery is fully disconnected in the OFF position, you can keep your RF Explorer stored for months and the battery will keep the charge intact, as opposed to cell phones or laptops which typically implement a soft switch which slowly discharge the battery by drawing a microamperes continuously from it. -
Page 24: Using The Battery Dedicated Screen
RF Explorer may draw up to 500mA according to USB standard, and may take up to 3hs max to charge a fully discharged battery in normal conditions. We recommend the first time to be charged for up to 8hs. It is ok having the battery connected forever to the USB port, the internal charger will stop and start the charge when needed. - Page 25 As a reference, 500 charge cycles will typically reduce the total battery capacity about 30% - in order for this new RF Explorer User Manual page 25...
-
Page 26: Charging A Fully Depleted Battery
Note: A more limited, equivalent functionality was available in old firmware versions prior to v1.16 in the About screen, it has now moved to the new Battery screen. The About screen no longer sets the device to sleep. RF Explorer User Manual page 26... -
Page 27: Expansion Modules
Expansion Modules RF Explorer Signal Generator includes an internal expansion port to enhance the RF power capabilities and frequency coverage of the main unit with RF Explorer Signal Generator compatible Expansion Modules. Note: Spectrum Analyzer modules cannot be connected to the Signal Generator, they are incompatibles and have a changed gender connector to avoid any change of connecting incompatible modules. -
Page 28: Protecting Your Instrument From Damage
Protecting your instrument from damage Please protect the RF port from static discharge. This is sensitive device. The RF output port is DC decoupled and can sustain up to 25V DC external voltage. http://en.wikipedia.org/wiki/Electrostatic_sensitive_device RF Explorer User Manual page 28... -
Page 29: Rf Explorer Holder
Feature Sturdy 3mm acrylic body Color: blue and silver Secure support for your RF Explorer Signal Generator for working on the bench Nice and practical design Comes flat-packed, assembly required. RF Explorer User Manual page 29... -
Page 30: Rf Explorer Accessories
RF Explorer uses standard SMA quality connectors. By using adapters you can connect RF Explorer to any RF device or antenna. You can buy SMA adapters and devices on any RF shop, but sometimes is difficult to find what you need and have the certainty the connector you are ordering is the right one. -
Page 31: Rf Adapter Rp-Sma Jack To Sma Plug Straight-Long Version
This RF connector is ideal to use RF Explorer deployed horizontally, with any antenna connected onto it. For instance when you are on the road and you don't have a RF Explorer Stand, you can still easily fit the USB cable, the antenna and connect to a computer with easy. -
Page 32: Sma Connection Cables
This SMA male to female is a quality cable able to handle 6GHz with very low attenuation. It is the perfect cable to connect the RF Explorer Signal Generator to a device, or to work as a tracking generator. The semi-rigid nature of the cable allows for stable... -
Page 33: 50Cm Length - Sma Male To Sma Female Rf Pigtail Coaxial Cable Rg316
50cm length - SMA male to SMA female RF pigtail Coaxial Cable RG316 RF cables are required when connecting RF Explorer to other instruments or devices. This 50cm cable is good for any frequency up to 3GHz, and can fit RF Explorer with any external SMA-male device or antenna. -
Page 34: Attenuators
SMA attenuators are used to reduce the input power, and therefore enable RF Explorer Spectrum Analyzer to measure stronger signals. It is also used to protect the input SMA port of RF Explorer when unknown strong signals may be in the environment, so you can use this attenuator on demand. You can easily unplug the attenuator when measurement is for weak signals. -
Page 35: 6Ghz Sma Attenuator - 10Db
Use OffsetDB: +010 when connected to this attenuator. 6GHz SMA Attenuator - 30dB This precision attenuator can measure up to 6GHz frequency range with high amplitude accuracy. Use OffsetDB: +030 when connected to this attenuator. RF Explorer User Manual page 35... -
Page 36: Sma Male/Female Adaptor
SMA port. After hundreds of operations, if the adaptor wear and show attenuation or reliability problems, you can just replace it by a new one and always keep your original RF Explorer SMA port intact. SMA Termination – 50 ohm dummy load... -
Page 37: Connecting Rf Explorer To A Computer
API programming specification for RF Explorer RF Explorer offers a compact, easy to use, USB / RS232 programming interface. It can be used to automate external solutions when connected to an external computer or device. For full specification of the current API, check www.rf-explorer.com/API... -
Page 38: Specifications
RF Explorer is a reality thanks to the great community behind, always suggesting features and providing useful feedback. FCC and CE regulations RF Explorer is a Test and Measurement device, and therefore compatible with US FCC regulation 47 CFR Part 15.103(c). RF Explorer is certified for CE compliance under regulations EN/IEC61236 and EN/IEC61000.
Need help?
Do you have a question about the 3G Combo and is the answer not in the manual?
Questions and answers