Table of Contents
Advertisement
Advertisement
Table of Contents

Summary of Contents for Flying Phantom Essentiel
- Page 1 ASSEMBLING MANUAL...
-
Page 2: Table Of Contents
TABLE OF CONTENTS Table of contents Foreword ............................3 Overview ............................4 List of Parts ............................6 Needed Tools ........................... 9 ................................10 Beach Trolley Set-up ........................10 Platform............................11 6.1. Hulls ............................11 6.2. Trampoline ..........................12 6.3. Platform / Ropes Plan ......................17 Mast ............................... -
Page 3: Foreword
1. Foreword Dear Owner, Welcome to the world of foiling catamarans. This Assembling Manual is designed to help you assemble your Flying Phantom Essentiel step by step. It is very important that you follow every instruction. You may also use resort to Phantom International for help at a certain cost. -
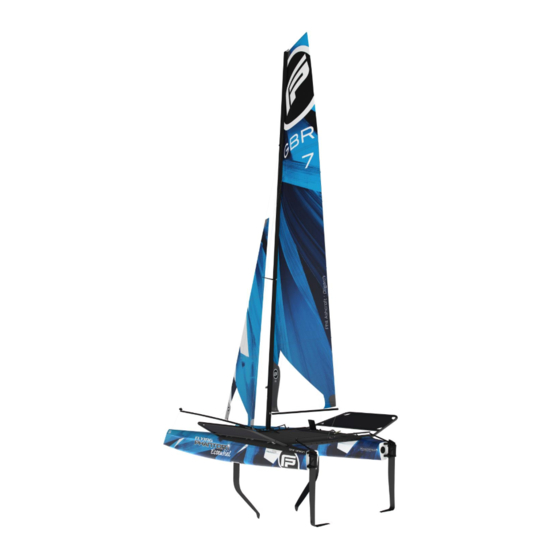
Page 4: Overview
OVERVIEW 2. Overview... - Page 5 OVERVIEW...
-
Page 6: List Of Parts
LIST OF PARTS 3. List of Parts In order to make the first assembling easier, all components are pre-assembled, and only a few packs have to be set up by the sailor. Pack name fonctional number Big box Rotator block HARK467 Rotator connecting line premium mast rotation M2902... - Page 7 LIST OF PARTS Mainsail luff rope down block HARK404 Mast foot cuni holder 3 blocks line M1103 Stainless Washer NFE25514 10*22*2 Washer 003 1000 599 02 Big box/ mast/ ropes Geenacker halyard SP1305 Mainsail halyard M3203 Cunningham jib arbalet pulley HARK404 Upper jib Cunningham rope TG1014...
- Page 8 LIST OF PARTS Big box/Bowsprit assy Textile shackle for pulley jib Cunni on forestay TG1104 Pulley for Cunningham rope HARK404 Textile shackle pulley jib sheet idler arbalet TG1307 Jib sheet pulley on bowsprit idler arbalet HARK404 Pool front kepper adjuster TG1311 Forestay eye bolt 582 A4 M5...
-
Page 9: Needed Tools
TOOLS 4. Needed Tools You will need the following tools in order to assemble your FLYING PHANTOM Essentiel: 1. Flat wrench : 7, 8, 10, 17, et 19 mm 2. Hexagonal wrench CHC : M4, M5 et M6 3. Screwdriver and hexagonal screwdriver 4. -
Page 10: Beach Trolley Set-Up
BEACH TROLLEY 5. Beach Trolley Set-up 1. Start with the 2-pieces axle and insert the connector. Align the second half of the axle and tighten the grub screws. Slide the inner fixation elements onto the axle against the inner 2. Complete both roller bearing units by clicking the pins into the pin-holder. Slide the roller- bearing units onto the axle once they are completed. -
Page 11: Platform
PLATFORM 6. Platform 6.1. Hulls 1. Introduce some navy fat in the inserts. 2. Pre-arch of the front beam: loosen the dolphin striker, stretch a thread between the two external bolts then screw back again the dolphin striker to reach a value of 4-5mm. 3. -
Page 12: Trampoline
PLATFORM 5. Loosen the beam hood screws, remove the bolts from the beams. 6. Put the four Dyneema textile shackles on beam for blocking the wings (W1029) 7. Position the front beam and introduce the bolts in it without tightening them. Repeat the procedure with the back beam. - Page 13 PLATFORM 6. Introduce the trampoline one centimeter on each side in the groove of the hulls. Then, without forcing, keep introducing the trampoline little by little alternating on one side then the other. Use two ropes as a tackle between the back beam and the trampoline as shown here below.
- Page 14 PLATFORM 10. To install the rope of central rack T1115, undo the screw connecting the worm screw to the bilge of the foil, holding the nut underneath and pass the end around the same screw, and the pulley. 11. Strech the central rack T1115 rope thanks to rope T1109 (Grey Dyneema). 12.
- Page 15 PLATFORM 13. Install the gennaker furler rope T1117 using the rope (fixing shackle gennaker furler rope T1116). Ensure that the rope of the gennaker furler goes under the other trampoline ropes and between the 2 lips of the groove, as shown on the pictures. 14.
- Page 16 PLATFORM 15. Install Main Sail tackle using the trailor axis.
-
Page 17: Platform / Ropes Plan
PLATFORM 6.3. Platform / Ropes Plan... -
Page 18: Mast
MAST 7. Mast 7.1. Diamond 1. Look at the plans of the following pages and use the packs Big box/mast/spreaders, Big box/mast/mastfoot and Big box/rigging 2. Install the spreaders. 3. Undo the mast foot. 4. Install the Cables M1803 in diamond bronze M1902, the cable ending screw must be flush to the diamond bronze;... - Page 19 MAST 5. Install the mast foot. Make sure there is some navy grease. Install diamond tensioner screw in the mast foot and then in the diamond bronze. 6. Screw back the mast foot, starting with the screws on either side of the mast. 7.
-
Page 20: Cables
MAST 7.2. Cables 1. Take the Big box/rigging, Big box/trapeze packs and Pack rigging. 2. Lay the mast on the boat, spreaders down, and with the top of the mast to the rear of the boat. 3. Arrange the cables with regard to the mast: a shroud Str M3503 on each side and the Str M3405 forestay in the middle. - Page 21 MAST Prepare the pendant. Put the eye of the screw rearward to insert the forestay bar at the front of the boat. 8. Mount the shrouds on the hulls with the Din 444 M 6 + Nut Nylstop M6 screws. 9.
-
Page 22: Haylards
MAST 7.3. Haylards 1. Please have the packs Big box/mast/ropes. 2. Install the HK404 pulley at the bottom of the mast 3. Insert the halyard of MS M3203 by rea, and then in the groove of the mast up to the mast foot pulley. - Page 23 MAST MAST...
- Page 24 MAST...
-
Page 25: Mast Setting
MAST 7.4. Mast Setting We recommend that you perform the first mast setting with three people 1. Check all the connections before setting the mast. 2. Fully unscrew the three chainplates. 3. Enter the mast foot in the mast ball with a 90 ° angle. 4. -
Page 26: Cunningham
MAST 7.6. Cunningham 1. Take the Big box pack / mast / mastfoot. 2. Set the two spinlocks on the mast. 3. Hitch up the three pulleys HK404 to the mast foot with rope M1103. 7.7. Trapezes 4. Install the trapeze elastics M2706 et M2705 from the pack Big box/trapeze going through the hulls grommets. - Page 27 MAST...
-
Page 28: Bowsprit
BOWSPRIT 8. Bowsprit 1. Use the packs Big box/Bowsprit assy and assy Bowsprit (cf plan next page). 2. Push the bowsprit lugs in the front beam. 3. Attach the front flanges TG1309 to the hull with the corresponding shackles (in Big box Rigging). 4. - Page 29 BOWSPRIT...
- Page 30 BOWSPRIT 11. Preinstall the jib cunningham as shown in the drawing herebelow thanks to ropes TG1102 and TG1103 and to the two pulleys HK404 fitted on textiles shackles.
-
Page 31: Wings
WINGS 8. Wings 1. For each Side Wings, take the four tubes and the connecting pieces in aluminium: forward (oblique edge, Ref: W1013) and aft (straight edge, Ref:W1014) 2. To assemble the tubes, start connecting the central tube with the forward tube, and the aft tube with the external tube. - Page 32 WINGS 3. Insert half a centimetre of the central tube in the aft connecting piece, and proceed the same way with the external tube and the forward tube. 4. Finish assembling the platform. 5. Lay the trampoline on the platform. Lace the tension rope and tighten.
- Page 33 WINGS 6. Set the Wichard wing locking pulley (RF30224) with the small grey Dyneema rope (Fastening locking pulley rope W1027). Attach the locking rope to the pulley (W1028) 7. Attach the snap hooks (WD2313) in the two trampoline eyelets with the W1025 strings. These snap hooks will be used to hang the strings coming out of the forward beams (Mainsail cunni and jib sheet).
- Page 34 WINGS Then attach the other end to the tuning loop on the opposing tube and adjust to the length you want, before securing with a knot (for example half hitch) Insert the black rubber band into the strap and around the tube in order to catch the slack of the strap when it is not used.
-
Page 35: Rudders
RUDDERS 9. Rudders 3.1. Crossbar 1. Please have the Big box/Steering system pack 2. Assemble the rudders in the corresponding rudder boxes. 3. Assemble the rudder boxes in the corresponding gudgeons. -
Page 36: Stick
RUDDERS 4. Assemble the helm tubes in the rudder boxes, do not forget the helm tube bearings (open rings). Allow helm tubes to exceed 5 mm to the rear. 5. Insert crossbar. 6. Raise the rear of the boat so that you can low down the rudders of about 80 centimeters. Measure the distance between the two leading edges of the rudders on same height, do the same for the trailing edges. -
Page 37: Sails
SAILS 10. Sails 10.1. Main Sail 1. Please have the Big box pack / MS 2. Position the pulleys on the straps of the MS using the textile shackles. 3. Raise the Main Sail. 4. Pass the « main Cunningham double block » rope in the HK404 sail pulley and fix it to the mushroom head button at the foot of the mast. -
Page 38: Jib
SAILS 6. Screw the boom to the gooseneck. 7. Pass the boom through the strap of the sail clew. 8. Install the textile shackle MS BO1401 in the eye of the sail clew. 10.2. Jib 1. Tension the battens. 2. Hook the jib tack to the shackle on the forestay bar. 3. -
Page 39: Gennaker
SAILS 10.3. Gennaker 1. Set the jib furler in accordance with the accompanying leaflet 2. Attach the furler to the gennaker tack webbing side opening to the rear. 3. Attach the furler disc at the end of the pole, attach the gennaker head to the SP1305 halyard using the corresponding shackle (Big box/mast/ropes). -
Page 40: Foils
FOILS 11. Foils Foils are mounted by simple insertion, dragging them from the top to the bottom in the hulls through the holds of foils. Latest version, updated 29 May 2018...
Need help?
Do you have a question about the Essentiel and is the answer not in the manual?
Questions and answers