Table of Contents
Advertisement
SAFETY INSTRUCTIONS
1. 120 Volts may cause serious injury from electric shock. Disconnect electrical power before starting installation or servicing.
Leave power disconnected until installation/service is completed.
2. Sharp edges may cause serious injury from cuts. Use care when cutting plenum openings and handling duct work.
3. Dropping may cause personal injury or equipment damage. Handle with care and follow installation instructions.
1. Read all instructions before beginning installation.
2. Improper installation may cause property damage or injury. Installation, service, and maintenance must be performed by a
qualified service technician.
3. Do not use in pool applications. Pool chemicals can damage the dehumidifier.
4. Do not use solvents or cleaners on or near the circuit board. Chemicals can damage circuit board components.
5. Wait 24 hours before running the unit if it was not shipped or stored in the upright position
TABLE OF CONTENTS
Safety Instructions . . . . . . . . . . . . . . . . . . . . . . . . . . . . . . . . . . . . . . . .1
Specifications . . . . . . . . . . . . . . . . . . . . . . . . . . . . . . . . . . . . . . . . . . . .2
Set Up Dehumidifier for Installation . . . . . . . . . . . . . . . . . . . . . . . .2
Packaging Content . . . . . . . . . . . . . . . . . . . . . . . . . . . . . . . . . . . . . . .2
Duct Collars . . . . . . . . . . . . . . . . . . . . . . . . . . . . . . . . . . . . . . . . . . . .2
Location Considerations . . . . . . . . . . . . . . . . . . . . . . . . . . . . . . . . . . .3
Installation . . . . . . . . . . . . . . . . . . . . . . . . . . . . . . . . . . . . . . . . . . . . . . .3
Leveling . . . . . . . . . . . . . . . . . . . . . . . . . . . . . . . . . . . . . . . . . . . . . . .3
Ductwork Installation . . . . . . . . . . . . . . . . . . . . . . . . . . . . . . . . . . . . .3
Drain Tubing and Condensate Pump Installation . . . . . . . . . . . . . . .4
Model 76 - Crawl Space Control and Wiring . . . . . . . . . . . . . . . .5
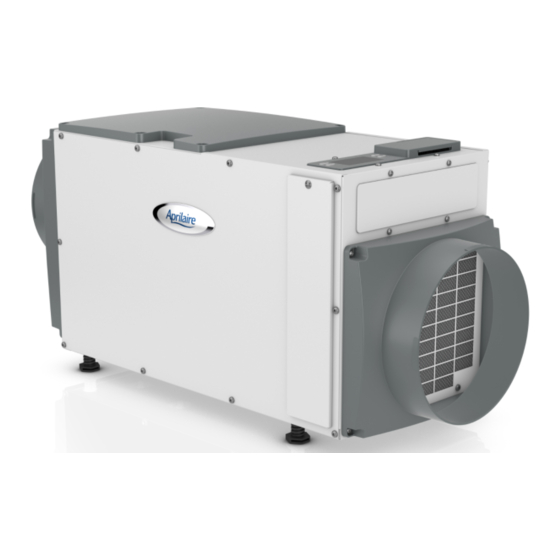
Model 1820 Dehumidifier
Installation Instructions
WARNING
CAUTION
READ AND SAVE THESE INSTRUCTIONS
Air Cycling . . . . . . . . . . . . . . . . . . . . . . . . . . . . . . . . . . . . . . . . . . . . . . .5
System Set-Up, Check & Start-Up . . . . . . . . . . . . . . . . . . . . . . . . . .6
Remote Control - Crawl Space . . . . . . . . . . . . . . . . . . . . . . . . . . . . .6
Ventilation / Air Cycling . . . . . . . . . . . . . . . . . . . . . . . . . . . . . . . . . . .7
System Check . . . . . . . . . . . . . . . . . . . . . . . . . . . . . . . . . . . . . . . . . . .7
Crawl Space Using the Dehumidifier Control . . . . . . . . . . . . . . . . . .8
Crawl Space Remote Control Using Model 76 . . . . . . . . . . . . . . . . .8
Start-Up . . . . . . . . . . . . . . . . . . . . . . . . . . . . . . . . . . . . . . . . . . . . . . .8
Troubleshooting . . . . . . . . . . . . . . . . . . . . . . . . . . . . . . . . . . . . . . . . . .9
Table 1 - Diagnostic Codes . . . . . . . . . . . . . . . . . . . . . . . . . . . . . . . .9
Table 2 - Troubleshooting Guide . . . . . . . . . . . . . . . . . . . . . . . . . . .10
Service Parts . . . . . . . . . . . . . . . . . . . . . . . . . . . . . . . . . . . . . . . . . . . .11
1
Advertisement
Table of Contents
Troubleshooting

Summary of Contents for Aprilaire 1820
-
Page 1: Table Of Contents
Model 1820 Dehumidifier Installation Instructions SAFETY INSTRUCTIONS WARNING 1. 120 Volts may cause serious injury from electric shock. Disconnect electrical power before starting installation or servicing. Leave power disconnected until installation/service is completed. 2. Sharp edges may cause serious injury from cuts. Use care when cutting plenum openings and handling duct work. -
Page 2: Specifications
SPECIFICATIONS Model 1820 Weight 56 lbs . Capacity: AHAM DH-1-2008 80°F, 60% RH Conditions 70 pints per day @ 200 CFM Power: 115 VAC, Single Phase, 60Hz 5 .8 Amps operating current Dehumidification: 50°F – 104°F, 40°F dew point minimum Dehumidifier Inlet Air Conditions Ventilation: 40°F –... -
Page 3: Location Considerations
LOCATION CONSIDERATIONS • Allow sufficient clearance for filter removal and FIGURE 3 – Filter Access Clearance to prevent airflow obstruction • Electrical service access will require the removal of the side panel shown . Allow sufficient space for service on this side of the unit . FILTER 13"... -
Page 4: Drain Tubing And Condensate Pump Installation
INSTALLATION (CONTINUED) DRAIN TUBING AND CONDENSATE PUMP FIGURE 5 – Drain and Condensate Pump Installation INSTALLATION The drain outlet on the dehumidifier can be plumbed directly to a condensate pump (see Figure 5) using the provided 3/4” MNPT x 3/4” hose barb fitting and 3/4”... -
Page 5: Model 76 - Crawl Space Control And Wiring
MODEL 76 – CRAWL SPACE CONTROL AND WIRING NOTE: Use 18-22 AWG wire for control wiring . FIGURE 7 – Model 76 Crawl Space/ Sealed Attic (Remote) Wiring Used as a crawl space control (or remote control), the Model 76 is mounted in the living space while the dehumidifier is located in the crawl space . -
Page 6: System Set-Up, Check & Start-Up
SYSTEM SET-UP, CHECK & START-UP If using a Model 76 Remote Control and/or the Air Cycling feature, REMOTE CONTROL – CRAWL SPACE proceed to Step 1 below . If not using either feature, proceed to SYSTEM CHECK on page 7 . If not installing in a crawl space with Model 76 remote control, 1. -
Page 7: Ventilation / Air Cycling
SYSTEM SET-UP, CHECK & START-UP (CONTINUED) SYSTEM CHECK VENTILATION / AIR CYCLING If not using the dehumidifier to Press and hold the ON/OFF button periodically cycle air in the crawl and MODE buttons for 3 seconds . space, press MODE to go to ZONE The measured humidity, AIR screen selections . -
Page 8: Crawl Space Using The Dehumidifier Control
SYSTEM SET-UP, CHECK & START-UP (CONTINUED) CRAWL SPACE USING THE DEHUMIDIFIER CONTROL 1 . Press the ON/OFF button to turn the dehumidifier control ON . The display will show the current setting, and the dehumidifier blower and HVAC blower (if wired to the HVAC system) will turn on to start sampling the air . The setting will be replaced by the measured humidity and “AIR SAMPLING”... -
Page 9: Troubleshooting
TROUBLESHOOTING Technical Support is available Monday through Friday, 7:00 a .m . to 5:00 p .m . CST, at (800) 334-6011 . Use the guides on the following pages to identify and correct system faults . Contact Technical Support before replacing the unit or any components and for additional troubleshooting . DIAGNOSTIC CODES When an error occurs, the Diagnostic Code along with SERVICE REQUIRED will be displayed on the control screen . -
Page 10: Table 2 – Troubleshooting Guide
TROUBLESHOOTING (CONTINUED) TABLE 2 – Troubleshooting Guide Symptom Possible Reason Troubleshooting Procedure Dehumidifier does not No power to unit . • Check that the dehumidifier is plugged in . turn on/run . • Check that the power switch is turned ON . •... -
Page 11: Service Parts
SERVICE PARTS 90-2298 Part Description Part No. Part Description Part No. Filter, 8” x 11 .75” x 1” EZK 5695 Sensor, High Temperature, Deh 5456 Internal Control Board, Deh 5444 Leveling Foot, Deh 5457 User Interface Assembly, Deh 5445 Capacitor, 45MFD, 370VAC 5458 Wiring Access Door, AA Deh 5446... - Page 12 AprilairePartners.com P.O. Box 1467 Madison, WI 53701-1467 800.334.6011 F: 608.257.4357 Printed in USA ©2017 Aprilaire – Division of Research Products Corporation 10012343 B2207621B 9.17...
Need help?
Do you have a question about the 1820 and is the answer not in the manual?
Questions and answers