Table of Contents
Advertisement
Advertisement
Table of Contents

Subscribe to Our Youtube Channel
Related Manuals for Ravpower RP-WD007

Summary of Contents for Ravpower RP-WD007
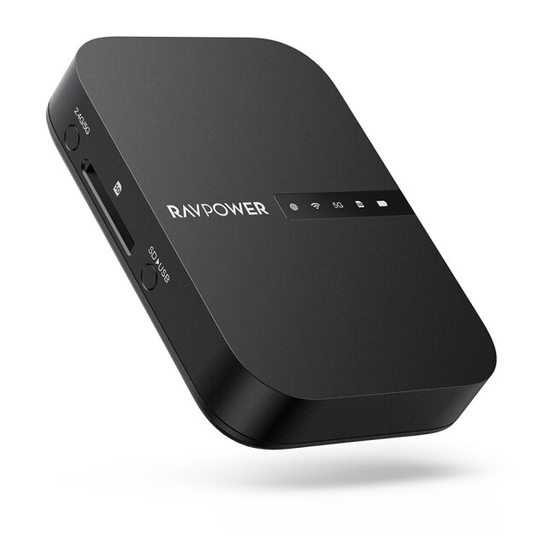
- Page 1 RAVPower RP-WD007 Advanced User Guide...
- Page 2 Thank you for your purchase of the RAVPower RP-WD007 FileHub. To get the most from your FileHub, please be sure to read all instructions thoroughly. Symbols and Conventions To make it easier to find the information you need, the following symbols and conventions are used: This icon marks notes;...
- Page 3 Package Contents Confirm that the package contains the following items: Cable RP-WD007 Quick Installation Guide...
-
Page 4: Table Of Contents
ONE KEY BACK UP (USB transfer) ........... 24 1) How to one key backup ............24 2) Files Management after Backup ..........24 3) NOTICE ..................25 Wireless Storage ................25 1) Download the APP ..............25 2) Connect the Wifi of RP-WD007 ..........26... - Page 5 3) Storage via APP ............... 29 4) Storage Via 10.10.10.254 ............31 5) NOTICE ..................33 Travel Router .................. 34 Access Point Mode ..............34 Router Mode ................34 Bridge Mode ................44 In-app Camera ................50 1) Save photos and videos directly to SD card via RAV FileHub . 50 2) How to find these picture? .............
- Page 6 Information ..................65 Admin ..................70 Guest................... 72 Network Settings ................73 Host Name .................. 74 Mac Address ................80 Region & Wi-Fi Channel .............. 81 Hide SSID..................82 Samba Service ................87 DLNA Service................88 Time Settings ................96 Wizard ..................
- Page 7 Caring for the Battery ............... 111 Troubleshooting ................112 Error Messages ................. 114 Hardware Specifications ..............115 Software Specifications ..............118 Warranty and Support ..............122 Contact ..................... 123...
-
Page 8: Getting To Know The Filehub
Getting to Know the FileHub Take a few moments to familiarize yourself with the FileHub Power Button: Short Press (1 second): Activates battery LED indicators Long Press (3 seconds): Activates Internet/LAN Battery LED Indicators: Indicates how much battery is left: 1 LED: 0-25% 2 LEDs: 26-50% 3 LEDs: 51-75%... -
Page 9: Specifications
If you long press the power button and all lights flash, the remaining battery capacity is not enough to turn on the FileHub. Please recharge your FileHub ( 110) Specifications MTK MT7628AN+MT7610E Operating System iOS, Android, Windows, macOS Battery Capacity 5200 mAh Li-ion Play Time 2.4G: 8.4 hours... - Page 10 SD Card Indicator Work Status Turns on white SD card inserted Flashes white SD card reading or writing Turns red Unable to back up or error Battary Indicator Work Status ≥ 30% Turns on white Turns on red < Fast flashes red <...
-
Page 11: Features At A Glance
Features at a Glance Wireless Sharing - Share files from the attached USB storage to smartphones, tablets, or other devices that are connect to the FileHub - Share files from a USB Hub with up to 4 USB flash drives - Connect Google Chrome cast to your FileHub and play videos and music on your connected USB storage through Chrome cast to the big screen. -
Page 12: External Battery Pack
External Battery Pack - 5200 mAh external battery charger capable of charging most smartphones 1-2 times. 5G Hz - Upgraded 300Mbps Wi-Fi speed on 2.4GHz band and up to 433 Mbps on 5GHz.Instantly convert a wired network to wireless network. And bridge and extend WiFi, share internet securely with others. -
Page 13: Configure The Filehub
Configure the FileHub Connection The FileHub WD007 can create a local wireless network (without internet access). Central functions are performed through the local network. To connect the FileHub wirelessly, please follow the steps below: Note: Example below shows Android OS 1. - Page 15 3. Select RAV-FileHub-2G-A2DC.
- Page 16 4. Enter the default password: 11111111, and click Connect. The same process applies for iPhone and other Smartphones when connecting the FileHub to local Wi-Fi. 5. Open Browser, enter 10.10.10.254 in the URL box.
- Page 18 6. Log in with default user name: admin, no password by default. 7. Then you will be prompted to the Setup Wizard. The wizard only helps you to connect your FileHub to the Internet. To get more usage, please visit to get the full guide.
- Page 19 and enter the password. 10. Click Next, then you can change the default FileHub Wi-Fi SSID and password to what you want. To get more information about the Wi-Fi & LAN settings, please click...
- Page 20 11. Click Next and then you can change the password of the admin account.
- Page 21 12. Click Next, you will then be prompted to wait 2 minutes while the system reboots. After the system has successfully rebooted, please reconnect to the FileHub wirelessly. Your FileHub will now connect to the Internet. The Wi-Fi LED indicator will turn to green.
- Page 22 If you change the SSID and password of the FileHub, you may need to forget the password of the FileHub from your phone first.
-
Page 24: More Filehub Features
LED light will not flash. (Identify the device ready) . 3.When the LED light is not flash please keep press the button “ SD»usb ” about 5 seconds until the LED light is flash again.( Now RP-WD007 is reading your SD card.) 4. -
Page 25: Notice
1) Download the APP You can create your own wireless personal media sharing center. Download the "RAV FileHub " app from the Apple App Store or Google Play first. You may also download it from the RAVPower website: www.RAVPower.com Example: Android... -
Page 26: Connect The Wifi Of Rp-Wd007
(supported formats: NTFS/FAT16/FAT32, up to 4TB) into the USB port of the FileHub, then switch on the FileHub. RP-WD007 supports a USB hub with up to 4 USB devices (2 hard disks max) 2. Download the app RAV FileHub from Google Play to your Android phone. - Page 27 RVA-FileHub-2G-A2DC. 5GHz MODE Please keep press the Wifi button on the left side until the 5G LED light is on, then you can use your phone to connect the Wifi RVA-FileHub-5G-A2DC.
- Page 28 Or you can turn on both 2.4GHz and 5GHz MODE...
-
Page 29: Storage Via App
3) Storage via APP... - Page 30 1) Use your phone/ipad download our app “RAV FileHub”. 2) Turn on RP-WD007, and plug into your SD card and flash drive/Hard drive, make sure the LED light of SD card and Wifi is turn on and stable. 3) Use your phone/Ipad/laptop to connect the Wifi of Filehub, (or the device will show device is not connected) 2.4 GHz...
-
Page 31: Storage Via 10.10.10.254
“cope to” “delete” “share” “more”(Move to, Rename). 5. Now you can cope or move your file on SD card, flash drive/Hard drive 4) Storage Via 10.10.10.254 1) Please connect the wifi of RP-WD007, 2.4 GHz RVA-FileHub- 2G-A2DC or 5GHz RVA-FileHub-5G-A2DC. - Page 32 2) Access 10.10.10.254 via your browser. Login with the default user name “admin” and leave the password field empty. (The username and password are the same as the key you use to login to the admin configuration page 10.10.10.254). 3) Click Explorer and select the file you want to move or cut.
-
Page 33: Notice
4) You need to connect network if you want to share the file. If you need specific instructions for the RAV FileHub app, please refer to the instructions listed on the RAVPower website www.RAVPower.com... -
Page 34: Travel Router
Travel Router Similar settings can also be performed on any Mac, or on mobile devices such as phone, tablet, etc. Access Point Mode Example: Android FileHub will automatically become an access point once you: 1. Power on the FileHub. 2. Plug a network cable from a well-established router to the FileHub, and wait for the blue Wi-Fi indicator light to stop flashing and remain steady. - Page 35 5. Click Settings, then select Network Settings.
- Page 36 6. Select Internet, choose Wired Access.
- Page 37 The FileHub provides Dynamic IP, Static IP and PPPoE for router setup. Please consult with the network administrator or refer to the wired network user documentation for best selection. If using DSL Internet, please enter the PPPoE username and password and click Save.
- Page 39 The FileHub will now connect to the Internet.
- Page 41 If a static IP address has not been issued by the network provider please request the information from the network provider. The given static IP fields (including network mask and gateway) must also be set to the router. Click Save. The FileHub will now connect to the Internet.
- Page 42 cable is connected securely. Loose cables are one of the most common reasons for network setup problems. If a wired network type cannot be chosen, an alternative method is available to set up the router mode: 1. Connect the computer directly to the wired connection with an Ethernet cable.
- Page 43 4. Connect the FileHub to the wired connection with an Ethernet cable 5. Login 10.10.10.254 6. Click Settings → Network Settings...
-
Page 44: Bridge Mode
7. Select Internet , then choose Wired Access and Static IP from the drop-down list 8. Enter into the IP field the same IP information assigned by the wired network. Click Save The FileHub will now connect to the Internet. Bridge Mode Definition: The router borrows an existing wireless Internet and broadcasts it using a different network name (SSID) and password. - Page 46 5. Select your wireless network (e.g. OpenWifi), enter the corresponding password. Click Save. The FileHub will now connect to the Internet.
- Page 47 FileHub can store the connected Wi-Fi.
- Page 48 FileHub can connect to a hidden SSID. 1. Open the SSID drop-down list. Click Other network…. 2. Enter the SSID and password, click Save. Wait a few seconds. The FileHub will connect to the hidden SSID.
- Page 49 Configuration #2: The setting applies to wireless networks that need a username and password to connect or use a Terms of Service agreement. 1. Get the user name and password of the Wi-Fi (if necessary). 2. Connect your phone to the FileHub wirelessly.
-
Page 50: In-App Camera
3. Open browser and log in 10.10.10.254. 4. Settings→ Network Settings → Internet, choose Wireless Access, click Scan to select the Wi-Fi, then leave the password empty, click Save. 5. Open another page of the browser, the authorization page will pop up, then login with the username &... - Page 51 APP: File Management-SD Card-Camera-XXX’s phone- photos/videos 10.10.10.254: Explorer-SD Card-Camera-XXX’s phone- photos/videos...
-
Page 52: Media Streamer & Sharer
3)Select the Media Streamer & Sharer 1) Share Files Access your movies, music, and photo at home or on the road when you connect up to five different devices to the unit via local Wi-Fi network. Make sure all device are connect with RVA-FileHub-2G-A2DC or RVA-FileHub-5G-A2DC. -
Page 53: Hotel Wifi Share
When you connected the wifi of RP-WD007, then you can wireless Storage (copy or move) the file on SD card and flash drive/Hard drive to your phone which means everyone can choice the photos they love and copy it to their phone via our app when traveling. -
Page 54: Authentication Wifi
1) Please connect the wifi of Filehub first and then use your device to connect local network. And then you can use guest device to connect the wifi of Filehub. 3) Authentication wifi page setting Via 10.10.10.254 Bridge Mode - ask hotel front desk to get the wifi user name and password of your room - connect your phone to Filehub, login its website 10.10.10.254 - Setting ->... -
Page 55: System Tools
System Tools Language At the login page, you may change the language... - Page 56 And select the account Guest can only visit the content of the folder “Share” which is created automatically on your USB storage. You can put the files that you want others to view into this folder. The guest can edit the password of the...
-
Page 57: Symbols
guest account. Symbols How much battery is left Not connected to any Internet network Connected to the Internet Click to redirect to the main page Click to go back to the last page Click to log out of the admin page... -
Page 58: Main Page
Main Page Videos/Photos/Music/Documents show the contents of the DLNA folder... -
Page 59: Explorer
Explorer It shows the contents of the USB storage attached to the FileHub Example: Windows 7/Firefox... - Page 60 Here you may view the pictures:...
- Page 61 Play music:...
- Page 62 Watch videos: Videos will be downloaded to your computer then open in the player you select. If you open videos on your phone or tablet, the supported formats of your phones/tablets can be opened directly. If your phone doesn’t support the formatted video, it will be downloaded to your phone:...
- Page 63 Here are some basic functions to manage your USB storage:...
- Page 64 To refresh the display To create new folders on your external USB storage device To copy files and paste them into another folder To move files and paste them into another folder To rename files or folders To delete files To upload the files in your PC/Laptop to the Upload USB external storage device...
-
Page 65: Information
wirelessly connected to your FileHub Information The information of your FileHub and the USB storage device can be checked here. Login 10.10.10.254 →Settings→ Information... - Page 67 Click Device to view the FileHub information.
- Page 68 Serial Number: Refers to which batch your FileHub belongs to. This is the same as the serial number (S/N) labeled on the bottom of your FileHub. When you have some problems with your FileHub, providing the serial number to our Tech Support will help to solve the issues. Click Storage to view the information of the USB storage attached to the FileHub.
- Page 69 You may click Delete to eject your USB device.
-
Page 70: Admin
User Settings Login 10.10.10.254, Settings →User Manager Admin Select Admin. Here you can change the password of the admin account. Enter your new password, click Save. - Page 71 Note: If you forget the new password, you will have to reset the FileHub to factory settings to enter 10.10.10.254...
-
Page 72: Guest
Guest Click guest, then click to enable or disable the guest account. You can also set the password of the guest account here. -
Page 73: Network Settings
Network Settings Log in 10.10.10.254, Settings → Network Settings... -
Page 74: Host Name
Host Name FileHub host name can be changed here: Select Host Name, enter the new host name, click Save... - Page 75 Now the host name has changed.
- Page 76 SSID Settings To change the SSID name and password of FileHub, please follow the steps below: Select Wi-Fi & LAN...
- Page 77 2. Enter your new SSID name and password. Click Save 4. After changing the SSID and Password, your phone will lose the connection to your FileHub. You have to reconnect your phone to FileHub...
- Page 79 If you only changed the password, the FileHub will lose the connection to your phone as well. And you have to click the FileHub SSID to Forget Network then reconnect to FileHub, because generally your phone can store the connected WiFi. Example: If you only change the password for 6D22, FileHub loses the connection to your phone.
-
Page 80: Mac Address
different button to Forget Network. Then reconnect it with new password Mac Address This is the Mac address of FileHub LAN itself. If your home router has a Mac filtering, please add the FileHub MAC address to the white list of your router. -
Page 81: Region & Wi-Fi Channel
Region & Wi-Fi Channel You may manually set the Region and Wi-Fi Channel... -
Page 82: Hide Ssid
And change the Security type (default: Mixed WPA/WPA2-PSK): Hide SSID Click... - Page 83 you may hide/unhide the SSID. If you hide the SSID, others cannot search your FileHub. If you would like to hide your SSID, please make sure you have set up the network setting (wired/wireless) previously, otherwise you will lose the connection to FileHub, and will need to reset the FileHub to restore the original settings.
- Page 84 DHCP Settings Click you may enable/disable the DHCP server. If you turn off the DHCP server, FileHub will NOT assign an IP address to your wireless device therefore making them unable to connect to the FileHub. The IP address from your wireless device needs to be inputted manually.
-
Page 87: Samba Service
Service Settings Click 10.10.10.254 → Settings → Service Settings Samba Service Provide shared services to files and printers for clients on the Microsoft Windows Network and Unix-Like Network. Default status is ON. -
Page 88: Dlna Service
DLNA Service FileHub also supports DLNA service (if you need to change the settings of DLNA, a USB storage device should be attached to the FileHub):... - Page 89 The default name: DLNA-FileHub-XXXX Default directory: WiFiDisk1_Volume1/Media Directory Server Example: DLNA Name changed to 6D22 and the directory changed to June.
- Page 90 Switch DLAN Service to ON, then click Add. Tap on the folder and click to change the directory.
- Page 92 Now go back to the main page, the sections will show the contents of the folder that you set for the DLNA directory.
- Page 95 System Settings Login 10.10.10.254, click System Settings...
-
Page 96: Time Settings
Time Settings Time Zone Click Time Zone to change the time zone for your FileHub. Default time zone is the same as the setting of your device. - Page 97 If you turn on the auto sync time server, you may set the sync frequency or you can sync now.
- Page 98 And here you can manually set the time for the FileHub.
- Page 100 Firmware Upgrade Here you can view the current version of the firmware of your FileHub. From here you can upgrade the firmware. To upgrade the firmware, please follow the steps below: 1. Download firmware from RAVPower website: https://www.ravpower.com/filehub-5G-wireless-travel-router-5200mah- portable-charger.html...
- Page 101 2. Unzip it. 3. Insert a USB storage device into your FileHub (e.g an external hard drive or a USB flash drive). 4. Connect to the FileHub via wireless. 5. Open a browser and enter 10.10.10.254. 6. Settings →System Settings→Firmware Upgrade→Browse, Browse and select the file.
- Page 103 7. Click Firmware Upgrade.
- Page 104 You will be prompted to wait 5 minutes while the system updates. After the system has updated, you will have successfully updated the firmware.
- Page 105 Factory Default There are two ways to reset the FileHub: 1. Hard Reset: Use a needle-like object to press the reset button found next to the USB port; hold for 10 seconds until the Wi-Fi indicator LED blinks, release it and wait for it to reboot.
- Page 106 Please ensure your FileHub has at least 50% power left (2 blue LED lights) before resetting This will reset all configuration settings to their default values. The default SSID Name: FileHub-XXXX The default SSID Password: 11111111(8 x 1’s) The default User Name: admin The default Password: blank (leave it empty) All changed settings will be restored to their factory default settings...
-
Page 107: Wizard
Wizard Click Wizard, you will be directed to step-by-step basic configuration guide. Guides you to set the FileHub up from beginning. -
Page 108: Battery Backup
Battery Backup FileHub RP-WD007 has an internal 5200 mAh battery, which you can use to charge your devices on the go. Charging the FileHub Start charging the FileHub when the remaining power is less than 25%. This will ensure your external charger is ready for emergency situations. -
Page 109: Charge Devices
Charge Devices To charge your device: Plug the USB end of the charging cable into one of the USB ports on the FileHub. Connect the micro-USB end of the cable to your device. After a few seconds, charging will start automatically. ... -
Page 110: Caring For The Filehub
Caring for the FileHub Storage When the FileHub will not be used for an extended period, store it in a cool, dry area with the terminal cover in place. To care for your safety, do not store your FileHub in locations that: •... -
Page 111: Caution
Caution Do not drop: The product may malfunction if subjected to strong shocks or vibrations. Keep dry: This product is not waterproof, and may malfunction if immersed in water or exposed to high levels of humidity. Caring for the Battery Observe the following precautions when using the FileHub: ... -
Page 112: Troubleshooting
Troubleshooting If the FileHub fails to function as expected, check the list of common problems below before consulting a RAVPower representative. Q: Why can’t I connect to the FileHub after changing the SSID password? A: Please forget the password of the FileHub on your phone 80. - Page 113 internet access.
-
Page 114: Error Messages
Error Messages Indicator Solution Wrong file format Change a USB device, or change a browser to upgrade the firmware No available space Plug a USB storage device (NTFS/FAT16/FAT32) into the FileHub Battery charge is critically low. Recharge the FileHub Device will shut down in 30 seconds Operation failed... -
Page 115: Hardware Specifications
Hardware Specifications Project Name RAV FileHub Model name Model MTK MT7628+MT7610E Frequency MIPS24KEc 580MHZ Flash Capacity SPI Flash16MB (128Mbit) SDRAM Capacity DDR264MB (512Mbit) LED light to show the battery status right Battery LED after power on: WiFi LED WiFi LED shows the system initiating state and WiFi Mode: Start flashing: Kernel loading in process Stop flashing: System initiation completes... - Page 116 WiFi Mode Push above 3s to WiFi Mode switching: button 2.4GHz -->5GHz-->5GHz & 2.4GHz - ->2.4GHz Back up button Push to start data copy (back up) from SD card to USB HDD. SD Card SD Slot External SD Card, Support to SDXC 2TB USB device TypeC connector Charging port and PC interface(TypeC...
- Page 117 Environmenta Operating Temperature: 5° C to 35° C l requirements Non-Operating Temperature: 0° C to 60° C Operating Humidity: 5% to 90% (Non-condensing) Non-operating Humidity: 5% ~ 90 % (Non- condensing) Product 90mm L x 78mm W x 23mm H dimension Emission MIC, PSE, VCCI...
-
Page 118: Software Specifications
Software Specifications System setting Language To select your native languages selection Firmware Automatically upgrade firmware upgrade Factory default To restore default system setting setting restore originated in factory production File system NTFS Support Microsoft Windows NTFS file system FAT16/FAT32 A) Support FAT16/FAT32 File System B) Application Tools: FAT file system check and repair tool exFAT(Optional) Both support Microsoft and Mac®... - Page 119 terminal for easy management WebDAV Makes the Web a readable and protocol writable medium which allow users to edit and manage documents and files stored on World Wide Web servers Access control Password A) Wi-Fi access control: protection None ...
- Page 120 Network side A) Static IP Management setting B) Dynamic IP LAN side setting Local IP setting Subnet mask setting DHCP server setting Default gateway setting Default DNS setting 2.4G Wi-Fi A) Wi-Fi mode setting Setting B) Wi-Fi basic setting C) Wi-Fi security setting 5G Wi-Fi Setting A) Wi-Fi mode setting...
- Page 121 jpg,tiff,bmp,png E) Document: Support formats of keynote,word,excel,ppt,pdf,txt (Invoke third-party app to open ) Android Client A) Audio: Support formats ofMP3 、 、 、 , Video: 3gp MOV,MPG,RM,RMVB,AVI,M4V, TS,FLV,VOB,M2TS,DIVX,WMV Photo:Support formats of 、 jpg,pngbmp tiff D) Document:Support formats oftxt,word,excel,ppt, pdf (Invoke third-party app to open )
-
Page 122: Warranty And Support
Warranty and Support This RAVPower RP-WD007 FileHub is covered with the RAVPower 12 month warranty from the date of its original purchase. If the RAVPower RP-WD007 FileHub becomes defective during its warranty period, please contact RAVPower or your seller for warranty cover. The following are not covered by our warranty: ... -
Page 123: Contact
Contact If you have any concerns and enquiries about RAVPower products and services, please contact RAVPower support team via any of the following methods. NORTH AMERICA Tel: 1-888-456-8468 Tech Support: 408-627-7503 (Monday-Friday 9:00 – 17:00 PST) Address: 2228 Junction Ave, San Jose, CA 95131 E-mail: - support@RAVPower.com...
Need help?
Do you have a question about the RP-WD007 and is the answer not in the manual?
Questions and answers