Table of Contents
Advertisement
Advertisement
Table of Contents

Related Manuals for Iteris VersiCam

Summary of Contents for Iteris VersiCam
- Page 1 Part Number 493432201 Rev. F...
- Page 2 All rights reserved. No parts of this work may be reproduced in any form or by any means - graphic, electronic, or mechanical, including photocopying, recording, taping, or information storage and retrieval systems - without the prior written permission of Iteris, Inc. Products that are referred to in this document may be either trademarks and/or registered trademarks of the respective owners.
- Page 3 Software Limited Warranty For a period of three years from the date of delivery of the System to the purchaser, Iteris warrants (I) that the Software will conform, in all material respects to the functional capacities described in the Documentation, provided that the Software is used as instructed;...
- Page 4 Software upgrade will be made and what constitutes a general release of such upgrade as opposed to a limited release. Iteris does not imply or guarantee that a general Software release will be made during the term of this Agreement. Any such Upgrade shall be subject to the terms of this Software License Agreement, but shall not extend the original term of this warranty.
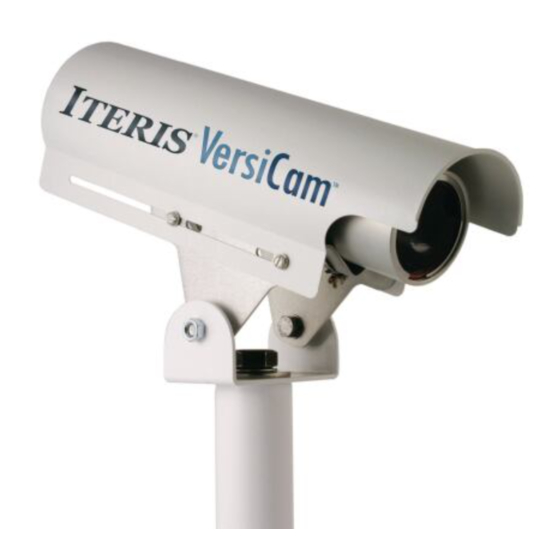
- Page 5 1. INTRODUCTION Powerful yet affordable The Iteris VersiCam is a complete video vehicle detection solution that is a cost effective replacement to inductive loops and other sensor technologies for many smaller intersections. Other applications include advance detection, highway, ramp metering, and construction-work zones.
- Page 6 Menu button, a monitor and a USB mouse to access the VersiCam system menu. Veteran Edge2 users will be pleasantly surprised to see the menu layout for the VersiCam is almost identical to the Edge2 processor, only scaled back to account for the smaller function subset. VersiCam users will enjoy the same signature Vantage ease of use and detection performance as users of the more feature rich Edge2 video detection system.
-
Page 7: Tools And Equipment
Refer to for specification of the IMSA cable. Section 10: Technical Information Note: Tools Required for Installation The following tools are required for installation of the VersiCam system: • Various Screwdrivers • Adjustable Wrench and Nut Drivers • Wire Strippers and Wire Cutters •... -
Page 8: Quick Start
User Guide 2. QUICK START This section is a highly abbreviated outline of the processes involved in drawing a vehicle detection zone. The topics following this quick start section will cover the process in greater detail. It is strongly recommended that the user take the time to read all the sections to become thoroughly familiar with all the system details. -
Page 9: Installation Process
Connect the monitor and mouse to the ICC Module. • Press and hold the ICC Module "Menu" button in for approximately one second and then release it. This will bring up the VersiCam main menu. Camera Field of View (FOV) •... - Page 10 User Guide Examples of Poor FOVs Ideally, the camera should be zoomed in until a minimum of 4 lanes are visible, the horizon should not be included as a part of the field of view. The zones should be drawn within the lane lines and should be the size of a medium vehicle.
- Page 11 User Guide clicking the mouse after moving the cursor up or down to the desired zone parameter. Click the middle mouse button to make a selection and exit out of each zone option item. When you are finished making zone parameter changes, position the mouse cursor over "Exit"...
- Page 12 User Guide Examples of Good Zones Programming • Labels: Camera, Configuration, Zones • Check using Mode (MOD) menu item Channel Assignment and Zone Type • Set Mode (MOD) 'Inact/Ch to "NoCall" • Set Options if needed • Set Clock (Clk) Time and Date information •...
- Page 13 User Guide Menu Tree...
-
Page 14: Camera Installation
User Guide 3. INSTALLATION The VersiCam system is composed of two distinct components, the Camera Processor unit and the ICC module which is located in the traffic control cabinet. The Camera Processor unit and the ICC module communicate over twisted pair cable. The cable transmits data and provides power from the ICC module to the Camera Processor unit. - Page 15 Use of mismatched pairs and wires can lead to installation issues and possible damage to the VersiCam equipment. Also make note of which wire pairs are being used for what purpose i.e., camera power, video, or communication.
- Page 16 User Guide Cord Grip Strain Relief Plug Pushed Over Cable Remove the cable cord grip cap and grommet from the assembly by unscrewing it. Install the grommet and cap on the cable and push the prepared cable through the cord grip body approximately four inches as shown below.
- Page 17 If you are still unsure about the best camera mounting location, you can always contact your local Iteris Dealer or call Iteris Product Support for recommendations on optimal camera mounting for your application.
- Page 18 Snug the center bolt and the two side camera mount bolts down temporarily. Final camera aiming will be done during the Field of View (FOV) setup procedure and all bolts will be permanently secured then. Camera Installed on Pedestal Bracket The ICC Module The VersiCam ICC Module...
- Page 19 If the VIDEO IN OK LED still fails to illuminate or blinks, contact your local Iteris Dealer or Iteris Product Support Team for assistance. Also see the section on the VIDEO IN OK LED in the ICC module installation section for more information.
- Page 20 User Guide ICC Module Configuration Switches There is a set of configuration DIP switches located on the top side of the bottom board of the VersiCam ICC module as is shown in the following pictures. Screwdriver Pointing to the DIP Switches On VersiCam Module Close Up of the DIP Switches Both Shown in the "ON"...
- Page 21 User Guide ICC Module Wire Terminations There are two sets of wire terminations that must be made on the ICC module. One multi-conductor cable will be used for video, communication, and camera power. A second cable will be used for ICC module power.
- Page 22 User Guide Insert the ground lug connector bottom on the opposite side that you cut the slit in the cable sheath. The lug should be inserted between the core wrap and copper corrugated shield. Install a ground wire, 14 gauge or larger, to to the post on the grounding lug and then place the connector top over the the post and secure it in place using one of the nuts provided.
- Page 23 ICC Module AC Power Requirement The VersiCam ICC module requires AC power which can be supplied by the plug on the front faceplate or can be supplied from the back of the module on pins L, M, and N. If AC power is available from the rack on pins L, M, and N, the front panel connector is disabled.
- Page 24 User Guide ICC Module Installation Logic Level Optoisolated Contact Open Collector Outputs The ICC module is designed to be installed in a standard NEMA TS-1 or TS-2 detector rack or in a standard 332 cabinet type detector input file. To the rack, the ICC module looks like a two channel detector loop amplifier. Though the ICC module foot print takes up two rack spaces like a four channel loop amplifier, the output board edge connector only plugs into one of the detector rack slots - the slot on the right.
- Page 25 See the surge protection device manufacturer’s recommendations for more specific information. Also, make sure the surge protector is oriented correctly. The "field" side should come from the VersiCam camera, while the "protected" side should go to the ICC Module. Reversing these surge device connections...
- Page 26 User Guide Field Of View Setup The image provided by the camera is critical to system performance. A good field of view (FOV) will ensure the best possible results from the system. The following should be kept in mind when adjusting the camera: •...
- Page 27 User Guide Four Lane Minimum Width Ideally, the camera should be zoomed in until a minimum of 4 lanes are visible, the horizon should not be included as a part of the field of view. The zones should be drawn within the lane lines and should be the size of a medium vehicle.
- Page 28 User Guide Proper Mounting Height – The camera should be mounted at approximately 30 feet for optimal system performance. For lower mountings, like a mast arm mount, a suitable camera extension bracket should be used to increase the camera mounting height to a more workable elevation. A camera mounting height of 25 feet or more can usually be obtained by using an extension bracket.
- Page 29 User Guide Pull the visor forward – You should have the camera sun shield (visor) far enough forward to give the camera maximum protection from the sun. By loosening the two hose clamp set screws, the camera body can be moved backward in the clamps, effectively lengthening the sun shield visor.
- Page 30 User Guide...
-
Page 31: System Configuration
Lane Structure Background: Starting with firmware revision 08.01.15SP1 VersiCam processors take advantage of a lane zone structure. The lane zone structure tracks vehicles as they travel through the zones. The lane structure helps to detect vehicles better and reject false calls due to shadows. The lane structure extends in front and behind of the existing zones for greater tracking coverage. - Page 32 User Guide This figure is an example of the Lane Zone Structure. Detection zones are drawn in yellow. The lane zone structure created by the system is shown in red. In certain intersection control applications only certain lanes may be needed for traffic ...
- Page 33 User Guide Zones Placement and Size Problem Zone Example Pay particular attention to zone detail number five, the zone located on top of the large white truck on the left. Notice that the roof of the truck is what primarily fills the detail number five zone area. The white truck roof has very few edges, and in this simulated situation, the truck call might be dropped if the truck were to stop in this position.
- Page 34 User Guide Zone Types The "Type" option in the ADD and EDIT menus allows the user to specify the type of detection to be used for a particular zone. Several types of detection are available and are defined below. PRESENCE (PR) (Default) – places a call while a vehicle is in the zone. When the vehicle exits the zone the call will be dropped.
- Page 35 User Guide Low Contrast zones in reality there are many other low contrast conditions other than fog. Note: Because of this, the decision was made to change the name to "Low Contrast Zones" or just "LC" to better reflect their true operation. From this point forward the term "Low Contrast" zones will be used interchangeably.
- Page 36 User Guide Improper Low Contrast (LC) Zone Placement In the picture, the Low Contrast zones numbered one and two that are located on top of the signal head and the LC zone number nine on the pole would all be poor choices for LC zone placement. Though these LC zones meet the majority of the necessary criteria for LC zones including, correct size, they are located in the top 1/3rd of the field of view, and they have been placed on an area of contrast;...
- Page 37 User Guide Demand and Passage Zones These two zones types are used in combination they are used in heavily congested traffic lanes only. During heavy traffic when vehicles occupy zones for a long period of time the processor may learn the vehicles as part of the background.
- Page 38 User Guide COUNT SPEED OCCUPANCY (CSO) – These zones are similar to count zones. They collect extra data splitting the count into small, medium and large vehicles and also estimating average speed and road occupancy per Bin Interval. Achieving Vehicle Separation & Placement •...
- Page 39 User Guide • Key: The camera in this illustration is mounted on the signal mast arm centered over the three lanes of departing traffic. • The CSO zone has to be programmed down for it to collect data. When installing a camera to view departing traffic the camera must be rotated 180 degrees so that the vehicles enter the zone from the top to the...
- Page 40 User Guide Vehicle Lane Zones If you need to detect bicyclists in vehicle lanes first draw the regular vehicle detection zone. Please follow all the recommendations for zone drawing outlined in the this manual. Once the vehicle zone is drawn, place a bike zone inside this zone.
- Page 41 User Guide Bicycle detection active in the vehicle lane TIMING – The Extend, Delay, and Pulse zones all have user programmable timing. To set the Note: timing for these zone types, either click both left and right mouse buttons simultaneously, or push the middle mouse button.
- Page 42 The following sections cover each item on the VersiCam processor main menu. To bring up the VersiCam main menu bar, push the Menu button for more two or more seconds and then release it. The VersiCam processor main Menu bar will appear on the screen.
- Page 43 User Guide Menu Screen on VersiCam Processor The user is presented with an on screen keyboard whenever any text editing field is available. Note: The fields that can be edited with the onscreen keyboard are zone label, camera label, config label, camera cycle and unit id.
- Page 44 User Guide Add Menu This menu option allows the user to add new detection zones. The user will select the desired zone parameters and then create the new detection zone by placing each of the detection zone corners. For instructions on how to draw zones, see the "Drawing Zones" section of this document. You can define up to 8 detection zones on the system.
- Page 45 User Guide Detector Type (Type) - This setting allows you to select the type of detection zone to create. There are several different zone types available. Detection Zone Function Type PRESENCE Places a call as long as vehicle is in the zone. EXTEND Extend the vehicle call for a programmable length of time.
- Page 46 User Guide Correct AND/W Setup Example In the above example please notice that the And/W value number of the child zone is set to the detail number of the parent zone. Also notice that the channel output (Ch/Out) of the child zone is set to NONE. It is also of interest to notice that the parent zone is set up like any other zone, all the changes were made to the child zone.
- Page 47 Channel Designators: PROC: 1, PROC: 2 Exit - Click on this option to exit out of the Add menu and return to the main VersiCam menu bar. Edit Menu The "Edit" option on the VersiCam menu brings up all the zone parameters for a specified zone. Click on "Edit"...
-
Page 48: Delete Menu
Note: VersiCam main menu bar and save your changes to a configuration. If you fail to perform this step your zone changes will not be saved. For a detailed description of each of the parameters in the detail menu, refer to the Add ... - Page 49 User Guide Load Menu The "Load" option (Lod) allows the user to load previously saved configurations. To Load Factory Defaults – Left click “Lod” and left click on “Factory Default”. A warning message will appear, “Reset system to factory default? Yes No”. Left click on “Yes”. This will clear all zones, unit id, camera labels, alarms, TOD schedules, options, com port parameters and restore them to factory default settings.
-
Page 50: Camera Menu
User Guide Camera Menu The "Camera" menu allows the user to change various camera specific settings on the system. Camera Label Customization – The saved "Camera Label” is user customizable. The default designation is: "1 Camera, 2 Camera, 3 Camera, 4 Camera, however, this can easily be changed. Camera names can be up to 10 characters in length. -
Page 51: Mode Menu
SYNC - This is a flag indicating that the system has video sync. 4.10 Mode Menu The "Mode" option menu includes the following functions and system information. When calling in with technical questions about your VersiCam, many times you will be asked Note: what firmware version your system is running. - Page 52 User Guide Zone Label and Zone Detail Number Example Showing Reference by Zone Type The zones in the picture are being referenced by "Zone Type". PR = Presence Zone DL = Delay EX = Extension BI = Bike CSO = Count Output Channel (Out / Ch) - This parameter determines how the output channels will function.
- Page 53 User Guide NOCALL - This is the default setting and is most commonly used during normal operation. The "NOCALL" setting will cause all unused channels not to place any calls. CALL - If this setting is selected, then all unused channels will place constant calls. Output Channel and Inactive Channel are two settings that cause new users problems when ...
-
Page 54: Clock Menu
User Guide 4.11 Clock Menu The system "Clock" option menu includes the following functions: It is important to set your VersiCam system to the correct time and date, because the system Note: makes use of this readily available information. It is also essential for getting proper and accurate time stamps if you decide to collect any count data. - Page 55 The VersiCam will store this count information in flash memory. Bin Last - This function, when turned "On", displays the last count bin data for the count zone selected in the "Bin Zone"...
- Page 56 Clock Display – Turns the Real Time Clock display on or off. Iteris Logo – This gives you the option to turn the Iteris Logo display on or off. The default is set to on. Exit - This function exits the Utility option menu and returns the user back to the main menu bar.
- Page 57 This can either be in real time connected to an VersiCam system or ahead of time saving the configuration to the PC’s hard drive for upload to an VersiCam at a later date. Complete details of operation of VRAS can be found in the manual that accompanies the software.
-
Page 58: Operation
Note: VersiCam firmware version at the time of this manuals publication. The following section is somewhat firmware dependent and may change in future firmware versions. Always refer to the current Vantage firmware release notes for the latest information on Vantage firmware features and operation. - Page 59 The buffers collect specific information about the intersection and allow the Vantage system to operate in a more intelligent manner. Typically, an even greater level of system operational stability is achieved after both buffers have been filled. If power is disrupted to the VersiCam Camera Processor module all the buffers will be reset.
-
Page 60: Learn Mode
S3 mode. Learn Mode Learn Mode is the mode that the VersiCam camera processor uses while it is learning the zone background and your field of view. During the "Learn Mode" the VersiCam camera processor places constant calls on the channels associated with the zones that have changed. - Page 61 Loss of Video - If video and video sync. is lost, the associated camera and all of its assigned zones will place constant vehicle calls. Loss of Power - If power is lost to the VersiCam camera processor unit, it will place constant vehicle calls on all channels.
-
Page 62: Troubleshooting (Faq)
Check the coax flex cable that goes from the processors video out to the monitor. Check the monitors operation. Does the monitor have power? Try a different monitor. If the video cable and the monitor are good then the fault lies with the processor. Send the VersiCam in for repair. - Page 63 Power cycle unit and go to the utilities menu and do a bin reset and log reset. iii. Upgrade VersiCam to latest firmware version. iv. If these steps fail to remedy the situation the VersiCam maybe bad and needs to be sent in for repair. Symptom E: System has constant calls.
- Page 64 Symptom K: The video on the monitor looks too bright. Adjust the brightness and contrast controls on the monitor. ii. If these steps fail to remedy the situation the VersiCam maybe bad and needs to be sent in for repair. Symptom L: The video on the monitor looks dark.
- Page 65 User Guide iii. If these steps fail to remedy the situation the VersiCam camera maybe bad and needs to be sent in for repair. Symptom M: After a power cycle my system the time resets to 01-01-2000 and bin data is lost.
- Page 66 User Guide Symptom P: Bike False Calls There may be occasions when false calls occur in the bike zone at the stop bar closest to the sidewalk caused by right turn vehicles. To help overcome this, extend the bike zone half way into the next vehicle lane.
-
Page 67: Vantage Software Upgrade (Vsu)
Vantage Software Upgrade Program Installation Procedure Before upgrading firmware in the Edge2 processor the Vantage Software Upgrade Tool must be installed on your PC. • Download the VSU program file from the Iteris Resource web page. • Unzip the file. •... - Page 68 Setting up Administrator Privileges Launch the Vantage Software Upgrade Program. The Upgrade program is found in the C:\Program Files\Iteris, Inc\Vantage Software Upgrade Program directory. The program will display a splash screen for a few seconds and then show the beginning form.
- Page 69 User Guide Vantage Software Upgrade Program beginning form Setup comm. port parameters. Under the “file” menu select “properties” or click on the icon. Communication Properties Select the serial communications port you wish to use and click on “OK”. Connect serial file transfer cable (null modem cable) from the computers DB9 RS232 port to the Vantage processor’s DB9 RS232 port.
- Page 70 User Guide Under the “Call” menu select “Connect” or click on the icon. To start the upgrade, click on “Upgrade” and then “Start Upgrade” or click the icon.
- Page 71 If no firmware choices exist at this point, firmware files must be installed. Note: Firmware Upgrade Choices Now the VSU process begins. The VSU program automatically saves the current configuration to a file named “VSUUpgrade.vcf”. This file is located in the VSU directory “C:\Program Files\Iteris,...
- Page 72 User Guide Inc\Vantage Software Upgrade Program\”. Vantage Software Upgrade Program begins to send a file to the processor. This process may take several minutes. Vantage Software Upgrade progress bar The progress bar shows what percentage of the file has been sent. You may see one, two or three progress bars appear during the VSU process.
- Page 73 Under the config menu there are two choices “send config” or “save config”. To save a configuration select “save config”. Choose a name and click on “save”. The config file is stored in the “C:\program files\Iteris Inc\Vantage software upgrade program” directory. These saved configuration files are compatible with VRAS.
- Page 74 Always make sure you are using the correct file transfer cable as described earlier in this section. If the wrong cable is used, you will not be able to connect to the VersiCam system and transfer data effectively. Make sure the correct comm. settings are set in the VersiCam system before attempting to upgrade firmware using the VSU program.
-
Page 75: Maintenance
Firmware Upgrades Approximately once a year, Iteris releases new firmware upgrades for its Vantage products. By using a program called Vantage Software Upgrade (VSU) you can update to the latest firmware into your Vantage product to add new features and the latest performance enhancements. See the section on "Vantage... -
Page 76: Product Support
Vantage products. Please do not hesitate to contact us at: Toll free: (888) 254-5487 For more information on Iteris, as well as the products and services that we provide, visit our website at: www.iteris.com Additional Training Materials Iteris has created a set of interactive training modules which covers the whole range of Vantage products. -
Page 77: Technical Information
User Guide 10. TECHNICAL INFORMATION IMSA 39-2/40-2 Cable... - Page 78 User Guide Edco HVCP-48 Surge Protection The Edco HVCP Series is a hybrid surge protection product featuring DC power, data and video protection in one package. Each separate circuit is capable of handling high-current impulses while tightly clamping transients and allowing critical power and data to be transmitted. DC Power Protection (VS) Operating Voltage 48 VDC...
- Page 79 User Guide VersiCam Specification Sheet...
- Page 80 User Guide Phase Information...
- Page 81 User Guide Detector Rack Configurations...
- Page 82 The following information is intended to assist the user in understanding the intersection count data bin storage capacity of VersiCam. Count data is handled in a FIFO (First In – First Out) format. This means that as data is added to the storage memory and the memory allocation becomes filled the oldest data will be dumped to make room for the new data.
- Page 83 User Guide...
- Page 84 1700 Carnegie Avenue Santa Ana, CA 92705 Phone: (949) 270-9400 Fax: (949) 270-9401...
Need help?
Do you have a question about the VersiCam and is the answer not in the manual?
Questions and answers