Advertisement
Quick Links
Owner's Manual / Manual de Instrucciones
: Picture Counter
: Film Cartridge Mark
: Battery Status
∗
When the camera is not used for
5 minutes while the power is on,
the LCD is turned off to save
power. The power-comes back on
if the shutter release button is
pressed down halfway.
: Contador de exposiciones
: Indicador del chasis de película
: Indicador de capacidad de la pila
∗
Cuando la cámara no se utiliza
durante aproximadamente 5 mi-
nutos mientras que la alimentación
está activada, el panel LCD se
apaga para ahorrar energía. El
estado de encendido se reestablece
cuando se pulsa hasta la mitad el
disparador.
ATTACHING THE STRAP
∗
Do not use a strap made for cellular phones or
other products. These straps are usually too weak
to hold your camera. For safety, use only straps
made for cameras.
COLOCACIÓN DE LA CORREA
∗
Al usar una correa de tipo convencional, confirme
que esté en buenas condiciones y compruebe su
resistencia. Tenga mucho cuidado al utilizarla
porque generalmente son usadas para artículos
de bajo peso.
1-324 UETAKE, KITA-KU, SAITAMA CITY, SAITAMA 330-8624, JAPAN
FGS-305101-
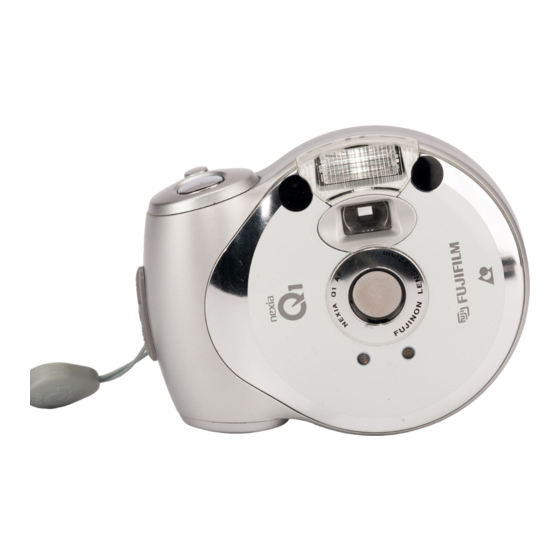
Thank you for purchasing a FUJIFILM nexia Q1 camera. We hope you enjoy the design and size of the
Q1. Before taking pictures, please read this manual for proper use and care. If you have any questions
call FUJIFILM's Consumer Information Services Department @ 1-800-800-FUJI (3854).
LOADING THE BATTERY
Your camera requires one 3V lithium
battery, type CR2/ DL CR2.
•
One new lithium battery should be enough for
about 250 pictures (based on our test condi-
tions.)
Load the battery before loading the film
cartridge.
Note 1:
If the battery is loaded after loading a new film
cartridge, the camera will not detect the film car-
tridge and will not allow you to take pictures with
that film cartridge. If this happens, check that the
motor has stopped and open the film cartridge
compartment cover.
• If the film cartridge compartment cover opens,
remove and reload your film cartridge, so that it
can be used.
• If the film cartridge compartment cover does
not open, rewind the film, then remove the film
cartridge. Since
i
i
i
i
i
is displayed on the cartridge
and the film can not be used, load a new film
cartridge.
LOADING THE FILM CARTRIDGE
Your FUJIFILM nexia Q1 is an Advanced Photo System (APS) camera
that uses a new size film in a special cartridge. This film is designated as
IX240 APS. The cartridge is designed to tell you that status of the film as
follows:
1. Film is unused
u
u
u
u
u
o o o o o
2. Film is partly used
3. Film is completely used
i
i
i
i
i
p
p
p
p
p
4. Film in the cartridge has been processed
When loading a cartridge, make sure that
tridge is white.
If our cartridge shows
(2),
(3) and
o o o o o
i
i
i
i
i
the film has been partly used or has been processed and the cartridge
cannot be used again. This valuable APS feature stops you from using
the same film more than one time.
Check that the film car tridge mark
does not appear on the LCD.
No display
: There is no film cartridge in the
camera.
Lit
: There is a film cartridge in the camera.
Blinks
: There is a fully used film cartridge in
the camera. Remove the film cartridge.
.
If "
" is displayed on the LCD, the cartridge
compartment cover cannot be opened (Safety
lock function).
USING THE CAMERA / UTILIZACIÓN DE LA CÁMARA
a
Turn the camera on by sliding the
b
Hold it firmly using both hands.
switch in the direction of the arrow.
Check that the flash ready lamp lights up.
Flash Ready Lamp
Piloto de flash preparado
Lit : Flash charging complete
Iluminado : La carga del flash ha acabado
Blinks : Flash charging
Parpadea : Flash cargándose
∗
∗
When the shutter release button is pressed
Cuando se pulsa el disparador hasta la mitad.
down halfway.
SELECTING THE PRINT FORMAT
This permits you to select prints format (C-4×6, H-4×7).
Turn the format selector to select the print format.
C
H
The print format is recorded on the film for each photo and is printed as
shown in the figure above. However, since the size of the area used
when the picture is taken is constant (16.7 × 30.2 mm), the print format
can be changed when more prints are made.
C : About. 16 × 23 mm
4 × 6 prints
H : About. 16 × 28 mm
4 × 7 prints
RED-EYE REDUCTION
FOTOGRAFÍA CON REDUCCIÓN DE
PHOTOGRAPHY
OJOS ROJOS
If the shutter button is pressed halfway down in a dark
Si se pulsa el disparador hasta la mitad en un lugar
place, the red-eye reduction lamp lights.
oscuro, se ilumina el piloto de reducción del efecto
"ojos rojos".
Press down the shutter release button halfway for 1 second.
Pulse el disparador hasta la mitad durante aproximadamente
After that press the shutter release button down completely.
1 segundo. A continuación, pulse el disparador hasta el fondo.
Dealing with Red-eye
Unas palabras sobre el efecto "ojos rojos"
When you photograph a person in dim light using flash, the
Cuando se realiza una fotografía con flash, de una persona en
eye will appear red in the finished photo. Under low light, the
un lugar con poca luz, a veces los ojos aparecen rojos. Esto
pupils of the eye get bigger for better vision. Red-eye is caused
ocurre cuando la luz del flash entra en los ojos y se vuelve a
by light from the flash entering the eye and being reflected
reflejar en el objetivo. Con el modo de reducción del efecto
back to the camera lens. Red-eye reduction causes an early
"ojos rojos", la pupila del sujeto se contrae antes de que el
flash to fire before the actual picture is taken. This causes the
flash se dispare. Cuando use este modo, tome las siguientes
eye to get smaller, reducing the red-eye effect for the final flash.
precauciones:
When using red-eye reduction mode:
•
Procure que la persona fotografiada centre su mirada
•
Ask your subject to look directly into the camera.
directamente en el objetivo de la cámara.
•
•
Tome la fotografía acercándose lo más posible a la persona
Approach as closely as possible to make your exposure.
que desea fotografiar.
-01
COLOCACIÓN DE LA PILA
Su cámara utiliza una pila de litio de 3V
CR2/DL CR2.
•
Una pila de litio nueva es suficiente para realizar
250 fotografías aproximadamente (dato basado
en nuestras condiciones de prueba).
Inserte la pila antes el chasis con la
película.
a
Nota 1:
Slide over the battery cover in the direction of
the arrow.
Si se inserta la pila inmediatamente después de
cargar un nuevo chasis de película, la cámara
podría no detectar el chasis de película y no se
podrán sacar fotografías con ese chasis de película.
Si esto ocurre, verifique que el motor se ha detenido
y luego trate de abrir la tapa del compartimento
del chasis de película.
• Si la tapa del compartimento del chasis de
película se abre, el chasis de película puede
ser utilizado si se quita y se coloca nuevamente.
• Si la tapa del compartimento del chasis de
película no se abre, quite el chasis de película
luego de rebobinar la película. Ya que
i
i
i
i
i
se
visualiza en el chasis y la película no puede
ser utilizada, coloque un chasis de película
nuevo.
COLOCACIÓN DEL CHASIS DE PELÍCULA
Utilice "Película con chasis IX240 para fotografías color".
1. Sin exponer
u
u
u
u
u
o o o o o
2. Parcialmente expuesto
3. Expuesto
i
i
i
i
i
p
p
p
p
p
4. Procesado
(1) indicator on the car-
Compruebe que la marca
(1) en el chasis sea de color blanco.
u
u
u
u
u
u
u
u
u
u
Si el chasis nuestra las marcas
o o o o o
(2),
i
i
i
i
i
(3) ó
(4) in white, this shows that
indica que el rollo ha sido expuesto ó procesado y el chasis no puede
p
p
p
p
p
ser usado nuevament. Ésta característica valiosa de esta cámara
previene exposiciones dobles.
".
"
Compruebe que el indicador de chasis de película
".
" no aparece en el panel LCD.
Sin indicación
: No hay un chasis de película
en la cámara.
Iluminado
: Hay un chasis de película en la
cámara.
Parpadea
: Hay un chasis de película comple-
tamente expuesto en la cámara. Extraiga el
chasis de película.
.
Si en el panel LCD iluminado la indicación "
",
Please
la tapa del compartimento del chasis no se puede
see note.
abrir (función de bloqueo de seguridad).
∗
Make sure that nothing is in
front of the lens.
SELECCIÓN DEL FORMATO DE COPIA
Esto le permite seleccionar un formato de copia (C-4×6, H-4×7).
Gire el selector para seleccionar el fomato de copia.
4×6 COPIAS
4×7 COPIAS
C
H
(2:3)
(9:16)
El formato de copia se graba en la película para cada toma y se imprime en la
zona indicada en la ilustraci. Sin embargo, como el tamaño del área expuesto
cuando se toma una fotografía es constante, (16,7 × 30,2 mm), independientemente
del formato de copia selecccionado inicialmente, cada vez que se realiza una
nueva copia se puede cambiar el formato de la misma.
C : Aprox. 16 × 23 mm
4 × 6 copias
H : Aprox. 16 × 28 mm
4 × 7 copias
TAKING OUT THE FILM CARTRIDGE
When the last frame in the film has been used, the film rewinds into
the cartridge.
EXTRACCIÓN DEL CHASIS DE PELÍCULA
Una vez expuesto el último fotograma de la película, ésta se rebobina
automáticamente en el chasis.
Gracias por comprar la cámara FUJIFILM nexia Q1. Esperamos que disfrute el diseño de la Q1. Antes
de tomar fotos, por favor lea este manual minuciosamente, ya que contiene importante información
sobre su uso y cuidado apropiados. Si tiene alguna preguntas, por favor llame al Departamento de
Información al Cliente de FUJIFILM en el 1-800-800-FUJI (3854).
b
Flip open the battery cover in the direction of
the arrow.
CHECKING THE BATTERY
Lit
: Battery is OK.
Lit
: Battery is low. Replace with the new battery.
Blinks
: The shutter cannot be released because bat-
tery is dead. Replace with new battery.
p
p
p
p
p
(4) en color blanco,
a
Unlock the film cartridge compartment cover by twisting
the lever in the direction shown by the arrows.
b
Open the film cartridge compartment cover.
Note 2:
Picture Counter
Nota 2:
The nexia Q1's picture counter will count the number of used
El contador de exposiciones de la nexia Q1ís contará
frames as you take pictures. If the battery is replaced while a
automáticamente el número de fotogramas expuestos cuando
partly used cartridge is in the camera (Mid Roll), the camera
usted toma fotos. Si se reemplaza la pila cuando hay un chasis
will not resume counting from the last used frame. The picture
parcialmente expuesto en la cámara (a mitad de rollo), la camará
`
counter will be reset to zero (
) and correct the number of
no seguirá contando a partir del último fotograma expuesto. El
pictures is not displayed. When the last frame in the film has
contador de exposiciones volverá automáticamente a indicar cero
`
been exposed, the film rewinds into the cartridge.
(
antes de cambiar la pila. Cuando se haya expuesto el último
fotograma de la película, ésta se rebobinará automáticamente
dentro del chasis.
c
Compose the picture.
∗
Keep at least 0.6m (2.0ft.) from your subject.
The flash lamp fires when the
AUTOMATIC
brightness of the subject is low.
FLASH
The flash distance will vary depend-
ing upon the film speed (sensitivity
to light or ISO rating). When using
flash, keep the subject within the
flash range in the chart below.
Film speed
ISO 100
ISO 200
ISO 400
ISO 800
∗
Take out the film cartridge after the motor has stopped turning and "
.
" is
blinking.
∗
Extraiga el chasis de película después de comfirmar que ha dejado de
girar y está prapadeando "
.
".
a
a
Open the film cartridge
Abra la tapa del compar-
compartment cover by
timiento del chasis de
twisting the lever in the
pelìcula girando la
direction shown by the
palanca en la dirección
arrows.
indicada por las fleshas.
b
b
Take out the film car-
Extraiga el chasis de la
tridge.
película.
∗
∗
Symbol 3
i
i
i
i
i
on the bot-
El signo 3
i
i
i
i
i
que aparece
tom of the film cartridge
en la parte inferior del
should have turned white.
chasis de la película debe
haberse puesto blanco.
c
Load the battery, observe polarity (
and
).
d
Close the battery cover until it snaps into place.
COMPROBACIÓN DE LA PILA
Iluminado
: La carga de la pila es correcta.
Iluminado
: La carga de la pila es insuficiente. Coloque
una pila nueva.
Parpadea
: El obturador no dispara porque la pila está
agotada. Sustitúyala.
c
Load the film cartridge.
d
Close the film cartridge compartment cover until it
snaps into place.
Contador de Exposiciones
). Usted debe observar el número de fotogramas expuestos
d
Press the shutter release button.
La lámpara del flash se dispara
automáticamente cuando la
iluminación del motivo es inferior
a un nivel predeterminado.
La distancia de alcance del flash varía
según la sensibilidad de la película.
Cuando haga fotografías en un luger
oscuro, mantenga al sujeto dentro del
alcance de la luz del flash.
Effective
Sensibilidad de
Gama de alcance
flash range
la película
del flash
0.6 - 2.0 m
0,6 - 2,0 m
ISO 100
2.0 - 6.6 ft.
2,0 - 6,6 ft.
0.6 - 3.0 m
0,6 - 3,0 m
ISO 200
2.0 - 9.8 ft.
2,0 - 9,8 ft.
0.6 - 4.0 m
0,6 - 4,0 m
ISO 400
2.0 -13.1 ft.
2,0 - 13,1 ft.
0.9 - 6.0 m
0,9 - 6,0 m
ISO 800
3.0 -19.7 ft.
3,0 - 19,7 ft.
(Using color negative film)
(Utilizando película negativo color)
TAKING OUT THE FILM IN
MID-ROLL
If you need to remove the film cartridge before you
have taken all the pictures, press the
button
with the point of a pen or something similar.
∗
When a film cartridge is rewound without taking any pic-
tures or when the film is rewound mid-roll,
i
i
i
i
i
is displayed
on the film cartridge, and re-exposure cannot be made.
EXTRACCIÓN DE LA
PELÍCULA A MITAD DE ROLLO
Presione el botón
con la punta de un boligrafo o
objeto similar.
∗
Cuando se rebobina la película sin haber tomado ninguna
fotografía o cuando la película se rebobina hasta la mitad,
el signo
también se visualizará en el chasis de película.
i
i
i
i
i
En ese caso el chasis no se puede exponer otra vez.
Advertisement

Related Manuals for FujiFilm nexiaQ1


Summary of Contents for FujiFilm nexiaQ1
- Page 1 Thank you for purchasing a FUJIFILM nexia Q1 camera. We hope you enjoy the design and size of the Gracias por comprar la cámara FUJIFILM nexia Q1. Esperamos que disfrute el diseño de la Q1. Antes Q1. Before taking pictures, please read this manual for proper use and care. If you have any questions de tomar fotos, por favor lea este manual minuciosamente, ya que contiene importante información...
- Page 2 ENGLISH ESPAÑOL SPECIFICATIONS CARACTERÍSTICAS TÉCNICAS • • • • Flash Película Flash Film IX240 cartridge film for color prints Automatic flash, 6 seconds recycle time, with red-eye reduction (LED pre- Película con chasis IX240 para fotografías en color Flash automático con tiempo de recarga de 6 seg., con reducción del efecto •...