Table of Contents
Advertisement
Quick Links
Advertisement
Table of Contents

Summary of Contents for FAAFTECH FT-LVDS-AUD5
- Page 1 INSTALLATION MANUAL FT-LVDS-AUD5 REV 090117...
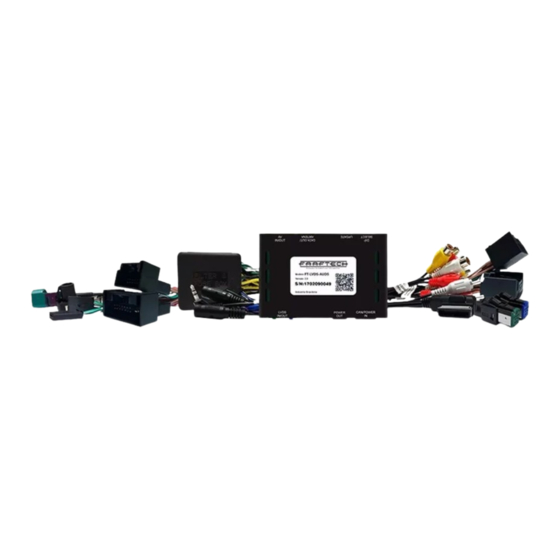
- Page 2 PRESENTATION • Congratulations for purchasing the video interface FT-LVDS-AUD5. • Please, read this manual with attention before installing your new device. • Keep this manual with you in order to check the functioning procedures and the security information. • We recommend that a professional, with experience in the field of installation of vehicle devices, is the one to install this interface.
-
Page 3: Dip Switches
DOWN on cars with a 6,5” screen DIP 5 No function TV and DVD selection FT-TV-1SEG DIP 6 up DIP 7 down TV FAAFTECH FT-TV-1SEGII DIP 6 down DIP 7 down FT-TV-HDII TV LBSAT LBCR-1100 DIP 6 up DIP 7 up... - Page 4 • Remove the steering wheel column cover to find the location Conector A Note: on the FT-LVDS-AUD5 Connect to the negative Black there are 2 whips with di erent connectors. Check on the vehicle’s connector which one of the whips will plug correctly.
-
Page 5: Accessory Connections
ACCESSORY CONNECTIONS Check an example of an installation with a DVD, TV, front camera in the AV3 input, and a rear camera. Use the auxiliary outputs to power the accessories, such as DVD, TV and camera, in case they are being installed MOBILE MULTI-MEDIA PLAYER Digital TV Receptor... - Page 6 ACCESSORIES FUNCTIONING Follow the steps below in order to access the accessories you have installed on the interface’s AV inputs. 1° Select the AUX audio input on the multimedia; 2° Use one of the following methods to access the interface’s AV mode and flip between the accessories installed: Audi A1 and Q3 Press the “ASTERISK”...
- Page 7 ACCESSORIES FUNCTIONING Use the steering wheel commands to control the DVD and the TV (compatible models only) by using the movements listed below: TV COMMANDS DVD COMMANDS BUTTON Simple touch 2-seconds Simple touch 2-seconds Spin button 1 up Channel + ---------- Track + ----------...
- Page 8 FUNCTIONING OF THE CAMERAS Rear Camera The rear camera will show automatically once you put the car on the reverse gear. When you spin the steering wheel, the parking guide lines will move, showing the approximate direction the vehicle will go to. Important Notice The parking guides are not 100% precise regarding to the way they show.
- Page 9 FUNCTIONING OF THE CAMERAS Camera Viewing You can view the installed cameras at any time by following the steps below: • Press and hold the NAV button on the steering wheel for 3 seconds to view the rear camera; • Simply touch the NAV button to switch between the rear and the front camera (in case both are installed);...
-
Page 10: Setup Menu
SETUP MENU Check below how to access the setup menu of the FT-LVDS-AUD5: 1. Access the AV1 (DVD), AV2 (TV) or AV3 input; 2. After selecting one of those sources, press the OK button on the steering wheel command and hold it for about 5 seconds to view the setup menu;... - Page 11 SETUP MENU AV2: Select the name of the auxiliary input AV2 (TV or AV2). AV3: AV3 – Select to use AV3 as the third audio/video input. NAV – Select to use AV3 as GPS. CAM FRONT – Select to use AV3 as a front camera input. Idioma (Language): PORTUGUES –...
-
Page 12: Troubleshooting
TROUBLESHOOTING 1. After installing the interface, the multimedia won’t turn on. • Review the installation process and check if the connections have been done according to the images shown on pages 3 and 4; • Check if the connectors are plugged in tightly and if there are no wires loose on the connectors. -
Page 13: Warranty
WARRANTY FAAFTECH assures their clients a 01 (one) year period against defects in mate- rials and workmanship, proved by presenting both the receipt of purchase from the reseller to the costumer and the present Warranty Certificate filled, observ- ing the following: 1. -
Page 16: Technical Support
TECHNICAL SUPPORT Follow us on social media +55 0800 603 2330 or +55 62 3241 4600 suporte@faaftech.com.br www.faaftech.com.br Available from Monday to Friday, from 8 a.m. to 6 p.m. Brasilia time...
Need help?
Do you have a question about the FT-LVDS-AUD5 and is the answer not in the manual?
Questions and answers