Table of Contents
Advertisement
Advertisement
Table of Contents

Related Manuals for elektron eye technology Henson 9000


Summary of Contents for elektron eye technology Henson 9000
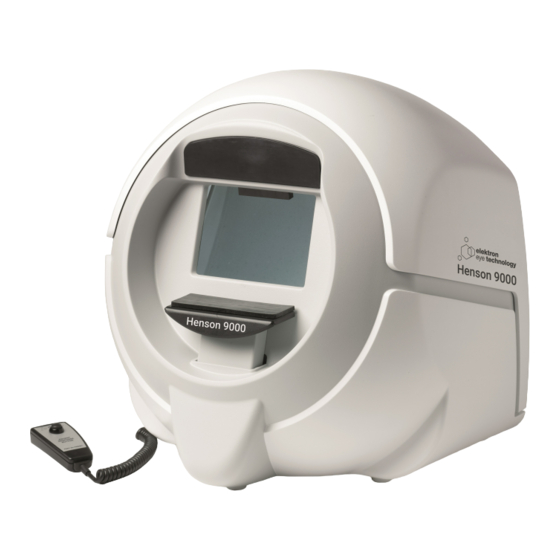
- Page 1 Henson 9000 E lektr o n E ye Techno lo g y Ltd .
- Page 2 HENSON 9000 E lektr o n E ye Techno lo g y Ltd . All r ig hts r es er ved . No p a r ts o f this wo r k ma y b e r ep r o d uced in a ny fo r m o r b y a ny...
-
Page 3: Table Of Contents
Co ntents Table of Contents Part I Welcome ....................... 8 1 Elektron c om pan y n otic es ....................... 9 2 Im portan t w arn in gs ....................... 1 0 3 Rev ision h istory ....................... 1 2 4 H elp/ M an u al in f orm ation 5 A c kn ow ledgem en ts ....................... - Page 4 Hens o n 9000 Per imeter Us er M a nua l Pr o g r e s s i o n : R a t e o f ch a n g e G S S II Pr i n t i n g Pa t i e n t i n s t r u ct i o n s S t i mu l u s l o ca t i o n s E n t e r i n g p a t i e n t d e t a i l s...
- Page 5 Co ntents ....................... 9 9 4 Editin g data in th e database ....................... 1 0 0 5 Visu al f ield c h art ....................... 1 0 1 6 Fin din g a rec ord in th e database .......................
- Page 6 Hens o n 9000 Per imeter Us er M a nua l ....................... 1 4 4 6 Database errors Te s t n o t r e co g n i s e d D a t a b a s e B a ck u p n o t a va i l a b l e Part XIII Appendix 6 - License file Part XIV Appendix 7 - Networking Part XV Appendix 8 - Practice...
-
Page 7: Part I Welcome
Welco me Welcome Henson 9000 Perimeter To find out more about Henson perimeters visit our website: http://www.elektron-eye-technology.com or scan the QR code opposite. E l e k t r o n E y e Te c h n o l o g y 2 0 1 8... -
Page 8: Elektron C Om Pan Y N Otic Es
The only warranties for Elektron Eye Technology UK Ltd. products and services are set forth in the express warranty statements accompanying such products and services. Nothing herein should be construed as constituting an additional warranty. -
Page 9: Im Portan T W Arn In Gs
Welco me Imp o r ta nt wa r ning s This unit must be connected to an earthed electricity supply Hazardous voltages are present inside this unit. No user-serviceable parts inside No modification of this equipment is allowed This equipment is not suitable for use in an oxygen rich environment The instrument is not... -
Page 10: Rev Ision H Istory
Hens o n 9000 Per imeter Us er M a nua l Revis io n his to r y Release Date Change Version 1.0 August 2013 New version for V2.0 software Version 1.1 May 2014 For version 2.1 onwards software Version 1.2 July 2014 Additional Installation Information... - Page 11 Welco me To send Feedback, click the feedback button and enter details in the box. Pressing send will generate an email with the files attached. Information for the software Versions after the 3.5 release The release version of software called 3.5 contained some important changes to the way the software operates.
-
Page 12: Elp/ M An U Al In F Orm Ation
Hens o n 9000 Per imeter Us er M a nua l Help /M a nua l info r ma tio n Many of the images in this help manual have 'hot spots'. If you place the cursor over one of these and click then you will jump to a new page giving further information on a topic. -
Page 13: C Kn Ow Ledgem En Ts
Welco me Ackno wled g ements Microsoft, Windows, Windows 7 and Windows 8 and Windows 10 are registered trademarks of Microsoft Corporation. Adobe and Acrobat (R) reader(R) are registered trademarks of Adobe systems. E l e k t r o n E y e Te c h n o l o g y 2 0 1 8... -
Page 14: Part Ii Quick Start
Hens o n 9000 Per imeter Us er M a nua l Quick start To start a visual field test or one of the menu bar items click over that item on the start-up screen. To get more help on an item in the start-up screen click that item on the image below. Appendix 3 for installing and setting up the software. -
Page 15: Sm Art Su Pra Sin Gle Stim U Lu S Test
Quick s ta r t Sma r t Sup r a Sing le Stimulus tes t After selecting the test and entering the patient's date of birth you will be presented with the Smart Supra Single Stimulus test screen below. T o get m ore h elp on a test sc reen item c lic k over th e item in th e im age below . -
Page 16: Sm Art Su Pra M U Ltiple Stim U Lu S Test
Hens o n 9000 Per imeter Us er M a nua l Sma r t Sup r a M ultip le Stimulus tes t After selecting the test and entering the patient's date of birth you will be presented with the Smart Supra Multiple Stimulus test screen below. -
Page 17: Zata Thr Es Ho Ld Tes T
Quick s ta r t ZATA Thr es ho ld tes t After selecting the test, you will be asked whether this is a new or an existing patient Depending on your response you will then either need to enter patient details or select the specific patient's details from the database . - Page 18 Hens o n 9000 Per imeter Us er M a nua l E s ter ma n Bino cula r Dr iving tes t After selecting the relevant Group 1 or Group 2 test you will be presented with the test screen below.
-
Page 19: Esterman Binocular Driving Test
Vis ua l field tes ts Visual field tests The following visual field tests are available with the Henson 9000 Smart Supra Single Stimulus Choose this test to screen large numbers of patients. It is a fully automated test where the patient presses a... -
Page 20: Sm Art Su Pra Tests
Hens o n 9000 Per imeter Us er M a nua l Sma r t Sup r a tes ts There are two different Supra-Threshold tests provided with the Henson 9000 software, Single Multiple stimulus: Both incorporate three levels of testing. -
Page 21: M U Ltiple Stim U Lu S
Vis ua l field tes ts 3 .1 .1 M u ltiple Stim u lu s The Smart Supra Multiple Stimulus test is used to rapidly screen the visual field. The test is semi-automated but requires more perimetrist involvement than the single stimulus equivalent. With a skilled perimetrist this can result in more reliable results with less variability. -
Page 22: P Atien T In Stru C Tion S
Hens o n 9000 Per imeter Us er M a nua l P atien t in stru c tion s 3 .1 .1 .1 It is important that the patient understands what they need to do during the test. Below is a set of instructions that we have found work well. The eye not being tested should be occluded and the test eye must be correctly aligned with the patient sitting comfortably. -
Page 23: P Resen Tin G An D Selec Tin G Dif F Eren T M U Ltiple Stim U Lu S Pattern S
Vis ua l field tes ts P resen tin g an d selec tin g dif f eren t m u ltiple stim u lu s pattern s 3 .1 .1 .2 The currently selected multiple stimulus pattern is represented on the screen by the red circles. To present this pattern to the patient click or press the space bar. -
Page 24: M Issed Stim U Li In M U Ltiple Stim U Lu S Su Prath Resh Old Test
Hens o n 9000 Per imeter Us er M a nua l M issed stim u li in m u ltiple stim u lu s su prath resh old test 3 .1 .1 .3 It is not unusual for a patient with no visual field loss to miss the occasional stimulus. To differentiate between these and misses due to genuine field loss, the pattern should be presented a second time. -
Page 25: Sin Gle Stim U Lu S
Vis ua l field tes ts 3 .1 .2 Sin gle Stim u lu s The Smart Supra Single Stimulus test is ideal for screening the visual field. The fully automated test requires no intervention other than to instruct the patient on what to do, ensure that they have the correct refractive correction in front of their eye and that... -
Page 26: Stan Dard An D M U Lti-Sam Plin G A Lgorith M S
In this algorithm the patient has to miss a flash at each test location twice, or see it twice before it is marked as seen or missed. This algorithm is new to the Henson 9000 and takes a little longer, as there are more presentations, but is more robust to response errors and is less variable. -
Page 27: P Atien T In Stru C Tion S
Vis ua l field tes ts P atien t in stru c tion s 3 .1 .2 .2 It is important that the patient understands what they need to do during the test. Below is a set of instructions that we have found work well. The eye not being tested should be occluded and the test eye must be correctly aligned with the patient sitting comfortably. -
Page 28: Settin G Th E Test In Ten Sity
Hens o n 9000 Per imeter Us er M a nua l 3 .1 .3 Settin g th e test in ten sity The Smart Supra tests present stimuli at intensities that are above the patients estimated threshold. It uses one of two techniques to establish the patient's threshold: Age related (Total Deviation). -
Page 29: Sin Gle Stim U Lu S Algorith M
Vis ua l field tes ts Sin gle Stim u lu s algorith m 3 .1 .3 .1 The threshold sensitivity is measured at four test locations, one in each quadrant. The locations are displaced 9 degrees from the vertical and horizontal meridians. At each location a repetitive bracketing algorithm (1dB steps, six presentations) is undertaken. -
Page 30: M U Ltiple Stim U Lu S Algorith M
Hens o n 9000 Per imeter Us er M a nua l M u ltiple Stim u lu s algorith m 3 .1 .3 .2 Perimetrist task. Present the current pattern by clicking Present Ask the patient how many stimuli they saw, the pattern can be repeated if necessary. Click either depending on whether or not they saw any stimuli. -
Page 31: T Est Option S
Vis ua l field tes ts 3 .1 .4 T est Option s Clicking allows you to change the Supra-Threshold Test Options the default values of which are set in your Options file For the M u ltiple an d Sin gle Stim u lu s tests you can select to test on the basis of the patients age or from a measurement taken at the beginning of the test. -
Page 32: Exten Din G Th E Test
Hens o n 9000 Per imeter Us er M a nua l 3 .1 .5 Exten din g th e test Each Smart Supra test is composed of three levels. The first level is a quick screening of 26 locations which are a subset of the 24-2 test pattern. -
Page 33: A Ddin G An D C Orrec Tin G Presen Tation S
Vis ua l field tes ts 3 .1 .6 A ddin g an d c orrec tin g presen tation s In the Supra-Threshold tests it is possible to add extra test locations, re-test locations, mark a location as missed or re-classify a missed location as seen. This can be done at any stage of the test. -
Page 34: C H An Gin G Th E Su Pra-Th Resh Old In C Rem En T
Hens o n 9000 Per imeter Us er M a nua l 3 .1 .7 C h an gin g th e su pra-th resh old in c rem en t There are three different Smart Supra test increments that correspond to the 95, 98 and 99% chance of a stimulus presentation being seen by a person with no field loss. -
Page 35: A N Alysin G Th E Resu Lts
Vis ua l field tes ts 3 .1 .8 A n alysin g th e resu lts The number of seen/missed stimuli in the status bar at the bottom of the screen, see below. At the end of a 24-2 test a cumulative histogram is presented giving the number of location missed at each level. -
Page 36: T Oolbar
Hens o n 9000 Per imeter Us er M a nua l 3 .1 .9 T oolbar Exit the program and return to main menu. Save current visual field data (both eyes). Print results (both eyes). Start new Patient (same test). Open the Help file (context-sensitive). -
Page 37: Zata Thr Es Ho Ld Tes T
Vis ua l field tes ts ZATA Thr es ho ld tes t ZATA (Zippy Adaptive Threshold Algorithm) is a new threshold program that is faster and more accurate than earlier threshold tests (Full Threshold, Fast Threshold). Shorter test times are important in perimetry, as patients find it hard to maintain their attention much beyond three minutes and loss of attention is associated with increased variability. -
Page 38: Blin D Spot
3 .2 .1 Blin d spot After the demonstration at the beginning of a ZATA test the Henson 9000 searches for the blind spot. It starts off by presenting a Supra-Threshold stimulus at the most likely location of the blind spot. -
Page 39: Exten Din G Th E 24-2 Test
Vis ua l field tes ts 3 .2 .2 Exten din g th e 24-2 test The ZATA 24/30-test starts off testing the 24-2 locations The test can be extended, either during or at the end of the 24-2 test, to include the 30-2 locations by clicking the 30-2 button The current level is highlighted in blue. -
Page 40: Fov Ea M Easu Rem En T
Hens o n 9000 Per imeter Us er M a nua l 3 .2 .3 Fov ea m easu rem en t In a ZATA test it is possible to measure the sensitivity of the eye at the fovea. For this measurement the patient fixates the centre of a four-point pattern of lights positioned below the normal central fixation light. -
Page 41: Global In Dic Es
Vis ua l field tes ts 3 .2 .4 Global In dic es Global indices are single numbers that characterize the whole visual field. They are used to monitor the extent of loss over time. There are three provided with the ZATA Threshold test: Mean Defect. -
Page 42: M Ean Def Ec T
Hens o n 9000 Per imeter Us er M a nua l M ean Def ec t 3 .2 .4 .1 The Mean Defect value, on the printout, gives the clinician an estimate of the extent of damage. A more negative value indicates a less sensitive eye. Mean Defect values are sensitive to both scotoma and media opacities. -
Page 43: Stan Dard Dev Iation
Vis ua l field tes ts Stan dard Dev iation 3 .2 .4 .2 The Pattern Standard Deviation of the defect values is a measure of their variability. Large values are indicative of localised scotoma. This global index can be used to monitor progression where increases in the index indicate a deepening or enlargement of localised loss. -
Page 44: H Em If Ield T Est
Hens o n 9000 Per imeter Us er M a nua l H em if ield T est 3 .2 .4 .3 The Hemifield Test compares the defect values in the superior hemifield to those in the inferior hemifield and reports on whether this falls within normal limits. The test is very sensitive to the early changes that occur in glaucoma which are often restricted to either the superior or inferior hemifields. -
Page 45: Ou Tpu Ts
Vis ua l field tes ts 3 .2 .5 Ou tpu ts At the end of a ZATA test the following three buttons will appear on the menu bar. The currently displayed format is represented by the button with a blue background. displays the results in a gray scale format. -
Page 46: T H Resh Old/ Gray Sc Ale
Hens o n 9000 Per imeter Us er M a nua l T h resh old/ gray sc ale 3 .2 .5 .1 Threshold and gray scale values are displayed on the standard printout . Threshold values are given in decibels of attenuation where 0 corresponds to 3183 cd/m (10000 asb). -
Page 47: T Otal Dev Iation
Vis ua l field tes ts T otal Dev iation 3 .2 .5 .2 Total Deviation values are the difference between the measured threshold and that expected from an age-matched normal eye. They are presented in two different forms: Absolute values in decibels (dB). Symbols representing the probability that the threshold measure comes from a normal eye. -
Page 48: P Attern Dev Iation
Hens o n 9000 Per imeter Us er M a nua l P attern Dev iation 3 .2 .5 .3 Pattern Deviation values remove the effect of overall shifts in sensitivity to better expose the pattern of any field loss. At the end of a test the software calculates, for each test location, the Total Deviation values... - Page 49 Vis ua l field tes ts E l e k t r o n E y e Te c h n o l o g y 2 0 1 8...
-
Page 50: P Rin Tou T
Hens o n 9000 Per imeter Us er M a nua l 3 .2 .6 P rin tou t Below is an example printout from the ZATA Threshold test. Patient demographics and details of the field test used are given at the top of the chart. You can get further help on the different elements of the print out by clicking over that item in the image below. - Page 51 Vis ua l field tes ts 3 .2 .7 P rogression : Rate of c h an ge You can monitor the rate of change in the visual field in the Database program. The progression screen below shows two graphs (one for each eye) that display the global indices Mean Defect and Pattern Standard Deviation versus the age of the patient.
- Page 52 Hens o n 9000 Per imeter Us er M a nua l Clicking any other record will revert the right hand display to a visual field chart. E l e k t r o n E y e Te c h n o l o g y 2 0 1 8...
- Page 53 It is often helpful when reviewing visual field data to have a means to scale the extent of loss. The Henson 9000 uses the GSS II system developed by Paolo Brusini. It is based upon the Mean Defect and Pattern Standard Deviation and plots these 2 global measures against each other.
-
Page 54: P Rin Tin G
Hens o n 9000 Per imeter Us er M a nua l P rin tin g 3 .2 .7 .2 To obtain a print of the progression analysis: Exit the progression analysis by clicking The right hand panel will contain the progression analysis, see below. Click The image shows a maximum of six gray scales. -
Page 55: P Atien T In Stru C Tion S
Vis ua l field tes ts 3 .2 .8 P atien t in stru c tion s It is important that the patient understands what they need to do during the test. Below is a set of instructions that we have found work well. The eye not being tested should be occluded and the test eye must be correctly aligned with the patient sitting comfortably. -
Page 56: S T I Mu L U S L O Ca T I O N S
Hens o n 9000 Per imeter Us er M a nua l 3 .2 .9 Stim u lu s loc ation s The ZATA test can use either the 30-2, 24-2 or 10-2 patterns of test stimuli. The 30-2 and 24-2 test pattern presents stimuli on a 6 degree square matrix displaced 3 degrees from the vertical and horizontal mid-lines and covers an area of either 30 or 24 degrees (the 30-2 is an extension of the 24-2 test that can be selected during or at the end of a 24-2 test). -
Page 57: En Terin G Patien T Details
Vis ua l field tes ts 3 .2 .1 0 En terin g patien t details At the start of a ZATA tests the following form appears. If you select Existing Patient (one with a previous record in the database) the software will display the table of records. - Page 58 Hens o n 9000 Per imeter Us er M a nua l Notes: Using prior data reduces test times and increases the precision of the threshold estimates. E l e k t r o n E y e Te c h n o l o g y 2 0 1 8...
-
Page 59: Za T A C On Trols
Vis ua l field tes ts 3 .2 .1 1 ZA T A c on trols Start/stop the test Exit the test program and return to main menu. Save current visual field data (both eyes). Print results (both eyes). Open the help file (context-sensitive). -
Page 60: Esterm An Bin Oc U Lar Driv In G Tests
Hens o n 9000 Per imeter Us er M a nua l E s ter ma n Bino cula r Dr iving tes ts The Henson 9000 provides two visual field tests for Driving. The first, Group 1, meets the standard set by the UK Driver and Vehicles Licensing Agency (DVLA) for drivers of cars and motorcycles. -
Page 61: P Atien T In Stru C Tion S
Vis ua l field tes ts 3 .3 .1 P atien t In stru c tion s It is important that the patient understands what they need to do during the test. Below is a set of instructions that we have found to work well. The test is going to take about 4 minutes. -
Page 62: Option S
Hens o n 9000 Per imeter Us er M a nua l 3 .3 .2 Option s Options program has a Tests tab with an option to maintain a minimum value for the beep volume. (Min volume On). The UK DVLA require that a beep is made when a stimulus is presented so this option should be selected when testing patients within the UK. -
Page 63: Stim U Lu S Loc Ation S
Vis ua l field tes ts 3 .3 .3 Stim u lu s loc ation s The patterns of the stimuli in the Group 1 and Group 2 Driving Tests are shown below: Group 1-120 point test Group 2-124 point test E l e k t r o n E y e Te c h n o l o g y 2 0 1 8... -
Page 64: Part Iv General Information
The 26 point Smart Supra tests use test locations that have been optimized for the early detection of glaucoma . The overall speed of Henson 9000 tests is further improved with: A fast start-up time - the 9000 uses LEDs which do not need to be warmed up. - Page 65 Gener a l info r ma tio n Repeating/adding new test locations Supra-Threshold tests allow stimuli to be re-presented to confirm a response. You can also add new locations by placing the cursor over the location you wish to test and clicking the mouse button or touch pad.
- Page 66 Hens o n 9000 Per imeter Us er M a nua l Pr ep a r ing the p a tient Before undertaking a visual field test the patient needs to be carefully instructed on what the test is about and how they need to respond. They need to be carefully positioned at the instrument, have the correct...
-
Page 67: A Lign In G Th E Patien T
Gener a l info r ma tio n 4 .1 .1 A lign in g th e patien t The patient should be seated comfortably with their forehead touching the headrest. The patients test eye should be looking through the centre of any trial lens which should be positioned as close as possible to the eye. -
Page 68: P Atien T In Stru C Tion S
Hens o n 9000 Per imeter Us er M a nua l 4 .1 .2 P atien t In stru c tion s It is important that the patient fully understands what they need to do during the test. Suggested instructions for the different tests can be found by following the links below: Smart Supra Multiple Stimulus Smart Supra Single Stimulus ZATA... -
Page 69: Ref Rac Tiv E C Orrec Tion
It is important that the patient wears the correct refractive correction (suitable for a 25cm test distance) during the visual field test. Following the version 4.0 software update the Henson 9000 is now fitted with a full aperture trial lens holder. Place the correct lenses in the holder and with the patient correctly aligned move the holder as close to the patients eye as possible. -
Page 70: U To Tim In
Hens o n 9000 Per imeter Us er M a nua l Auto timing In single stimulus tests the speed of presentations changes according to how fast the patient presses the response button If the patient responds quickly, the speed of presentations increases. If they respond slowly the speed of presentations will decrease. -
Page 71: Atc H Trials
Gener a l info r ma tio n Ca tch tr ia ls Single stimulus tests incorporate catch trials to give the clinician an estimate of the patient's reliability. False positives: when no stimulus is presented. False negatives (only in threshold and Driving tests): when a repeat presentation is made at an already seen location. -
Page 72: H An Gin G Eyes
Hens o n 9000 Per imeter Us er M a nua l Cha ng ing eyes The selected eye has a blue background You can change eyes at any time by clicking the unselected button. Swapping during a test will not result in any loss of data. -
Page 73: Dem On Stratin G Th E Test
Gener a l info r ma tio n Demo ns tr a ting the tes t All the single stimulus tests begin with a demonstration. This consists of series of presentations where the responses of the patient are not saved. During the demonstration stage the test status indicator will show It is a good idea to tell the patient not to be concerned if they make some errors at the beginning of the test as the first few presentations do not count. -
Page 74: En Terin G Patien T Data
Hens o n 9000 Per imeter Us er M a nua l E nter ing p a tient d a ta Prior to saving your data in the database and, depending on your set up options prior to printing the results, the following form will ask you to enter patient details. Use either the on-screen keyboard or an external keyboard to enter/edit the data in the fields. -
Page 75: En Terin G Th E Patien T' S Date Of Birth
Gener a l info r ma tio n E nter ing the p a tient's d a te o f b ir th To enter the patient's date of birth at the beginning of each test. Click over the correct day, month and year using the vertical sliders when necessary and then click to continue. -
Page 76: Fixation Targets
Hens o n 9000 Per imeter Us er M a nua l Fixa tio n ta r g ets The Henson 9000 has two fixation targets: A small central red spot. Four peripheral spots located 6 degrees from the central point along the 0, 90, 180 and 270 meridians. -
Page 77: Elp F Ac Ility
Gener a l info r ma tio n Help fa cility Clicking opens up the on-line help. Opening and closing the Help facility will not affect the test programs. You can keep the help program open while continuing with a field test. An example of a help page is shown below. -
Page 78: 0 H Elp Rx
Hens o n 9000 Per imeter Us er M a nua l 4.10 Help Rx Recommended additions (lens power to be added to the patient's current distance prescription) are given in the table below. Patient's age 40-44 +1.50 45-49 +2.00 50-54 +2.50 55-59... -
Page 79: 1 P Rin Tin G Th E Resu Lts Of A F Ield Test
Gener a l info r ma tio n 4.11 Pr inting the r es ults o f a field tes t Click to print your results. If your Options are set to enter patient information on the printout then you will be presented with the window below. -
Page 80: 2 Respon Se Bu Tton
Hens o n 9000 Per imeter Us er M a nua l 4.12 Res p o ns e b utto n The Patient Response Button is used in the single stimulus tests. The patient needs to click the response button each time they see a stimulus. The test is paused if the button is held down. -
Page 81: 3 Sav In G V Isu Al F Ield Data
Gener a l info r ma tio n 4.13 Sa ving vis ua l field d a ta To save the results of a visual field test Click open up the database entry form. Use either the on-screen keyboard or an external keyboard to enter/edit the data in the fields. Only use the following characters: letters A-Z, numbers 0-9 and hyphen - Click to save,... -
Page 82: 4 Video C Am Era
Hens o n 9000 Per imeter Us er M a nua l 4.14 Vid eo ca mer a The Henson 9000 is fitted with a video camera for monitoring fixation. The camera is set up within the Options program. The intensity and contrast can be adjusted during a test by clicking over the appropriate buttons (see above). -
Page 83: Part V Options Program
Op tio ns p r o g r a m Options program The Options program allows you to customize the test and associated programs. To make changes close ALL Henson programs, including the Start-up screen, and then run the Options program from the Windows desktop icon The tabbed form below will then pop-up. - Page 84 Hens o n 9000 Per imeter Us er M a nua l Tes ts The Tests tab of the Options program allows you to customize certain characteristics of the Smart Supra and Driving tests. You can select whether: Sm art Su pra threshold is set by age (Total Deviation) or by measurement (Pattern Deviation).
- Page 85 Op tio ns p r o g r a m E l e k t r o n E y e Te c h n o l o g y 2 0 1 8...
-
Page 86: Om Pu Ter
Hens o n 9000 Per imeter Us er M a nua l Co mp uter The Computer tab of the options program allows you to select the perimeter's USB device, the software language and whether to run in software only mode. In software only mode messages are not sent to the perimeter. -
Page 87: Database
Op tio ns p r o g r a m Da ta b a s e The Database tab of the Options program allows you to specify the name and path of the default database . This is where: Visual field records will be stored when you click Records will be recalled when you open the database program. -
Page 88: Ba Ckup
Hens o n 9000 Per imeter Us er M a nua l Ba ckup The Backup tab of the Options program allows you to specify the database backup path. Normally this will be a network or removable drive fitted to your computer. If you have access to a network, then the backup location can be a mapped drive on another computer/server. -
Page 89: Video Setu P
Op tio ns p r o g r a m Vid eo s etup The Video tab of the Options program allows you to select the Henson camera and optimize the image. Select the correct video device from the Video Input Device drop-down menu. With a patient correctly positioned and looking through any trial lens, use the +/-... -
Page 90: In Tegration
1: Passing parameters using programmable buttons, these need to be set up at instillation. There are no selectable options. 2: Text files. The Henson 9000 will automatically use data placed into a text file by a practice management software if present. The Henson9000 needs to be told where the text file is located. - Page 91 Op tio ns p r o g r a m The Henson 9000 automatically saves either a JPEG or DICOM image of the chart. The PDF tab of the Options program allows you to archive an additional copy of the printout in a PDF format.
-
Page 92: Sa Ve/Ca Ncel
Hens o n 9000 Per imeter Us er M a nua l Sa ve/Ca ncel In the Options program each tab has a Save, Cancel and Help button. Click on any of the tabbed pages to save the changes made on all tabs. Click o return without saving any changes. -
Page 93: Registration An D Lic En C In G
In both cases a licence number will be required - this is either supplied with your Henson 9000 device (check the rear of the unit for a licence number label) or was purchased as part of an upgrade. - Page 94 Hens o n 9000 Per imeter Us er M a nua l and then press the Get activation code button. A QR code (as shown below) will be displayed which should be scanned with a smart phone device with a data connection. The QR code is a link to a website which will then display the licence activation key for you to enter in the boxes below the QR code.
-
Page 95: Part Vi Database Program
Da ta b a s e p r o g r a m Database program Visual field data from all test programs are saved in a powerful Windows database. To view this data exit any test programs and from the start-up screen click on the menu bar. -
Page 96: Bac Ku P C Opy Of Th E Database
Ba ckup co p y o f the d a ta b a s e The Henson 9000 automatically keeps a backup copy of the database that is updated every time you save or modify a record. This backup copy should be on a different drive (e.g. external disc or network drive). -
Page 97: H An Gin G Th E Ac Tiv E Database
Cha ng ing the a ctive d a ta b a s e The Henson 9000 can access and use many different database tables. Each one might contain data from a specific study, or a group of patients. On start-up the database program displays... -
Page 98: Deletin G A Rec Ord F Rom Th E Database
Hens o n 9000 Per imeter Us er M a nua l Deleting a r eco r d fr o m the d a ta b a s e To delete a record from a database: Select the record to be deleted. Click When prompted, confirm delete. -
Page 99: Editin G Data In Th E Database
Da ta b a s e p r o g r a m E d iting d a ta in the d a ta b a s e To edit a record click to display the screen below. Use either the on-screen keyboard or an external keyboard to enter/edit the data in the fields. Only use the following characters: letters A-Z, numbers 0-9 and hyphen - Click to save your changes,... -
Page 100: Visu Al F Ield C H Art
Hens o n 9000 Per imeter Us er M a nua l Vis ua l field cha r t The stored image of the visual field chart for the selected record is shown in the right hand panel. To obtain a magnified image of a section move your mouse to the section and hold down the left button. -
Page 101: Fin Din G A Rec Ord In Th E Database
Da ta b a s e p r o g r a m Find ing a r eco r d in the d a ta b a s e When you first enter the database the list is sorted alphabetically by family surname. To sort the database by record number or date of test, click on the appropriate column heading. -
Page 102: Ist/ T Ree V Iew S
Hens o n 9000 Per imeter Us er M a nua l Lis t/Tr ee views There are two options for viewing database records, List View and Tree View. List View lists all records while Tree View lists all patients, grouped by surname. Clicking on a surname in Tree View will display the first names of all the patients with the same surname and clicking on a first name will display all records for the selected patient. -
Page 103: Im Port Rec Ords
Da ta b a s e p r o g r a m Imp o r t r eco r d s The Henson Database can import 24-2 and 10-2 files from the Humphrey Visual Field Analyser (HFA). This is a two stage process. The HFA files are first exported to an Excel Spread Sheet using the H FA toExc el.exe program. -
Page 104: Ov In G Th Rou Gh Th E Database
Hens o n 9000 Per imeter Us er M a nua l M o ving thr o ug h the d a ta b a s e The selected record in the database is highlighted and has an in the left column, see below. You can move through the database list by: Pressing the up/down arrow or Page keys. -
Page 105: 0 Im Age F Iles
Da ta b a s e p r o g r a m 6.10 Ima g e files The Henson 9000 saves an image of the chart when a record is saved. The format of this image file will depend on the options settings . -
Page 106: 1 P Rin Tin G A Database Rec Ord
Note: Previous versions of the software relied on Adobe reader to integrate with the database and display the stored PDF image files. From Version 3.5 the Henson 9000 default image file format is JPEG. If required an additional PDF file can be stored for use in practice management system. -
Page 107: 2 Sav In G Rec Ords In Database
Da ta b a s e p r o g r a m 6.12 Sa ving r eco r d s in d a ta b a s e When you click at the end of a visual field examination the following database entry form is displayed: Use either the on-screen keyboard or an external keyboard to enter/edit the data in the fields. -
Page 108: 3 P Rogression An Alysis
Hens o n 9000 Per imeter Us er M a nua l 6.13 Pr o g r es s io n a na lys is The Henson 9000 database contains progression analysis software that plots changes to the global indices Mean Defect and Pattern Standard Deviation. To undertake a change analysis: Select a patient record . -
Page 109: G L A U Co Ma S T A G I N G S Ys T E M: G S S Ii
It is often helpful when reviewing visual field data to have a means to scale the extent of loss. The Henson 9000 uses the GSS II system developed by Paolo Brusini. It is based upon the Mean Defect and Pattern Standard Deviation and plots these 2 global measures against each other. -
Page 110: Part Vii Utilities Program
Hens o n 9000 Per imeter Us er M a nua l Utilities program The Utilities program contains a number of routines to help with the management of your visual field database. It starts by displaying a list of the records in the current database (specified in the Options file). -
Page 111: Open In G An Existin G V Isu Al F Ield Database
Utilities p r o g r a m Op ening a n exis ting vis ua l field d a ta b a s e To view records from a different database: Click on the Utilities toolbar. Select the drive, directory and database from the drop-down menus. Click Once a database is opened you will be able to perform all the other utility routines, e.g. -
Page 112: Reatin G A N Ew V Isu Al F Ield Database
Hens o n 9000 Per imeter Us er M a nua l Cr ea ting a new vis ua l field d a ta b a s e To create a new Henson database: Click on the Utilities toolbar. Select the drive and directory where you want to create the database from the drop- down menus. -
Page 113: Opyin G A V Isu Al F Ield Database
Utilities p r o g r a m Co p ying a vis ua l field d a ta b a s e To copy the database. Connect a removable drive/pen to an available USB port. Click on the Utilities toolbar. Select the removable drive and directory from the drop-down menus. -
Page 114: Ergin G Databases
Hens o n 9000 Per imeter Us er M a nua l M er g ing d a ta b a s es To merge data from another Henson database. Click on the Utilities menu bar. Select the drive, directory and name of the database (only valid database files will be shown). -
Page 115: Ran Sf Errin G Rec Ords Betw Een Databases
Utilities p r o g r a m Tr a ns fer r ing r eco r d s b etween d a ta b a s es To transfer records from one 9000 database to another: Open the Target database. Click on the Utilities toolbar. -
Page 116: Im Port H En Son 6000 Rec Ords
Hens o n 9000 Per imeter Us er M a nua l Imp o r t Hens o n 6000 r eco r d s To import data from a Henson 5 or 6000 database: 1. Click 2. Select the location of the 6000 database from the drop menus 3. -
Page 117: Part Viii Appendix 1 - 9000 Technical Specification
Ap p end ix 1 - 9000 technica l s p ecifica tio n Appendix 1 - 9000 technical specification The Henson 9000 is a central field Perimeter which is controlled from a PC running a Windows™ compatible operating system. It includes a series of... - Page 118 Hens o n 9000 Per imeter Us er M a nua l 9. ELECTRICAL SPECIFICATION Mains Input Voltage: 100-240 VAC ; universal input. Fuses: 2 off 20 x 5mm IEC 60127-2 Time delay. Fuse rating: T2AH 250V (all voltages) Frequency 50/60 Hz Power consumption:60 VA Input Connector filtered IEC 320 socket.
- Page 119 Ap p end ix 1 - 9000 technica l s p ecifica tio n Quick start guide. Patient response button and cable assembly Mains lead for Henson. (Country specific) Installation software on a USB flash drive. Occluder (eye patch) Dust Cover Dual USB cable.
-
Page 120: Part Ix Appendix 2 - 9000 Connection Details
Hens o n 9000 Per imeter Us er M a nua l Appendix 2 - 9000 connection details The picture below shows the rear panel and connections of the Henson 9000 The fuses are located in a drawer under the mains power plug on the left hand side of the rear panel. -
Page 121: Part X Appendix 3 - Installation
Ap p end ix 3 - Ins ta lla tio n Appendix 3 - Installation 1. LOCATION The Henson should be placed on a suitable flat surface, with no part of the unit over hanging the edge of the surface. The patient aperture should be positioned away from direct light. - Page 122 Hens o n 9000 Per imeter Us er M a nua l 5.2.2.1 Requirement for all ME equipment and systems: Table 1, modified as appropriate using Fig. 1 and 2 Table 2, completed as appropriate using Figure 3 5.2.2.2 ME Equipment not specified for use in shielded location Tables 3 and 5 (life-supporting) using Figure 4, Tables 4 and 6 (non-life-...
- Page 123 Ap p end ix 3 - Ins ta lla tio n E l e k t r o n E y e Te c h n o l o g y 2 0 1 8...
- Page 124 Hens o n 9000 Per imeter Us er M a nua l E l e k t r o n E y e Te c h n o l o g y 2 0 1 8...
-
Page 125: Installing The Software
Network : Wired or Wireless network adapter if networking is required. Connectivity : TWO Free USB ports (or a suitable powered USB hub) to connect to the Henson 9000 9. Installing the software Ensure all other USB devices are unplugged from the computer. - Page 126 Hens o n 9000 Per imeter Us er M a nua l Wait for the Henson to complete its start up sequence. (approx 30-40 seconds) Open the Henson Options program by double-clicking on the computers desktop Click on the Computer tab and check that there is a Device listed in the list box on the page.
-
Page 127: Part Xi Appendix 4 - Maintenance And Warranty
Ap p end ix 4 - M a intena nce a nd wa r r a nty Appendix 4 - Maintenance and warranty Warning : Mains isolation - The mains cable to the device should be isolated from the mains supply by removing it from the wall socket before any inspection, maintenance or cleaning is undertaken. -
Page 128: Reg Ula R Ins P Ectio N A Nd Ma Intena Nce
Hens o n 9000 Per imeter Us er M a nua l 11.1 Reg ula r ins p ectio n a nd ma intena nce Before any maintenance or cleaning is undertaken, it is important that the mains cable is removed from the wall socket, isolating the unit from any power. - Page 129 Ap p end ix 4 - M a intena nce a nd wa r r a nty The head rest and chin rest pads are attached with an industrial hook and loop type fastener and can be replaced without any tools. To change the headrest pad 1.
- Page 130 Hens o n 9000 Per imeter Us er M a nua l To Replace the chin rest pad NOTE: Ensure the chin rest is in it's lowest position before changing the pad 1. With fingers, prise up one end of the pad and 2.
- Page 131 Ap p end ix 4 - M a intena nce a nd wa r r a nty E l e k t r o n E y e Te c h n o l o g y 2 0 1 8...
-
Page 132: Upgradin G Th E Sof Tw Are
Hens o n 9000 Per imeter Us er M a nua l 11.2 Up g r a d ing the s o ftwa r e Upgrades of the software and documentation are available to download from the support section of the Elektron healthcare web site www.elektron-eye-technology.com If the software is upgraded, up-to-date operational instructions can be found in the online help, which can be accessed by clicking... -
Page 133: Lean In G
Ap p end ix 4 - M a intena nce a nd wa r r a nty 11.3 Clea ning Housing The housing may be kept clean by wiping with a damp cloth. This should be done with the unit disconnected from the supply. -
Page 134: Rev En Tativ E M Ain Ten An C E
Hens o n 9000 Per imeter Us er M a nua l 11.4 Pr eventa tive ma intena nce Every six months it is recommended that the mains lead is inspected and replaced if there is any sign of damage to the insulation or plugs. The connected computer should be maintained in accordance with the manufacturer’s instructions. -
Page 135: Replac Em En T Parts
Ap p end ix 4 - M a intena nce a nd wa r r a nty 11.5 Rep la cement p a r ts There are NO user serviceable parts in the Henson device. The following replacement spare parts are available from the supplier: Item Part number Dust cover... -
Page 136: Repairs An D Rec Alibration
Hens o n 9000 Per imeter Us er M a nua l 11.6 Rep a ir s a nd r eca lib r a tio n The Henson 9000 contains no user serviceable parts except for replaceable external items (fuses). The unit must only be serviced by an appropriately qualified person. -
Page 137: Warran Ty
Ap p end ix 4 - M a intena nce a nd wa r r a nty 11.7 Wa r r a nty If, within 24 months from the date of installation, any defect is discovered in the instrument in respect of material or workmanship and reasonably within our control, we undertake to make good the defect at our own expense, provided notice is given to us as soon as it is discovered and that the instrument is immediately forwarded to our works, carriage paid, in the original... -
Page 138: Part Xii Appendix 5 - Troubleshooting
Hens o n 9000 Per imeter Us er M a nua l Appendix 5 - Troubleshooting Every effort has been made to make sure your Henson perimeter works without error for many years. However, if things do go wrong here are some checks that you can do before contacting your distributor for help. - Page 139 12.1 Ba ckg r o und o ut o f to ler a nce The Henson 9000 incorporates special sensors within the bowl which continually maintain the background luminance at the correct level. If this intensity cannot be maintained at the beginning of an examination, an error message will be displayed.
- Page 140 Hens o n 9000 Per imeter Us er M a nua l 12.2 Bo wl er r o r A Bowl error message will appear when the communications with the bowl do not appear to be working. Check that the USB cables(s) between the Henson and computer are plugged in and that the Henson is powered up.
- Page 141 Ap p end ix 5 - Tr o ub les ho o ting 12.3 LE D er r o r At the beginning of each examination, LED operation is checked automatically. If a fault is detected, an error message will be displayed. Press Continue to proceed with the test, but note that data collected may be subject to error.
- Page 142 Hens o n 9000 Per imeter Us er M a nua l 12.4 Chinr es t If the chin rest will not respond to the buttons check that it has not reached a limit (upper or lower). If you are using a touch screen check that it is configured for mouse operation (i.e. it will replicate mouse buttons correctly) some touch screens invoke a right mouse click if the touch screen is pressed for several seconds.
- Page 143 Ap p end ix 5 - Tr o ub les ho o ting 12.5 K ey vio la tio n A key violation message will appear when trying to save a record in the database using the same family name, record number and date and time of test of a record that already exists. E l e k t r o n E y e Te c h n o l o g y 2 0 1 8...
- Page 144 Hens o n 9000 Per imeter Us er M a nua l 12.6 Da ta b a s e er r o r s The Henson Database program contains your saved visual field records. It has a specific set of error messages related to the workings and limitations placed upon its operation.
- Page 145 Ap p end ix 5 - Tr o ub les ho o ting 1 2 .6 .1 T est n ot rec ogn ised One of the facilities available in the Henson Database is to import records from earlier Henson perimeters (6000 and Pro).
- Page 146 Hens o n 9000 Per imeter Us er M a nua l 1 2 .6 .2 Database Bac ku p n ot av ailable Every time a perimetrist saves or edits a visual field record the result is saved within the database and a second copy is made at the backup location.
- Page 147 Ap p end ix 6 - Licens e file Appendix 6 - License file Clicking on the Start-up screen opens up a window that shows the version number of the current software. In addition it gives a link to the web site of Elektron Technology - the manufacturers of the Henson range of perimeters and a second link to a file that gives details of the software License.
- Page 148 Hens o n 9000 Per imeter Us er M a nua l Appendix 7 - Networking The Henson can be networked to enable: Multiple machines to access the same database, Multiple machines to access a network printer, Server backup (the database must reside on the server). The options for networking the Henson will depend on what computer equipment is used.
- Page 149 It may be possible for your practice management software (PMS) to directly control the Henson software. If the computer running your PMS is directly connected to the Henson 9000 and has the facility for programmable buttons. It can use them to run the Henson tests directly without exiting the practice management software or using the Henson main menu.
- Page 150 Hens o n 9000 Per imeter Us er M a nua l <DA T A > The patient details above are self explanatory and all must be provided. The <DA T A > entry is only used on the Driving and ZATA tests. On the Driving test you must enter a 1 or 2 to denote Group 1 or 2 test.
- Page 151 Ap p end ix 8 - Pr a ctice ma na g ement integ r a tio n <Data> <path to a f older to plac e th e P DF> (this is optional but if used will override any setting for copy PDF in options) The path to the text file and its name are set in the options program.
- Page 153 Index Index print record save records as PDF searching - 1 - transferring records Database backup 12dB button Date of birth - 5 - Default database path Default test level 5dB button overriding - 8 - Default threshold Defect 8dB button Delete database record - A - Demo mode...
- Page 154 Henson Perimeter User Manual Load save as PDF Refractive correction Options program Utilities program Relocate blind spot Repeat eye test - M - Response button 36, 59, 80 Measured threshold Response time Merge databases Retest 24, 33 Miss button 24, 33 Rmv button 24, 33 Missed stimuli...
- Page 155 Index Utilities copy to USB create new database introduction merge databases open existing database transfer records - V - Video camera Video settings 59, 82, 89 - Z - ZATA 19, 37 new/existing patient details © 2 0 1 8 E l e k t r o n E y e Te c h n o l o g y...
Need help?
Do you have a question about the Henson 9000 and is the answer not in the manual?
Questions and answers