
Related Manuals for Studiologic Numa Compact 2


Summary of Contents for Studiologic Numa Compact 2
- Page 1 Numa Compact 2 Operation Manual Manuale d‘uso Bedienungsanleitung Mode d’emploi Rev. 21-03-2018...
-
Page 2: Numa Compact
Mains Before connecting the unit to the main power supply, please check if the power supply is suitable for the Numa Compact 2 adapter. The unit can be powered with 100 – 240VAC, using the included power adapter. - Page 3 ENGLISH Numa Compact 2 Operation Manual Numa Compact 2 by Studiologic®...
-
Page 4: Table Of Contents
Index Safety instructions Your new Numa Compact 2 Product overview Key features Example of use Operation diagram Power - Inputs and connections Power connection USB power Expression / Universal pedals Audio output Headphones Volume Panel - Display and navigation Sound / MIDI... -
Page 5: Numa Compact 2 By Studiologic
MIDI (Zone edit) Program Change LSB - MSB MIDI channel Volume Split assign Transpose Octave Pedal 1 - Pedal 2 Stick 1 - Stick 2 Aftertouch Declarations Appendix Sound map MIDI Implementation chart Specifications Dimensions Numa Compact 2 by Studiologic®... -
Page 6: Key Features
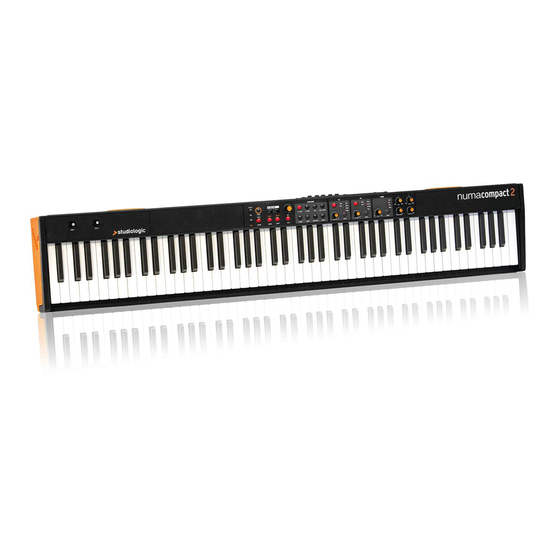
Your new Numa Compact 2 Product overview The Numa Compact 2 is an incredibly powerful musical instrument, packed in a stylish and slim cabinet, based on a totally new technology and updated user interface. The keyboard includes an Aftertouch control and together with the programmable Sticks, allows to have a total control of the musical performance. -
Page 7: Example Of Use
Your new Numa Compact 2 Example of use MIDI IN MIDI OUT PED1 PED2 Operation diagram UPPER Rev send Stereo reverb LOWER Rev send Sound engine UPPER Strings resonance LOWER AUX out Bass Treble Stereo reverb AUDIO out Mastering Volume... - Page 8 Numa Compact 2. Therefore Numa Compact 2 is your per- fect partner on stage, in the studio or at home. 128 voices of max polyphony is available to add depth and expression.
- Page 9 Your new Numa Compact 2 Interactive Numa The integrated USB port allows your Numa Compact 2 to con- nect to your computer and be powered directly, without the USB <> Computer need of the external adapter (included). You can use a USB and MIDI out for MIDI data transmission.
-
Page 10: Expression / Universal Pedals
Numa Compact 2 to the power socket (or use the USB connection). Switch the unit on by using the power button next to the power plug of the Numa Compact 2, set the main Volume, Bass and Treble controls to the half position and the... -
Page 11: Headphones
L/R outputs are still available for recording or other audio connections. When you use the Numa Compact 2 for the first time, we re- commend you to turn the Volume knob on the Output sec- Volume tion to not more than half way between 0 and Full. - Page 12 Parts/Zones selection The main HOME display of the Numa Compact 2 is the one shown at power on and it’s divided in 3 main areas: the top area shows the current Program number and name, the left and right lower areas are related to the Lower and Upper Sound sections, in SOUND mode, and to the Zone A and Zone B sections, in MIDI Mode.
-
Page 13: Split
MIXER page, by keeping it pressed for a few seconds. The Numa Compact 2 has 99 user’s programmable memo- STORE / User Programs ries called Programs, where you can store all SOUND, FX1/2... - Page 14 Sound, to make the sound selection easier and faster. Thanks to this function, you will have an automatic setting of your preferred sounds for each Bank. A-PIANO [1/2] P01-JAZZ DUET Concert Stage Ac-Bass Concert V: 127 V: 127 Vintage Studio SOUND A-PIANO A0 - B3 C4 - C8 Numa Compact 2 by Studiologic®...
- Page 15 SynBrass FunKlav Square Cembalo Cluster ReedOrg GloKeys ORCHESTRA Strings1 BASS/GUITAR Strings2 Ac-Bass Horns El-Bass Brass Slap Baroque Plucked BigBand Ny-Guitar BrassFall El-Guitar SaxBand Ac-Guitar TenorSax Jz-Guitar JazzFlute 2 Guitars Trumpet 12 Strings Oboe BassRide1 BassRide2 Numa Compact 2 by Studiologic®...
- Page 16 (programmable send in Edit) Amount: the 2 potentiometers control the Amount of the selected effect, like the dry/wet ratio (for modulating effects like the Chorus) or other parameters, like the distortion level of the DRIVE effects. Numa Compact 2 by Studiologic®...
-
Page 17: Strings Resonance (Damper Model
99 Program. In addition to the powerful FX1-2 double effect processors, STRINGS RESONANCE the Numa Compact 2 also has a built in STRINGS RESONANCE (Damper model) post-processing effect, dedicated to the ACOUSTIC PIANOS sound bank and controlled by the related parameter of the GLOBAL EDIT. -
Page 18: Velocity Curve
He- adphones plug; this will allow to use the headphones out as an extra auxiliary output, for recording or to connect it to an ac- tive-amplified subwoofer, in addition to the internal speakers. Numa Compact 2 by Studiologic®... -
Page 19: Pedal,
OFF and select the function of the STICK 2 in the related PART EDIT; storing the desired setting in a PRO- GRAM. Numa Compact 2 by Studiologic®... -
Page 20: Factory Reset
- In MIDI BAR open the file you have downloaded; - Press the play button and wait for the end of the procedure; - When the Numa Compact 2 display shows “UPLOAD FINISHED”, restart the instrument (off and on). QMidi: - Open QMidi;... -
Page 21: Programs Send/Receive
WINDOWS You can use a program like MIDI-Ox as it follows (be sure that the Numa Compact 2 is seen by the computer USB/MIDI ports and MIDI-Ox settings). To send data to your computer: - Connect the Numa Compact 2 to your computer via USB;... -
Page 22: Mixer
The Mixer allows to control all four parts and zones (LOWER/ MIXER UPPER/ZONEA/ZONEB) at once, in a single organized page. MIXER This function can also be accessed with a shortcut, keeping 127 U pressed the SPLIT button also marked MIXER with brackets. 64 B Numa Compact 2 by Studiologic®... - Page 23 Even with one SPLIT point (programmable for each PROGRAM) the possible settings are almost one hundred, considering the status and combinations of LOWER+UPPER+ZONEA+ZONEB and the SPLIT settings made possible by this function. Numa Compact 2 by Studiologic®...
-
Page 24: Transpose
ON in the GLOBAL EDIT area. To control the Stick 2 as- signment manually, you can set to OFF the FX-AUTOSET and the function can be switched ON or OFF and stored in the Pro- grams. Numa Compact 2 by Studiologic®... -
Page 25: Aftertouch
Normally you will set the Aftertouch ON for the UPPER part, that is commonly used for the main musical part or solo performances, while the LOWER part is normally as- sociated to accompaniments or bass lines, if the SPLIT is active. Numa Compact 2 by Studiologic®... -
Page 26: Midi (Zone Edit)
MIDI (Zone edit) MIDI The Numa Compact 2 allows to control 2 separate MIDI Zones, with all related parameters; the result can be stored in the current PROGRAM, together with the settings of the internal LOWER and UPPER sections, with a common SPLIT point and separate settings. Step through the functions with the MIDI button selected and EDIT button activated: the value of the actual function will be shown on the display and can be adjusted rotating the Encoder. - Page 27 STICK 1 STICK 1 GLOBAL EDIT area. To control the Stick 2 assignment manually, you can set to OFF the FX-AUTOSET and the function can be switched ON or OFF and stored in the Programs. Numa Compact 2 by Studiologic®...
- Page 28 ON for the UPPER zone, that is commonly used for the main musical zone or solo performances, while the LOWER zone is normally associated to accompaniments or bass lines, if the SPLIT is active, however the setting is totally under your con- trol and choice. Numa Compact 2 by Studiologic®...
-
Page 29: Declarations
Please help to keep our environment clean. State of the art To ensure maximum quality all Studiologic by Fatar devices are al- ways engineered to be state-of-the-art products, therefore updates, modifications and improvements are made without prior notice. - Page 30 Informationen die Sie benötigen, um dieses Gerät zu verwenden. Bitte folgen Sie den Anweisungen in dieser Bedienugsanleitung. Bei Fremdeingriff am NUMA Compact 2 erlischt die Garantie. Es wird empfohlen nur das vom Hersteller vorgesehene Zubehör zu verwenden. Verwenden Sie das Gerät ausschließlich wie in dieser Bedienugsanleitung beschrieben.
- Page 31 DEUTSCH Numa Compact 2 Bedienungsanleitung Numa Compact 2 by Studiologic®...
-
Page 32: Pedal 1 - Pedal
Pedal 2 FX Autoset Werkseinstellung Firmware Version und Update Programme Senden/Empfangen Programmeinstellungen Programm Name Splitpunkt Mixer Menüeinstellungen Lautstärke Splitpunkt setzen Transponieren Octave Rev send Pedal 1 - Pedal 2 Stick 1 - Stick 2 Aftertouch Numa Compact 2 by Studiologic®... - Page 33 Index MIDI (Zonen-Edit) Programmwechsel LSB - MSB MIDI Kanäle Volume Split assign Transpose Octave Pedal 1 - Pedal 2 Stick 1 - Stick 2 Aftertouch Anmerkungen Anhang Sound Map MIDI Implementation Chart Spezikifationen Maße/Gewichte Numa Compact 2 by Studiologic®...
- Page 34 Das Numa Compact 2 Produktübersicht Das NUMA Compact 2 ist ein höchst leistungsfähiges Musikinstrument, dass in einem stilvollen und schlanken Gehäuse geliefert wird und auf einer völlig neuen Technologie und einer aktua- lisierten Benutzeroberfläche basiert. Die Tastatur ist mit Aftertouch ausgestattet und zusammen mit den programmierbaren Sticks erhält man, die volle Kontrolle über das Instrument.
- Page 35 MIDI OUT PED1 PED2 Funktionsdiagramm UPPER Rev send Stereo reverb LOWER Rev send Sound engine UPPER Strings resonance LOWER AUX out Bass Treble Stereo reverb AUDIO out Mastering Volume Digital Suggested setting amplifier BUILT-IN SPEAKERS Numa Compact 2 by Studiologic®...
- Page 36 Musiker wählten diese Klänge aus und waren am Design der praxisgerechten Bedienung des NUMA Com- pact 2 beteiligt. Daher ist das NUMA Compact 2 Ihr perfekter Partner auf der Bühne, im Studio oder zu Hause. 128 Stimmen max. Polyphonie sind verfügbar, um Tiefe und Ausdruck zu erzeugen.
- Page 37 Your new Numa Compact 2 Interactive NUMA Der integrierte USB-Port ermöglicht es das NUMA Compact 2 an Ihren Computer anzuschließen und direkt mit Strom USB <> Computer versorgt zu werden, ohne dass der externe Adapter (im Lie- ferumfang enthalten) benötigt wird. Sie können einen USB- und MIDI-Ausgang für die MIDI-Datenübertragung verwen-...
- Page 38 Numa Compact 2 an die Steckdose anzuschließen (oder ver- wenden Sie den USB-Anschluss). Schalten Sie das Gerät mit dem Netzschalter Numa Compact 2 ein, stellen Sie die Laut- stärkeregler-, Bass- und Höhenregler auf die 12 Uhr Position und den Mastering-Regler auf Null-Minimum (die Mastering- Funktion wird in dieser Bedienungsanleitung später erklärt),...
- Page 39 Zur Datenübertragung über USB verbinden Sie das Numa Compact 2 mit einem USB-Kabel mit Ihrem Computer. Wenn Sie das Numa Compact 2 zum ersten Mal anschließen, wird es von Ihrem Computer automatisch erkannt und der entspre- chende Treiber wird vom Betriebssystem installiert (class com- pliant).
- Page 40 DEMO Parts/Zones selection Die Haupt-HOME-Anzeige des Numa Compact 2 wird beleuchtet sobald das Gerät eingeschaltet wird und ist in 3 Hauptbereiche eingeteilt: Der obere Bereich zeigt die aktuelle Programmnummer und den Programmnamen an, die linken und rechten unteren Bereiche beziehen sich auf die un- teren (lower) und oberen (upper) Soundbereiche im SOUND-Modus und auf die Zone A und die Zone B im MIDI-Modus.
- Page 41 Die SPLIT-Taste kann auch als Abkürzung verwendet werden, um die MIXER-Funktion auszuwählen, indem man sie für einige Sekunden gedrückt hält. Das Numa Compact 2 verfügt über 99 Speicherplätze, die “Pro- STORE / Speicherplätze grams” genannt werden. In diesen können Sie alle SOUND-, FX1 / 2-Einstellungen, Intensität, Funktionen, Splitpunkte und...
- Page 42 Dank dieser Funktion haben Sie eine automatische Ein- stellung Ihrer bevorzugten Sounds für jede Bank. A-PIANO [1/2] P01-JAZZ DUET Stage Concert Ac-Bass Concert V: 127 V: 127 Vintage Studio SOUND A-PIANO A0 - B3 C4 - C8 Numa Compact 2 by Studiologic®...
- Page 43 SynBrass FunKlav Square Cembalo Cluster ReedOrg GloKeys ORCHESTRA Strings1 BASS/GUITAR Strings2 Ac-Bass Horns El-Bass Brass Slap Baroque Plucked BigBand Ny-Guitar BrassFall El-Guitar SaxBand Ac-Guitar TenorSax Jz-Guitar JazzFlute 2 Guitars Trumpet 12 Strings Oboe BassRide1 BassRide2 Numa Compact 2 by Studiologic®...
- Page 44 > FX2 (einer der vier Effekte) > Reverb (send ist programmier- bar in EDIT) Amount-Regler: Die 2 Potentiometer steuern den Anteil des ausgewählten Effekts, wie das “Wet” / “Dry”-Verhältnis (für Modulationseffekte wie der Chorus) oder andere Parameter, wie die Verzerrung des DRIVE-Effekts. Numa Compact 2 by Studiologic®...
- Page 45 Dieser Effekt, der mit den Erfahrungen der NUMA STAGE und CONCERT-Instrumente entwickelt wurde, fügte den Klavier- klängen einen noch realistischeren Effekt hinzu und reprodu- ziert die Resonanzen der echten Saiten und des Resonanzbo- dens des akustischen Instruments. Numa Compact 2 by Studiologic®...
- Page 46 Verstärkersystem auch dann aktiv, wenn eine Buchse in den Kopfhörer gesteckt ist. Dadurch kann die Kopfhörerbuchse als zusätzlicher Hilfsausgang, zur Aufzeichnung oder zum Anschluss an einen aktivverstärkten Subwoofer zusätzlich zu den internen Lautsprechern verwen- det werden. Numa Compact 2 by Studiologic®...
- Page 47 PED2 Anschluss so programmiert werden, dass fast alle Pedaltypen angeschlossen werden kön- nen: • Sustain-Pedal Öffner • Sustain-Pedal Schließer • Expression-Pedal (Volume Funktion, Pedale mit Potentiometer und Stereo-Klinkenstecker) • SLP3-D Dreifachpedal Soft/Sostenuto/Sustain mit Halbdämpfer-Funktion Numa Compact 2 by Studiologic®...
- Page 48 Möchte man alle Parameter direkt und manuell steuern, kann die Funktion auf OFF gestellt werden und die Funktion des STICK 2 im zugehörigen EDIT Bereich ausgewählt werden und die gewünschte Einstellung in einem PROGRAM (Speicher- platz) abgespeichert werden. Numa Compact 2 by Studiologic®...
- Page 49 - Öffnen Sie in der MIDI BAR die Datei, die Sie heruntergeladen haben. - Drücken Sie die Play-Taste und warten Sie auf das Ende des Vorgangs. - Wenn das Numa Compact 2 Display “UPLOAD FINISHED” azeigt, starten Sie das Gerät neu (aus und wieder einschalten). QMidi: - Öffnen Sie QMidi - Wählen Sie die Firmware-Datei aus, die Sie heruntergeladen...
- Page 50 MIDI- und die SysEx Librarian - Einstellungen) erkannt wird. Datenübertragung an den Computer: - Öffnen Sie SysEx Librarian. - Wählen Sie in der Symbolleiste “Numa Compact 2” als Gerät aus. - Klicken Sie auf die “Record many” - Taste in SysEx Librarian.
- Page 51 Popup-Menü Namens “Destination”. - Klicken Sie darauf und wählen Sie den MIDI-Port, über den Sie senden möchten. - Wählen Sie auf dem Numa Compact 2 die Funktion RECEIVE (Empfangen) aus. - Im Programm SysEx Librarian drücken Sie die “Play” -Taste und warten, bis die Übertragung abgeschlossen ist.
- Page 52 UPPER / ZONE A / ZONE B) sofort auf einer einzigen Seite zu MIXER steuern. Diese Funktion kann auch mit einer Taste aufgerufen 127 U werden, wobei die SPLIT [Mix]- Taste gedrückt gehalten wird. 64 B Numa Compact 2 by Studiologic®...
- Page 53 Selbst mit einem SPLIT-Punkt (programmierbar für jedes PRO- GRAM) gibt es fast hundert mögliche Einstellungen unter Berücksichtigung des Status und der Kombination von LOWER + UPPER + ZONE A + ZONE B und den SPLIT-Einstellungen, die durch diese Funktion ermöglicht werden. Numa Compact 2 by Studiologic®...
- Page 54 PEDAL 1 - PEDAL 2 Hier können Sie entscheiden, ob die Pedale für jeden Absch- nitt aktiviert sind (UPPER / LOWER oder ZONEA und ZONE B, PART EDIT [6/10] sobald die MIDI-Taste aktiviert ist). PEDAL 1 PEDAL 1 Numa Compact 2 by Studiologic®...
- Page 55 Bereich (UPPER), der üblicherweise für die meisten Musikstücke oder das Solo verwendet wird, während der un- tere Bereich (LOWER) normalerweise mit Begleitungen oder Basslinien verbunden ist, wenn die SPLIT – Funktion aktiv ist. Numa Compact 2 by Studiologic®...
- Page 56 MIDI (Zonen edit) MIDI Mit dem NUMA Compact 2 können Sie 2 separate MIDI-Zonen mit allen zugehörigen Parame- tern steuern. Das Ergebnis kann im aktuellen PROGRAM(M) zusammen mit den Einstellungen der Tastaturbereiche (LOWER- und UPPER) mit einem gemeinsamen SPLIT-Punkt und separaten Ein- stellungen abgespeichert werden.
- Page 57 Tonlage zu spielen. Auf der anderen Seite klingt es manchmal besser, wenn man die Obere (UPPER) - Zone um ein oder zwei Oktaven absenkt. Einfach die gewünschte Einstellung ausprobieren und dann im aktuellen PROGRAM(M) abspeichern. Numa Compact 2 by Studiologic®...
- Page 58 Zone, die üblicherweise als die Hauptmusikzone oder bei So- loaufführungen verwendet wird, während die untere (LOWER) Zone normalerweise mit Begleitungen oder Basslinien verbun- den ist, wenn der SPLIT aktiv ist, aber die Einstellung ist völlig unter Ihrer Kontrolle und nach Ihrer Wahl. Numa Compact 2 by Studiologic®...
- Page 59 Anmerkungen Jedes Gerät von Studiologic von Fatar wird einzeln geprüft und ei- Garantle ner vollständigen Funktionskontrolle unterzogen. Die Verwendung ausschließlich hochwertigster Bauteile erlaubt die Gewährung von zwei Jahren Garantie. Als Garantienachweis dient der Kaufbeleg / Quittung. Schäden, die durch unsachgemäßen Einbau oder unsac gemäße Behandlung entstanden sind, unterliegen nicht der Garantie...
- Page 61 Appendix Numa Compact 2x Appendix Numa Compact 2 by Studiologic®...
- Page 62 Trumpet Plucked Oboe Ny-Guitar Cassotto El-Guitar Accordition Ac-Guitar Musette Jz-Guitar Harmonica 2 Guitars ChoirAh 12 Strings ChoirOh BassRide1 ChoirUh BassRide2 ChoirSint JazzOrg1 Bouzouki JazzOrg2 Kanoun DrawbVib AllDrawb Cawala 888-Pure Mizmar 888-Scan MildSet StndKit AllEven WorldKit Numa Compact 2 by Studiologic®...
-
Page 63: Midi Implementation Chart
1,2: sound level; Expression Sustain Reverb EFX ch 1,2: reverb send, ch 16: reverb level Modulation EFX ch 16: efx level All notes off Please note: MIDI CC not listed above are not supported by the instrument. Numa Compact 2 by Studiologic®... -
Page 64: Specifications
4” Design and Specifications are subject to change without notice. Il design e le specifiche tecniche sono soggette a modifica senza preavviso. Design et caractéristiques techniques sont sujets à changement sans préavis. Technische Änderungen vorbehalten. Numa Compact 2 by Studiologic®...
Need help?
Do you have a question about the Numa Compact 2 and is the answer not in the manual?
Questions and answers