
Related Manuals for 3T Strada

Summary of Contents for 3T Strada
- Page 1 OPERATING MANUAL Gravel / Road Bike ISO 4210:2014 Translation of the Original instruction manual...
- Page 2 Dear Customer, To start with, we’d like to provide you with some important information Firstly, here are a few important pointers as to the rider’s person which about your new bicycle. This will help you make the most of its benefits are also very important: and avoid any possible risks.
- Page 3 If you leave this page unfolded when you read this guide, you can immediately recognise which part of the bicycle is being referred to. Bicycle parts Frame Top tube Stem Down tube Handlebars Seat tube Brake lever Head tube Chain stay Seat stay Shifter Headset...
-
Page 4: Safety Information
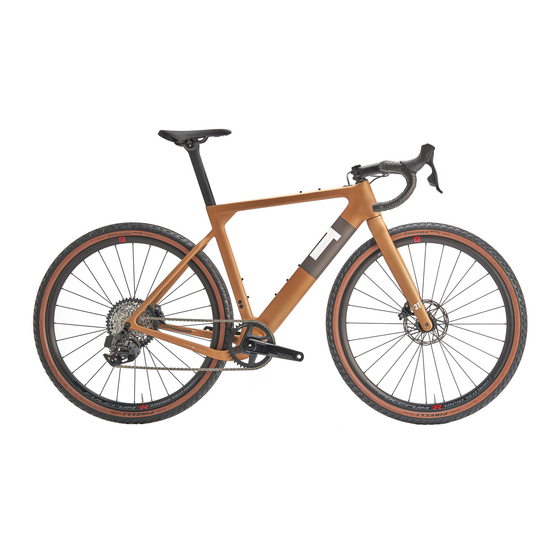
The illustration shows the 3T Exploro Gravelbike version. The bike you purchased may look somewhat different. This manual describes bicycles in the following categories: Road Racing bike, Triathlon/Time trial bike, Cyclocross bike, Single-speed bike/Fixie. This operating... -
Page 5: Table Of Contents
Contents Imprint Introduction Maintenance /upkeep For questions concerning your bicycle please Chain always contact your dealer first, only then in Bicycle parts Wheels case the manufacturer of the bicycle. Safety information Rims /tires For contact details please refer to the war- Contents ranty section, back cover or other included Tires and tire pressure... -
Page 6: For Your Safety
For your safety Before the first ride These instructions assume that you can already Please also consult the additional operating Modern braking systems might be ride a bicycle. It is not a teaching manual to help manuals of the individual component manu- more powerful or have a different you learn to ride. -
Page 7: Before Each Ride
Before each ride Ensure that the wheels are securely fastened in Check the air pressure in the tires. You will find Before every ride, please check that: the frame and fork. Check that the quick release instructions as to the correct tire pressures on •... -
Page 8: If You Have Had A Fall
If you have had a fall wear, which can impact the operating safety Check out the en- • Check that both brakes are operating fully. of these parts. tire bicycle for any • Do not set off again without having checked If you use parts for longer than their intend- changes. -
Page 9: Legal Regulations
Legal regulations Before riding your bicycle on public Maximum permissible weight: Rider‘s • Use on terrain roads, you should inform yourself weight + Bicycle weight + Baggage • Excess load about the applicable national regu- weight • Improperly repairing defects lations in your specific country. -
Page 10: Adjusting The Bicycle To The Rider
Adjusting the bicycle to the rider Type 3 The seat post, seat, stem and handlebars can Using quick releases and through axles Cyclocross bikes only be tightened and secured with quick releas- es or bolted connections. Quick releases and through axles are systems installed on the bicycle in place of bolted con- Please ensure that you read the nections. -
Page 11: Through Axles
• Check that all quick releases are If your bicycle has components that Inappropriately installed wheels may properly fastened before every ride. are fixed with quick releases, ensure shift while you are driving or detach • Make sure that all quick releases they are locked too when you park from the vehicle. -
Page 12: Installing Pedals
Installing pedals Ensure that you read the manufac- turer‘s instructions before using clip- If your bicycle was supplied without the pedals less pedals. Practice clipping your pre-installed, these have to be attached with the shoes in and out of the pedals‘ locking system 90˚... -
Page 13: Setting Up The Angle Of The Seat
If you place your foot in its proper position for cycling, your leg should now be lightly bent. Your foot is in the right position for cycling when its widest part is right above the pedal spindle. Patented seat post with two-screw locking mechanism Integrated Seatpost If your bicycle is equipped with a so-called in- If you are using clipless pedals, the pedal plates... -
Page 14: Setting Up The Position Of The Handlebars/Stem
Threadless stem Setting up the brake levers When adjusting the height of the seat, never pull the seat post further out than the maximum extension Set up your brake levels in such a way that you length marked! If your tube does not have a can safely apply them and brake comfortably. -
Page 15: Children
Children Frame Top tube Child bike trailers: Head tube • Take no chances in terms of quality when buy- Seat stay ing child bike trailers. • Only install child bike trailers on bicycles and Seat tube only using mounting parts approved or intend- ed for this purpose by the manufacturer. -
Page 16: Maintenance /Upkeep
Maintenance /upkeep Thanks to the evolution in materials and con- On no account should you ride with a Please have your bicycle checked by struction techniques, nowadays it is possible to bent or broken frame. Never attempt a specialist retailer on a regular ba- produce all shapes of frames safely so they per- to repair damaged parts yourself. -
Page 17: Chain
bush, please tighten the chain according to Dirt and permanent strain wear the instructions provided by the correspond- the chain. The chain should be re- ing manufacturer. placed as soon as it can be signifi- cantly lifted (approx. 5 mm) from the front chain ring. -
Page 18: Wheels
All screw connections have to be Modern rims (from 24") indicate when tightened with the correct torque. If they are worn from braking. These in- the torque is not correct, the screws dicators take the form of embossed could break or loosen other parts (see page or coloured points or lines on the brake sur- 26 “Torques for screwed connections”). -
Page 19: Tires And Tire Pressure
In particular, rims made of compos- If you replace the tires, only exchange them Please also inform yourself using ite materials, such as carbon fibre, for the same model with the same dimensions the information provided by your tire require special attention. Friction and profile. -
Page 20: Tubeless Tires
Your bicycle can only function safely Only use tubeless tires in the pre- Attaching tubular tires requires ex- and effectively if you replace parts scribed way, with the correct air pert skills and lots of experience! Al- with suitable, authorised replace- pressure and the recommended ways have your tubular tires changed ments. - Page 21 Disk brakes: • Lightly strike the wheel from above with the • The wheel can be removed without any further palm of the hand. preparation. • Take the wheel out of the frame. • Please note: when fitting the wheel, the disk must be slotted between the brake linings of Types of valve on bicycle tubes the brake calliper and ultimately be centred...
-
Page 22: Brakes
• Check that the tire is properly in place and Brakes Various versions of disk brakes are runs true using the control ring on the side of available for racing and cyclo-cross the tire. Adjust the positioning of the tire with Modern bicycles can be equipped with a variety bikes. - Page 23 downhill sections, you should not be gently Brake pad wear braking the whole time. It is better to brake more sharply for a shorter period going into a Normal operation wears down brake bend or if you are starting to go too fast. This rubbers and brake pads.
-
Page 24: Gears
If your bicycle comes equipped with You can avoid this problem by apply- a converter, which makes it possible ing the brake lever before transport to operate hydraulic brakes with me- and then fixing it in this position using chanical brake levers, read the attached com- a strap. - Page 25 The gear lever can be operated as shown in Gears are vital to your safety on this example: the bike! Please read the operating instructions supplied to you by your Rear Front manufacturer and familiarise yourself with how to operate the bicycle and switch gears before your first ride.
-
Page 26: Triathlon/Tt Bike
The use of spoke guards is required. Triathlon/TT bike Time-trial handlebars Otherwise, only minor setup errors could lead to the chain or the entire Handlebar extension rear derailleur falling between the sprockets Time-trial gear switcher and the spokes. Aerobrake lever Spoke protector Disk wheel... -
Page 27: Inspection Plan
The behaviour of a bicycle with a Inspection plan Work which you are able to carry out yourself TT handlebar or attachments can with no risk to safety is printed in bold. be dangerously different to what Only use parts of the same brand you are used to. - Page 28 Schedule and inspection work Every 300 to 500 kilometres: After rides in the wet: Before every ride: Work undertaken Work undertaken Work undertaken Check the following: Clean and grease: • Chain • Gears Maintenance/inspection: • Sprockets • Chain Check the following: •...
-
Page 29: Lubrication
Lubrication Working on the bicycle requires special knowledge, experience and special tools! Only allow specialists to work or check key parts on the bicycle! Lubricant schedule What should be greased? How often? With which lubricant? Chain After cleaning off any dirt, after riding in the wet, every 250 km Chain lubricant Brake and shifter cables When their performance deteriorates, once a year... -
Page 30: Bolted Connections
Bolted connections Bolted connection Torque Bolted Torque Max. connection Thread Screw of seat rails to 20 Nm It is vital that all bolted connections on seat post clamp Bottle holder 4 Nm* the bicycle have the correct torque in Brake blocks 6 Nm order to ensure that they are secure. -
Page 31: Loose Accessories
Loose accessories You always have to fit the enclosed Not all carbon frames and compo- If you are riding with baggage, en- accessories in line with the guide- nents are compatible with each oth- sure that you do not exceed the max- lines and instructions. -
Page 32: Trailers
You have to stop riding immediately if Trailers Read the manufacturer’s instructions an object is trapped between the tire for use as they often contain impor- and the mudguard. The object has to tant information for cycling with a be removed before you can continue on your trailer. -
Page 33: How To Use Carbon Components
How to use carbon components If you have a carbon frame or parts, Therefore, it is vital to regularly check carbon Do not clamp a carbon frame directly into a these should not be applied with frames and other carbon components very work stand, instead you should secure it by grease or oil. -
Page 34: Transporting The Bicycle
Transporting the bicycle Always transport bicycles on their running sur- By car faces when not otherwise prescribed by the car- By aircraft rier manufacturer. You may not attach the bicycle to the roof rack or rear carrier by its crank set. It Check with the airline regarding the regulations You should use only roof and rear-mounted car- riers which comply with the requirements of the... -
Page 35: Liability For Material Faults (Warranty)
Liability for material faults (warranty) In all nations which apply EU law, In the case of a defect/possible lia- Battery packs and batteries the common conditions for warranty/ bility claim, please contact your spe- Battery packs and batteries are not residual or domestic waste and must be handed over to your liability for material defects apply. -
Page 36: Inspections
Inspections Of particular importance for the next inspection: inspection inspection After approx. 200 kilometres After approx. 1000 kilometres ______________________________________ Work done: Work done: ______________________________________ ___________________________________ ___________________________________ ______________________________________ ___________________________________ ___________________________________ ______________________________________ Materials used: Materials used: ___________________________________ ___________________________________ Parts that are to be exchanged: ___________________________________ ___________________________________ ______________________________________... -
Page 37: Hand-Over Documentation C5
The following components were assembled and checked separately: Permitted for competitions c yes c no _______________________________________________________ 3T products are designed for a rider weight limit of 110 kg/240 lb. _______________________________________________________ _______________________________________________________ Customer /recipient /owner c The assembling/inspecting party completed a test ride Name... -
Page 38: Bicycle Identification C6
Bicycle identification In the case of change of ownership: Bicycle manufacturer _________________________ 3T CYCLING SRL Brand _______________________ Owner _______________________ Model _______________________ Address _______________________ Frame height/size _______________________ _______ _______________ Colour _______________________ Date/Signature _______ _______________ Frame number _______________________ Fork _______________________ Serial number... - Page 39 We thank you for buying your 3T frame or bike! Our aim is to bring back the joy of bike riding. 3T bike frames and bikes are for riders that want to do more, feel more, and explore wider horizons.
- Page 40 3T.BIKE...
Need help?
Do you have a question about the Strada and is the answer not in the manual?
Questions and answers