Table of Contents
Advertisement
Quick Links
Advertisement
Table of Contents

Summary of Contents for Teledata s.r.l. ONEMINI
- Page 1 ONEMINI Fire Alarm Panel User and Installation Manual...
- Page 3 Information ownership © COPYRIGHT 2017, Teledata s.r.l. All rights reserved. Any full or partial distribution, modification or reproduction of this document are prohibited without written authorization by Teledata s.r.l. except the following actions: Fully or partially printing the document in its original format. ...
-
Page 5: Table Of Contents
Manufacturer's identification data Packaging content Identify the model and the serial number Standards compliance Equipment management Transportation Environmental conditions Unpacking Replacement Disposal Introduction to ONEMINI General features Installation precautions Technical specifications 5.3.1 HARDWARE features 5.3.2 Software features Technical data 5.4.1 Datum plate 5.4.2... - Page 6 7.6.7 Connectable loop devices Connection to host computer 7.7.1 Point to Point connection 7.7.2 LAN or WAN connection 7.7.3 ONEMINI control panel ring network Power supply 7.8.1 Network input features 7.8.2 Grounding features 7.8.3 Panel power supply features Panel internal cabling...
- Page 7 10.8.5 Setting weekly trends 11.1 Viewing events 11.1.1 Exporting data 11.2 Enabling users and changing login codes 11.2.1 Programmer 11.3 Managing alarms 11.3.1 Mute alarms and the unit ONEMINI LARM ONTROL ANEL . 1.0.3 / 2018 SER AND NSTALLATION ANUAL...
- Page 8 Disable system elements 11.6.1 Disabling/Enabling a device 11.6.2 Disabling/Enabling a loop 11.6.3 Disabling/Enabling a zone 11.6.4 Disabling/Enabling an output 11.6.5 Disabling/Enabling a board 11.7 Modify a user password ONEMINI LARM ONTROL ANEL . 1.0.3 / 2018 SER AND NSTALLATION ANUAL...
-
Page 9: Introduction To This Manual
It must be kept in a clean place accessible to operators, and kept in good conditions. Manual data Equipment: ONEMINI Title: User and Installation Manual Code or edition: v. 1.0.2 ENG Print month and year:... -
Page 10: Safeties And Warranties
Please write or call to contact personnel able to answer your questions and provide assistance. Service email: info@teledata-i.com Service phone number: +39 0227201352 Service fax number: +39 022593704 ONEMINI LARM ONTROL ANEL . 1.0.3 / 2018 SER AND... -
Page 11: Product Identification
Packaging content The packaging contains the following items: Description Quantity ONEMINI panel Resistances, diodes and jumpers kit Installation and user manual (this manual) Identify the model and the serial number Inside and out the box of the panel there are identification stickers that must not be removed under any circumstance. -
Page 12: Standards Compliance
15.6, 15.7, 15.15 cl. 9.7, 9.8, 9.15 Vibration resistance Durability reliability: cl. 15.8, 15.13 cl. 9.9 Electrical stability Durability reliability: cl. 15.5, 15.14 cl. 9.6, 9.14 Humidity resistance ONEMINI LARM ONTROL ANEL . 1.0.3 / 2018 SER AND NSTALLATION ANUAL... -
Page 13: Equipment Management
Avoid destruction by incineration and disposal in waterways. The product must be safely disposed. Before disposal, batteries must be removed from all products containing batteries being careful to avoid short circuits. Observe current regulations for battery disposal. ONEMINI LARM ONTROL ANEL . -
Page 14: Introduction To Onemini
The control panel can be programmed using the touch screen or by importing programming data from a USB key. Like all Teledata products, ONEMINI can be managed through the integrated supervisory and control software. Installation precautions The electronic boards are provided with semiconductors that are sensitive to electrostatic charges. -
Page 15: Technical Specifications
Management of different types of analog detectors and modules: Thermal, optical and mixed detectors Input Modules Output Modules Addressed call points Addressable sirens Wireless translator ONEMINI LARM ONTROL ANEL . 1.0.3 / 2018 SER AND NSTALLATION... -
Page 16: Technical Data
6 Kg Painting Epoxy resin Color Black Conduit holes 4 x 25 mm 5.4.5 Environmental features Storage temperature (-40 ÷ +70)°C Operating temperature (-5 ÷ +40)°C Operating humidity (relative) ONEMINI LARM ONTROL ANEL . 1.0.3 / 2018 SER AND NSTALLATION ANUAL... -
Page 17: Hardware Configuration
1 synoptic led (ONE16 TD596) 1 PT-LAN network card (for LAN or WAN network connection) 1 ONERING card (for panel network connection) 2 batteries (max 12V @ 7,2 Ah) ONEMINI LARM ONTROL ANEL . 1.0.3 / 2018... -
Page 18: Layout And Connections
7. Layout and connections Logic board (TD595) layout ONEMINI LARM ONTROL ANEL . 1.0.3 / 2018 SER AND NSTALLATION ANUAL... - Page 19 Loop Send- Loop Send+ Connector J4 and J12 PIN no. NAME FUNCTIONALITY 485- RS-485 line - 485+ RS-485 line + Ground AUX+ AUX power output (27Vdc @ 500mA) Ground ONEMINI LARM ONTROL ANEL . 1.0.3 / 2018 SER AND NSTALLATION ANUAL...
-
Page 20: Pt-Lan Card (Optional)
Connect the flat cable to the connector J3 (7 pin) of the network card and to connector J11 (6 pin) of the main board. Leave free the 7th pin on the panel side which corresponds to the NC function. ONEMINI LARM ONTROL ANEL . - Page 21 Connect the control panel to the network card on connector RJ-45 of the network card using: 10BASE-T crossed network cable: for connection to the host PC 10BASE-T direct network cable: for connection to a hub. ONEMINI LARM ONTROL ANEL .
-
Page 22: Onering Card (Optional)
ONERING Card (optional) The ONERING expansion card permits to connect up to 32 ONEMINI model panels. The purpose is to share information between panels, allowing also to do cross outputs activations. The ONERING card, is supplied with a flat cable and must be connected to the main board... - Page 23 3. Assemble the ONERING card and fix it with four 3x6mm screws. 4. Connect the data flat cable in J7 connector of ONEMINI panel. 5. Connect the power cable to PSOUT+ and GND terminals of J4 connector of ONEMINI panel.
- Page 24 ONERING ring network is developed to ensure functionality also in case of a bus cut or short. The system is able to keep the data transfer between the panels in degraded mode, in case of power failure of one or more ONERING cards. ONEMINI LARM ONTROL ANEL .
-
Page 25: Power Supplies And Batteries
Check the bus connections before starting the system. Power supplies and batteries Inside ONEMINI panel it is possible to two 7.2Ah batteries. Batteries must be cabled in series and blocked with the nylon wire wraps supplied. ONEMINI LARM ONTROL ANEL . -
Page 26: System Description
In the event of one of these cases the control panel will indicate it by an optical indication (message on the display, yellow LED for sounder fault is on) or acoustic signal (buzzer). ONEMINI LARM ONTROL ANEL . -
Page 27: Communication With Detectors And Modules
Communication with detectors and modules ONEMINI control panel communicates with addressable detection and control devices through a two-wire line, called loop. It is possible to use the control panel in open loop systems or closed loop systems. -
Page 28: Generic Loop Connection Requirements
The total length of all legs should not exceed the maximum allowed length, according to the section of the cable used, Total resistance from the control panel connectors to the end of every junction should not exceed 100Ω. ONEMINI LARM ONTROL ANEL . -
Page 29: Closed Loop Configuration
SF5300 (40930-8) temperature detector, (class A1R and B) SF5100E (IV100) (like SF5100 but without isolator) SF5200E (IV200) (like SF5200 but without isolator) SF5300E (LV350) (like SF5300 but without isolator) ONEMINI LARM ONTROL ANEL . 1.0.3 / 2018 SER AND... - Page 30 FDWVMI120 output module FDWMCB100 battery powered output module FDSGLSP100 addressable sounder FDWCP100 call point It’s possible to connect the following Apollo’s device on the loop: ONEMINI LARM ONTROL ANEL . 1.0.3 / 2018 SER AND NSTALLATION ANUAL...
- Page 31 Open area alarm device 58000-700 XP95 Base sounder Discovery / XP95 Integrated base sounder Discovery 45681-277 XP95 /XP95 55000-877 XP95 Loop powered beacon 45681-276 Ancillary base sounder Soteria Detector ONEMINI LARM ONTROL ANEL . 1.0.3 / 2018 SER AND NSTALLATION ANUAL...
-
Page 32: Connection To Host Computer
The control panel can be connected to a host computer by means of a Point to Point connection or online by means of an appropriate LAN interface. 7.7.1 Point to Point connection Below an example of point-to-point connection. ONEMINI LARM ONTROL ANEL . 1.0.3 / 2018... -
Page 33: Lan Or Wan Connection
Below an example of network connection. With this configuration it is possible to connect one or more control panel in a LAN or WAN environment and monitor them from a host provided with centralized supervision functionality. ONEMINI LARM ONTROL ANEL . -
Page 34: Onemini Control Panel Ring Network
7.7.3 ONEMINI control panel ring network More than one ONEMINI control panel may be connected together in a ring network on a dedicated bus, by installing the optional ONERING network card. In this network, events and alarms can be shared. -
Page 35: Power Supply
Following features are useful for the system installation: Output operating voltage 27.6 V - Max. 500mA Voltage of battery charger 27.6 V- Max. 900mA Low battery threshold 21.6 Volts Battery release threshold 20.4 Volts ONEMINI LARM ONTROL ANEL . 1.0.3 / 2018... -
Page 36: Panel Internal Cabling
Cable outlet for 22 mm diameter must be use. It is important to connect the cable shields to an earth terminal in the panel mechanics. For closed loops, connect only one side of the shield, leaving the other side disconnected. ONEMINI LARM ONTROL ANEL . - Page 37 Below a cabling example of a complete panel is shown. ONEMINI LARM ONTROL ANEL . 1.0.3 / 2018 SER AND NSTALLATION ANUAL...
-
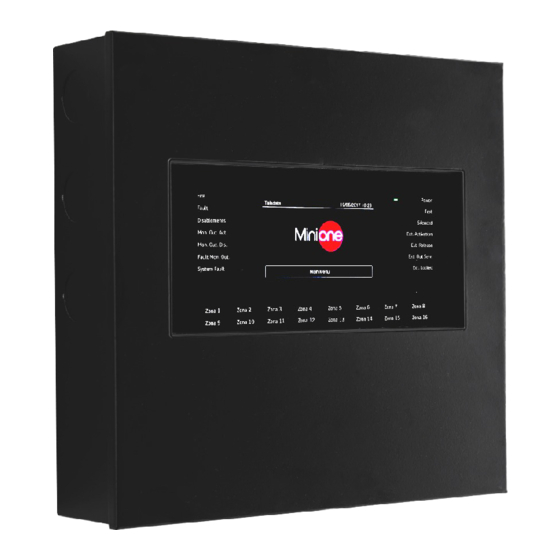
Page 38: Control Panel
At least one device under test Silenced Yellow Alarm silenced Ext. Activation Yellow Extinguishing circuit activated (not yet available) Ext. Release Yellow Extinguishing circuit released (not yet available) ONEMINI LARM ONTROL ANEL . 1.0.3 / 2018 SER AND NSTALLATION ANUAL... -
Page 39: Graphic Interface
view system events silence the panel and alarms reset the panel and alarms disable devices test installed devices export log events to USB ONEMINI LARM ONTROL ANEL . 1.0.3 / 2018 SER AND NSTALLATION... -
Page 40: Access Levels
Level 3: reserved to Programmers; an access code is required (and jumper JP3 must be closed) Level 4: reserved to Technical support; a wired PC connection is required. ONEMINI LARM ONTROL ANEL . 1.0.3 / 2018 SER AND... -
Page 41: Basic Operations For Any Operator
Menu Function Events Opens the Events menu. Assistance Opens the Assistance page. If any type of event has occurred, the Current events page is displayed when turned on. ONEMINI LARM ONTROL ANEL . 1.0.3 / 2018 SER AND NSTALLATION ANUAL... -
Page 42: Viewing Events
To scroll through the pages that display all events. Silence To mute the panel buzzer (but not device alarms). 9.1.1 Viewing events Main menu -> Events The Events menu lets you view events logged by category. ONEMINI LARM ONTROL ANEL . 1.0.3 / 2018 SER AND NSTALLATION... - Page 43 ONEMINI LARM ONTROL ANEL . 1.0.3 / 2018 SER AND NSTALLATION ANUAL...
- Page 44 Press Save to confirm: all events in the selected zone are displayed. :it’s possible to enter in Events menu choising one of the box show in main page; we can only see the events related to the events choise. ONEMINI LARM ONTROL ANEL .
-
Page 45: Viewing Assistance Information
9.1.2 Viewing assistance information Main menu -> Assistance Information required to receive assistance is displayed in this page. ONEMINI LARM ONTROL ANEL . 1.0.3 / 2018 SER AND NSTALLATION ANUAL... -
Page 46: Login
2. Press OK to confirm: the relevant menu is displayed according to the entered code. Change the password as soon as possible to avoid unauthorized access to the system (see 11.2 Enabling users and changing login codes). User menu ONEMINI LARM ONTROL ANEL . - Page 47 ONEMINI LARM ONTROL ANEL . 1.0.3 / 2018 SER AND NSTALLATION ANUAL...
- Page 48 Programming menu Procedures used by the various operators who work on the unit are described below. This icon identifies functions reserved to the User. This icon identifies functions reserved to the Programmer. ONEMINI LARM ONTROL ANEL . 1.0.3 / 2018...
-
Page 49: Configuration
ONERING system. In order to have this functionality, it is necessary to have installed in the panel an OneRing additional card, and the panel is connected into a ring with other ONEMINI Procedura 1. Select the quantity of panels connected into the ring. -
Page 50: Run Auto-Addressing
This function will search for and save all devices connected to the panel. Procedure Select the required loop: self-programming will start and the found devices will be displayed as illustrated in the example. ONEMINI LARM ONTROL ANEL . 1.0.3 / 2018... -
Page 51: Detectors Configuration
The first two alarms received will be ignores by the panel and will reset the detector. Sensitivity 24 H: the level of sensitivity remains the set one for the entire day. ONEMINI LARM ONTROL ANEL . - Page 52 3. Select an unused sensor number: the sensor settings window is displayed. 4. Enter the required settings. 5. Press Next to move to the next screen. 6. Press Save to confirm. ONEMINI LARM ONTROL ANEL . 1.0.3 / 2018...
- Page 53 3. Select the sensor to copy settings from. 4. Select the first sensor in the group to copy settings to. 5. Select the last sensor in the group to copy settings to. 6. Press Save to apply settings to all selected sensors. ONEMINI LARM ONTROL ANEL .
-
Page 54: Modules Configuration
Latching This function allows the automatic reset of the central once the 'input falls in the stand-by condition. It is activated in case of technological monitoring or fault. ONEMINI LARM ONTROL ANEL . 1.0.3 / 2018... - Page 55 3. Select an unused module number (blank): the module settings window is displayed. 4. Enter the required settings. 5. Press Next to move to the next screen. ONEMINI LARM ONTROL ANEL . 1.0.3 / 2018...
- Page 56 3. Select the module to copy settings from. 4. Select the first module in the group to copy settings to. 5. Select the last module in the group to copy settings to. 6. Press Save to apply settings to all selected modules ONEMINI LARM ONTROL ANEL .
-
Page 57: Zones Configuration
If Yes, all system devices will be linked to the zone. If No, select the loop that activates the zone. Loop Select the entire loop that will be associated with the programmed zone. ONEMINI LARM ONTROL ANEL . 1.0.3 / 2018... -
Page 58: Linking Devices To Zones
3. Select the Device option. 4. Select the required loop: all devices in the loop are displayed. 5. Select all devices to be linked to the zone. 6. Press Back to save the selection. ONEMINI LARM ONTROL ANEL . 1.0.3 / 2018... -
Page 59: Set Zone Operating Parameters
8. Enter the second level code 22222; 9. Select the Maintenance section; 10. Select the Exclusions section; 11. Entering the section protected; 12. Verify that the area we have planned as protected is green ONEMINI LARM ONTROL ANEL . 1.0.3 / 2018... -
Page 60: Link An Output Module To A Zone
3. To edit linked events see 10.4.2 Link an event to a zone for parameter descriptions. 4. To edit linked loops: see 10.4.3 Linking loops to zones for parameter descriptions. 5. To edit linked devices see 10.4.4 Linking devices to zones for parameter descriptions. 6. To edit operating parameters: see 10.4.5 ONEMINI LARM ONTROL ANEL . - Page 61 2. Select the zone to be deleted 3. To delete a single zone, press the zone twice. 4. To delete several consecutive zones, press the first and last zone in the interval. 5. Press Save to delete the zone. ONEMINI LARM ONTROL ANEL .
-
Page 62: Output Zones Configuration
To delete an output zone: 1. Select the Delete option: a list of output zones in the system is displayed. 2. Select the output zone to be deleted 3. Press Save to delete the output zone. ONEMINI LARM ONTROL ANEL . -
Page 63: Logic Functions Configuration
NOT XOR Example of how to use logic operators For each operator, below you can find an example of how they work. In these examples only two inputs elements where considered. ONEMINI LARM ONTROL ANEL . 1.0.3 / 2018... - Page 64 To create a logic function: 1. Select the Add option: a list of available logic functions is displayed. 2. Select the first available logic function: the page where the logic function can be built appears. ONEMINI LARM ONTROL ANEL . 1.0.3 / 2018...
- Page 65 In the example, the logic function will be activated when sensor 001 in loop 1 triggers an alarm and detector 009 in loop 1 is in pre-alarm. 6. Press Next to move to the next window. 7. Set the required parameters. 8. Associate Output Zone ONEMINI LARM ONTROL ANEL . 1.0.3 / 2018...
- Page 66 To delete a logic function: 1. Select the Delete option: a list of available logic functions is displayed. 2. Select the logic function to be deleted 3. Press Save to delete the logic function. ONEMINI LARM ONTROL ANEL . 1.0.3 / 2018...
-
Page 67: Setting System Parameters
, these languages Farsi Arabic Polish Estonian Romanian Portuguese 10.7.2 Entering panel information Programming menu -> Configure -> System -> General -> Panel info ONEMINI LARM ONTROL ANEL . 1.0.3 / 2018 SER AND NSTALLATION ANUAL... -
Page 68: Setting Led And Buzzer Behavior
Activates the blinking led function on devices installed on the loop. The led blinks when queried by the panel. Red led Sets the device led blink color to red. The led blinks when queried by the panel. ONEMINI LARM ONTROL ANEL . 1.0.3 / 2018... -
Page 69: Setting Remote Communications
If a PT-LAN network card is installed, set the same parameter for the network card. Physical Physical supervisor address address Logic Logic supervisor address address Make sure the same values are set on the supervisor. ONEMINI LARM ONTROL ANEL . 1.0.3 / 2018 SER AND NSTALLATION ANUAL... -
Page 70: Setting Loop Features
This function will allow to export various data from the panel to a USB support. The panel is compatible with USB supports with a capacity until 16Gb formatted in FAT32 with 4096 byte allocation table. It is necessary to format the device in such way with a PC. ONEMINI LARM ONTROL ANEL . -
Page 71: Import Data
10.7.9 Import data Programming menu -> Configure -> System -> USB -> Import This function will allow to import a previously saved configuration, file from a USB support to the panel. ONEMINI LARM ONTROL ANEL . 1.0.3 / 2018 SER AND... -
Page 72: Various System Settings
Programming menu -> Configure -> System -> General -> Miscellaneous Settings Settings are described below. Parameter Description T1& T2 This parameter set if panel can control T1&T2 procedure or not ONEMINI LARM ONTROL ANEL . 1.0.3 / 2018 SER AND NSTALLATION... - Page 73 Control Activate this option to debug installation errors, especially short circuits between grounding and unit signals (such as, for example, a contact between cable shield and conductor). ONEMINI LARM ONTROL ANEL . 1.0.3 / 2018 SER AND...
-
Page 74: Setting The Calendar
Programming menu -> Configure -> Date & Time -> Date and Time Procedure 1. Set the current date and time. 2. Press Save to confirm. 10.8.2 Setting daylight savings time Programming menu -> Configure -> Date & Time -> Summertime ONEMINI LARM ONTROL ANEL . 1.0.3 / 2018 SER AND NSTALLATION... - Page 75 The panel automatically switches to daylight savings time. Manual Manually set the month and day daylight savings time starts and ends. Function not enabled, no daylight savings time period is calculated. managed ONEMINI LARM ONTROL ANEL . 1.0.3 / 2018...
-
Page 76: Setting Holidays
To edit an existent time interval: 1. Select the Edit option: the list of time intervals is displayed. 2. Select the time interval to be edited. 3. Change the start and end times. ONEMINI LARM ONTROL ANEL . 1.0.3 / 2018... -
Page 77: Setting Weekly Trends
4. Press Save to confirm. To delete an existent weekly trend: 1. Select the Delete option: the list of weekly trends is displayed. 2. Select the weekly trend to be deleted. 3. Press Save to confirm. ONEMINI LARM ONTROL ANEL . 1.0.3 / 2018... -
Page 78: Use
A panel with a full memory is around 60 seconds. To avoid data corruption, do not disconnect the USB support, do not stop the exporting procedure and do not turn off the panel. ONEMINI LARM ONTROL ANEL . -
Page 79: Enabling Users And Changing Login Codes
The device in alarm status will turn on its red LED. To avoid a loop overload, in case of more than one alarm, a maximum of 10 red LEDs on the devices will be activated. The following functions are reserved to the User ONEMINI LARM ONTROL ANEL . -
Page 80: Mute Alarms And The Unit
By activating the evacuation all the output modules programmed as “Activate evacuation” (see 10.3 Modules) will be activated, even if their zone is not active, and if the logic function where they are linked to is not yet valid. ONEMINI LARM ONTROL ANEL . - Page 81 Clean detector Medium clean detector Almost dirty detector Dirty detector Procedure 1. Select the required loop: all connected devices are displayed. 2. Press a single sensor to view details. ONEMINI LARM ONTROL ANEL . 1.0.3 / 2018 SER AND NSTALLATION...
- Page 82 Single: used to test only one device. Zone: used to test devices in a specific zone. Loop: used to test devices in a the loop. Test results ONEMINI LARM ONTROL ANEL . 1.0.3 / 2018 SER AND NSTALLATION...
- Page 83 Maintenance -> Test -> Conflicts This function lets you check whether two devices have the same address on the loop, in the system. 1. If several devices are displayed with the same address, change one. ONEMINI LARM ONTROL ANEL . 1.0.3 / 2018...
-
Page 84: Identifying Mismatches
2. Correct any found mismatch. 11.5.5 Testing led operations Maintenance -> Test -> Led This function lets you check whether all the LEDS on the panel and the RGB display values are correctly working. ONEMINI LARM ONTROL ANEL . 1.0.3 / 2018 SER AND... -
Page 85: Disable System Elements
Disabling/Enabling a device Maintenance -> Exclusions/Inclusions -> Devices Procedures To disable a detector: 1. Select the device to be bypassed. 2. Press Save to confirm. Sensor 001 is bypassed in the example. ONEMINI LARM ONTROL ANEL . 1.0.3 / 2018 SER AND... -
Page 86: Disabling/Enabling A Loop
Maintenance -> Exclusions/Inclusions -> Zone Warning: bypassing a zone automatically bypasses all connected loops and relevant devices. Procedures To disable a zone: 1. Select the zone to be bypassed: ONEMINI LARM ONTROL ANEL . 1.0.3 / 2018 SER AND NSTALLATION... -
Page 87: Disabling/Enabling An Output
Maintenance -> Change password This feature will permit to modify the password of the logged user. To modify the User password: 1. Select the Change option: the code change page is displayed. ONEMINI LARM ONTROL ANEL . 1.0.3 / 2018... - Page 88 3. Confirm the new code to save it. This new code must be used at the next login Each user can modify their password. To activate other users (max 3) see paragraph 11.2. ONEMINI LARM ONTROL ANEL . 1.0.3 / 2018...
Need help?
Do you have a question about the ONEMINI and is the answer not in the manual?
Questions and answers