Table of Contents
Advertisement
Advertisement
Table of Contents

Related Manuals for Swift Hitch SH04

Summary of Contents for Swift Hitch SH04
-
Page 2: Table Of Contents
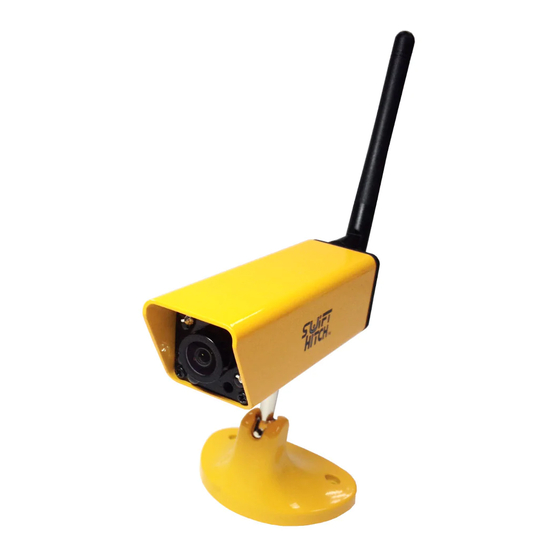
INTRODUCTION Warranty Restrictions Maintenance PRODUCT Included Parts Camera Illustration HOW TO USE Charging Camera Download Free APP: Swift WiFi Cam Power On Camera Link Camera Mount Camera Mount Magnetic Holder for Smart Phone (Optional) View Camera How to use tether for the camera (Optional) MAIN FUNCTIONS OF CAMERA MAIN FUNCTIONS OF APP 11-14... -
Page 3: Introduction
INTRODUCTION Thank you for purchasing this wireless camera kit. This product works at 2.4GHz frequency band which can be legally used worldwide without permission. We feel confident that you will be pleased with the quality and features of this product. The camera use CMOS sensor to capture the image and transmits the image to your smart phone by WiFi. -
Page 4: Restrictions
Restrictions: 1. DO NOT use this product to violate one's privacy. Monitoring one's activities without consent is illegal and this product is not designed and manufactured for such purposes. 2. DO NOT put this product near any medical equipment. Radio waves might potentially cause breakdown of electrical medical equipment. -
Page 5: Product
PRODUCT Included Parts: This package comes with the following items. Please check whether they are all included in the packaging box. If there is missing part, please contact the retailer for replacement. Camera x1 AC power charger x1 USB charging cable x1 Power extension cable ×1 Magnet holder for phone x1 Screw set for camera x1... -
Page 6: How To Use
HOW TO USE 1. Charging the Camera There are three ways to charge the camera build-in battery before using camera. 1) Charge the camera build-in battery via AC adapter by connecting USB charging cable between AC adapter and camera. Wall outlet can have output of AC between 100V~240V, adapter output is 5VDC to camera. -
Page 7: Download Free App: Swift Wifi Cam
2. Download Free APP: Swift Wifi Cam You can search Swift WiFi Cam in App Store for iPhone Or Google Play for Android . (Or scan the QR code below with APP such as Quick Scan to download the APP) 3. - Page 8 2) Run downloaded APP on smart phone 3) Tap on “Add a new camera” icon to add the camera (FIG-02). 4) Search camera by Taping on “Search in LAN“(FIG-03). FIG-03 FIG-04 5) Camera will be found and displayed with ID code. (FIG-04) 6) Tap on the ID code and enter the “Save Camera”...
-
Page 9: Mount Camera
7) The camera which has a Bright Blue point icon shows that the camera has been connected to your smart phone.(FIG-06) 8) Tap on the camera which you want to see,(FIG-06), and you can start enjoying camera live video. (FIG-07) FIG-07 FIG-08 5. -
Page 10: Mount Magnetic Holder For Smart Phone (Optional)
6. Mount Magnetic Holder for Smart Phone or Tablet (Optional) 1) Stick universal metal plate onto phone back. Take out the metal Remove paper Stick plate on the back of the plate cover from plate your phone 2) Mount magnetic phone holder on dashboard Take out the phone Remove paper Stick base on dashboard and... -
Page 11: How To Use Tether For The Camera (Optional)
How to use tether for the camera (Optional) 1. Pulling the end of tether through the hole of another end and tie the tether on a fixed part of your vehicle. 2. Clip in the hook on the camera pole above the base. 3. -
Page 12: Main Functions Of Camera
MAIN FUNCTIONS OF CAMERA 1. Link your smart phone/tablet to camera’s WiFi access point. 2. Support video and audio transmission.(Audio default is off) 3. Rechargeable battery can have run time up to 5 hours. 4. Send alert to phone/tablet when camera battery runs low. 5. -
Page 13: Main Functions Of App
MAIN FUNCTIONS OF APP Switch between STA(Station) Mode and AP(Access Point) Mode STA mode: Camera can connect to Internet via router. AP mode: Camera allows smart phone to be linked directly. Camera factory default setting is AP mode. 1) Switch from AP mode to STA mode If you have a wireless router where the camera is installed, you can connect your camera to the WiFi network of this router, and then view the camera inside this router’s network. - Page 14 If wrong password is input, you camera will not be able to establish valid WiFi connection with router and have to wait another 30 seconds to go back AP mode and then you need setup camera again with correct password to function in STA mode.
-
Page 15: Turn On/Off Ir Led And Guide Line
Turn On/Off IR LED and Guide Line Tap on icon on the viewing camera page to turn on IR LED and guide line of camera . Guide line can be used as assistance for vehicle backup.(FIG-14) FIG-13 FIG-14 Camera IR light can be turned on/off via smart phone /tablet (FIG13) Video Parameter Setting Tap on to set video parameter (FIG-15):... -
Page 16: Video And Image Control
Video and Image Control Video quality setting: You can change the video quality by choose your prefer quality level by tap icon Video Quality iOS APP Android APP Keep the video steam faster and Smooth Not available smoothly ( less delay) Standard VGA 640x480 VGA 640x480... -
Page 17: Advance Functions Of App
ADVANCE FUNCTIONS OF APP 1. Push Notice: If the camera is connected to internet by router (STA mode), you can setup push notice function, and get a warning message when the alarm is triggered. Push notification function is setup as below: 1) Setup alarm trigger first: Enter the main menu of the camera list, tap icon, then tap “Setting”... -
Page 18: Mail Settings
⑤ Attention: “Setup Arm Schedule” function is NOT enabled for SH04. 2) Tap on the APP Settings icon and set the “Receive push notice” to ON(FIG-21). 3) Make sure the notification setting in your smart phone is set Swift WiFi Cam “Allow Notifications”... -
Page 19: User Name And Authorization Setting
3) Fill in Sender and Receiver with corresponding email address, and then fill in sender’s SMTP Sever, SMTP Use and SMTP Password, then tap on Set To finish the setting process. (FIG26,FIG27,FIG28 ) FIG-28 FIG-27 FIG-26 3. User name and authorization setting: You can set the multiple user accounts for the camera, different user have different access right to control the camera. -
Page 20: Specifications
SPECIFICATIONS Item Description Specification/Parameter Working Mode P2P/AP/STA Transmission IEEE 802.11B/G/N CSMA/CA ACK standard/Protocol Modulation Mode OFDM/DBPSK/DQPSK/CCK Wireless Transmission Distance 200 feet(open area site) Receiving Sensitivity -85dBm@11M Transmission Power 17dBm (Max.) Antenna 2dBi Imaging Sensor 1/6.5″CMOS Total Pixels(Max) 648x488 Resolution 640x480/320x240 Video Compression Mode MJPEG... -
Page 21: Trouble Shooting
TROUBLE SHOOTING If you have experienced any operation problems, please try to follow the trouble shooting instruction below before contacting swift hitch technical support. Troubled Condition Solution Check if you have spelled app name correctly Can not find app in Google play or as “swift wifi cam”... -
Page 22: Approval Information
Certification Information All our products meet the requirements of approval FCC and CE, and are granted the FCC/CE certification. They are authorized to bear FCC/CE mark. FCC/CE This equipment has been tested and found to comply with the limits for a Class B digital device, pursuant to Part 15 of the FCC rules.
Need help?
Do you have a question about the SH04 and is the answer not in the manual?
Questions and answers