
Summary of Contents for StarLogic 62904150
- Page 1 LP Phono CD Recorder Installation and User’s Manual Item Number: 62904150 SKU# 01366 * Important Notice: Please read this manual carefully All brand names and trademarks are the property of their respective owners...
-
Page 2: Table Of Contents
Contents Overview ............................. 3 Quick Start Guide..........................3-4 Music System Controls Identification ..................5-10 Operating Instructions .......................11-18 Using the Remote Control ......................19-22 Recording CDs..........................23-29 Specifications ..........................30 Troubleshooting..........................31 Records, Stylus, CD’s ........................32-34 Important Safety Instructions/Precautions................35--36 Customer Service ..........................37 Warranty ............................38... -
Page 3: Overview
Overview • This All-in-One Music System enables you to enjoy your favorite albums and cassettes and record them onto CD’s. • This unique music system offers you the options of playing music from various sources such as Vinyl Records, CD’s, AM/FM Radio and Cassette Tapes. •... - Page 4 Quick Start Guide 5. Press the selector buttons located on the bottom of the front panel to choose to listen to Phono, CD, Cassette Tape, AM / FM Radio and AUX. AUX PHONO FM-AM CD TAPE To record from a Phono Record or Cassette please read the following steps: 1.
-
Page 5: Music System Controls Identification
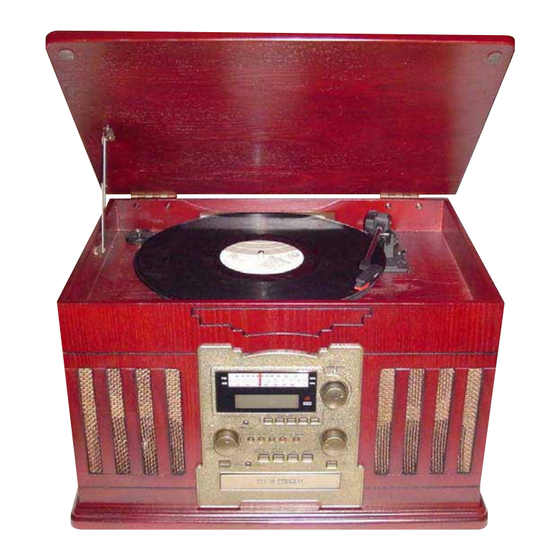
Turntable Diagram Top View Before use, slide off the stylus protector (white colored plastic 1) Turntable Platter. 2) 45 RPM adaptor. 3) Shock absorbing tension screw. When you transport the unit, turn the screw clockwise to secure the turntable. Before use, completely loosen the screw by turning it counterclockwise with a coin or screwdriver. The platter will now absorb vibration and allow the tone arm and record to play correctly. -
Page 6: Front View
Front View LED CD Track Indicator AM / FM Radio Dial Music Source Selection Buttons CD Drawer Music Source Selection Buttons---Push one of the five selection buttons in order to determine where your music source will play from. Set the Music Source to AUX Inputs. PHONO Set the Music Source to PHONO. - Page 7 Front View FM-AM Radio Control Button AM / FM Radio Tuning Radio Dial Knob Radio Tuning Rotate this knob to select the AM or FM radio station you choose to listen to. Knob CD Control Buttons 1 2 3 4 FAST By pressing this button the CD player will go back and play the REVERSE...
- Page 8 Back View While in FM mode, tune in an FM station and extend the antenna lead FM Antenna to find the best position for the reception. This antenna may need to be repositioned if you move your unit to a new location. AC Power Cord Plug the power cord into an AC wall socket.
-
Page 9: Control Panel
Control Panel 1. POWER 15. STOP PLAYBACK/RECORD 2. PHONO 16. PLAY 3. AUX 17. PAUSE 4. AUX IN Jack 18. OPEN/CLOSE CD TRAY 5. FM/AM 19. VOLUME 6. CD 20. DISC TRAY 7. TAPE 21. MUSIC SKIP 8. REMOTE SENSOR 22. -
Page 10: Remote Control
Remote Control 1. OPEN / CLOSE TRAY 13. ERASE 2. DISPLAY 14. TRACK INCREMENT 3. PHONO 15. MANUAL / AUTO INCREMENT 4. REPEAT 16. RECORD 5. SHUFFLE 17. REC VOL - 6. AUX 18. REC VOL + 7. CD 19. PREVIOUS 8. -
Page 11: Operating Instructions
Basic Operation 1. Press the POWER switch to turn the unit on. 2. Select the music source by pressing the corresponding button. PHONO FM-AM TAPE 3. Rotate the VOLUME knob clockwise or counterclockwise to turn the radio on and adjust to desired sound level. - Page 12 Listening to the Radio 1. Select FM or AM using the FM-AM button. FM-AM 2. Tune to the desired frequency. If the reception is poor AM broadcast: Reposition the unit to find the best position for AM stations. FM broadcast: Extend and move around the FM antenna so that you can receive the station clearly.
- Page 13 Listening to a Record 1. Press the PHONO button to select PHONO. 2. Gently open the dust cover and secure the lid by extending the support. 3. Put the record on the turntable. When playing a 45 RPM record, use the included adaptor. 4.
- Page 14 Listening to a Record (Continue) 7. Move the tone arm gently to the edge of the record (or the starting point of a track). The platter will begin to spin. 8. Gently lower the tone arm by slowly releasing the cue lever. You can lower the tone arm manually if the cue lever has not been raised.
- Page 15 Listening to a Cassette Tape 1. Select TAPE using the TAPE button. 2. Insert the cassette into the tape deck. (Note: The Cassette will automatically start playing. Tape will play from right to left.) 3. Press and release the Fast Forward / Eject button half way to Fast Forward the cassette. Note: To stop the Fast Forward function, press and release the Fast Forward / Eject button gently.
- Page 16 Listening to a CD 1. Press the CD button. 3 & 4 “--- BUSY CD” will appear in the Display. When no disc is set in the tray, “NO DISC” will appear on the display. 2. Press the OPEN/CLOSE button to insert a CD. 3.
- Page 17 Listening to a CD (Continue) PREVIOUS NEXT STOP PLAY / PAUSE To suspend playback temporarily (pause mode). 1. Press the PAUSE button ( ) during playback. Playback stops at the current position. To resume playback, press the PLAY/PAUSE button ( ). To stop playback.
- Page 18 Understanding the LED Display Display Each time the DISPLAY button is pressed, the display changes as follows:...
-
Page 19: Using The Remote Control
Using your Remote Control Repeat Playback Repeat Each time the REPEAT button is pressed, the repeat mode is changed as follows: REPEAT ALL (Repeat ALL the Tracks) Press the REPEAT button once during playback. All the tracks of the disc will be played repeatedly. REPEAT 1(Repeat one track) Press the REPEAT button twice during playback. - Page 20 Using your Remote Control (Continue) Shuffle Playback Shuffle The CD tracks can be played randomly. Press the SHUFFLE button during playback. (In the stop mode, press the SHUFFLE button and the PLAY button). When the SHUFFLE playback of all the tracks has been finished, the unit stops and the shuffle playback mode is cancelled.
- Page 21 Using your Remote Control (Continue) Programmed Playback to 32 tracks can be programmed in the desired order. Insert a disc and select “CD” before beginning programming. Shuffle playback does not work during programmed playback. Programmed playback works with finalized discs only. Program 1 Press the PROGRAM button in the stop mode.
- Page 22 Using your Remote Control (Continue) Programmed Playback (Continue) To check the programmed order In the stop mode, press the PREVIOUS / NEXT button repeatedly to show the track numbers that have been stored in memory. To add a track to the end of the program. In the stop mode, press the PROGRAM button.
-
Page 23: Recording Cds
Recording CD-R and CD-RW Operation Steps *It is suggested to use the Manual Track mode for Select Recording Source creating a CD with tracks as on the album. Select Auto/Manual Track Increment Mode; Set Auto Track Increment Sensitivity Please refer to the detailed operation instructions that follow. For CD-R or CD-RW discs, if they are recorded and finalized, the disc can be played by ordinary CD players. - Page 24 Recording a CD-R and CD-RW Disc Audio from a Phono Record, Cassette Tape or Auxiliary device can be recorded on the CD recorder. 1. Insert a blank Audio CD-R or CD-RW disc into the CD tray. Press the OPEN/CLOSE button ( ), place a disc on the disc tray with the printed label side up, then press the OPEN/CLOSE button ( ) to close the disc tray.
- Page 25 Recording a CD-R or CD-RW Disc (Continue) B) When recording from a Cassette tape, load the Cassette tape into the unit (located on side of the unit) Playback will automatically begin. (You may press the Fast Forward / Eject button halfway to Fast Forward the Tape.
- Page 26 Recording a CD-R or CD-RW Disc (Continue) If necessary, adjust the recording level using the REC LEVEL knob, the display will show from 00 - Recording Level Indicator Play the source to be recorded and adjust the recording level so that the highest level reached on the meter does not exceed the “OVER”...
- Page 27 Recording a CD-R or CD-RW Disc (Continue) 7. Once you are finish with the recording, press the STOP button to stop the recording. 8. To finalize the CD, press the FINALIZE button on the unit. (Note: Once you press the FINALIZE button, the “BUSY”...
- Page 28 Finalizing This section deals with the steps taken after recording. Once finalized, CD-R discs are truly final. No more tracks can be recorded on them. By contrast, CD-RW disc can be “un-finalized”, and if there is space, further material can be recorded on them. In order for a disc to become a standard CD, it must have a Table of Contents (TOC) written to it.
- Page 29 Erase or UnFinalize a CD-RW It is possible to erase the last recorded track, it is also possible to erase a whole disc. Erase procedures are possible only on an UNFINALIZED CD-RW disc. If a CD-RW disc has been finalized, unfinalize it prior to erasure. 1 Press the CD button to select “CD”.
-
Page 30: Specifications
Specifications Amplifier section Output Power……………………………..5 W + 5W Frequency Response………………….….60 to 20, 000 Hz Tuner section FM Section Frequency Range…………………………88 to 108 MHz AM Section Frequency Range……………………..…..530 to 1710 KHz CD PLAYER section Frequency Response…………………….60 to 20, 000 Hz +/-4 dB Signal-to-Noise Ratio……………….……55 dB (IEC-A) Cassette Deck section Track System…………………………...….4 Track, 2 channel stereo... -
Page 31: Troubleshooting
Troubleshooting Guide Music System Problem Cause Solution Power does not come Unit is unplugged. Connect the unit to the AC power supply. No sound comes out The volume is turned down (to MIN.) Adjust the volume. of the speakers. The input selector does not match the play Re-select the desired input source. -
Page 32: Records, Stylus, Cd's
Handling Records Do not touch the record’s grooves. Only handle records by the edges or the label with clean hands. Otherwise, dirty hands can leave a residue on the record surface that will gradually deteriorate the quality of your record. Using a soft anti-static cloth to gently wipe the record surface when the record has become dirty. - Page 33 About CD-R and CD-RW discs CD-R discs can be recorded once only. Once they have been used for recording, they cannot be erased or re-recorded. However, if space is available on the disc (and the disc has not been Finalized), additional material can be recorded. By contrast, a CD-RW disc can be used in much the same way as a CD-R disc, but the last track or tracks recorded can be erased, and the space on the disc can be re-used for other recordings.
- Page 34 Discs (Continued) Never use such chemicals as record spray, antistatic sprays or fluid, benzine or thinner to clean the discs. Such chemicals will do irreparable damage to the disc’s plastic surface. Discs should be returned to their cases after use to avoid dust and scratches that could cause the laser pick up to “skip”.
-
Page 35: Safety Information
Precautions Safety Information CAUTION: In order to shut off the power to this product completely, unplug the power cord from the wall outlet. Be sure to unplug the unit if you do not intend to use it for an extended period of time such as a vacation. Do not remove the protective housing. - Page 36 FCC Norm This equipment has been tested and complies with limits for Class B digital devices pursuant to Part 15 of Federal Communications Commission (FCC) rules. FCC Compliance Statement These limits are designed to provide reasonable protection against frequency interference in residential installations.
-
Page 37: Customer Service
For technical support and answers to questions regarding the operation and installation of this Starlogic item you may contact the manufacturer’s technical support team by calling the toll free number below to obtain help. A customer service representative will assist you. -
Page 38: Warranty
Manufacturer’s Warranty 90 Day Limited Warranty This product is warranted to be free from defects in material and workmanship for a period of 90 days. Warranty obligations are limited to replacement or repair of defective parts and components, at the option of the manufacturer.
Need help?
Do you have a question about the 62904150 and is the answer not in the manual?
Questions and answers