
Subscribe to Our Youtube Channel
Summary of Contents for ONELAN STB-HD-1
- Page 1 PRELIMINARY INSTALLATION MANUAL STB-HD-1 HD IP Receiver Box ONELAN Limited Andersen House, Newtown Road, Henley-on-Thames, Oxfordshire. UK, RG9 1HG Tel: +44(0) 1491 411400 Fax: +44(0) 1491 579254 Web site: www.onelan.com...
-
Page 2: Table Of Contents
TABLE OF CONTENTS SAFETY PRECAUTIONS...........................3 PACKAGE CONTENTS............................3 PRODUCT DESCRIPTION..........................4 SPECIFICATIONS.............................5 UNPACKING and INSPECTION..................................6 HARDWARE INSTALLATION and CONNECTIONS............................6 Remote Control.............................7 Procedure to connect to the Receiver Box via the IP Input port..............8 Steps to setup channel list through USB disk for IPTV..................11 Setup channel list through URL for IPTV.......................11 ∎ Prepare Channel List by Control Center................................11 ∎ Steps to Deploy Receiver Box to Retrieve Channel List..........................12 Setup channel list without using Control Center...................13 HD Receiver Box Notes..........................14... -
Page 3: Safety Precautions
If the device has been in a cold environment allow it to warm to room temperature for at least 2 hours before connecting power PACKAGE CONTENTS This package contains: One STB-HD-1 Receiver Box One Remote Control One IR Receiver One Adaptor ... -
Page 4: Product Description
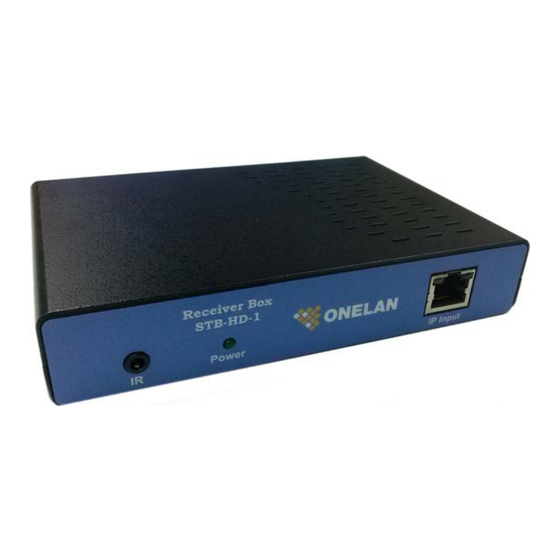
PRODUCT DESCRIPTION ONELAN's STB-HD-1 is a cost-effective HD IP Receiver Box which receive high/standard definition audio/video based on MPEG-2, H.264/AVC content. The receiver box accepts IP Input and with HDMI and/or Component video output to TV. The compact design saves space and is easily controlled via a friendly graphical user interface (GUI) for rapid deployment. -
Page 5: Specifications
SPECIFICATIONS Specifications Audio Mode Stereo, Dual, Joint Stereo and Mono Audio Format MEPG-2 Layer 1 and Layer 2, MP3, and Linear PCM (LPCM) Output Connection 1 Set RCA Jack for Base Band Volume Control Stepping Adjustment Video MEPG-2 MP@HL decoding MPEG-4 Supports up to ASP@L5 HD resolution Video Format H.264 Fully compliant with ITU-T H.264,... -
Page 6: Unpacking And Inspection
1. Connect the media source (Satellite STB, Media player, or other media device) to ONELAN's HD IP Streaming Server, then connect to the Receiver Box IP Input. 2. Connect the Receiver Box HDMI or Component video with Audio R/L to TV. -
Page 7: Remote Control
Remote Control 1. Power On/Off 2. Mute 3. Color Special Function keys 4. Digits 5. Status / Information 6. List 7. Menu 8. Escape / Exit / 9. Channel (Up) Select (Up) / 10. Volume (Down) Select (Left) / 11. Volume (Up) Select (Right) 12. -
Page 8: Procedure To Connect To The Receiver Box Via The Ip Input Port
Procedure to connect to the Receiver Box via the IP Input port The following procedure will allow the installer to setup the Receiver Box via the GUI 1. After the hardware installation and connection, turn on the TV and power on the Receiver Box. 2. - Page 9 4. Setting – for setting up the IP related parameters Ethernet Config to setup Link Type, Ethernet Config Config Mode, and Ping Test Factory Reset Reset to factory Default Upgrade USB/Card Upgrade / Upgrade USB Loader / OTA Upgrade Version Version information Remark: After setting up Ethernet Config for the IP Input, the message of “Network connection success”...
- Page 10 5. AV Setting Video Contrast Contrast Brightness Setting Video Brightness Saturation Setting Video Saturation Setting Video Hue Video Resolution Setting Video Resolution...
-
Page 11: Steps To Setup Channel List Through Usb Disk For Iptv
Steps to setup channel list through USB disk for IPTV (For Single/few Receiver Boxes and Few Channels) Prepare a USB disk. Create a text file, filename is “tvlist.txt”, under the root folder of the USB disk. As the following sample format tvlist.txt, the format of the channel list is one channel per ... -
Page 12: Steps To Deploy Receiver Box To Retrieve Channel List
∎ Steps to Deploy Receiver Box to Retrieve Channel List Create text file, named “outip.txt”, in the root folder of the USB disk. Write the URL of the channel list, for example “http:// 192.168.1.123:8888 /channels.csv”, to the first line of the text file. (the IP address and port number is where one HDIP Streaming Server located) Plug‐in the USB disk in to the receiver box, and power it up. Wait for the device boot‐up, and check the channel list of IPTV ... -
Page 13: Setup Channel List Without Using Control Center
Setup channel list without using Control Center 1. Create a text file, named as “channels.csv” 2. Upload it to one web server, which is accessible by all receiver boxes. 3. Create text file, named “outip.txt”, in the root folder of a USB disk. 4. Write the URL of the channel list, for example “http://192.168.1.123:8888/channels.csv”, to the first line of the text file. (The IP address and the port number is where the server located.) 5. Plug‐in the USB disk into the receiver box STB‐HD‐1 and power it up. 6. Wait for the device boot‐up, and check the channel list of IPTV. (PS1. Whenever there is channels changed/added/deleted, please repeat pocess 1 & 2 and STB‐HD‐1 needs to be rebooted or press the remote control “video” button to recapture the video. PS2. Whenever web server changing IP, please repeat process 4~6.) Example: You make 7 channels of the “channels.csv” file as follows: “ABC NEWS”, udp://224.1.5.1:1234 “Extra”, udp://224.1.5.2:1234 “PLUS 7”, udp://224.1.5.3:1234 “7mate”, udp://224.1.5.4:1234 “7TWO” rtp://225.3.4.1:8888/?localport=8888 “GO!”, http://172.21.6.70:8888/VideoInput/play.ts “Gem”, http://172.21.6.71:8888/VideoInput/play.ts Upload it to your web server as follows: http://www.xxxx.com/C01/channels.csv Create the “outip.txt” in a USB as follows: http://www.xxxx.com/C01/channels.csv Follow process 5 & 6 to finish the channel list setting. ( You can make ex.40 channels of the channels.csv for customer 02 to be http://www.xxxx.com/C02/channels.csv The same for others customers 03, 04, 05..) You can set access code for each customer to get their own channel list from your website. And, you can update the channels.csv file for each customer whenever adding/changing/deleting channels. -
Page 14: Hd Receiver Box Notes
HD Receiver Box Notes PRODUCT NOTES: ITEM VALUE DEVICE NAME PURCHASE DATE INSTALLATION DATE SERIAL NUMBER FIRMWARE VERSION...
Need help?
Do you have a question about the STB-HD-1 and is the answer not in the manual?
Questions and answers