Table of Contents
Advertisement
Available languages
Available languages
CARBIDE SERIES
®
47100 Bayside Parkway • Fremont • California • 94538 • USA | corsair.com
INSTALLATION GUIDE n GUIDE D'INSTALLATION
© 2015 Corsair Components, Inc.
All rights reserved. Corsair, the sails logo, and Carbide Series are
INSTALLATIONSANLEITUNG n Guía de instalación
registered trademarks of Corsair in the United States and/or other
countries. All other trademarks are the property of their respective
РУКОВОДСТВО ПО УСТАНОВКЕ n GUIA DE INSTALAÇÃO
owners. Product may vary slightly from those pictured.
インストールガイド
PN: 49-001387 rev AA
Advertisement
Chapters
Table of Contents

Related Manuals for Corsair Carbide Series 600


Summary of Contents for Corsair Carbide Series 600
- Page 1 CARBIDE SERIES ® 47100 Bayside Parkway • Fremont • California • 94538 • USA | corsair.com INSTALLATION GUIDE n GUIDE D’INSTALLATION © 2015 Corsair Components, Inc. All rights reserved. Corsair, the sails logo, and Carbide Series are INSTALLATIONSANLEITUNG n Guía de instalación registered trademarks of Corsair in the United States and/or other countries.
- Page 2 English: ....................5-16 Français: ....................17-28 Deutsch: ....................29-40 Español: ....................41-52 Россию: ....................53-64 Português: ..................65-76 :....................77-88 日本人...
-
Page 3: Table Of Contents
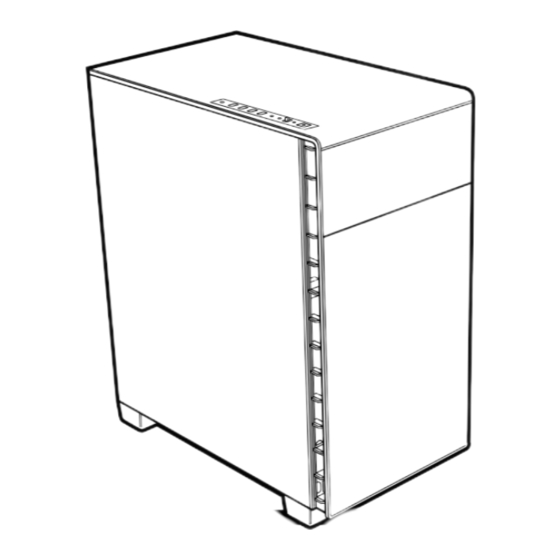
Frequently Asked Questions: ........................15-16 260mm Congratulations! 454mm Thank you for purchasing the Carbide Series 600 Inverse-ATX Full-Tower PC Case. Carbide Series Quiet 600Q The 600Q’s minimalistic curved exterior houses an inverse ATX layout designed to maximize airflow and minimize noise. A door hides a pair of 5.25” drive bays, while a three-speed fan controller lets you pick just the right airflow and performance profile for your comfort. -
Page 4: Accessory Kit Contents
CARBIDE SERIES ® Accessory Kit Contents Case Features (x3) Corsair AF140L fans included Bottom triple 120mm or dual 140mm fan mounts compatible with 240/280/360mm radiators Rear 120/140mm fan mount compatible with 120/140mm fan or radiator Front dual 120mm or dual 140mm fan mounts compatible with 240/280mm radiators (x2) USB 3.0, (x2) USB 2.0, Headphone/Mic, Three-speed fan controller, Power/Reset... -
Page 5: Removing The Side Panels
CARBIDE SERIES ® 1. Removing the Side Panels (600C) 2. Installing the Motherboard Pull the latch to release the Snap your motherboard’s I/O acrylic side panel, then lift the shield into the cutout. panel off of the hinge. Align the motherboard with the standoffs in the case. -
Page 6: Installing Hdds
CARBIDE SERIES ® 4. Installing HDDs 6. Installing the Power Supply Step 1 – Place the drive into Remove the thumbscrews the 3.5” drive tray. securing the power supply mounting bracket to the back of the case. 600C_600Q Step 5 Attach bracket to the power supply with screws (included Step 1... -
Page 7: Removing The Front And Top Fascia
CARBIDE SERIES ® 8. Removing the Front and Top Fascia 10. Connecting the Fan Controller From inside the case, carefully 1. Connect the SATA power push the tabs securing the connector to the PSU SATA front or top to the case, power cable. -
Page 8: Frequently Asked Questions
4. Where can I mount a fan? Fan Mount Locations Front x2 120mm/140mm Rear x1 120mm/140mm Bottom x3 120mm, x2 140mm Side To learn more about this case visit the product page at corsair.com then remove the screws and gently pull the I/O panel upwards:... - Page 9 260mm Félicitations ! 454mm Merci d'avoir acheté le boîtier Carbide Series 600. Carbide Series Quiet 600Q La forme extérieure incurvée et minimaliste du 600Q abrite une disposition ATX inversée afin de maximiser le flux d'air et de minimiser le bruit. Une trappe dissimule deux baies pour lecteur de 5,25 pouces, tandis qu'un contrôleur de ventilateur à...
-
Page 10: Contenu Du Kit D'accessoires
® Contenu du kit d’accessoires Caractéristiques du boîtier 3 ventilateurs Corsair intégrés, modèle AF140L Supports inférieurs triple ventilateur de 120 mm ou double ventilateur de 140 mm, compatibles avec radiateurs 240/280/360 mm Supports arrière de ventilateur 120/140 mm, compatibles avec ventilateur... -
Page 11: Retrait Des Panneaux Latéraux
CARBIDE SERIES ® 1. Retrait des panneaux latéraux (600C) 2. Installation de la carte mère Tirez le loquet pour libérer le Enclenchez la plaque de panneau latéral en acrylique, protection des E/S de la carte puis levez le panneau pour le mère dans la découpe d'accueil. -
Page 12: Installation Des Hdd
CARBIDE SERIES ® 4. Installation des HDD 6. Installation du bloc d'alimentation Étape 1 – Positionnez le Retirez les vis à serrage à main qui lecteur sur le plateau pour fixe le support de montage du bloc lecteur 3.5". d'alimentation à l'arrière du boîtier. Fixez le support au bloc 600C_600Q Step 5 d'alimentation au moyen des vis... -
Page 13: Retrait Des Panneaux Frontal Et Supérieur
CARBIDE SERIES ® 8. Retrait des panneaux frontal et supérieur 10. Raccordement du contrôleur de ventilateur Depuis l'intérieur du boîtier, 1. Raccordez le connecteur poussez délicatement les d'alimentation SATA languettes qui verrouillent au câble du bloc l'avant ou le dessus du boîtier, d'alimentation SATA. -
Page 14: Foire Aux Questions
120mm/140mm Haut Arrière x1 120mm/140mm x3 120mm, x2 140mm Côté Milieu Pour en savoir plus sur ce boîtier, veuillez vous rendre sur corsair.com à la page des produits tretirez les vis, puis tirez doucement le panneau d'E/S vers le haut:... - Page 15 Häufig gestellte Fragen: ..........................39-40 260mm Vielen Dank! 454mm Vielen Dank, dass Sie sich für die Carbide Series 600 entschieden haben Carbide Series Quiet 600Q Im Inneren des minimalistischen, geschwungenen Äußeren des 600Q verbirgt sich ein inverses ATX-Layout, das für maximalen Luftstrom und minimale Geräuschbelastung optimiert ist.
-
Page 16: Inhalt Des Zubehörkits
CARBIDE SERIES ® Inhalt des Zubehörkits Funktionsmerkmale des Gehäuses 3 Corsair AF140L-Lüfter inbegriffen Halterungen auf Unterseite für dreifache 120 mm oder zweifache 140 mm Lüfter, mit 240/280/360 mm Radiatoren kompatibel Halterung auf Rückseite für 120/140 mm Lüfter, mit 120/140 mm Kühlern oder Radiatoren kompatibel Halterungen auf Vorderseite für zweifache 120/140 mm Lüfter,... -
Page 17: Abnehmen Der
CARBIDE SERIES ® 1. Abnehmen der Seitenplatten (600C) 2. Installation des Motherboards Ziehen Sie an der Lassen Sie die I/O-Blende des Verriegelung, um die Motherboards in die dafür Acryl-Seitenabdeckung vorgesehene Öffnung einrasten. freizugeben, und heben Sie die Abdeckung aus Richten Sie das Motherboard dem Scharnier. -
Page 18: Installation Von Hdd-Laufwerken
CARBIDE SERIES ® 4. Installation von HDD-Laufwerken 6. Installation des Netzgerätes Schritt 1 –Schieben Sie das Entfernen Sie die Laufwerk in den Einschub Rändelschrauben, mit denen für 3,5-Zoll-Laufwerke. die Netzteilhalterung an der Rückseite des Gehäuses befestigt ist. 600C_600Q Step 5 Befestigen Sie die Halterung mit Schritt 1 den beim Netzteil mitgelieferten... -
Page 19: Entfernen Der Front-Und Oberabdeckung
CARBIDE SERIES ® 8. Entfernen der Front-und Oberabdeckung 10. Anschließen der Lüftersteuerung Drücken Sie vom 1. Schließen Sie den SATA- Gehäuseinneren aus die Netzanschluss an das Zungen vorsichtig herunter, SATA-Netzteilkabel an. mit denen die Front- bzw. 2. Schließen Sie den 3- oder Oberabdeckung am Gehäuse 4-Pin-Lüfteranschluss an befestigt ist, und ziehen Sie... -
Page 20: Häufig Gestellte Fragen
3. An wen kann ich mich wenden, wenn ich ein beschädigtes Gehäuse 600C_600Q FAQ erhalten habe oder einer der Lüfter nicht mehr funktioniert? Gehen Sie zu corsair.force.com und fordern Sie eine RMA an, damit wir die beschädigten Teile ersetzen können. 4. Wo kann ich einen Lüfter anbringen? Punkte für Lüfterhalterungen... - Page 21 ¡Enhorabuena! 454mm Le agradecemos que haya adquirido los modelos Carbide Series 600 Carbide Series Quiet 600Q El exterior curvado y de aspecto minimalista del 600Q alberga un diseño de ATX invertido pensado para maximizar el flujo de aire y minimizar el ruido. Una puerta oculta un par de bahías para discos de 5,25", mientras que un controlador de...
-
Page 22: Contenido Del Kit De Accesorios
® Contenido del kit de accesorios Características del chasis (x3) Ventiladores Corsair AF140L incluidos Espacio para montaje en la parte inferior de tres ventiladores de 120 mm o de dos de 140 mm compatibles con radiadores de 240/280/360 mm Espacio para montaje de ventiladores traseros de 120 mm/140 mm... -
Page 23: Retirada De Los Paneles Laterales
CARBIDE SERIES ® 1. Retirada de los paneles laterales (600C) 2. Instalación de la placa base Tire del enganche para soltar Introduzca el protector de E/S el panel lateral acrílico y de la placa base en el orificio después suelte el panel preperforado. -
Page 24: Instalación De Las Unidades Hdd
CARBIDE SERIES ® 4. Instalación de las unidades HDD 6. Instalación de la fuente de alimentación Paso 1 – Coloque la unidad Retire los tornillos de ajuste manual en la bandeja correspondiente que aseguran el soporte de montaje de 3,5". de la fuente de alimentación a la parte posterior del chasis. -
Page 25: Extracción Del Frontal Delantero Y Superior
CARBIDE SERIES ® 8. Extracción del frontal delantero y superior 10. Conexión del controlador del ventilador Desde el interior del chasis, 1. Conecte el conector de empuje cuidadosamente las alimentación SATA a cable pestañas que asegurar la parte de alimentación PSU SATA. superior o frontal al chasis, y 2. -
Page 26: Preguntas Más Frecuentes
3. ¿Con quién debo ponerme en contacto si recibo mi chasis 600C_600Q FAQ dañado o si uno de los ventiladores ya no funciona? Vaya a corsair.force.com y solicite un RMA para que podamos reemplazar las piezas dañadas. 4. ¿Dónde puedo montar un ventilador? - Page 27 260mm Поздравляем! 454mm Благодарим Вас за приобретение корпуса Carbide Series 600. Carbide Series Quiet 600Q Минималистический дизайн корпуса 600Q формата ATX со скругленными линиями предназначен для обеспечения максимального воздушного потока и значительного уменьшения шума. За дверцей находится пара отсеков для 5,25-дюймовых жестких дисков, а 3-скоростной...
-
Page 28: Содержимое Комплекта Аксессуаров
CARBIDE SERIES ® Содержимое комплекта аксессуаров Особенности корпуса (x3) Вентиляторы Corsair AF140L, входят в комплект поставки Места для установки нижнего тройного (120mm) или двойного (140mm) вентиляторов, совместимые с радиаторами 240/280/360mm Место для установки заднего вентилятора 120/140mm, совместимое с вентиляторами или радиаторами 120/140mm, Место... -
Page 29: Снятие Боковых Панелей
CARBIDE SERIES ® 1. Снятие боковых панелей (600C) 2. Установка материнской платы Потяните фиксатор, чтобы Вставьте заглушку портов ввода- освободить акриловую боковую вывода материнской платы в вырез. панель, затем поднимите панель с петли. Выровняйте материнскую плату с опорными изолирующими винтами на... -
Page 30: Установка Жестких Дисков
CARBIDE SERIES ® 4. Установка жестких дисков 6. Установка блока питания Действие 1 – поместите диск в Отверните барашковые винты, которыми закреплен монтажный отсек для 3,5-дюймовых дисков. кронштейн блока питания в задней части корпуса. 600C_600Q Step 5 Закрепите блок питания на кронштейне, используя... -
Page 31: Снятие Передней И Верхней Панелей
CARBIDE SERIES ® 8. Снятие передней и верхней панелей 10. Подключение контроллера вентилятора С внутренней стороны корпуса 1. Подключите разъем питания осторожно нажмите на язычки, SATA к кабелю питания которыми крепиться передняя или SATA на блоке питания. верхняя панель к корпусу, 2. -
Page 32: Часто Задаваемые Вопросы
3. К кому следует обратиться, если корпус получен поврежденным или 600C_600Q FAQ один из вентиляторов больше не работает? Перейдите на сайт corsair.force.com и запросите разрешение на возврат материалов (RMA), чтобы мы смогли заменить поврежденные части. 4. Где можно установить вентилятор? Расположение... - Page 33 260mm Parabéns! 454mm Obrigado por ter adquirido o Carbide Series 600. Carbide Series Quiet 600Q As curvas minimalistas do exterior do 600Q abrigam um layout ATX inverso projetado para maximizar o fluxo de ar e minimizar o ruído. Uma porta esconde um par de Compartimentos de unidade de 5,25", enquanto um controlador de ventoinha de três...
-
Page 34: Conteúdo Do Kit De Acessórios
CARBIDE SERIES ® Conteúdo do kit de acessórios Recursos do gabinete (x3) Ventoinhas AF140L Corsair incluídas Montagens de ventoinha de 140mm dupla ou 120mm tripla inferior compatível com radiadores de 240/280/360mm Montagem de ventoinha de 120/140mm traseira compatível com ventoinha... -
Page 35: Removendo Os Painéis Laterais
CARBIDE SERIES ® 1. Removendo os painéis laterais (600C) 2. Instalando a placa-mãe Puxe a trava para liberar o Encaixe a blindagem de E/S da painel lateral de acrílico, e sua placa-mãe na abertura. então levante o painel para fora da dobradiça. Alinhe a placa-mãe aos suportes do gabinete. -
Page 36: Instalando Hdds
CARBIDE SERIES ® 4. Instalando HDDs 6. Instalando a fonte de energia Passo 1 – Coloque a unidade Retire os parafusos que fixam o na bandeja de unidades suporte de montagem da fonte de 3,5”. de alimentação na traseira do gabinete. -
Page 37: Removendo O Painel Dianteiro E Superior
CARBIDE SERIES ® 8. Removendo o painel dianteiro e superior 10. Conectando o controlador da ventoinha Por dentro do gabinete, 1. Conecte o conector de empurre cuidadosamente as energia SATA ao cabo de abas que fixam a dianteira ou alimentação SATA da PSU. o topo ao gabinete, e puxe 2. -
Page 38: Perguntas Frequentes
3. Quem eu devo contactar caso eu receba meu gabinete danificado 600C_600Q FAQ ou se uma das ventoinhas não estiver mais funcionando? Acesse corsair.force.com e solicite um RMA, para que possamos substituir as peças danificadas. 4. Onde eu posso montar uma ventoinha? Montar um fã... - Page 39 後部: ............1 x 120mm または 1 x 140mm ファンコントローラの接続: ............................86 フロントI/Oコネクタの取り付け: ..........................86 よくある質問: ................................87-88 260mm 454mm はじめに Carbide Series 600 をご購入いただき、 ありがとうございます。 Carbide Series Quiet 600Q 600Q では、カーブしたミニマルデザインと逆 ATX レイアウトを採用しており、ノイズ を最小限に抑えながら高いエアフローを実現します。ドアの後ろには 2 台の 5.25 インチ ドライブベイが設置されています。3 速のファンコントローラにより、最適なエラーフロ ーを簡単に調整することができます。逆 ATX 規格を採用することにより、ケースの上側を...
-
Page 40: アクセサリーキットの内容
CARBIDE SERIES ® アクセサリーキットの内容 Case Features Corsair AF140L 冷却ファン (同梱) 120mm 冷却ファン 基 /140mm 下部冷却ファン 基)用マウント (240/280/360mm ラジエータ互換) 120mm/140mm リア冷却ファン用マウント( 120/140mm ラジエータ互換) 240/280mm 120mm/140mm フロント冷却(各2基)ファン用マウント( ラジエータ互換 (x2) USB 3.0, (x2) USB 2.0, ヘッドフォン/マイク、 速ファンコントローラ、 電源/リセットボタン (600Q): (600C): 吸音材付きサイドパネル 完全透明アクリルサイドドア 冷却ファン用ネジ(長)... -
Page 41: サイドパネルの取り外し
CARBIDE SERIES ® 1. サイドパネルの取り外し (600C) 2. マザーボードの取り付け ラッチを引いてアクリルサイドパ 切り欠きに、マザーボードの I/O シ ネルを外し、次にヒンジからパネ ールドをはめ込みます。 ルを持ち上げます。 マザーボードをケースの絶縁ネジ穴に 合わせます。 付属のネジで固定します。 600C_600Q Step 3 1. サイドパネルの取り外し (600Q) 3. 5.25 インチドライブの取り付け 1. フロントドアを開きます。 蝶ネジを外し、 600C STEP1 サイドパネルを傾けます。 2. 5.25 インチベイシールドを取り 外します。 600C_600Q STEP2 3. ドライブベイに 5.25 インチドラ イブを前方から挿入します。工具... -
Page 42: Hdd の取り付け
CARBIDE SERIES ® 4. HDD の取り付け 6. 電源ユニットの取り付け ステップ 1 – 3.5 インチドライブ ケースの背面にブラケットを取り 付け、電源ユニット固定用ネジを トレイにドライブを挿入します。 外します。 ネジ(電源に付属)を用い、ブラ 600C_600Q Step 5 ケットを電源ユニットに取り付け ます。 ステップ 1 ケースの背面に電源ユニットを挿 ステップ 2 – 図に示すように、マ 入します。 ザーボードの後ろから HDD ケー ケースにブラケットを固定しなが ジにドライブとレールアセンブリ ら、ネジを交換してください。 を挿入します。 600C_600Q STEP4 注:電源ユニットのファンは、... -
Page 43: フロントパネルとトップパネルの取り外し
CARBIDE SERIES ® 8. フロントパネルとトップパネルの取り外し 10. ファンコントローラの接続 ケースの内側から、フロントやト 1. SATA 電源コネクタを、電源 ユニットの SATA 電源に接続 ップをケースに固定しているタブ を慎重に押し、ゆっくり外側に引 します。 き出します。 2. 3 ピンまたは 4 ピンファンコ ネクタをケースファンヘッダ フロントパネル用タブ (6 個) や ーに接続します。 トップパネル用タブ (8 個) につい 3. ケースのファン速度切り替え ても、同じ作業を繰り返します。 ボタンを押し、ファン速度を 切り替えます。 パネルを交換するには、ゆっくり と元の位置に押し戻します。 9. -
Page 44: よくある質問
2. I/O パネルの電源とリセットヘッダーで極性は重要ですか? ステップ 8 でも説明したように、トップパネルを外してからネジを外 いいえ。LED のヘッダーでのみ重要です。 し、I/O パネルをゆっくりと上向きに引き出します。: 3. 破損したケースを受け取ったか、またはファンの一つが動作しない場合、 誰に連絡すべきですか? 600C_600Q FAQ Corsair.force.com にアクセスして、当社が破損した部品を交換できる よう、RMA を依頼します。 4. どこにファンを搭載できますか? ファンマウントの位置 フロント x2 120mm/140mm 上部 リア x1 120mm/140mm x3 120mm, x2 140mm 底部 サイド 中央 このケースに関する詳細は、 corsair.com の製品ページにアクセスしてくだ さい 。...
Need help?
Do you have a question about the Carbide Series 600 and is the answer not in the manual?
Questions and answers