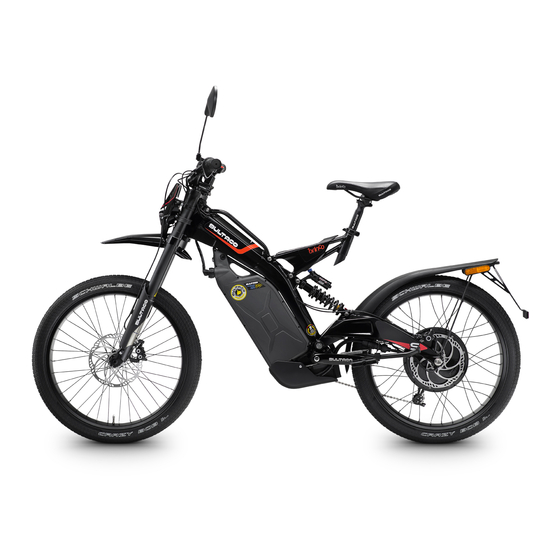
Bultaco BRINCO User Manual
Electric moto bike
Hide thumbs
Also See for BRINCO:
- User manual (71 pages) ,
- Quick manual (43 pages) ,
- User manual (40 pages)
Table of Contents
Advertisement
Advertisement
Table of Contents

Related Manuals for Bultaco BRINCO


Summary of Contents for Bultaco BRINCO
- Page 1 USER MANUAL THEELECTRIC MOTO-BIKE...
- Page 2 © 2015 BULTACO MOTORS S.L. , Madrid, Spain. All rights reserved. Printing and full or partial reproduction is prohibited without written permission from BULTACO MOTORS S.L.
- Page 3 Welcome bultaquista First of all, thank you for buying a Bultaco. We are proud to have worlds of the motorcycle and the bicycle: electric propulsion your confidence. The new Brinco is a new and groundbreaking and the physical experience of pedaling, independently, or by concept, the Moto- Bike that you will enjoy in a way you have combining the two systems.
- Page 4 In this manual we will give you advice and warnings so you can take the technical data, maintenance services, colors, design, equipment and the full advantage of your Brinco as keep it as good as new. That is why we vehicle materials.
- Page 5 USE ON PUBLIC ROADS. - Loss of warranty rights granted by the manufacturer. - Possible need to obtain another driving licence. Contact one of our Bultaco Motors Dealers if you have any - Risk of accidents and serious injuries questions.
-
Page 7: Table Of Contents
INDEX 1. GENERAL SAFETY 3.5. Gear shift / Transmission 3.6. Stopping your Brinco 1.1. General warnings 3.7. Instructions for Use 1.2. Operational Safety 3.8. Directions for Parking 1.3. Locating Power Components 4. MAINTENANCE 2. VEHICLE DESCRIPTION 4.1. Adjusting the Rear Suspension: Shock Absorber 2.1. - Page 8 GENERAL WARNING...
-
Page 9: General Warnings
POSSIBLE DANGERS TO THE VEHICLE OR OTHER PARTIES. Your Brinco is not a competition vehicle and it is not designed for such use. Thus, its use in competition will mean the loss of the warranty provided by Bultaco Motors S.L. -
Page 10: Operational Safety
Listed below are several things to keep in mind regarding the operation of the vehicle: ALWAYS USE THE ORIGINAL BULTACO BATTERY CHARGER. Whenever you do not use your Brinco, put the engine stop button in the OFF position [See section 2.3]. It is easy to forget when it is on and an accident could occur when getting on or off the bike. -
Page 11: Locating Power Components
VEHICLE HAS BEEN SWITCHED OFF. Their handling (except for assembly / disassembly and charging the battery and engine disconnection to handle the rear wheel) must only be carried out by a Bultaco Motors Dealer. NEVER CUT CABLES OR HANDLE THE Any damage to any of the power components must be repaired immediately by a Bultaco POWER COMPONENTS. -
Page 12: 2. Vehicle Description
VEHICLE DESCRIPTION... -
Page 13: Presentation
Motorbike with a spectacular, very sporty and beautiful result. From the first time you see a Bultaco Brinco it is clear that it is something new and uncomparable to everything we knew before. Its features might ressemble those of a competition... -
Page 15: Location Of Components
2.2. Location of Components Three-phase Permanent Magnet Motor. [See section 2.9] Planetary gearbox [See section 3. 5] Possibility of Change: Overdrive - Low Range Gearbox (2) by touching the button located at the base of the rod: Pressing with the right foot it goes to the gear ratio of higher speed. DC / AC Three Phase Controller [See 2.9] Power Cell Li-Ion Matrix Battery... -
Page 16: Handlebar Controls
CHECK THE BRAKE POSITION PROPERLY. The rear brake throttle. lever is on the left handlebar grip. Shifter [See 3.5] Throttle control 9-speed gear ratio. Always make sure that the accelerator returns correctly to its initial position when you release it after accelerating before switching ON your Brinco. -
Page 17: Dashboard
Speedometer (km/h - mph) [See 2.5] Warning Indicator [See 5] This light flashes when you turn on your Brinco and testing Driving mode: ECO - SPORT – TOUR [See 4.5 - 2.9] is being performed. Once testing has finished, the light... -
Page 18: Dashboard Configuration
2.5. Dashboard Configuration COMMUTATION ENTRE KM/H ET MPH CHANGING DRIVING MODE ECO MODE TOUR MODE SPORT MODE Press the “MODE” and “SET” buttons simultaneously for more than 4 seconds. The riding mode when starting the vehicle will be ECO by The measurement unit will default. - Page 19 ODOMETER - TRIP 1 - TRIP 2 SUMMARY OF FEATURES This option can be changed by pressing the “MODE” button Dashboard buttons with a long press for more than 4 seconds until the display shows ODO - TRIP1 - TRIP2. Long Short Long...
-
Page 20: Power Control Button
2.6. Using the POWER CONTROL Button The Power Control button [See 2.3] allows you to select and maintain the same level of power during your ride. To use the power button, you accelerate to achieve the desired power level (you can check its value on the dashboard) and then press the Power Control button to maintain that power level. -
Page 21: Identification Numbers
Engine Identification Number The engine identification number is engraved on the left side of the engine. DO NOT CHANGE ANY OF THE IDENTIFICATION NUMBERS OF YOUR BRINCO NOR BREAK THEIR SAFETY SEALS, OTHERWISE YOU WILL LOSE YOUR WARRANTY. -
Page 22: Technical Specifications
26.1 Ah Capacity Three-phase DC/AC controller (50V-55A Maximum power) Three selectable driving modes: Portable with high performance specifically for the Control Bultaco Brinco Li-Ion Matrix Power Cell. SPORT: 2 kW Unit Charger TOUR: 1.5 kW Power 465W ECO 0.9 kW Input 110 VAC - 240 VAC Output 58.1 VDC / 8A... - Page 23 CHASSIS / SUSPENSIONS / BRAKES RANGE Light aluminum alloy, central spine type. Road Frame ECO mode (average speed 25 km/h) up to 100km Mountain Swing arm Mono-Shock in light aluminum alloy. Front suspension 180 mm. travel Rear suspension 217 mm. travel TRANSMISSION Hydraulic system with 4-piston caliper and...
-
Page 24: Dimensions
2.9. Dimensions 23.2º 1200.7 1856.7... - Page 25 DIMENSIONS WEIGHTS Distance between 1,200.7 mm Vehicle (without battery) 31.5 Kg wheel centers Seat height Vehicle (with battery) 39.5 Kg 1,121.6 - 1,003.6 mm Release angle 23.2 Load Capacity 100 Kg 273.6 mm Base height to ground Total length 1,856.7 mm Width 760 mm 1,094.2 mm...
-
Page 26: 3. General Operation
GENERAL OPERATION... -
Page 27: Prior Checks
3.1. Prior checks To make sure your Brinco is ready for use, you must perform the following checks: 1. Adapt the seat and handlebar height to your size so that they are in a safe and comfortable position. Make sure all items are well secured and that they are in the proper position. - Page 28 NEVER CUT WIRES OR MODIFY ANY OF THE POWER COMPONENTS. IT CAN CAUSE SERIOUS INJURY. If after reading these instructions you still have questions, contact your Bultaco Motors Dealer, who will be happy to help. BATTERY AND CHARGER THE BATTERY HAS A SAFETY SEAL WITH SAFETY WARNINGS.
-
Page 29: Battery Charge
3.2. Battery Charge ALWAYS CHARGE THE BATTERY Connect the Bultaco original charger to the battery and the power outlet (240 WITH THE ORIGINAL BULTACO V AC 50Hz / 110 V AC 60Hz). Remember that this can be done with the batteries BATTERY CHARGER on the vehicle or with them removed, as shown below. - Page 30 FOLLOW THE STEPS DESCRIBED TERY ALWAYS MAKE SURE YOUR IN REVERSE ORDER. BRINCO IS DISCONNECTED. IT IS RECOMMENDED THAT THE BATTERY SCREW IS TIGHTENED USING A 5 ALLEN KEY PROVIDED IN OUR TOOLKIT, TO PREVENT THE SCREW FROM COMING LOOSE.
-
Page 31: Battery Charging
3.2. Battery Charge 3.2.2 Battery charging CHARGER INDICATOR Failure during charging. The battery is charging. The battery is fully charged. Check charger instructions. ONCE THE BATTERY IS CHARGED (GREEN INDICATOR), FIRST DISCONNECT THE CHARGER FROM THE NETWORK AND THEN DISCONNECT THE BATTERY CHARGER. - Page 32 PERFORMANCE. If you will not use the vehicle for long periods of time you must disconnect the battery from the moto-bike. We recommend that the Brinco battery is kept connected to the MAXIMUM BATTERY PERFORMANCE WILL NOT BE ACHIEVED UNTIL YOU HAVE MADE charger if it is not going to be used for more than 30 days.
- Page 33 3.2.2 Battery charging LED INDICATOR LIGHTS Operating condition Comments during charging < 80% > 80% 100% Start with total Flashing discharge Main charge Further load Final charge / charge conservation...
- Page 34 < 80% > 80% 100% Missing battery Battery failure Flashing Time failure Regulating failure 10-14 Temperature failure TROUBLESHOOTING Error number Procedure 1,2,3,4 Check battery and battery wiring 6,11-13 Ask for the charger to be checked at your Bultaco Motors Dealer...
-
Page 35: Starting Your Brinco
(both dashboard and wristband/card must have physical contact) until the dashboard lights up [See 2.4 ]. 2. When you turn the system on your Brinco will perform a test and an intermittent warning light will flash on the dashboard. Clarification: If the power button is ON, the warning light will be illuminated permanently and you must operate any of the brakes before you set off. - Page 36 MOTOR MAY BE MISLEADING WITH REGARDS TO THE VEHICLE’S POWER. Press 4. With the button in the ON position, press one of the brake levers [See 2.3]. Once the warning indicator is off you can speed up and enjoy the Brinco ride. [See 2.4],...
-
Page 37: Starting Card /Wristband Copy
3.3.1- Starting Card / wristband Copy We will provide you with a Brinco Master card. This card allows you to make up to 10 card/ wristband copies. REMEMBER THAT YOU CAN MAKE 10 COPIES FROM YOUR MASTER CARD. To make a copy from your Master card you should purchase a blank card or wristband at... - Page 38 FOR USE IN AREAS WITH STEEP, LONG SLOPES. If the flashing warning light appears, it is recommended that the Brinco power level be reduced and assisted by pedalling so that the warning level with a continuous light, that IF YOU ONLY USE YOUR BRINCO IN would mean the vehice coming to a complete stop, is not reached.
-
Page 39: Gear Shift / Transmission
3.5. Gear shift / Transmission To get the most out of pedalling, your Bultaco Brinco has a transmission comprised of a planetary low range gearbox and a cassette of 9 sprockets. By combining the different gear ratios you will get the performance you need at all times. - Page 40 THE STOP SWITCH MAY BE USED IN AN EMERGENCY IF YOU WANT TO TURN OFF THE ENGINE. Interchangeably, you can disable your Brinco by placing your card or wristband on the front of the dashboard until the dashboard turns off. GET THE MOST OUT OF THE BATTERY, RECHARGE IT IMMEDIATELY AFTER EACH RIDE.
-
Page 41: Riding Instructions
Please respect the laws and the environment. If the warning light flashes, remember to reduce the level of performance demand and assist the Brinco by pedalling before the light becomes a continuous one, which is when the self-protection system disconnects the power. - Page 42 LEAVE IT CONNECTED TO THE CHARGER CONTINUOUSLY If the batteries are exposed to too low temperatures when the Brinco is parked outside, the rider may see a temporary reduction in range or maximum power delivered when riding. Avoid parking the vehicle in places where ambient temperature is below -20 °C/-4 °F.
-
Page 43: 4. Maintenance
Maintenance... -
Page 44: Adjusting The Rear Suspension: Shock Absorber
10-15 mm for normal riding and 15-20 mm if going downhill. Recommendations for the shock absorber: Do not try to remove the shock absorber. Visit a Bultaco Motors Dealer if it does not operate normally.. Damage caused by misuse or removal will void the warranty. - Page 45 Compression adjustment valve (blue) SHOCK ABSORBER SETTINGS COMPRESSION ADJUSTMENT VALVE Towards + Increases compression (hard) Preload adjustment valve Towards - Decreases compression (soft) Rebound adjustment (red) SPÉCIFICATION REBOUND ADJUSTMENT VALVE Towards +, Increases retention (slow) A - LENGTH B - TRAVEL 76+/-2 240+/-2 Towards - Decreases retention (fast)
-
Page 46: Adjusting The Front Suspension: Fork
4.2. Adjusting the front suspension: Fork The front fork compresses under load and rebounds to recover its entire length. The rebound dampening (or bounce) is the setting that determines how quickly or slowly the fork rebounds. RUNNING-IN PERIOD: 20 HOURS OF RUNNING-IN ARE REQUIRED FOR A NEW Regular maintenance, cleaning and inspection are required according to the condition FORK, IT WILL RUN MORE SMOOTHLY... - Page 47 Rebound adjustment valve. Preload adjustment nut SUGGESTED PRESSURE: 7-10 BAR Main air chamber.
-
Page 48: Brakes
4.3. Brakes Before the first use of your Brinco you should check the condition of both brakes. First, carefully do some brake tests away from normal traffic, on a flat and non-slippery surface. Increase the brake power, little by little. - Page 49 CHECK THE THICKNESS OF THE DISCS. Check the thickness of To adjust the brake levers, Move the handle on the the discs. The minimum sit in the saddle and place handlebar so you can grab thickness is noted on the disc your hands on the levers.
- Page 50 Before each use (there should be no loss of fluid) BULTACO MOTORS DEALER. IF YOU connections DETECT ANY ABNORMALITY WITH THE Clean the brake If it is very dirty BRINCO BRAKES OR IF YOU NEED TO PERFORM ANY MAINTENANCE WORK. It is not necessary Change the brake fluid...
-
Page 51: Wheels And Tyres
Make sure that the spoke tension is correct since that can cause unstable behavior. SUGGESTED PRESSURE: 1.8 - 2.2 BAR Check that all spokes are tight. MINIMUM PROFILE DEPTH: In the event of any spoke is not tight enough, go to your Bultaco Motors Dealer. ≥ 1.5 MM... - Page 52 4.4.1- Wheel Change REMOVING THE FRONT WHEEL Turn your Brinco upside down and place the seat and handlebars on a flat surface. Place a wooden block or similar under the handlebar grips to prevent the display from touching the ground. You should also place a cloth on the BE CAREFUL BECAUSE AS YOU REMOVE seat so that it does not get stainned or damaged.
- Page 54 [Check 3.2.1 to see how to unplug the ground. You should also place a the connector]. cloth on the seat so that it does not get stainned or damaged. ALL THE IMAGES IN THIS SECTION SHOW YOUR BRINCO IN AN INVERTED POSITION (UPSIDE DOWN).
- Page 55 - DO NOT REMOVE THE WHEEL IMMEDIATELY AFTER A JOURNEY: THE ENGINE GETS HOT AND YOU COULD GET BURNT - THE HEX WRENCH SUPPLIED BY BULTACO IS FOR EMERGENCY USE IN CASE OF A PUNCTURE DURING A JOURNEY REMOVING THE REAR WHEEL...
-
Page 56: Transmission: Chain And Bottom Bracket
Bultaco Motors Dealer for a If in doing so you can see at least replacement. half-a sprocket of the drive chainring, go to a Bultaco Motors Dealer for a replacement. -
Page 57: Cleaning
4.6. Washing We recommend regular cleaning to extend the lifespan of your Brinco and always ensure proper performance. You must be careful not to damage any of the components. In order to do that we recommend: BE CAREFUL WITH THE ELECTRICAL... - Page 58 4.7. Torques TORQUES Maximum Assembled part Assembly Thread and Quality Torque (Nm) Safety Torque (Nm) Power arm with steering post ALLEN BOLT M6x1 DIN 912 8.8 8-10 Handlebar with power arm ALLEN BOLT M6x1 DIN 912 8.8 8-10 Upper locking plate with bar ALLEN BOLT M6x1 DIN 912 8.8 8-10 Fork tip lock...
-
Page 59: Maintenance Table
4.8. Maintenance Table Task to be carried out Scheduled maintenance by the user by Bultaco Before After 620 miles Every 1550 miles Component Task to Perform each use each use or 6 months or 12 months CHASSIS Check the general condition of the whole structure... -
Page 60: Troubleshooting
TROUBLESHOOTING... - Page 61 In spite of the fact that each Brinco has been carefully inspected prior to leaving the factory, there may be circumstances beyond our control that may cause some kind of failure. In the event that your Brinco suffers a problem, we have provided the following indications...
- Page 62 BRINCO DOES NOT TURN ON 1. Check that the battery is sufficiently charged. 2. Make sure that you have successfully passed the wristband/starting card close to the dashboard’s NFC antenna. 3. Check that the stop button is in the ON position.
-
Page 63: 6. Warranty
WARRANTY... - Page 64 6.1. Warranty The guarantor is the company BULTACO MOTORS S.L., with registered offices at Av. Gregorio Peces Barba, 1. Technology Park. 28918 Leganés (Madrid). Spain. The guarantee applies only to moto-bikes have been initially placed on the market through Bultaco Motors Dealers of each country, meeting the regulatory requirements of each country. This warranty does not limit or prejudice the rights and legal safeguards that apply to consumers under national mandatory standards and is independent of the legal guarantee provided by Bultaco.
-
Page 65: Warranty Exclusions
In addition, these claims are excluded from the warranty in the following situations: - If they require scheduled maintenance according to the Bultaco Maintenance Program and if the damage was caused by the failure or delay of it to be done. - Page 66 - If repairs are not made in time or if not performed according to the specifications of Bultaco Motors S.L. and the damage was caused by a delay to repair. - If there are non original parts directly or indirectly assembled on the moto-bike or if the moto-bike has been modified without the approval of affected items by Bultaco Motors S.L.
- Page 67 - If the instructions for battery maintenance as indicated in this manual are not followed. 6.3. Warranty Consultations and Management All warranty formalities must be made through the nearest Bultaco Motors Dealer or though the one that delivered your new Bultaco. You can check the dealers list on our web site www.bultaco.com...
-
Page 68: Warranty Rights Of The Owner
Bultaco Motors, S.L. have been followed according to the conditions contained herein. Bultaco Motors, S.L. is responsible for any lack of conformity which exists at the time of delivery of the product. When the product is not correct, the buyer is to decide if they want to repair or replace the product. This decision of the buyer, when communicated to the seller, requires both parties to fulfill it with one exception: if the cost of the repair or replacement is disproportionate to the value of the product a more reasonable solution will be taken into account. -
Page 69: Warranty Term
6.5. Warranty period Bultaco Motors, S.L. responds to the faults that are found during a term of two years from the delivery date, but if the lack of conformity is manifested after the sixth month, the consumer must prove that the defect originated and already existed at the time the product was delivered. - Page 70 bultaco.com...
Need help?
Do you have a question about the BRINCO and is the answer not in the manual?
Questions and answers