Advertisement
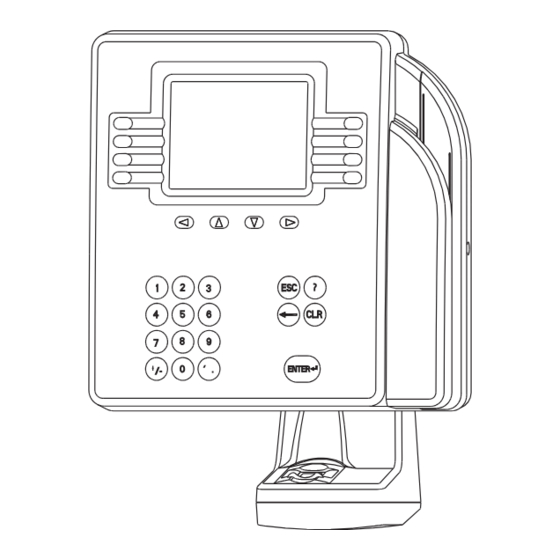
ADP QuickPunch
Finger Scan Verification Device
Installation Guide
The ADP QuickPunch
finger scan verification device allows
®
you to require employees to perform verification when they
swipe a badge or enter their personal identification number
(PIN) at the Series 4000 timeclock. To use the verification
devices, Your ADP host system must include the ADP Quick-
Punch software.
When you attach the finger scan verification device to the Series
4000 timeclock, the device must lie flat against the mounting
surface.
Tools You Will Need
No. 2 Phillips
Security wrench
(ships with Series 4000
screwdriver
Document Part Number: 4703858-002
Document Revision: B
Determining the Part Number of the Timeclock
Important: If the part number of the timeclock is 8602000-4xx, you cannot mount the
timeclock with the finger scan verification device away from an AC outlet. You must
mount the timeclock over (covering) an AC outlet or use an internal AC outlet. Also,
the finger scan verification device connects differently to the main board in the
timeclock depending on the part number of the timeclock.
Determine the part number of the timeclock in either of the following ways:
• Look at the bar code label on the bottom of the timeclock (the underside of the time-
clock as you look at the display and keypad). The part number is directly above the
bar codes.
• If the Series 4000 timeclock uses firmware version 2.0 or higher, access Mainte-
nance mode at the timeclock and run the Hardware Report. The part number of the
timeclock is included in the report output on the screen. For more information about
the Hardware Report, refer to the Series 4000 Timeclock User's Guide.
Preparing for the Installation
Do the following only if you are adding the ADP QuickPunch verification device to an
installed and assembled Series 4000 timeclock. Otherwise, go directly to
Connecting the Verification Device"
to begin the installation.
1. Use the security wrench to loosen the security screw on the right side of the timeclock
and open the cover.
2. Inside the timeclock, unplug the power cord from the electrical outlet.
1
3. Perform this step only if there is a backup battery installed in the timeclock.
a. Tilt the battery out of its position by pushing up on the top bracket (1) and pulling
the top of the battery outward.
b. Disconnect the black wire from the negative battery terminal (2). Then, disconnect
the red wire from the positive battery terminal (3) and remove the battery.
Pliers or 1/4 inch
(6.35 mm) wrench
Installing and Connecting the Verification Device
1. Refer to the next illustration to see if there is a black plate covering the right square
cable access hole (1) in the bottom of the timeclock. If there is a plate, use a 1/4 inch
(6.35 mm) wrench to remove the two nuts on the screw posts, and remove the plate.
2. To attach the device to the timeclock:
a. Thread the device's cable and ground wire (1) into the timeclock through the square
access hole and align the screw holes in the device with the holes in the base of the
timeclock.
b. Install the two mounting screws (2) using a No. 2 Phillips screwdriver. If necessary,
slide the transformer (3) up slightly so that you can more easily install the screws.
"Installing and
3. If the part number of the timeclock is 8602004-4xx or 8602800-4xx, plug the cable into
1
2
3
1
4. Ground the verification device by attaching the green ground wire to the main board of
3
2
1
2
the RS-232 connection on the main board:
If the part number of the timeclock is 8602000-4xx, plug the cable into the RS-232
connection on the main board:
the timeclock. Where you attach the ground wire depends on the timeclock model and
which optional devices are installed in the timeclock.
Warning: Failure to attach the ground wire to the main board will result in damage to
the finger scan verification device.
3
Advertisement
Table of Contents

Summary of Contents for Adp QuickPunch
-
Page 1: Installation Guide
Hardware Report, refer to the Series 4000 Timeclock User’s Guide. Preparing for the Installation Do the following only if you are adding the ADP QuickPunch verification device to an installed and assembled Series 4000 timeclock. Otherwise, go directly to “Installing and... -
Page 2: Specifications
Protected up to 15 kV (IEC 61000-4-2 Lvl 4) is likely to cause harmful interference, in which case, the user, and not ADP, Inc., is required to correct the Series 4000 Timeclock Installation Guide. Otherwise, proceed to the next step.
Need help?
Do you have a question about the QuickPunch and is the answer not in the manual?
Questions and answers