
Summary of Contents for Jonsa DM/R4HDM4
- Page 1 DIGITAL MODULATOR INSTRUCTION MANUAL DM/R4HDM4 - 4 HDMI INPUTS TO DVB-T MPEG4 ® AUSTRALIA...
-
Page 2: Table Of Contents
DIGITAL MODULATOR - 4 x HDMI INPUTS TO DVB-T MPEG4 CONTENTS SAFETY PRECAUTIONS 4...5 CHAPTER 1: INTRODUCTION 6...8 Product Overview Features Specifications Schematic Overview Principle Chart System Mode Appearance and Description CHAPTER 2: INSTALLATION General Precautions Power Precautions Device’s Installation Flow Chart Illustrated in the Following Environment Requirement Grounding Requirement CHAPTER 3: OPERATION... - Page 3 DIGITAL MODULATOR - 4 x HDMI INPUTS TO DVB-T MPEG4 CONTENTS [CONTINUED] Video Parameters: Advanced RF Settings Audio Parameters: Set Audio Stream Parameters: Set Service Name Stream Parameters: Set Service ID 4.10 Stream Parameters: Set LCN 4.11 Stream Parameters: Set PID 4.12 Stream Parameters: Set NIT 4.13 Stream Parameters: Set PDS 4.14...
-
Page 4: Safety Precautions
DIGITAL MODULATOR - 4 x HDMI INPUTS TO DVB-T MPEG4 SAFETY PRECAUTIONS WARNING: Avoid personal injury and product damage by complying with the following important operating and maintenance instructions. Avoid Electric Shock WARNING: To reduce risk of electric shock, perform only the instructions that are included in the operating instructions. - Page 5 DIGITAL MODULATOR - 4 x HDMI INPUTS TO DVB-T MPEG4 Ventilation WARNING: To protect this product against damage from overheating, do the following: • This product has openings for ventilation to protect it from overheating. To ensure product reliability, do not block or cover these openings • Do not open this product • Do not push objects through openings in the product or enclosure • If the modulator has been kept in cold conditions for a long time, keep it in a warm room no less...
-
Page 6: Chapter 1: Introduction 6
• RF Frequency Range: 45 MHz … 862 MHz • 1 x DVB-T RF Test Port: - 30 dB • LCD Display, NMS, Local Configuration Input 1.3 Specifications Product Code DM/R4HDM4 Video & Audio Input 4 x HDMI Input Connector Type Type A... -
Page 7: Schematic Overview
Installer, Property Owner, and/or Integrators responsibility to contract with the provider of content, to authorise the use/method of the equipment. Jonsa Australia Pty Ltd takes no responsibility for the activation of this mode nor the content that is modulated and distributed via an RF distribution system. -
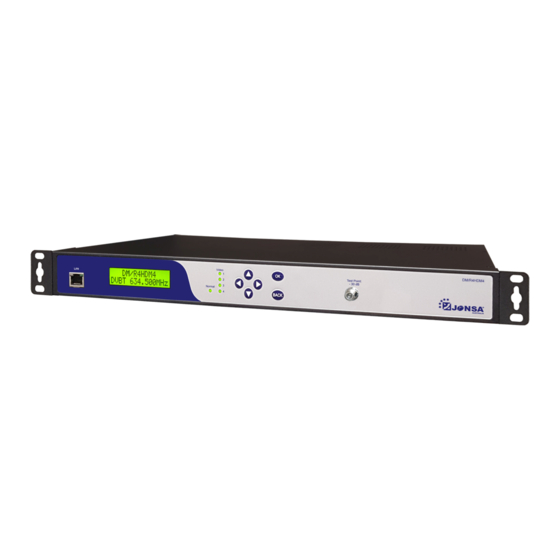
Page 8: Appearance And Description
Check the Contents 1 x Digital Modulator 1 x Set of 19" Rack Mounting Brackets 1 x Australian AC Power Cord 1 x Instruction Manual Note: HDMI LEADS are NOT INCLUDED. They can be purchased separately, please refer to our website: www.jonsa.com.au... -
Page 9: Chapter 2: Installation
DIGITAL MODULATOR - 4 x HDMI INPUTS TO DVB-T MPEG4 CHAPTER 2: INSTALLATION This section explains the cautions that could possibly injure users when it’s used or installed. For this reason, please read all of these details and please keep this firmly in mind before installing or using the product. 2.1 General Precautions • Must be operated, maintained and located in a dust free environment • Never open the cover of the product... -
Page 10: Lcd Menus - Using The Control Buttons On The Digital Modulator 10
DIGITAL MODULATOR - 4 x HDMI INPUTS TO DVB-T MPEG4 CHAPTER 3: OPERATION 3.1 LCD Menus - Using the Control Buttons on the Digital Modulator Boot System DM/R4HDM4 = Product Code: DM/R4HDM4 Switch On Please wait... 564.500 MHz = RF Output Frequency [CH 33] Press the "OK"... - Page 11 DIGITAL MODULATOR - 4 x HDMI INPUTS TO DVB-T MPEG4 LCD Menu [Continued] Main Menu Video Port Number: PRESS "OK" then PRESS "q" "p" to change to PRESS "OK" PRESS "OK" Video Set Video the HDMI Input Port required then PRESS "OK" Resolution: PRESS "OK", Automatic Resolution Detection Auto...
- Page 12 DIGITAL MODULATOR - 4 x HDMI INPUTS TO DVB-T MPEG4 LCD Menu [Continued] Stream Private Data: PRESS "OK" then PRESS "q" "p" to enter in the PRESS "OK" Set PDS 00000037 required number and then PRESS "OK" Are you sure? PRESS "OK"...
-
Page 13: Chapter 3: Operation 10
DIGITAL MODULATOR - 4 x HDMI INPUTS TO DVB-T MPEG4 LCD Menu [Continued] System Language: PRESS "OK" then PRESS "q" "p" to enter in the language type and PRESS "OK" Set Language English then PRESS "OK" [Languages might be expanded in the future] Are you sure? PRESS "OK"... - Page 14 DIGITAL MODULATOR - 4 x HDMI INPUTS TO DVB-T MPEG4 • To change the IP address of the PC, settings would have to be changed in “Network Connections”, Press the Windows Key + R, then type “ncpa.cpl” as shown below, click OK • This command will open up your network connections, locate your Ethernet card, should be “Local Area Network”, it should say that it’s connected or unidentified network.
-
Page 15: Login
DIGITAL MODULATOR - 4 x HDMI INPUTS TO DVB-T MPEG4 • As default the settings should be set to “Obtain an IP Address automatically” • Assigning an IP to the PC, ensure that this IP is not the same as the one you used on the modulator or any other PC’s you connect to the modulator network. -
Page 16: Rf Parameters: Setup Of Dvb-T Rf Output
DIGITAL MODULATOR - 4 x HDMI INPUTS TO DVB-T MPEG4 4.3 RF Parameters: Setup of DVB-T RF Output 4.6 Video Parameters: Advanced RF Settings • Configure the below settings for the DVB-T • You can set the video parameters for the input RF Output. -
Page 17: Stream Parameters: Set Service Id
DIGITAL MODULATOR - 4 x HDMI INPUTS TO DVB-T MPEG4 4.9 Stream Parameters: Set Service ID 4.12 Stream Parameters: Set NIT • Set the service ID's for each of the input sources. • Set the NIT [Network Information Table]. If any of these parameters are changed, please click If these parameters are changed, please click on on "Save Settings". -
Page 18: Stream Parameters: Set Service Type
DIGITAL MODULATOR - 4 x HDMI INPUTS TO DVB-T MPEG4 4.15 Stream Parameters: Set Service Type 4.17 System Parameters: Retrieve Inventory • Set the Service Type, being an SD or HD Service. • The interface below shows the current software, If these parameters are changed, please click on hardware and database version, including the date "Save Settings". -
Page 19: System Parameters: Set Language
"reset to default" the digital modulator. Alternatively, Restore the • When after switching on and restoring the device to parameters on to a different DM/R4HDM4 digital factory setting, it is still not working properly modulator for simple plug and play installations • When maintenance is required... -
Page 20: Chapter 6: Dvb-T Australian Channel Plan
DIGITAL MODULATOR - 4 x HDMI INPUTS TO DVB-T MPEG4 CHAPTER 6: DVB-T AUSTRALIAN CHANNEL PLAN Channel Channel Frequency MHz DVB-T Carrier Bandwidth Digital Centre Channel Frequency BLOCK A 174–181 7 MHz 177.5 181–188 7 MHz 184.5 188–195 7 MHz 191.5 195–202 7 MHz... -
Page 21: Chapter 7: How To
DIGITAL MODULATOR - 4 x HDMI INPUTS TO DVB-T MPEG4 CHAPTER 7: HOW TO? CONNECTION & RF DISTRIBUTION EXAMPLE - 16 x HDMI OUTPUT AV SOURCES TO DVB-T FRONT VIEW OF 19" RACK HDMI outputs from AV Source to the inputs on the Digital Modulators RF outputs from the Digital Modulators for... -
Page 22: Chapter 8: Quick Setup Information Table
DIGITAL MODULATOR - 4 x HDMI INPUTS TO DVB-T MPEG4 CHAPTER 8: QUICK SETUP INFORMATION TABLE For quick setup via the web NMS, go to RF Parameters > Quick Setup, then Select a MOD Number as per the frequency and parameters preferred below. For LCD Panel Access refer to Page 10, follow the RF Menu's. MOD Number Modulator 1 Modulator 2... -
Page 23: Chapter 9: Warranty
ATTACH YOUR PROOF OF PURCHASE HERE... Please keep a copy of your proof of purchase with this Instruction Manual / Warranty. DO NOT SEND BACK TO JONSA AUSTRALIA PLEASE READ THIS WARRANTY AND KEEP IT WITH YOUR PURCHASE RECEIPT Please complete these details and retain your original proof of purchase as you will require both documents to claim this as a warranty repair. - Page 24 Silverwater 3 - 29 Birnie Avenue, Canning Vale NSW 1811 ® Lidcombe WA 6155 Australia AUSTRALIA NSW 2141 Australia saleswa@jonsa.com.au Australia +61 1300 660 155 +61 1300 250 407 www.jonsa.com.au sales@jonsa.com.au Copyright © Jonsa Australia Pty Ltd. All Rights Reserved.
Need help?
Do you have a question about the DM/R4HDM4 and is the answer not in the manual?
Questions and answers