Advertisement
Quick Links
Wireless Base Stations
▫
and Client Devices
Surveillance Cameras
▫
Remote Sensors
▫
Remote Lighting
▫
Off Grid Electronics
▫
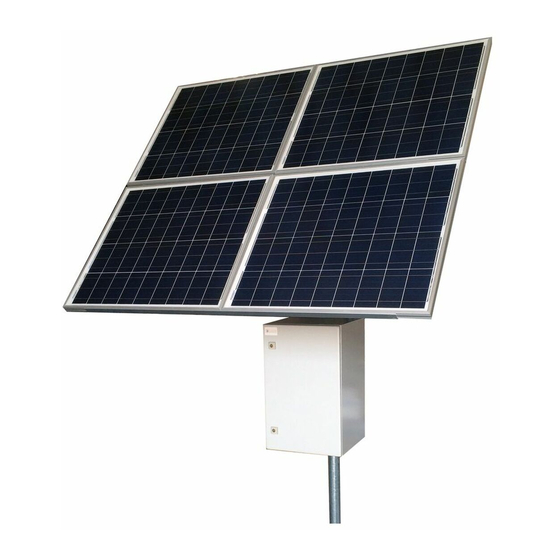
Congratulations! on your purchase of the RemotePro
remote power system. Please take a moment to review this Qwik
Install Guide before assembly or battery installation. Other in-
structions come with other components of this kit. Be sure to re-
view all instructions.
DANGER! Voltages in this system can exceed
When following the instructions in this guide take extreme care to avoid
contact with output of solar panels. Only licensed electricians or those
with experience working around high voltage should attempt to install.
Safety:
For your own protection, follow these safety rules.
▫
Perform as many functions as possible on the ground
▫
Do not attempt to install on a rainy, windy or snowy day or if
there is ice or snow accumulation at the install site or if the
site is wet.
▫
Make sure there are no people, pets, etc. below when you are
working on a roof or ladder.
Recommended Tools: Phillips & Flat Screwdriver, 17/13/10mm
wrench, 8mm nut driver
Please help preserve the environment and return
used batteries to an authorized depot. Most auto
parts stores will pay for your used battery.
RPSTL12/24/48M
Remote Power System
65VDC and are very dangerous!
You Can Be Killed!
RemotePro
®
®
off-grid
Advertisement

Related Manuals for Tycon Power Systems RemotePro RPSTL24

Summary of Contents for Tycon Power Systems RemotePro RPSTL24
- Page 1 RPSTL12/24/48M ® RemotePro Remote Power System Wireless Base Stations ▫ and Client Devices Surveillance Cameras ▫ Remote Sensors ▫ Remote Lighting ▫ Off Grid Electronics ▫ ® Congratulations! on your purchase of the RemotePro off-grid remote power system. Please take a moment to review this Qwik Install Guide before assembly or battery installation.
- Page 2 Qwik Install STEP 0: Install mounting pole per separate instructions. STEP 1: Prepare the enclosure: Install DIN rail (if required) to door using two phillips head screws. Install just the top mounting bracket to the enclosure using two 8mm bolts. NOTE: It takes two people to mount the enclosure to a pole.
- Page 3 STEP 7: Before attaching the battery cables to the batteries, first re- move the battery cable fuse. This will prevent accidental short circuit. Connect all battery minus (-) connections, then connect all battery plus (+) connections. WARNING! The fan supplied with the system operates on 12VDC or 24VDC.
- Page 4 48V 320W Configuration using 12V Solar Panels 48V 650W and 1300W Configuration using 24V Solar Panels. Note: For 650W use 1/2 of above configuration.
- Page 5 24V 650W and 1300W Config using 24V Solar Panels. Note: For 650W use 1/2 of above configuration...
- Page 6 CAUTION: Be sure to connect the bat- tery to the controller first and disconnect it last. Connecting so- lar panels to the con- troller without the battery connected could damage the controller.
- Page 10 STEP 11: Connect the battery wires to the solar controller BAT inputs. Be sure to pay strict attention to polarity. CAUTION: Wiring with a reverse polarity will cause equipment damage. Wiring solar panels to BAT input can cause equipment damage. Double check wiring and then install the fuse in the battery cable to energize the system.
- Page 11 TECH CORNER Additional Information you may find useful 1. CONTROLLER: The TP-SC24-40-MPPT controller is designed for use with 12V or 24V battery systems. The TP-SC48-60-MPPT is de- signed for 12V, 24V or 48V battery systems. Maximum load out from either controller is 20A Max. 2.Fuse: There is a fuse in-line in the battery cables.
-
Page 12: Replacement Parts
7. TROUBLESHOOTING: A. The lights on the solar controller look fine but the batteries aren’t charging? The solar voltage must match or exceed the battery voltage. Check to make sure Solar Panels are wired cor- rectly. B. There is no voltage output? If battery voltage is too low the charge controller will turn off the load outputs. -
Page 13: Specifications
SPECIFICATIONS Subject to change without notice RPSTL- RPSTL- RPSTL- 200Ah or 200Ah or 200Ah or 12V Battery Capacity 400Ah 400Ah 400Ah Max Load Output Battery / Load Voltage (DC) 11-15V 22-29V 44-58V Over-Voltage Protection Bulk Charge 14.4V 28.8V 57.6V Float Charge 13.8V 27.6V 55.2V... - Page 14 Accessories TP-SC-BT1 RS232 to Bluetooth adapter. • Allows for wireless monitoring and con- trol of the MPPT solar charge controller up to 15m. • Uses a smartphone app available for Android and IOS devices • Completely weatherproof for outdoor mounting •...
- Page 15 Remote Station Monitor TPDIN-Monitor-WEB2 • Qty 4: Voltmeters and current meters • Web Based: allows station monitoring over the internet. • Qty 4:10A relays for controlling power to devices, starting a generator, etc. • Measures internal and external tempera- tures •...
-
Page 16: Limited Warranty
Limited Warranty ® The RemotePro products are supplied with a limited 36 month warran- ty which covers material and workmanship defects. This warranty does not cover the following: ▫ Parts requiring replacement due to improper installation, misuse, poor site conditions, faulty power, etc. ▫...
Need help?
Do you have a question about the RemotePro RPSTL24 and is the answer not in the manual?
Questions and answers