Table of Contents
Advertisement
Advertisement
Table of Contents

Related Manuals for Bushwhacker BIG EYE G3

Summary of Contents for Bushwhacker BIG EYE G3
- Page 1 VER.201711...
-
Page 2: Table Of Contents
Contents Quick Start Guide ............1 Introduction ..............3 Camera Structure ............4 Antenna .............. 4 Microphone ............4 Indicator Light ............. 4 Lens ..............5 Lock Hole ............5 IR LED ..............5 Light Sensor ............5 Lock Buckle ............5 PIR Sensor ............ - Page 3 4.2.7 Auto Power Off ........12 4.2.8 Sound Recording ......... 12 4.2.9 PIR Level ..........12 4.2.10 Photo Effects ........13 4.2.11 Sending Interval ........13 4.2.12 Network Information View ..... 13 4.2.13 Network Search ........13 4.2.14 Test Routine ......... 14 4.2.15 Get Configuration Parameters ....
- Page 4 Basic Parameters Setting ......... 25 Network Parameters Setting ......25 8.5.1 Email Parameters ......... 25 8.5.2 MMS Setting ........27 8.5.3 SMS Parameters ........27 Camera Rename ..........28 Delete Camera ..........28 Parameters’ Sending & Saving ......28 Parameters Receiving ........29 8.10 Software Version ..........
-
Page 5: Quick Start Guide
Quick Start Guide... -
Page 7: Introduction
Introduction Big Eye G3 wildlife camera (also known as wireless hunting camera / 3G trail cameras) is an wireless infrared detection device with 3Gnetwork. It is triggered by pyroelectric infrared sensor (PIR). Any change of environment temperature caused by movement of animals in observation area automatically triggers completion of photographs or video. -
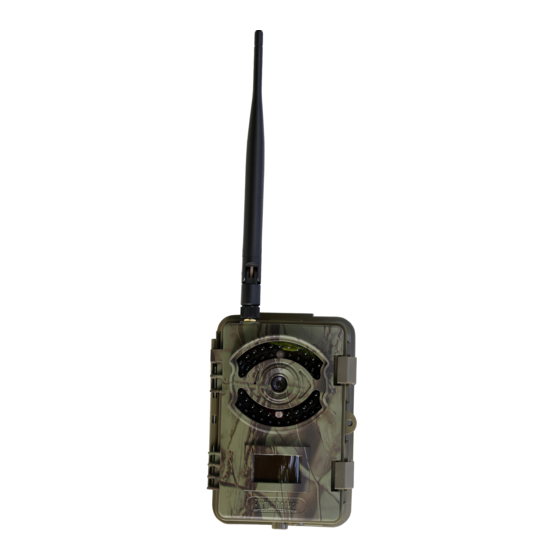
Page 8: Camera Structure
Camera Structure Antenna Lock Hole USB/TV Cable Port Microphone PIR sensor TFT screen SIM card slot Indicator Light SD card slot Speaker Lens keypad Tripod Nut Lock Buckle Power/mod Waterproof Plug e switch IR LED Battery Slot Resistance DC Port Battery Slot Cover Antenna Uses WCDMA standard 3G network, there are two types of... -
Page 9: Lens
In “ON” Mode: camera starts successfully if red indicator light flashes 6 times and then blue indicator light flashes 3 times continually. If start failed, the blue indicator light will keep lighting, user can turn off the camera then restart. On “TEST”... -
Page 10: Pir Sensor
PIR Sensor This is the PIR sensor window, please don’t cover when using. The material is relatively fragile, in order to avoid damage, please do not press firmly. When install camera please make sure there are not moving objects in 3m area in front of PIR sensor, such as branches, leaves, weeds, strings, color ribbon and other objects which may fluttered in the wind to avoid potential false triggers. -
Page 11: Sd Card Slot
current date and time. 3.11 SD Card Slot Please insert SD card correctly. The supported memory capacity is up to 64GB. SD card to be formatted before use; and SD card lock protection off. It’s recommended to use high speed SD card not less than class 10 to achieve the best performance. -
Page 12: Keypad
1080P 1673 2964 720P 1673 3547 5792 WVGA 1098 2156 4570 7157 1283 2519 5340 8114 3.12 Keypad For menu operation MENU button, press it to set parameters; Switch among “IMAGE/SET/SYSTEM”; Press “EXIT” button to exit. Up, Quick switch to camera mode. "ZOOM" mode to enlarge the picture;... -
Page 13: Power/Mode Switch
3.13 Power/Mode Switch OFF: to turn off the camera. TEST: to set operational parameters. to work under surveillance status. 3.14 DC Port External DC power supply, please use 6V / 2A power adapter, the same specifications of the solar power can also be used as an external power supply access. -
Page 14: Menu Function
Menu Function Press "MENU" key to enter the menu, press ▲, ▼ key to move the cursor to select various function options, "OK" key to confirm. Press "REPLAY" to enter playback mode. Press the "EXIT" key to return to the previous menu or exit the menu. Image 4.1.1 Mode... -
Page 15: Setting (Network Included)
Note: There is a logical association with time lapse shot. Please read the relevant section. Setting (Network Included) 4.2.1 Device No. Device number defaults to BUSH, composed of 4 characters, each character can be 0-9, AZ in any choice, it will be the first 4 characters of image filename. -
Page 16: Stamps
Time lapse time starting point is the point of shooting, so the time lapse will have a logical limit on recording time. As shown in the table below: Shortest Shortest Video Video Interval Interval Length Length Duration Duration 1 min 2 min 2 min 5 min... -
Page 17: Photo Effects
4.2.10 Photo Effects According to the actual shooting scene, user can preset the photo effect, to increase or decrease the brightness of the photo. These are different options: -3, -2, -1, standard, + 1, +2, + 3. 4.2.11 Sending Interval After taking a picture, if no shooting again within a specific time interval, camera will send picture (mail, MMS mode) or short message (SMS mode). -
Page 18: Test Routine
Network search Confirm to start network search Network standard is displayed in the camera as: (transmission speed from low to high) UTRAN GSM W/EGPRS UTRAN W/HSDPA UTRAN W/HSDPA UTRAN W/HSDPA and HSUPA SIM card intact No SIM card found Note: Please use this function after setting the network parameters, see related chapters. -
Page 19: Get Configuration Parameters
please check the email, it is a test message”. 4.2.15 Get Configuration Parameters Users can remotely control parameters through the APP. Press the "OK" button, then select the "OK" option the screen will be black out and camera starts to search for the parameter file from APP. The screen opens after parameters have been acquired and modified. -
Page 20: Default Set
Setting time and date 4.3.3 Default Set: This operation will restore all system settings in the camera to factory defaults. Factory Default Parameters Photo Mode Camera Image Size 12MP Video Size 1080P Shooting No. Video Length Setting Device No. BUSH Timer PIR Interval Time Lapse... -
Page 21: Language
network parameters available Display the IEMI code for IMEI the current network module System Format SD card Time & Date 2017/01/01 00:00 Default Set Factory Language English Beep Sound Loop Recording TV Mode Password Set 1234 G3R__01_6.1.09 Software Ver. S:10 MCU Version:1 4.3.4 Language:... -
Page 22: Replay
MCU Version:1 G3___01_6.1.01 is DSP firmware information: G3 is model number, 01 stands for language (default language: English),6.1 is firmware version,01 is updated version. S:10 is information of network firmware, version is 10. MCU Version:1 is information of MCU firmware, version is 1. Replay On “TEST”... -
Page 23: Test And View
Test and View Shooting in Test Mode Turn camera "TEST" mode then the display works, and the upper left corner of the display will show the current shooting mode, resolution, the number of images you can shoot. In “Test” mode user can test to take photo and video. -
Page 24: Remote Control Instruction
Remote Control Instruction G3 camera can remotely change parameters through APP or network. The format of the parameters is: For example: # 01 = 1 * #:Separator of beginning; 01:Parameter instruction code, see the table below for specific code; =:Separator of Instruction code and specific parameters; 1:Specific Parameters;... - Page 25 (7), 5 minutes (8), 10 minutes (9), 20 minutes (10), 30 minutes (11), 1 hour (12), off (13) Interval shooting: 3 seconds (1), 5 seconds (2), 10 seconds (3), 15 seconds (4), 30 seconds (5), 1 minute (6), 2 minutes (7), 5 minutes (8), 10minutes #10=1* (9), 20 minutes (10), 30 minutes (11), 1 hour (12), 2 hours (13), 6 hours (14), 12...
- Page 26 (7), 5 minutes (8), 10 minutes (9), 20 minutes (10), 30 minutes24(11), 1 hour (12), off (13) Public Account #40= xxxxx* Public Password #41= xxxxx*...
-
Page 27: Remote Access To Pictures And Info
Remote Access to Pictures and Info Users can get pictures and information from G3 camera through mail, MMS, SMS. Email By mail, users can receive originals or thumbnails taken by the camera. SMS notification function can be turned off at the same time. -
Page 28: App Software (Android Version)
APP Software (Android Version) Overview The G3's APP software allows remote control of the G3 camera, setting or changing camera operating parameters. Software Installation Users can download the APP on Google play and search for "WildCam" for installation. Also available through our website or dealer, direct access to software: G3APPXXXXXXXX.apk. -
Page 29: Basic Parameters Setting
Basic Parameters Setting Click Camera Setting to do parameters setting for camera, detailed instruction please refer to relevant section. Network Parameters Setting Select Net Setting for camera's network settings. Network parameters are divided into Email, MMS and SMS three application types. - Page 30 NET APN: according to local operators’ information. For example: Email China Unicom AT&T Parameters NET APN UNINET Phone Account APN Empty Empty Password Empty Empty Send Server and Port are the email server and sending port of the sending mailbox. Please consult your local operators. For example: QQ mailbox fill smtp.qq.com, Port 465;...
-
Page 31: Mms Setting
Fill in the APN account and password based on the local operators. For example, China Unicom is blank, no need to fill in; AT & T's APN account is wap@cingulargprs.com, APN password CINGULAR1 8.5.2 MMS Setting Select "MMS" for MMS parameter settings, camera will send image to the receiving phone number.More information please check from local operators. -
Page 32: Camera Rename
Camera Rename The set camera can be renamed. Click the Rename option in the Setting List interface, user can change the camera name, the number of the SIM card in the camera, the number for configuration file sending and IMEI information. Input box for the initial set of information, user can delete the input box and input new information. -
Page 33: Parameters Receiving
Save: Save the parameters of the current page settings. Save Default: Save the parameters of the current page as the default values, the parameters will be called directly in the next camera settings until it is changed. Parameters Receiving When camera is in working condition, it will automatically change the configuration. -
Page 34: Software Version
8.10 Software Version In the camera interface, click the My area in the lower right corner, user can check the current software version. The current version is: G3 Andriod v1.0.0... -
Page 35: Pc Clint Setting
PC Clint Setting PC client application can be downloaded from the official website (www.Bushwheker.cn), without need for installation. Just download and decompress the G3set.exe program to run Please select the appropriate language and camera model. Camera parameters setting Click the camera settings for the camera parameter settings. After parameter setting, click on the "directory"... -
Page 36: Network Parameters Setting
storage address. Click "generate" to generate the camera parameter settings file. Click "Exit" to exit the main menu interface. Copy the parameter settings file of CameraSet.cfg to the SD card. Insert it to the camera and turn the key to TEST, camera setting is automatically finished.。... -
Page 37: Email Parameters Setting
menu interface. Copy the parameter settings file of Camera NetSet.cfg to the SD card. Insert it to the camera and turn the key to TEST, and then the camera automatically sets the parameters. Load: When setting parameters, if the generated parameters are incorrect, click "Load"... -
Page 38: Mms Parameters Setting
message notice. If the original images and SMS notification are needed, you can choose to change. 9.1.3 MMS Parameters Setting In the network settings menu, select the MMS option for MMS mode parameter settings. After selecting the Country, Operator, it is needed to fill in the Send Interval, Phone Number, MMS APN, MMS URL, MMS Proxy Server, MMS port. - Page 39 In this mode, it is required to set the Country, Operator, Send Interval, Phone Number. When sending SMS, the set mobile phone number can receive the text information of the image shot by the camera. Note: Phone number format is "+8613800138000" or "13800138000".
-
Page 40: Firmware Upgrades
Firmware Upgrades Manufacturer reserve the right of upgrading the product hardware and software. User may update camera software version through SD card (SD card capacity shall less than 32GB). 10.1 DSP Firmware Upgrades Prepare a formatted SD card. Copy version software document named... -
Page 41: Main Features And Specifications
Main features and specifications 11.1 Main features Picture pixels: 3MP/5MP/8MP/12MP/16MP. HD video: 1080P 30 frames per second. The sound of the video can be set on or of. In the "camera + video" mode, the camera after being triggered to start every time, the camera will take pictures first and then record a scene video. -
Page 42: Parameters
Supportive for nine square pictures browsing and auto play mode. Device number will be showed on image file name, this helps users identify which cameras captured the image when browse files. You can set a password for power-on. Two sets of precise timing settings. Color pictures at daytime, monochrome pictures at night, switched automatically. - Page 43 1080P:1920x1080@30fps Working Time Day /night, auto-induction switch FOV=90 degree (G3R:50 degree), F=2.4 Lens (G3R:2.5), auto-induction switch filtering IR Flash Distance 65 feet / 20 m 42pcs; Visible light lamp/invisible light Infrared Lamp lamp selectable Power Saving On/off; Only 20 lights work after opened LCD screen 2.4 inch, TFT colors Operation Keypad...
- Page 44 alphabets or 0~9. Power Supply 4× AA, 8× AA Network Band 800/850/900/1900/2100MHz Two mailboxes can be set. Message notice can be set at the same time. Email Either original (maximum 16M) thumbnail (640x480) can be sent. Only send thumbnail (640x480) Send message notice Sending Interval Instant, 5sec~1 hour, Off...
-
Page 45: Faq
Please check below items if camera cannot start normally No batteries; Batteries are not installed correctly; Run out of battery; Batteries do not comply with specifications; Not tune function switch to ON state yet; Not insert SD card yet;... -
Page 46: Warranty Policy
WARRANTY We guarantee our Bushwhacker cameras to be free of defects in materials and workmanship under normal use and service for a period of a limited times after registered date of purchase. -
Page 47: Standard Packing List
Standard Packing List Component name Quantity Camera Antenna USB Cable TV Cable Strap Manual Warranty Card : Important reminder Users need to purchase batteries, please use high quality battery. Users need to purchase SD card, please use high quality SD card for better use. -
Page 48: Statement
Statement 1. The manufacturer reserves the right to make corrections at any time to the contents of this manual due to inconsistencies in editing / typographical errors and product upgrades and includes modification in new version of the manual. These amendments are without notice. - Page 49 Welcome to use WildCam APP to set parameters.
Need help?
Do you have a question about the BIG EYE G3 and is the answer not in the manual?
Questions and answers