Advertisement
Children's Battery Operated Ride-on
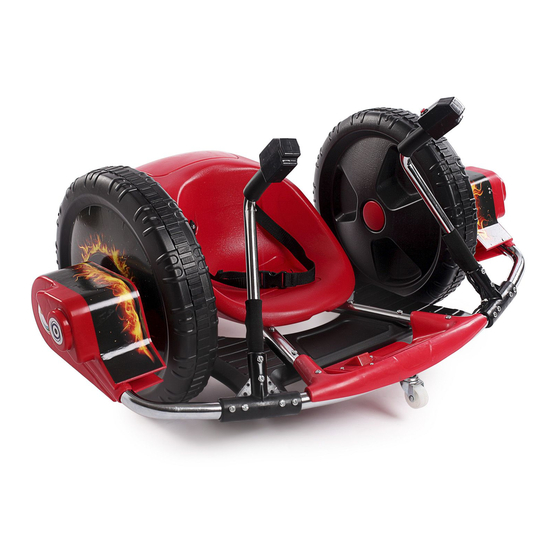
Spin Krazy
Suitable for 6+ years
Maximum user weight: 32kgs/70.55lbs
Adult assembly required
Owner's user manual
Read and understand this entire manual before using!
Please keep this manual for future reference as it contains important
information
Before the fist time use, charge the battery for at least 10-12 hours
1
Advertisement

Subscribe to Our Youtube Channel
Summary of Contents for Fun Wheels Spin Krazy
- Page 1 Children’s Battery Operated Ride-on Spin Krazy Suitable for 6+ years Maximum user weight: 32kgs/70.55lbs Adult assembly required Owner’s user manual Read and understand this entire manual before using! Please keep this manual for future reference as it contains important information...
-
Page 2: Table Of Contents
Table of content 1. About your new “spin krazy” 2. Parts list 3. Assembly steps 4. How to operate your “spin krazy” 5. How to charge the “spin krazy” 6. Troubleshooting guide 7. Maintaining your “spin krazy” 8. Disposal of battery About your new “spin krazy”... -
Page 3: Parts List
Parts list Part PART PICTURE Q’ty(pcs) REMARKS PAT PART PICTURE Q’ty(pcs) REMARKS NAME NAME Main Seat frame support Steering Pedal handlebar plate Seat Foot rest Driving Battery wheel cover Flag B4*20 For pedal Screw plate assembly M6 lock One in Ø6.5 For pedal nuts... - Page 4 Parts list Spare parts bag Part Part Picture Quantity Part Part Picture Quantity Remarks name arks name Wheel M5*1 cover screw M6*1 B4*8 One for screw back up screw back Spann Cable One for back up...
-
Page 5: Assembly Steps
Assembly steps • Your new vehicle requires adult assembly • Children can be harmed by small parts, sharp edges and sharp points in the vehicle’s unassembled state. Care should be taken in unpacking and assembly of the vehicle. Children should not handle parts, or help in assembly of the vehicle. •... - Page 6 ● Put something on the floor to protect the product from damage when assemble. ● Remove the M6X40 screws from the main frame ● Turn over the Main Frame, fit the seat support to the holes on the main frame, push it into the holes.
- Page 7 ASSEMBLE THE DRIVING WHEELS ● Remove all the parts on the axle ● Fit the driving wheel onto the axle ● Fit a Ø12 washer onto the axle ● Fit a Ø10 lock nut to lock the driving wheel, DO NOT OVER TIGHTEN ●...
- Page 8 ASSEMBLE THE SEAT...
- Page 9 ● Connect the power wires first, please reference the picture 1 ● Find 4 pieces M6x30 screws in the spare parts bag, turn over the seat and put it on the floor ● Turn over the whole vehicle, and fit it on the seat, align the holes, then screw in the M6X30 screws.
- Page 10 ASSEMBLE THE HANDLEBAR ● Remove the M6x35 screws on the three direct links ● Fit the steering handlebar onto the three direct links, lock them with M6x35 and M6 lock nut ● Fix the M6 lock nut with crescent wrench, tighten the M6x35 screws with screwdriver.
- Page 11 ● Fit the Ø6.5 washer and lock nut, then tighten them CONNECT ALL THE WIRES Turn over the vehicle body, you can see there are connectors on A, B, C and D Connect the A connectors first, the male connector of A is come out from the main frame, the female connector is come out from the pedal switch.
-
Page 12: How To Operate Your "Spin Krazy
● Fit the flag to the hole on the battery cover and insert it. Reminder: before assemble the battery cover, connect the battery first, please notice the red connector should be connected with the red terminal. How to operate your “SPIN KRAZY” WARNIGN! PREVENT INJURIES AND DEATHS: ●NEVER LEAVE THE CHILD UNATTENDED. - Page 13 • Never ride on a road, on a lawn or dirt area, near notor vehicles, on or near steep inclines or steps, or near swimming pools or other bodies of water; • Only ride on flat surface. such as inside a house or a playground. •...
- Page 14 2.press the pedal switch, then the vehicle will move forward Stop: release the pedal switch then the vehicle will stop Slow down the speed: when the vehicle move forward, press the turn left buttons and turn right button on the steering handlebars at the same time, then the speed will slow down Turn right and left: 1.
- Page 15 the battery in a well-ventilated area ONLY. - NEVER pick up the battery by the wires or charge r. Damage can occur to the battery and may cause a fire. Pick up the battery by the case ONLY. - Charge the battery in a dry area ON LY. •...
-
Page 16: Troubleshooting Guide
1. Plug the charger port into the input socket. 2. Plug the charger plug into a wall outlet. The battery will begin charging. Trouble shooting guide ■PROBLEM: The vehicle does not run PROBLEM CAUSE: The battery may be low on power. After each use, or once a month minimum, charge the battery for a full 10 to 12 hours. - Page 17 The vehicle is equipped with a self-resetting fuse. When the vehicle is overloaded or operated incorrectly; the self-resetting fuse will be cut off for 5-20seconds before becoming operational again. The self-resetting fuse is under the seat (Refer to the picture.) To avoid the fuse cutting off the power, follow these guidelines: DO NOT overload the vehicle, Maximum weight allowed :32kgs...
- Page 18 Water may have corroded the system, or loose dirt, gravel or s and might have jammed the switch. POSSIBLE C AUSE: Motor is damaged. The motor needs professional repair. ■PROBLEM: The battery will not recharge. POSSIBLE C AUSE: B atter y con nector o r adapter con nector is loose. Make sure the batter y connector and adapter connector are firmly plugged together.
-
Page 19: Disposal Of Battery
Maintaining Your Ride-on •It is parent's responsibility to check main parts of the toy prior to usage. Parents must examine ride-on regularly for potential hazards, specifically the battery charge cable/cord, plug and screws that fasten certain parts of the ride-on. In the event of any damage, the toy must not be used until that damage has been properly repaired. - Page 20 ● Do not dispose of your lead - acid battery in a fire . The battery may explode . ● Do not dispose of a lea d-acid battery in your regular, household trash . The incineration , land filling or mixing of sealed lead - acid batteries with household trash is prohibited by law.
Need help?
Do you have a question about the Spin Krazy and is the answer not in the manual?
Questions and answers