Table of Contents
Advertisement
Quick Links
INSTALLATION AND
INSTALLATION AND
OWNER'S INSTRUCTIONS
OWNER'S INSTRUCTIONS
Signature Series
External Jack
Adjustable and Fixed
Height Goal System
Contender
Champion
Table of Contents
Safety Instructions............................... 2
Goal Specifications............................. 3
Determine Installation Location............ 3
Ground Anchor Installation................. 4
Pole Assembly............................... 5
.. 6
...... 7
Backboard Attachment.................. 8
Goal Alignment......................... 9
Rim Attachment........................ 10
Raise and Adjust Backboard........ 11
Height Indicator Attachment....... 12
Ready to Play....................... 13
Made in the USA
Warranties......................... 14
www.goalsetter.com
Advertisement
Table of Contents

Summary of Contents for Goalsetter Systems Contender Signature Series
-
Page 1: Table Of Contents
INSTALLATION AND INSTALLATION AND OWNER’S INSTRUCTIONS OWNER’S INSTRUCTIONS Signature Series External Jack Adjustable and Fixed Height Goal System Contender Champion Table of Contents Safety Instructions....... 2 Goal Specifications......3 Determine Installation Location.... 3 Ground Anchor Installation....4 Pole Assembly....... 5 Extension Arm Attachments .. -
Page 2: Safety Instructions
• DO NOT CLIMB THE POLE OR HANG on the rim or any part of Goalsetter Systems, Inc. reserves the right to make changes at any the goal system. This includes the backboard, support braces time without notice or obligation. -
Page 3: Goal Specifications
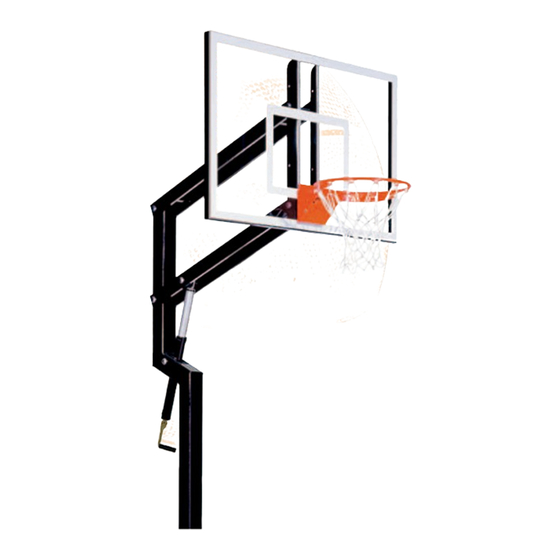
Goal Specifications Champion Contender Pole Size: 4”x4” 4”x4” Backboard Size: 32” x 48” 36” x 54” Weight w/Acrylic: Adjustable 290 lbs. 300 lbs. Fixed 290 lbs. 300 lbs. Weight w/Glass: Adjustable 325 lbs. 335 lbs. Fixed 325 lbs. 335 lbs. (A) Height Range: 6’-10’... -
Page 4: Ground Anchor Installation
Ground Anchor Installation Step 1: Locate and unpack a 4” ground anchor (Item The arrow on the decal TIME OUT TIP: G2440). Remove plastic plugs from bolt holes and ensure the MUST be pointing toward the playing surface. threads are in good condition. REPLACE THE PLUGS – they will keep concrete and debris from the bolt holes during installation. -
Page 5: Pole Assembly
Pole Assembly Step 2: Unpack pole and jack (or stabilizer bar for IMPORTANT fixed height goals). Jack (or stabilizer bar) comes packaged • Allow 48 hours for concrete to cure before beginning. with the pole. • Check to see that no concrete or debris obstructs threads in ground anchor bolt holes by threading anchor bolts in and out. -
Page 6: Extension Arm Attachments
Extension Arm Attachments Adjustable Height Goals Only Step 3: Insert jack assembly through bottom opening in WARNING pole as shown and align jack pivot with hole in pole. Attach jack Two or three people in good physical condition and capable of to pole using the following: jack pole bolt, two flat washers and a lifting at least 90-100 lbs. -
Page 7: Extension Arm Attachments (Adjustable)
Extension Arm Attachments Fixed Height Goals Only WARNING Step 3: Set stabilizer bar to 20 ” by turning the bar to Two or three people in good physical condition and capable of lengthen or shorten. lifting at least 90-100 lbs. (40-45 kg) each are recommended for safe installation and assembly. -
Page 8: Backboard Attachment
Backboard Attachment IMPORTANT WARNING ” washer needs to be seated properly over nylon bushings on Two or three people in good physical condition and capable of lifting at least 90-100 lbs. (40-45 kg) each are recommended for outside of backboard H frame. safe installation and assembly. -
Page 9: Goal Alignment
Goal Alignment Step 4: Fasten pole to threaded ground anchor plate WARNING! by installing and hand tightening the three rear anchor bolts with For safe assembly, do the following: lock washers. • Use two or three people to raise goal assembly and hold it in a vertical position. -
Page 10: Rim Attachment
Rim Attachment Step 2: If not already removed, remove cover plate NOTE: Use all steps of the following instructions to install a reflex rim. To install a static rim, follow all steps except Steps 2 and 6. screws and cover plate from rim assembly. Step 3: Starting with the top two mounting holes, Your warranty card is located TIME OUT TIP:... -
Page 11: Raise And Adjust Backboard
Raise and Adjust Backboard Fixed Height Goals Only Step 4: Lengthen or shorten the stabilizer bar by WARNING! turning it turn for every ” of adjustment needed (or 1 full To prevent serious injury or death, if using a stepladder, make turn for every ”... -
Page 12: Height Indicator Attachment
Height Indicator Attachment Adjustable Height Goals Step 3 Step 1 Step 1: Position top of rim 10’ above playing surface by turning crank handle. Step 2: Measure distance with a tape measure for accuracy. Step 3: Align height indicator bar decal with 10’... -
Page 13: Ready To Play
• Contact Goalsetter Systems, Inc. for replacement parts. Only A general-purpose lubricating oil like “3-in-1” or lightweight use parts provided by Goalsetter Systems, Inc. Use of other motor oil is recommended. DO NOT use a penetrating oil parts (a) may cause the goal system to fail, (b) could result in (i.e. -
Page 14: Warranties
Goalsetter Systems, Inc. warrants to the original retail purchaser that Goalsetter Systems, Inc. shall have the right to require the purchaser all structural components of Goalsetter Systems™ Signature Series*,... - Page 15 In response to your claim, you will receive an order confirmation as well as a notice stating whether Goalsetter Systems, Inc. needs your warranty item returned. Goalsetter Systems, Inc.
- Page 16 Phone 800.362.4625 Fax: 641.594.3343 Email:info@goalsetter.com www.goalsetter.com 12/2012 GS IM3402...
Need help?
Do you have a question about the Contender Signature Series and is the answer not in the manual?
Questions and answers