Table of Contents

Related Manuals for iGenix IG9851

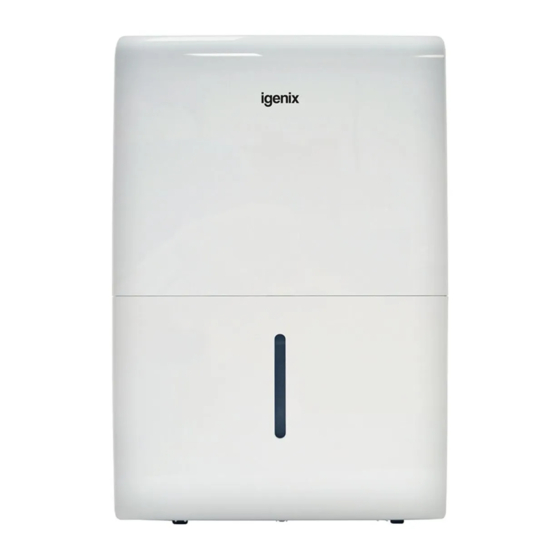
Summary of Contents for iGenix IG9851
- Page 1 USER MANUAL 50 Litre Dehumidifier White IG9851 Batch code: Please read these instructions carefully before use and retain for future reference Before switching on your appliance, always check for any damage which may have been caused in transit...
-
Page 2: Table Of Contents
CONTENTS Important Safety Instructions ..........3-5 Intended Use ................5 Specification .................6 Appliance Overview ..............7 Control Panel ................8 Operating Instructions ...............9 Functions ................10-11 Water Extraction ..............12 Cleaning and Maintenance ..........13-14 Trouble Shooting Guide ............15 Error Codes ................16 Fuse Replacement .............. -
Page 3: Important Safety Instructions
IMPORTANT SAFETY INSTRUCTIONS Read and follow all of the instructions even if you feel you are familiar with the product, and find a place to keep this manual handy for future reference. Important: This appliance is intended for use in a domestic environment only. - Page 4 • Do not use the unit for any other purposes than its intended use. • To protect against electrical shocks, do not immerse unit, plug or cord in water, or spray with liquids. • Never unplug the power cord without switching the unit off first by pressing the Stand-By button, as this could damage the unit.
-
Page 5: Intended Use
• This dehumidifier must not be used in spaces: - Where there is a high concentration of gases, solvent or any other volatile organic compounds, - In very dusty environments; in any domestic, commercial or industrial environment where air composition is flammable. INTENDED USE - Purpose of a Dehumidifier Air always contains a certain amount of water in the form of water vapour. -
Page 6: Specification
51dB(A) – 52dB(A) Net Weight 19.8Kg Product Dimensions (mm) (H)616 x (W)392 x (D)282 Brand Igenix Product Code IG9851 Product Description Hermetically Sealed Equipment Contains Flourinated Greenhouse Gases R410A F Gas Mass (kg) 0.29 Equivalent Tonne of Carbon Dioxide (ET CO2) 0.61... -
Page 7: Appliance Overview
APPLIANCE OVERVIEW Control Panel Handle (both sides) Water Level Window Water Tank Air Filter Air Outlet Grille Continuous Drain Outlet Power Cord Bracket Casters Power Cord and Plug Accessories (located in the water tank) Female Threaded Power Cord Bracket Continuous Drainage Hose Drainage Hose Adapter... -
Page 8: Control Panel
Control Panel Frost Protection On/Off Stand-By Lights up to indicate that the Lights up to indicate that the Press this button to switch Frost Protection Function is Timer function is set to either between standby mode and working. auto turn on or auto turn off. ‘On.’... -
Page 9: Operating Instructions
OPERATING INSTRUCTIONS Appliance Location Where to position your dehumidifier? For best results; position the dehumidifier somewhere central like a landing or a hallway. As long as the internal doors are open, the excess moisture from all the rooms in the house will migrate naturally towards the dehumidifier and be processed. -
Page 10: Functions
Functions AUTO: Use this mode for automatic dehumidification. In this mode, the desired humidity cannot be adjusted, however the fan speed can be changed at any time by pressing the Turbo button. MANUAL: Use this mode to manually select the desired humidity level (between RH35% and RH85%) and Fan Speed (Normal/Turbo) •... - Page 11 back to standby mode. • Press the Timer button, the On light will then illuminate. • Use the Humididty/Hours buttons to select the desired amount of time until you would like the appliance to switch on (the LED display will show the hours).
-
Page 12: Water Extraction
WATER EXTRACTION There are 2 ways to extract water from the dehumidifier: Using the Water Tank: • When the water tank is full, the Tank Full indicator will illuminate. • Press the Stand-By button to switch the unit to standby mode and disconnect from the power source. -
Page 13: Cleaning And Maintenance
CLEANING AND MAINTENANCE Always switch off the unit and unplug from the mains socket before cleaning or performing any maintenance. When not in use for long periods it is also advisable to remove the plug from the power socket. Wipe the outside of the unit with a soft, damp cloth. A mild detergent may be used if necessary. - Page 14 End of Season Maintenance • Press the Stand-By button to switch the appliance to standby mode and disconnect from power source. • Empty and clean the water tank • Clean the unit and the filters as per cleaning procedure above. •...
-
Page 15: Trouble Shooting Guide
TROUBLE SHOOTING GUIDE If you experience difficulties with the appliance, please check the suggestions below before contacting customer services on 01473 271272: Problem Possible Cause Possible Solution Unit does not start. No power to the unit. Check the mains power supply. Press the Stand-By button to switch the appliance to ‘On.’... -
Page 16: Error Codes
Error Codes Error Code Possible Cause Possible Solution Humidity sensor error. Unplug the unit and plug it back in again. Tube temperature sensor Unplug the unit and plug it back in again. error. Water tank is full or not Empty the water tank if required and ensure inserted correctly. -
Page 17: Fuse Replacement
MAINS PLUG FUSE REPLACEMENT Fuse Cover Fuse Replacement (Class I) This appliance must be eathed. Remove the fuse cover with a small flat head screw driver. Take out the fuse and replace with a new fuse of the same Amp. Replace the fuse cover and push back into place. -
Page 18: Terms And Conditions And Warranty Information
lgenix Warranty Terms & Conditions This product is guaranteed for a period of 12 months as standard from the date of purchase against mechanical and electrical defects. You can extend your warranty for a further 12 months by registering your product. Upon registration we will cover your product for a period of 24 months from the original purchase date against any mechanical or electrical defects. - Page 19 Terms & Conditions of our warranty policy are shown on the opposite page. They are also available on our website. www.igenix.co.uk To register your product, please complete all sections of the form below and return to us at the following address: lgenix, 38 Bluestem Road, Ransomes Europark, Ipswich, IP3 9RR.
- Page 20 38 Bluestem Road, Ransomes Europark, Ipswich, IP3 9RR Tel. 01473 271 272 Disclaimer: Igenix operate a policy of continual improvement and development. We therefore reserve the right to change/alter the specification and appearance of our appliances without prior notice. All diagrams and images shown in this manual are for illustration purposes only.
Need help?
Do you have a question about the IG9851 and is the answer not in the manual?
Questions and answers