Table of Contents
Advertisement
Quick Links
Advertisement
Table of Contents
Troubleshooting

Summary of Contents for InfiniSource ETC 100
- Page 1 The Hardware Guide...
- Page 2 P.O. Box 860, Sandy UT 84091-0860 Telephone (801) 262-1611 Printed in the United States of America TimeForce II is a registered trademark of Infinisource. Win- dows is a trademark of the Microsoft Corporation. InstallShield Express is a registered trademark of InstallShield Software Corporation.
- Page 3 SOFTWARE LICENSE AGREEMENT READ CAREFULLY BEFORE USING THE SOFTWARE This is a legal agreement between you, as licensee, and Infinisource. BY USING THIS SOFT- WARE, YOU ACCEPT THE TERMS OF THIS AGREEMENT. Infinisource grants you a nonexclusive license to use this copy of this Infinisource software program (the “Software”) on a single computer at a time.
- Page 4 Data and Computer Software clause at DFARS 252.227-7013 or subparagraphs (c) (1) and (2) of the Commercial Computer Software — Restricted Rights at 48 CFR 52.227-19, as applicable. Contractor/manufacturer is Infinisource, 9350 South 150 East Suite 300, Sandy, Utah 84070.
-
Page 5: Table Of Contents
Velocity Clocks ......15 ETC 100 Model Clock ..... . 17 Creating a Time Clock Profile . - Page 6 Hardware Installation ..... . 26 Serial Clocks ......27 Modem Clocks .
- Page 7 Setting Finger ID Security Levels ..70 Setting the Global Security Level ..71 Collecting Data ......71 Time &...
- Page 8 Set Subnet Mask ..... . 110 Set Gateway ......110 Enable DHCP .
- Page 9 Clock Setup ......149 Reports ......150 Manage Memory .
- Page 10 Connecting the Bell/Buzzer ....175 Replacing the Motherboard ....177 IQ Clocks ......178 IQ 300, 400 or 500 Time Clock .
- Page 11 Modem Clocks ......210 Ethernet Clocks......210 How Do I Create Clock Groups? .
- Page 12 viii...
-
Page 13: Introduction
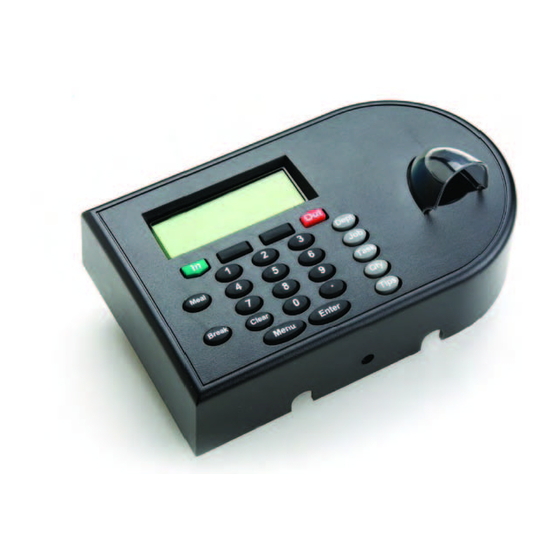
There are three lines of time clocks available for use with TimeForce II. Each line consists of multiple clock models, allowing you a range of functionality and communication options. The lines of clocks that Infinisource offers are ETC clocks, IntelliClocks (or IQ clocks), and Velocity clocks (or V800/V850 clocks). ETC 100 Clock The 100 Series time clock is used for collecting only the most basic Time &... - Page 14 Infinisource Velocity Clocks The major difference between a Velocity clock and an ETC or IQ clock is the absence of a card reader. Data is entered at the clock exclusively through direct keypad entry and finger ID verification. This allows you to eliminate the hassle of assigning and maintaining physical time cards for your employees.
-
Page 15: Installing The Clocklink Utility
The ClockLink utility is a separate utility to the TimeForce system which connects to your time clock, downloads the stored punches and sends them to the TimeForce II database. The majority of Infinisource time clocks use the On Demand communication method, which negates the need for a separate utility to facilitate communications. -
Page 16: Logging In
Infinisource The default installation directory is “C:\Program Files\Qqest Soft- ware Systems\TimeForce II\ClockLink.” To select a custom install directory, click on the [BROWSE] icon. Once the install directory has been selected, click on the [NEXT] icon to continue. Note: It is recommended that you allow the program to be installed in its default installation directory. -
Page 17: Clock Server
TimeForce II Hardware Guide Clock Server The Clock Server utility is used to download the punches from your On Demand Ethernet or Cellular clock and send them to the TimeForce II database. The server software listens on the specified port for a connec- tion to the time clock. - Page 18 Infinisource The “Installation Options” screen opens. This screen allows you to select whether you would like to install the program files, database files or both on this machine. Make the desired selection, and click on [NEXT] to continue. Note: This setting allows you to split the Clock Server install between multiple machines.
-
Page 19: Setting Up The Clock Server
TimeForce II Hardware Guide Setting Up the Clock Server Before you can use the Clock Server, the following setup steps must be completed. Add Database Connection Before the Clock Server will be able to send the punches from your time clock to TimeForce, you must first configure a connection to the Time- Force II database. -
Page 20: Add Company
Infinisource • The port that the program listens on is displayed in the Port column. This setting is always “5402.” • The Status column displays the status of the network interface. While listening, “Waiting” will be displayed in this column. -
Page 21: Add Clock
TimeForce II Hardware Guide Add Clock A profile must be created for each time clock that will be connecting to the server for downloading. From the main Clock Server menu, click on the “File” drop-down menu and select Add/Edit Clocks. Each company that you have inserted into the system is listed in the left-hand section of the screen. - Page 22 Infinisource...
-
Page 23: Determining Your Clock Model
TimeForce II Hardware Guide Determining Your Clock Model Each time clock comes with a clock code located on the bottom of the clock which allows you to determine your clock type. Use the following instructions to determine your clock model. Clock Codes The clock code is located on a sticker on the bottom of the clock. -
Page 24: Intelliclocks (Iq Clocks)
Infinisource Additional Clock Codes B (Bell): This means that the clock includes a relay switch to operate an external bell or other signal device. Every clock has the relay option, but the physical relay itself will only be installed if this code appears with the regular clock code. - Page 25 TimeForce II Hardware Guide IQ 400 Clocks For model-specific clock usage instructions, see “IQ 400 Clock” on page 37. • 400 S: Model IQ 400 IntelliClock with Serial communication. A Serial clock is connected directly to a computer’s serial com port. See page 27 for instructions on installing a Serial time clock.
- Page 26 Infinisource • 500 IP: Model IQ 500 IntelliClock with Ethernet communication. An Ethernet clock is connected directly to a network hub or server, and is seen by the system as a “Network Device.” See page 28 for instructions on installing an Ethernet time clock.
-
Page 27: Velocity Clocks
TimeForce II Hardware Guide Card Reader Types The type of card reader included in your clock can be determined by the colored dot located next to the clock code on the bottom of the clock. • If there is no colored dot next to the clock code on the bottom of the clock, this means that your clock is equipped with a standard mag- netic card reader. - Page 28 Infinisource • V800 C: Model V800 clock with Cellular Modem communication. A Cell clock uses a cellular connection to a GSM network to com- municate. • V800 W: Model V800 clock with Wireless communication. The clock uses a wireless network connection to communicate.
-
Page 29: Etc 100 Model Clock
TimeForce II Hardware Guide ETC 100 Model Clock ETC Model clocks are available with the following communication options, Serial, Serial Daisy and Modem. Each clock model is explained in detail in this chapter. Creating a Time Clock Profile Before the ClockLink utility will be able to connect to your time clock, you must first create a profile for the clock within the TimeForce pro- gram. -
Page 30: Hardware Installation
Infinisource 10. If you would like to assign this clock to a Default Department, click on the “No Department” link and make the desired selection from the tree-directory that appears. 11. If you would like to upload relay events to the time clock, put a check-mark in the Upload Relay Events field. -
Page 31: Serial Clocks
TimeForce II Hardware Guide Serial Clocks Infinisource recommends that you test communication with your time clock before installing the clock to its permanent location. If you pur- chased a 20-ft. cable, use it for the communications test. Otherwise, test communications with the 6-ft. test cable that was included with your purchase. -
Page 32: Modem Clocks
Infinisource. Attach the time clock to the wall with the provided mounting screws. -
Page 33: Uploading The Date And Time
With this setting enabled, the “Date” and “Time” fields are grayed-out. Click on the [OK] icon to send the date and time to the clock. You can now exit the ClockLink utility. ETC 100 Model Clock... -
Page 34: Time Clock Usage Instructions
Infinisource Time Clock Usage Instructions Once you have installed the clock your employees can begin using it to punch in and out. Periodically, you will need to process those punches to calculate the hours and earnings required for payroll. Time & Attendance Clock (100 Series) The Model 100 time clock uses a magnetic card reader and time cards to collect your employees’... -
Page 35: Intelliclock Setup Instructions
If you do not purchase an option with the clock, but decide to add it later, you may do so at any time. Contact the Infinisource Sales Department to enable options on your IntelliClock. - Page 36 Infinisource Select the appropriate clock model from the Model drop-down menu (as in “IQ400,” “IQ500,” “IQ1000,” etc.). The clock Number is also known as the Clock ID. This number is assigned in the memory of the clock itself. The default number is “1.”...
-
Page 37: Editing And Deleting Existing Clock Profiles
TimeForce II Hardware Guide Note: These settings are specific to your network setup. Infini- source cannot supply these settings. • Serial Clock: Select the Com Port that the clock is connected to from the drop-down menu. Select “Auto Detect” to have the system automatically determine which port the clock is con- nected to. -
Page 38: Hardware Installation
Infinisource • Number: This is the ID of the displayed time clock. The set- ting in this field is a link. Click on the link to bring up the pro- file for this clock. • Model: This column displays the clock model (as in “IQ400,”... -
Page 39: Serial Clocks
TimeForce II Hardware Guide Serial Clocks The IntelliClock should be placed in a convenient location where employees typically enter and exit the work area. It includes a mounting panel with four holes. Mounting screws are included. Once the mount- ing panel is attached to the wall, the clock’s face can be snapped into place and locked onto the mounting panel. -
Page 40: Ethernet Clocks
Infinisource Insert one of the square, plastic RJ-11 connectors of the Telephone Adapter Cable into the port on the bottom of the time clock labeled “PHONE/COMPUTER/DAISY.” Snap the IntelliClock face piece into place on the mounting panel and lock it in with the two locks located on the bottom of the mounting panel. -
Page 41: Configuring The Ethernet Clock
<ENTER>. To exit the menu without making changes, simply press the <ENTER> key. Important: The Ethernet Settings are specific to your Local Area Net- work. You must change the default settings. Infinisource Technical Sup- port cannot supply these settings. Configuring the Wireless Time Clock If you have a wireless IQ 1000 Ethernet clock, use the following section to configure your clock for wireless communication. - Page 42 • Gateway • SSID These settings are specific to your network setup. Infinisource cannot supply these settings. From the clock keypad, press the <MENU> button and select “Admin.” Enter an administrator ID (or Card #) and press the <ENTER> key.
- Page 43 TimeForce II Hardware Guide Set Subnet Mask From the Ethernet Menu, press 2 for “Set Subnet Mask.” The following prompt appears: SET NEW SUBNET MASK: CURRENTLY: ENTER NEW MASK: The “Currently” field shows the current Subnet Mask. To change the mask, type in the new setting at the clock keypad (remember to use the period key) and press <ENTER>.
-
Page 44: How Do I Find The Id And Password
Infinisource How Do I Find the Clock ID and Password? The clock ID and password are stored in the time clock itself. These set- tings can be changed from ClockLink once you have connected to the time clock, but you must specify the clock's current ID and password before a connection can be made. -
Page 45: Uploading The Date And Time
TimeForce II Hardware Guide Uploading the Date and Time Before you can begin using your time clock, you must first upload the date and time to the clock using the ClockLink utility. Note: Before you will be able to upload the date and time, you must first create a time clock profile in TimeForce II for each clock that you would like to connect to. - Page 46 Infinisource...
-
Page 47: Using The Model Iq 300, 400 Or 500 Intelliclock
TimeForce II Hardware Guide Using the Model IQ 300, 400 or 500 IntelliClock IntelliClocks are feature-rich, sophisticated time & attendance systems with the ability to perform job tracking and costing functions as well (depending on the clock model). IntelliClocks used in conjunction with the TimeForce system automate the process of collecting hours worked from all employees, apply pay rules consistently and correctly, and track company accruals. - Page 48 Infinisource Note: Proximity time card users need only hold their time card up to the target located on the right of the face of the clock. The display panel shows the card number of the card just swiped, and reads MAKE SELECTIONS THEN PRESS “ENTER”...
-
Page 49: Iq 400 Clock
TimeForce II Hardware Guide Quickly and evenly slide the card through the card reader slot from top to bottom. Note: Proximity time card users need only hold their time card up to the target located on the right of the face of the clock. The display panel shows the card number of the card just swiped, and reads: MAKE SELECTIONS... - Page 50 Infinisource The display panel shows the card number of the card just swiped, and reads MAKE SELECTIONS THEN PRESS “ENTER” Press the <ENTER> key on the clock keypad to complete the punch entry. Note: The <ENTER> key should always be pressed when completing a punch at the clock, unless the “Quick Punch”...
-
Page 51: Iq 500 Clock
TimeForce II Hardware Guide Press the <TASK> key to specify a task with the punch. Enter the desired task number at the keypad, or scan it using a barcode wand or reader, and press <ENTER>. The following message appears: QTY or ENTER If you are finished entering punch information, press the <ENTER>... - Page 52 Infinisource Quickly and evenly slide the card through the card reader slot from top to bottom. Note: Proximity time card users need only hold their time card up to the target located on the right of the face of the clock.
- Page 53 TimeForce II Hardware Guide Enter the desired job either by typing the job number at the keypad and pressing <ENTER>, or by scanning it in using an optional bar- code reader or wand. The following message appears: QTY, TASK, or ENTER If you are finished entering punch information, press the <ENTER>...
- Page 54 Infinisource • Department Override: Employees can be assigned to a default department level in the TimeForce software. When employees punch at the time clock without entering department information, their punches are assigned to their specified default department. When an employee needs to clock in at the beginning of the day with a department number other than their default department level, a “department override”...
-
Page 55: Other Punch Options
TimeForce II Hardware Guide Other Punch Options After the card number has been specified, press <ENTER> to complete the punch and have the software determine whether it is an in or out punch. If you wish to assign the punch type, press the <IN>, <LUNCH>, <BREAK>, or <OUT>... -
Page 56: Main Menu
Infinisource Main Menu When you enter your password, the Main Menu appears with three options: 1. SYSTEM MAINT 2. SYSTEM OPTIONS 3. PASSWORDS Type in the number of the option that you wish to access. Note: Press the [CLR] button to return to the previous menu from any point in the clock menu options. - Page 57 TimeForce II Hardware Guide Clear Data Memory Warning: This option deletes all data that is currently being stored in the clock. There is no way to recover data that has been deleted from the clock. When you select this option, you receive the following prompt: PLEASE CONFIRM: DELETE ALL DATA? The <NO>...
- Page 58 Infinisource Ethernet This menu contains the clock’s ethernet settings. This menu has four options: 1. SET IP ADDRESS 2. SET SUBNET MASK 3. SET GATEWAY 4. SHOW SETTINGS Set IP Address When you select this option, you receive the following prompt:...
-
Page 59: System Options
TimeForce II Hardware Guide System Options When you select this menu item, the following message appears: SYSTEM OPTIONS ENTER OPTION NUMBER FOLLOWED BY *ENTER* Type in the option number you wish to access. When you do so, you receive a prompt inviting you to change the current setting for this option by typing 1 for Yes or 0 for No. - Page 60 Infinisource TABLE: Hardware-1: IntelliClock Options Number Function This option enables relay events. Type in 1 to enable relay events, and 0 to disable them. This is a premium option, and requires a special pass- word. Press <CLR> to cancel, and <ENTER> to enter your password and access the option.
-
Page 61: Passwords
TimeForce II Hardware Guide TABLE: Hardware-1: IntelliClock Options Number Function This option is currently undefined. An option may be added here at a future date. This option enables the Quick Punch feature. With this feature enabled, employees do not have to press the final <ENTER> when clocking In or Out. - Page 62 Infinisource...
-
Page 63: Using The Model Iq 1000 Intelliclock
TimeForce II Hardware Guide Using the Model IQ 1000 IntelliClock The IQ 1000 is an advanced model of time clock with many features and benefits designed to offer you a wide range of options in how you col- lect your time and attendance data. Note that the operating temperature range of the IQ 1000 is 5°... - Page 64 Infinisource If you would like to assign this clock to a group, make the desired selection from the Group Name drop-down menu. Note: See page 211 for instructions on creating clock groups. If you would like to assign the clock to a Default Department level, click on the “No Department”...
- Page 65 TimeForce II Hardware Guide • Ethernet: Put a check mark in the DHCP option to use Dynamic Host Configuration Protocol. Otherwise, enter the IP Address where the clock can be reached. Remember to use periods. If the clock can only be reached using a specific port number, enter the appropriate port into the Port Number field.
-
Page 66: Customizing Time Clock Information
Infinisource Customizing Time Clock Information Multiple levels of information can be uploaded to the time clock from the TimeForce database. Allowed Period This is the period of time during which the time clock will accept punches. Any employee punching outside of this time range will receive an error message stating that supervisor approval is required in order to complete this punch. - Page 67 Relay Events Infinisource time clocks come with an optional feature called “Relay Events.” This feature allows you to connect an external bell, buzzer or other signal device to the time clock and program specific times of the day for the signal to go off, usually indicating schedule start, stop or break times.
- Page 68 Infinisource In the Duration Seconds column, enter the number of seconds that you want the bell or buzzer to sound for when the event is activated. 10. When the relay event occurs, it can either pulse for its duration or it can sound continuously.
- Page 69 TimeForce II Hardware Guide Locate the desired clock profile in the list, and click on the link in the Number column. The clock profile opens. The Employees at the Clock setup is located in the bottom section of the screen. Remove the check mark from the Send All Employees option.
- Page 70 Infinisource Departments at Clock This option allows you to define which department levels your employ- ees will be able to punch into and out from at this time clock. If an employee attempts to punch into a department that is not assigned to this clock they will receive an error message stating that supervisor approval is required for this punch.
- Page 71 TimeForce II Hardware Guide Jobs at the Clock This section will only be available if you are using the “Job Tracking” module of the TimeForce II system. Use this option to define which jobs your employees will be allowed to punch into from this time clock.
- Page 72 Infinisource 10. Click on the [UPDATE] icon located at the bottom of the screen to save the changes that you have made. Tasks at the Clock This section will only be available if you are using the Job Tracking module of the TimeForce system.
-
Page 73: Editing And Deleting Clock Profiles
TimeForce II Hardware Guide To unassign tasks, highlight the desired names in the Task Selected box and click on the icon. The selected tasks are moved to the Task Unselected box. 10. Click on the [UPDATE] icon located at the bottom of the screen to save the changes that you have made. -
Page 74: Iq 1000 Clock Messages
Infinisource • Group: If the time clock is assigned to a clock group, this field displays the name of the group that the clock is assigned to. • Description: This is the description that was inserted when the clock profile was created. - Page 75 TimeForce II Hardware Guide Put a check mark in the Default Message field if you would like this message to be the default message that is displayed when all other messages have expired, or haven't activated yet. Note that with the default message option selected, the option to enter a date range for this message disappears.
- Page 76 Infinisource Select the desired Department by clicking on the “No Depart- ment” link, and making the appropriate selection from the tree- directory that appears. Use the Message field to enter the desired message. The message may contain a maximum of 21 characters.
-
Page 77: Editing And Deleting Existing Messages
TimeForce II Hardware Guide Editing and Deleting Existing Messages Each existing message is listed under the Active Messages section beneath its corresponding header. • To edit a message, click on the Message ID. Make the desired changes in the detail screen and click on the [UPDATE] icon to save your changes. -
Page 78: Finding The Clock Password
Infinisource The “Main Admin Menu” appears. Press 1 for “System Maint.” Press 2 for “Memory.” Press 3 for “Set Clock ID.” The “Currently” field displays the clock's current ID. Enter a new ID if desired and press <ENTER>. You can now exit the time clock menu by pressing <CLR> repeatedly until the time is shown on the clock display. -
Page 79: Using The Iq 1000 Clock
TimeForce II Hardware Guide Using the IQ 1000 Clock The IQ 1000 is our most advanced model of clock with many options and features. It can be used to restrict employee punching, allowing employees to punch at the clock during their scheduled shift times only. This model also allows your employees to view various information at the clock itself such as accrual totals, scheduled shift times and the date and time of their last clock entry. - Page 80 Infinisource The Finger ID menu appears with the following options: 1. NEW FINGER ID 2. CHECK EXISTING 3. DELETE EXISTING 4. GLOBAL SECURITY Press 1 to enter finger templates for the first time. The prompt ENTER CARD NUMBER appears. Enter the card number or keypad entry number that you assigned to this employee in the TimeForce software and press <ENTER>.
-
Page 81: Check Existing Finger Id Records
TimeForce II Hardware Guide 12. If the “QUALITY” and “CONTENT” reads are too low, the follow- ing message may appear: QUALITY: [X]/100 CONTENT: [X]/100 QUAL. OR CONTENT LOW RETRY ACCEPT If you get this message, you can have the employee moisten his or her finger slightly. -
Page 82: Setting Finger Id Security Levels
Infinisource Setting Finger ID Security Levels Once you have enrolled your employees and they begin punching at the IQ 1000 clock, you may notice that the clock has difficulty verifying the identity of one or two employees. If this is the case, you may change the security level for that employee, making it easier for the clock to posi- tively identify him or her. -
Page 83: Setting The Global Security Level
TimeForce II Hardware Guide Setting the Global Security Level In addition to an individual security level that is set for each employee, the IQ 1000 also has a global security setting. By default, this is set to level 5, the highest level of security. When an employee is clocking in, the clock checks the global setting and the individual setting and uses the lower of the two. - Page 84 Infinisource Check to see that the clock display is showing the logo screen with the time displayed at the bottom. If you are using cards with magnetic strips, hold the card with the magnetic strip facing right. If you are using cards with barcodes, hold the card with the barcode facing left.
-
Page 85: Job Tracking Entries
TimeForce II Hardware Guide Job Tracking Entries Use the following instructions to enter punches at the time clock which are assigned to job and task information in the TimeForce system. Check to see that the clock display is showing the logo screen with the time displayed at the bottom. - Page 86 Infinisource ENTER JOB #: OR PRESS A KEY BELOW TO SELECT FROM A LIST JOB #: There are two methods of specifying a job at the clock: •Job Number: Enter the number assigned to the job in the Time- Force system and press <ENTER>. If you are using an optional barcode wand or gun, you can also scan a job barcode.
-
Page 87: Department Entries
TimeForce II Hardware Guide •Task List: To select the desired task from a list of tasks that have been uploaded to the time clock, press either one of the grey buttons located above the number pad on the clock keypad. Use the up and down arrow buttons to scroll though the avail- able tasks. - Page 88 Infinisource Quickly and evenly slide the card through the card reader slot from top to bottom. If you are using direct keypad entry, type the card number into the clock keypad and press <ENTER>. The display panel shows the card number and reads:...
- Page 89 TimeForce II Hardware Guide •Department List: Press one of the grey buttons located above the number pad on the clock keypad to select the department from a list. Use the up and down arrow buttons to scroll through the list of departments. When the desired department in the list is highlighted, press the <ENTER>...
-
Page 90: Other Punch Options
Infinisource Other Punch Options After the card number has been specified, press <ENTER> to enter the punch and have the software determine whether it is an in or out punch. If you wish to assign the punch a type, press the <IN>, <LUNCH>, <BREAK>, or <OUT>... - Page 91 TimeForce II Hardware Guide 1. SYSTEM MAINT 2. SYSTEM OPTIONS 3. CLOCK PASSCODE 4. CLOCK INFORMATION Type in the number for the option you wish to access. Note: Press the <CLR> button to return to the previous menu from any point in the clock Menu options.
- Page 92 This option is restricted for security purposes. A menu will appear asking you to enter a passcode. To obtain this pass- code, call Infinisource Technical Support at 1-800-697-7010. Set to Defaults When you select this option, you receive the following prompt:...
- Page 93 If data is found, the pointers are reset to include the found data, making the information available for download. This option is intended for use by Infinisource Technical Support. Clear Emp, Times...
- Page 94 Infinisource When you select this option, you receive the following prompt: ENTER GLOBAL TIMEOUT (KEYPRESS WAIT TIME) IN SECONDS: NOW: 20 RANGE 20 - 60 The available range of seconds is 20 through 60. By default, the default timeout is set to 20 seconds. Enter the desired number of seconds at the clock keypad and press <ENTER>.
- Page 95 TimeForce II Hardware Guide The Currently field shows the current Subnet Mask. To change the Sub- net Mask, type in the new mask and press <ENTER>. Set Gateway When you select this option, you receive the following prompt: SET NEW GATEWAY: CURRENTLY: ENTER NEW GATEWAY: The Currently field shows the current Gateway.
- Page 96 Infinisource Connection Type This option lets you configure whether your clock will connect to a wireless access point (infrastructure), or computer-to-clock (AD HOC). Security Settings This option allows you to configure network authentication options. Show Settings This menu displays the clock’s current wireless settings.
-
Page 97: System Options
TimeForce II Hardware Guide The date and time setting is saved, and the clock returns to the main “System Maintenance” menu. System Options When you select this menu item, the following message appears: SYSTEM OPTIONS ENTER OPTION NUMBER FOLLOWED BY *ENTER* Type in the option number you wish to access. - Page 98 Infinisource TABLE: Hardware-2: IQ 1000 Clock Options Number Name Description This option is for use when a reciept printer is attached to the time clock. Printer Note: Enabling this option with no printer attached will result in excessive wait times as the time clock attempts to communicate with the non-existent printer.
- Page 99 TimeForce II Hardware Guide TABLE: Hardware-2: IQ 1000 Clock Options Number Name Description With this option enabled and configured on a per- employee basis in TimeForce, the clock will track when Lunch Punch the employee clocks out for a lunch break, and will require Restriction the employee to take the specified amount of time for lunch before being allowed to clock back in.
- Page 100 Infinisource TABLE: Hardware-2: IQ 1000 Clock Options Number Name Description This option allows you to restrict Tasks at the time clock. With this option enabled, the time clock will only accept Task Restriction Task Numbers that have been sent to the clock from the TimeForce II system.
- Page 101 TimeForce II Hardware Guide TABLE: Hardware-2: IQ 1000 Clock Options Number Name Description When enabled, a MIN number of card digits is selected. When the MIN number is entered at the clock by a user, Auto Entry the clock will act as if the final <ENTER> key has been pressed and accept or reject the punch.
- Page 102 Infinisource TABLE: Hardware-2: IQ 1000 Clock Options Number Name Description HID 10302 This option decodes HID 37-BIT Binary cards, and is 37-Bit Decode mutually exclusive with other decode formats. This option decodes HID 37-BIT Binary Coded Decimal HID 10320 cards, and is mutually exclusive with other decode for- 37-Bit Decode mats.
- Page 103 TimeForce II Hardware Guide TABLE: Hardware-2: IQ 1000 Clock Options Number Name Description The TimeForce system allows you to specify that finger template verification is not required for certain employees. Door External With this clock option enabled, those employes will be Only granted door access with no finger template verification, while still enforcing verification for others.
- Page 104 Infinisource TABLE: Hardware-2: IQ 1000 Clock Options Number Name Description When enabled, the password sent by the ClockLink or Clock Server utilities at login will be evaluated. The login will be denied if the password does not match the pass- Enforce word stored in the clock.
-
Page 105: Personal Clock Interface
TimeForce II Hardware Guide When you select this option the following message appears: NEW ALPHA PASSCODE IN=QUIT OUT=DONE IQ1000 <<PREV NEXT>> Enter the desired passcode and press the <OUT> key. Select [YES] to keep the changes that you have made, or [NO] to reject the changes and keep the previous passcode. -
Page 106: Live Lookup
Infinisource Accruals Select this option to view the number of “Sick” and “Vacation” hours that you currently have available. Press any key to return to the main menu. Department and Personal This menu option displays your default department level. For Adminis- trators, Supervisors, and Team Leaders the “Class”... -
Page 107: Configuring The Server
TimeForce II Hardware Guide A message box appears which reads “This will install Live Lookup for TimeForce. Do you wish to continue?” Click on the [YES] icon. The InstallShield Wizard opens and guides you through the rest of the installation process. The InstallShield Wizard opens with a “Welcome”... -
Page 108: Configuring The Time Clock
Infinisource In the TimeForce Server field, enter the name of the machine or IIS webserver that hosts the TimeForce website. If the Live Lookup Server is installed on the same machine as the TimeForce system, enter “http://localhost” into this field. -
Page 109: Using Live Lookup Options
TimeForce II Hardware Guide Using Live Lookup Options The following instructions walk you through using Live Lookup options at the time clock. Press the <MENU> button on the clock keypad, and select the PERSONAL option. Enter your Card # using the number keys on the clock keypad and press <ENTER>. -
Page 110: Adjust Display Contrast
Infinisource Adjust Display Contrast The IQ 1000 is equipped with a control which allows you to adjust the contrast of the main clock display screen. Remove the time clock from the wall (if mounted). The contrast control is located on the back of the clock. -
Page 111: Iq 1000 Battery Backup Pack
TimeForce II Hardware Guide The current time is displayed at the top of the screen. The following prompt appears: ENTER TIME AS hhmmss In 24-hour format, enter the desired time as “HH/MM/SS” and press <ENTER>. For example, a time of four o’clock p.m. would be entered as “160000.”... -
Page 112: Led Status Light
Note: See page 5 for instructions on setting up the Clock Server. You may have chosen to use a Clock Server hosted by Infinisource. In this case, the server IP should have been supplied to you at the time of pur- chase. -
Page 113: Set Call Times
TimeForce II Hardware Guide Enter your card number and password. The Main Menu appears. Note: The default administrator username is “8888.” The default admin password is “1111.” Select 1 for “SYSTEM MAINT.” Select 6 for “OUTBOUND OPTIONS.” Select 3 for “ENTER SERVER IP.” From the keypad of the clock, enter the IP address of the Push Server. -
Page 114: Initiating A Manual Upload
Infinisource 1. EVERY MIDNIGHT 2. 9, 1, & 6:00 3. MANUAL ONLY 4. REAL TIME 5. ONDEMAND • Every Midnight: With this option selected, all of the punches accumulated during the day will be uploaded to the Clock Server at 12:00 am. - Page 115 TimeForce II Hardware Guide Enter your card number and password. The Main Menu appears. Note: The default administrator username is “8888.” The default admin password is “1111.” Select 1 for “SYSTEM MAINT.” Select 7 for “UPLOAD DATA.” The time clock initiates communication with the Clock Server and uploads its time and attendance data.
- Page 116 Infinisource...
-
Page 117: Velocity Clocks
TimeForce II Hardware Guide Velocity Clocks Velocity Clock models V800 and V850 are advanced clocks with many options and features. They can be used to restrict employee punching, allowing employees to punch at the clock during their scheduled shift times only. This model also allows your employees to view various information at the clock itself such as accrual totals, scheduled shift times and the date and time of their last clock entry. -
Page 118: Finding The Clock Id
Infinisource Finding the Clock ID On the clock keypad, press the <MENU> button. Select 1 for “ADMIN.” The clock prompts you for your card number. Type in a card num- ber with administrator-level access rights and press <ENTER>. Note: The default admin card number is “8888.”... -
Page 119: Hardware Installation
TimeForce II Hardware Guide You can now exit the time clock menu by pressing <CLR> repeatedly until the time is shown on the clock display. Hardware Installation Use the following instructions to place your time clock in the desired location and to install communications with the clock. Follow the instructions below that correspond with the type of communication that your clock uses. - Page 120 Infinisource • Connect the other end of the CAT5 cable to your network. The cable used to connect the clock must be a straight-through cable, not a crossover. To tell the difference between a straight- through and a crossover cable, hold the connectors side by side, with the same side of each connector facing you.
-
Page 121: Configuring The Ethernet Clock
TimeForce II Hardware Guide Rugged Edition Battery Charging The battery on a Rugged Edition clock gives you a minimum of 12 hours of operation per-charge, and can be recharged using vehicle power supply, or a standard outlet. The battery should be charged for 24 hours before initial use to ensure that the battery is fully charged. -
Page 122: Set Ip Address
Important: The Ethernet Settings are specific to your Local Area Net- work. It is highly recommended that you change the default settings. Infinisource Technical Support cannot supply these settings. Set IP Address From the “Ethernet” menu, press 2 for “IP Address.” The following... -
Page 123: Enable Dhcp
Ethernet connection. The clock provides the GSM network with the IP address and the port to the Infinisource hosted server. Once a connection to the server has been established, all further communication between the clock, GSM net- work and Infinisource Server is TCP/IP. -
Page 124: Hardware Installation
Infinisource Hardware Installation The clock should be placed in a convenient location where employees typically enter and exit the work area. It includes a mounting plate with four holes. Mounting screws are included. Once the mounting plate is attached to the wall and all cables are connected, the clock’s face can be slid into place and secured to the mounting plate. -
Page 125: Set Outbound Call Times
TimeForce II Hardware Guide Set Outbound Call Times This option allows you to specify how often stored punches are uploaded to the TimeForce database. From the clock keypad, press the <MENU> button and select 1 for “ADMIN.” Enter an administrator ID (or Card #) and press the <ENTER> key. Note: The default administrator ID is “8888.”... -
Page 126: Uploading The Date And Time
Infinisource You can now exit the clock menu by pressing <CLR> repeatedly until you are brought back to the displayed time. Initiating a Manual Upload The stored data in the clock can be manually uploaded to the TimeForce database from the clock main menu. -
Page 127: V800 Clock Usage Instructions
TimeForce II Hardware Guide • Enter the Time. By default this field is populated with the sys- tem time of the machine that ClockLink is installed on. Click on the up and down arrow keys at the end of the field to select the time, or place your cursor in the field and manually type the desired time. - Page 128 Infinisource Note: See “How Do I Find the V800 / V850 Clock ID and Pass- word?” on page 105 for further instructions. Enter a Description for this clock as you would like it to appear in TimeForce II and ClockLink.
-
Page 129: Customizing Time Clock Information
TimeForce II database. Relay Events Infinisource time clocks come with an optional feature called “Relay Events.” This feature allows you to connect an external bell, buzzer or other signal device to the time clock and program specific times of the day for the signal to go off, usually indicating schedule start, stop or break times. - Page 130 Infinisource Relay Events are assigned to time clock profiles in TimeForce II. Use the following instructions to assign relay events to your time clock pro- files. Note: The option to edit Relay Events will only appear if the “Upload Relay Events” option is selected in the time clock profile.
- Page 131 Live Host IP: This setting is not currently in use by the clock. • Live Host Port: This setting is not currently in use by the clock. • Logging Host IP: Reserved for use by Infinisource Product Supp- port. Velocity Clocks...
- Page 132 Infinisource • Employee ID Digits: This option is only required if you are using the clock’s “Quick Punch” option (option #15.) • Employee ID Start: This setting is not currently in use by the clock. System Options Each System Option that can be accessed from the menu of the time clock itself can also be specified here.
-
Page 133: Editing And Deleting Clock Profiles
TimeForce II Hardware Guide • The Departments section allows you to restrict employees based on the default department level that they are assigned to. All department levels appear in the “Unassigned” box. High- light the departments that you would like to allow to use this clock, and click on the icon. - Page 134 Infinisource From the Existing Clocks section of the screen, click on the [EDIT/ VIEW] icon. If you would like to view clock profiles belonging to a specific clock group only, make the desired selection from the Group Name drop-down menu. Select “All” to display all time clock pro- files.
-
Page 135: Enrolling Finger Id Templates
TimeForce II Hardware Guide Enrolling Finger ID Templates Before your employees will be able to enter punches at the V800, their finger IDs must first be enrolled at the clock. Press the <MENU> button on the time clock keypad. Select 1 for “Admin.”... -
Page 136: Deleting Existing Finger Id Records
Infinisource Once the clock has read the finger, the following message appears: QUALITY: [X]/100 OK TO ACCEPT? YES NO This message denotes the general quality of the template read. You want the “QUALITY” to be as high as possible. Press the soft key under “YES”... -
Page 137: Collecting Data
TimeForce II Hardware Guide GLOBAL SECURITY NOW: 3 0=AUTO, 1=MIN, 5=MAX NEW SECURITY: The default global security level is 3. Type in the new security level and press the <ENTER> key. Collecting Data Punching in and out is very simple with the V800. Within the Time- Force software, each employee is assigned a “Card Number.”... -
Page 138: Other Punch Options
Infinisource PRESS GREY KEYS OR IN/OUT, MEAL/BREAK [ENTER] TO ACCEPT Note: The clock will only display the punching options that have been enabled in the clock’s System Options menu. Press the <ENTER> key to complete the time & attendance entry. -
Page 139: Creating A Clock Profile
TimeForce II Hardware Guide Creating a Clock Profile The time clock allows employees to access their current punch, sched- ule, accrual, and departmental information directly from the clock. This information is uploaded to the time clock using the ClockLink utility. A time clock profile must be created in TimeForce II for each time clock. - Page 140 Infinisource 12. If you would like to upload individual employee schedules to the time clock, put a check mark in the Upload Schedules field. This setting makes it so that employees can only punch at the time clock during the range of time specified in the schedule that they are assigned to.
-
Page 141: Customizing Time Clock Information
TimeForce II Hardware Guide • Cellular: Put a check mark in the DHCP option to use Dynamic Host Configuration Protocol. Otherwise, enter the IP Address where the clock can be reached. Remember to use periods. If the clock can only be reached using a specific port number, enter the appropriate port into the Port Number field. - Page 142 Relay Events Infinisource time clocks come with an optional feature called “Relay Events.” This feature allows you to connect an external bell, buzzer or other signal device to the time clock and program specific times of the day for the signal to go off, usually indicating schedule start, stop or break times.
- Page 143 TimeForce II Hardware Guide The program allows you to search for existing clock profiles based on the clock group that they are assigned to. Make the desired selection from the Group drop-down menu. Select “All” to bring up all time clock profiles. Click on the [DISPLAY] icon.
- Page 144 Live Host IP: This setting is not currently in use by the clock. • Live Host Port: This setting is not currently in use by the clock. • Logging Host IP: Reserved for use by Infinisource Product Supp- port. • Employee ID Digits: This option is only required if you are using the clock’s “Quick Punch”...
- Page 145 TimeForce II Hardware Guide Employees at Clock The time clock gives you the option of restricting the employees who are allowed to punch in and out. If an employee who is not assigned to this time clock attempts to punch they will receive an error stating that they are not assigned to the clock, and that a supervisor override is required.
- Page 146 Infinisource • The Supervisors section allows you to restrict employees based on the supervisor that they are assigned to in the system. All supervisors appear in the “Unassigned” box. Highlight the supervisors that you would like to allow to use this clock, and click on the icon.
- Page 147 TimeForce II Hardware Guide The program allows you to search for existing clock profiles based on the clock group that they are assigned to. Make the desired selection from the Group drop-down menu. Select “All” to bring up all time clock profiles. Click on the [DISPLAY] icon.
- Page 148 Infinisource From the Existing Clocks section of the screen, click on the [EDIT/ VIEW] icon. The program allows you to search for existing clock profiles based on the clock group that they are assigned to. Make the desired selection from the Group drop-down menu. Select “All” to bring up all time clock profiles.
-
Page 149: Editing And Deleting Clock Profiles
TimeForce II Hardware Guide Open the TimeForce II software and log in as an administrator-level user. Click on the main “Clocks” navigation tab at the top of the screen. From the Existing Clocks section of the screen, click on the [EDIT/ VIEW] icon. -
Page 150: Enrolling Finger Id Templates
Infinisource From the Existing Clocks section of the screen, click on the [EDIT/ VIEW] icon. If you would like to view clock profiles belonging to a specific clock group only, make the desired selection from the Group Name drop-down menu. Select “All” to display all time clock pro- files. - Page 151 TimeForce II Hardware Guide ENTER YOUR CARD # Enter the card number of a user that has access to the “Admin” clock features and press the <ENTER> key on the clock keypad. Note: The default administrator username is “8888.” The following message appears: ENTER PIN: Enter the password for the given card number and press the...
-
Page 152: Deleting Existing Finger Id Records
Infinisource This message denotes the general quality of the template read. You want the “QUALITY” to be as high as possible. Press the soft key under “YES” to accept the template read. Press the button below “NO” to have the clock read the template again. -
Page 153: Collecting Data
TimeForce II Hardware Guide GLOBAL SECURITY NOW: 3 0= AUTO, 1=MIN, 5=MAX NEW SECURITY: The default global security level is 3. Type in the new security level and press the <ENTER> key. Collecting Data Punching in and out is very simple with the V850. Within the Time- Force software, each employee is assigned a “Card Number.”... -
Page 154: Job Tracking Entries
Infinisource PRESS GRAY KEYS OR IN/OUT, MEAL/BREAK [ENTER] TO ACCEPT Note: The clock will only display the punching options that have been enabled in the clock’s System Options menu. Press the <ENTER> key to complete the time & attendance entry. - Page 155 TimeForce II Hardware Guide SCROLL UP/DOWN OR USE LETTER KEYS TO SEARCH FOR NAME, OR [CLR] TO EXIT There are multiple methods of selecting a job at the clock: • The <IN> and <OUT> keys double as scroll up/down keys. Scroll through a list of the available jobs in the clock.
-
Page 156: Department Entries
Infinisource • Each number on the clock keypad is also assigned to letters (much like the buttons on a cellular phone). Press the appropri- ate button on the clock keypad to scroll through each letter. For example, to begin your search with the letter “F,” the <3> key would be pressed 3 times. - Page 157 TimeForce II Hardware Guide Place your finger on the template reader. To ensure correct place- ment, the finger should be placed with the first joint of the finger against the raised ridge at the base of the reader screen, and with the fingertip pressed firmly against the screen.
-
Page 158: Other Punch Options
Infinisource • Department Transfer: This type of punch is used when an employee is already clocked into a department level, but needs to switch to a new department at some point during the day. Two entries are generated with each department transfer, an “out”... -
Page 159: Additional Clock Features
Note: See “Personal Clock Interface” on page 158 for instructions on “Personal” clock options. • The “Production/Test” option is for use by Infinisource, and is only accessible with a password. • The “Upload Data” option will upload all of the current punches saved in the clock’s memory to the TimeForce system. -
Page 160: Set Date/Time
Infinisource • The “Request Configuration” option is used by clocks configured for On Demand processing. This selection will ask the On Demand server to send all of the configuration settings that have been set up for use with the clock. -
Page 161: Manage Finger Ids
TimeForce II Hardware Guide Date To specify the date on the clock select the “DATE” option by either pressing the number 2 on the clock keypad, or by using the scroll keys to highlight the option and pressing the <ENTER> key. Using the clock keypad, enter the appropriate date in the following format: “MM/DD/ YYYY”... -
Page 162: Reports
Infinisource Reports This option allows you to view reports about your clock hardware and firmware versions, as well as information about the data that is being stored by the clock. There are six options on this screen: 1. CLOCK INFORMATION 2. -
Page 163: Manage Memory
If data is found, the pointers are reset to include the found data, making the information available for download. This option is intended for use by Infinisource Technical Support. Clear Employee Information This option clears all information that has been uploaded to the clock from the TimeForce system (such as employees, departments, default schedules, etc.). -
Page 164: Clock Setup
This option is intended for use by Infinisource Technical Support. Dump Punch Memory This option lets the user view the actual punch data this is saved in the clock’s memory. -
Page 165: Clock Id/Pass
TimeForce II Hardware Guide Clock ID/Pass This menu allows you to view and edit the ID and password that your clock uses to communicate. See “How Do I Find the V800 / V850 Clock ID and Password?” on page 105 for detailed instructions on this menu. Keypad Behavior This menu allows you to specify how the clock keypad functions, and contains the following options:... -
Page 166: Finger Id Devices
Infinisource Auto-Enter ID This option allows you to set the maximum number of digits for an ID. Example: The “Auto-Enter ID” setting is set to 3. As soon as the third digit in an ID is entered at the keypad, the punch is automatically entered (without pressing the <ENTER>... -
Page 167: External Devices
TimeForce II Hardware Guide Required for Menus With this option enabled, finger template verification is required in order to access the clock’s menu options. When this option is selected, the following prompt appears: REQUIRE FP FOR ADMIN NOW: NO *ENTER* WHEN DONE Press the soft key under the “YES”... -
Page 168: Display Options
Infinisource Display Options This menu allows you to configure how your clock display and keypad functions, and contains the following options: 1. US/EURO DATE 2. QUICK PUNCH 3. GLOBAL TIMEOUT 4. LCD BACKLIGHT US/Euro Date This option allows you to select whether you would like the date shown on the face of your clock to be displayed in US or European format. - Page 169 TimeForce II Hardware Guide Lunch Restriction Enabling this option requires the employee to take a lunch break during their shift. The length of the lunch is configured on a per-employee basis in TimeForce. This data is then sent to the clock and enforced when this option is enabled.
-
Page 170: Personal Clock Interface
Infinisource Personal Clock Interface The “Personal” menu options allow your employees to log into the clock and view various kinds of information. This menu contains the following options: 1. VALID PUNCH TIMES 2. ACCRUALS 3. DEPT, PERS. 4. FIND PUNCHES... -
Page 171: V800 / V850 On Demand Ethernet Clock
Note: See page 5 for instructions on setting up the Clock Server. You may have chosen to use a Clock Server hosted by Infinisource. In this case, the server IP should have been supplied to you at the time of pur- chase. -
Page 172: Set Dial Times
Infinisource If a specific port number is required, enter it at the clock keypad. Press the upper-right soft key to automatically populate this setting with the default of “5402.” Note: In most cases, the default setting will be used. Press the <ENTER> key to save the changes that you have made. -
Page 173: Initiating A Manual Upload
TimeForce II Hardware Guide • On Demand: This option is only available with Ethernet and Cellular clocks. When enabled, the clock will capture the employee ID at the clock, and then query the On Demand server to see if this employee is in the database. If so, the employee will be allowed to continue the punch process. - Page 174 Infinisource...
-
Page 175: Downloading Your Time Clock
TimeForce II Hardware Guide Downloading Your Time Clock The following instructions walk you through using the ClockLink utility to download your time clock(s). From the Windows Start Menu go to Programs | TimeForce II and click on “ClockLink.” The ClockLink utility opens. Enter your login information if necessary and click on the icon. -
Page 176: Creating Scripts
Infinisource Notes: • In order for scheduled tasks to run, you must have the Remember Me option enabled on the main ClockLink login page. • When using ClockLink with Windows XP, the first time you load Scheduler a dialog box may appear which reads: “Microsoft Anti- Spyware has detected a program trying to add itself to your startup registry.”... -
Page 177: Scheduling Scripts
TimeForce II Hardware Guide •Download Punches: Select this option if you would like to sched- ule times for your time clock punches to be downloaded to the TimeForce system. •Upload TimeForce Data to TimeClock: Select this option if you would like the data from the time clock profile in the Time- Force system to be sent to the clock on a scheduled basis. - Page 178 Infinisource Note: You can also open ClockLink Scheduler from the Windows Start Menu. Go to Start | Program Files | TimeForce and click on “ClockLink Scheduler.” To create a schedule, click on the icon located in the upper right-hand section of the screen. The “Edit Schedule Event”...
-
Page 179: Existing Schedules
TimeForce II Hardware Guide 10. The Schedule Type field allows you to select how many days should pass between scheduled events. The following options are available: •Daily: This schedule type executes the scheduled script every day, based on the “Execution Time” and “Start / End Date.” •Weekly: This schedule type executes the scheduled script on a weekly basis. - Page 180 Infinisource...
-
Page 181: Clock Communication Troubleshooting
Serial Clock Troubleshooting If the ClockLink utility is unable to connect to your time clock, follow the directions below. Contact Infinisource Technical Support at 1-800- 697-7010 if these steps do not resolve your problem. You can also chat with a live technician via the TimeForce website at www.qqest- time.com. -
Page 182: Modem Clock Troubleshooting
Occasionally our customers experience difficulty when initially setting up communication between their modem time clock and the computer that has ClockLink installed. If so, you can call Infinisource Technical Support immediately at 1-800-697-7010. However, it may be wise to try these troubleshooting steps before calling support. - Page 183 TimeForce II Hardware Guide Many modems will not communicate with the clock if they do not have the current driver. Check your modem manufacturer’s web site for the most current driver. This fixes many modem issues. The clock needs its own line when communicating. This does not mean that the clock cannot share a phone line with another device (such as a fax machine), but when it is communicating it needs to be on the line alone.
-
Page 184: Ethernet Clock Troubleshooting
Occasionally our customers experience difficulty when initially setting up communication between their time clock and the computer that has ClockLink installed. If so, you can call Infinisource Technical Support immediately at 1-800-697-7010. However, it may be wise to try these troubleshooting steps before calling support. -
Page 185: Installing A Bell/Buzzer
Installing a Bell/Buzzer The following instructions will guide you through connecting your bell or buzzer to the relay connection on your Infinisource time clock. WARNING: The relay connection on the time clock handles electricity from a standard 120 VAC circuit. Because of the... -
Page 186: Removing The Motherboard
Infinisource Removing the Motherboard 2-Screw Card Reader: Remove the six screws connecting the back panel of the clock case to the front-piece using a Phillips screw driver. Remove the back panel. The card reader will still be attached to the back panel. -
Page 187: Connecting The Bell/Buzzer
TimeForce II Hardware Guide Figure HARDWARE-1: ETC Configuration Connecting the Bell/Buzzer and Power Source Lay the motherboard on a flat, secure surface with the electronic components facing up. The relay connection is on the lower left corner of the motherboard. Loosen both screws on the top of the relay connection. - Page 188 Infinisource Figure HARDWARE-2: ETC Bell Connection Connect the power source ground wire to the ground terminal on the bell. Connect the power source negative wire to the negative terminal on the bell. Connect the power source positive wire to the positive terminal on...
-
Page 189: Replacing The Motherboard
TimeForce II Hardware Guide Measure an appropriate distance down the power source positive wire from the bell and cut the wire (the distance between the bell and the place where you cut the positive wire determines how far the bell can be from the clock). IMPORTANT: Make sure you cut ONLY the positive wire. -
Page 190: Iq Clocks
Infinisource IQ Clocks The procedures for connecting your bell or buzzer to an IQ clock vary slightly depending on whether you are using an IQ 300/400/500 model clock, or an IQ 1000 model clock. Follow the instructions that corre- spond to your clock model. - Page 191 TimeForce II Hardware Guide Loosen both screws on the top of the relay connection. NOTE: Make sure that the electrical wires are not live. Serious injury or death can result from coming in contact with live electri- cal wires. Locate the three bell wires. One is the ground wire, one is the power source positive wire, and one is the power source negative wire.
- Page 192 Infinisource Figure HARDWARE-4: IQ 300, 400 or 500 Bell Connection 10. Tighten both screws to secure the wires. 11. Attach the clock and bell to the wall in their respective locations. 12. Connect the clock and bell to their power sources and reconnect the clock’s communication cable.
-
Page 193: Iq 1000 Time Clock
TimeForce II Hardware Guide IQ 1000 Time Clock Remove the clock from the wall (if it has already been mounted), turn it over and examine the back. At the bottom of the clock case a panel is cut out, revealing the hardware components on the inside of the clock. - Page 194 Infinisource Locate the three bell wires. One is the ground wire, one is the power source positive wire, and one is the power source negative wire. Connect the power source ground wire to the ground terminal on the bell. Connect the power source negative wire to the negative terminal on the bell.
- Page 195 TimeForce II Hardware Guide Figure HARDWARE-6: IQ 1000 Bell Connection 10. The 3 holes in the IQ 1000 relay are labeled “N.O.,” “COM” and “N.C.” •N.O. (Normally Open): This circuit is normally open. When the relay is activated the circuit closes, causing the bell or buzzer to go off.
- Page 196 Infinisource 11. Insert the 2 exposed wires into the appropriate ports on the clock relay. 12. Tighten both screws to secure the wires. 13. Attach the clock and bell to the wall in their respective locations. 14. Connect the clock and bell to their power sources and reconnect the clock’s communication cable.
-
Page 197: Installing A Door Security Reader
Security Reader Introduction The Door Security feature of an Infinisource time clock allows you to connect the clock relay to an external door switch (or, Wiegand reader). When an employee’s punch at the time clock is accepted, the relay acti- vates and the door opens. -
Page 198: Before You Install The Reader
Infinisource Before You Install the Reader The external reader should be mounted in the correct location before connecting it to the time clock. Mount at shoulder-height if cards are normally worn around the neck on a lanyard. Mount at hip-height if cards are activated “hands-free”... - Page 199 TimeForce II Hardware Guide Figure HARDWARE-7: Wiegand Connector The connections on the Wiegand port are (from left to right) “Data1,” “Data0,” “Ground,” and “VCC (Power).” See page 185 for a table detailing which colored wires are to be installed into which ports.
- Page 200 Infinisource...
-
Page 201: Poe Clocks
IQ 400 • IQ 300 PoE is not supported for the ETC 100 clock model. Specifications In order to use PoE, your network must be set up so that the clock’s Ethernet cable runs into a switch, router or hub that supports PoE func- tionality. -
Page 202: Identifying A Poe Clock
Infinisource Simply locate the communications port on the back of the clock in the upper left-hand corner of the cutout section of the clock case (directly above the clock relays). Plug one end of the Standard Category 5 (CAT5) cable into the Ethernet port. The other end of the CAT5 cable is plugged into your network switch, router or hub. -
Page 203: Static Discharge Plate
TimeForce II Hardware Guide Static Discharge Plate The fingerprint sensor on an IQ 1000, V800 or V850 time clock con- tains very delicate circuitry that is susceptible to damage from static shock. When you touch the time clock and your finger gets “zapped,” you are actually discharging static electricity from your body, shocking the clock and potentially damaging the fingerprint sensor. - Page 204 Infinisource Figure HARDWARE-8: Electrical Outlet Attach the ground wire to the desired location by slipping the ring- terminal at the end of the wire onto the screw and replacing. Replace the electrical outlet face-plate. You may now resume use of the clock, with employees using the static discharge plate as desired.
-
Page 205: Fingerprint Sensor Security Guard
WARNING: The circuitry and ribbons inside the fingerprint mod- ule are extremely delicate. If by chance the clock case does come open, stop what you are doing and call Infinisource Technical Sup- port immediately. Damage to the fingerprint module is not covered by your Service Agreement. - Page 206 Infinisource Using the provided Torx security screws and screwdriver bit, secure the guard to the fingerprint module. This also secures the finger- print module case. You can now replace the clock to its permanent location. Remember to re-connect the data and power cables.
-
Page 207: Finger Enrollment Station
TimeForce II Hardware Guide Finger Enrollment Station The Finger Enrollment Station is used to enroll and store the finger tem- plates of your employees from a computer workstation, instead of hav- ing to perform new enrollments at a time clock. Finger templates are stored in the TimeForce database. -
Page 208: Software Installation
Infinisource Software Installation The utility that the Enrollment Station uses is installed from the main TimeForce installation disk. The utility must be installed on the machine that the Enrollment Station is physically connected to. This machine must also have access to the TimeForce program database. -
Page 209: Enrollment Station Utility Login
TimeForce II Hardware Guide On the TimeForce Installation Menu, click on the [RETURN TO MAIN MENU] icon, then on [EXIT]. You can now open the utility and begin using your Enrollment Station. Enrollment Station Utility Login In order to log in to the Enrollment Station utility, you must supply it with the user name and password of the administrator TimeForce user, as well as the company code that all users enter when logging into the system. -
Page 210: Using The Enrollment Station
Infinisource Using the Enrollment Station The following instructions walk you through understanding how the enrollment process works, and lead you step-by-step through creating finger templates. Enrolling Legible Finger Templates The following topic is intended to give you a basic knowledge of finger enrollment process. - Page 211 TimeForce II Hardware Guide Quality and Content When a new template is enrolled a “Quality” and “Content” reading is generated, informing you of the overall quality of the scan. Quality The “Quality” reading refers to how well the ridge pattern is defined within the finger image that was enrolled.
-
Page 212: Finger Pattern Types
Infinisource Figure HARDWARE-10: Content Readings A finger template consists of the identifiable characteristics of your fin- gertip. These characteristics vary depending on which pattern type your finger contains (see “Finger Pattern Types” below for a definition of each of the three pattern types). If these characteristics are not captured when the template is created, the verification process will have little to compare a scanned finger to. - Page 213 TimeForce II Hardware Guide Loop In a loop pattern ridges enter from either side of the template image, loop around the image and pass out again, creating a “Core” (or center of the loop) generally located near the center of the template image. Whorl In a whorl pattern ridges at the core of the template image are usually circular, resulting in a “Delta”...
-
Page 214: Troubleshooting
Infinisource Troubleshooting If you experience difficulty when enrolling finger templates, try the fol- lowing troubleshooting steps: • Ensure that both the sensor and the finger are clean. An excessively dirty finger or sensor will affect the quality of an enrolled template. - Page 215 TimeForce II Hardware Guide The card number is detected within the TimeForce database. The assigned employee's name is displayed in the header at the top of the screen. Any finger templates that currently exist for this employee within the TimeForce database are displayed on the left. The New Finger Template section of the screen is where new tem- plates are enrolled.
-
Page 216: Viewing A Template Image
Infinisource Enter up to five templates for this employee, as desired. Finger tem- plates are automatically stored in the TimeForce database. Once a tem- plate has been enrolled, it can immediately be transferred to your time clock(s) using the ClockLink utility. -
Page 217: Using The "View Image" Option
TimeForce II Hardware Guide Using the “View Image” Option Open the Enrollment Station utility. From the Windows Start Menu go to Programs | TimeForce and click on “Enrollment Station.” Note: You may be asked login using a TimeForce username, pass- word and company code. - Page 218 • The IWAM and IUSR permissions are not set correctly on the “Webservices” directory. Refer to the TimeForce Knowledgebase or call Infinisource Technical Support for information on resolving this error. • The Execute Permissions on the “Webservices” directory are not set to “Scripts and Executables”...
-
Page 219: Cable Specifications
Any cable over 20 feet in length should be shielded, and should not have any splices. It is recommended that you use shielded cable supplied by Infinisource. If you are unable to use cable supplied by Infinisource, category 3 or 5 Shielded Twisted Pair cable may be used, but you should only use 1 wire from each twisted pair, and abandon the other wire of each pair. -
Page 220: Cable Pinouts
Infinisource • The physical path of the cable must be as free as possible of electro- magnetic interference (EMI) or radio frequency interference (RFI). Shielded cable will decrease vulnerability to such interference, but cannot guarantee its elimination. Avoid running cable over or near florescent lighting, electric motors, power distribution panels, transmitters or UTP network cable bundles. - Page 221 TimeForce II Hardware Guide Figure HARDWARE-11: Cable Pinouts Figure HARDWARE-12: Cable Pinouts Cable Specifications...
-
Page 222: Modem Clocks
Infinisource Modem Clocks Due to possible problems when running a modem clock on some types of phone systems, we require that only a “two wire” phone cable be used with our clocks (as opposed to the standard “four wire” cable). -
Page 223: How Do I Create Clock Groups
TimeForce II Hardware Guide How Do I Create Clock Groups? The TimeForce system allows you to organize your time clocks by assigning them to clock groups. Groups can be created based on their location, the employees that will be using the clock, etc. Clock groups are created from the “Clocks”... - Page 224 Infinisource...
-
Page 225: Finger Id Sensor Cleaning Instructions
TimeForce II Hardware Guide Finger ID Sensor Cleaning Instructions The following instructions walk you through cleaning the finger ID sen- sor on your IQ 1000, V800 or V850 time clock. Although maintenance and handling requirements for the sensor are few in number, observance of a few basics will help to ensure a high level of performance over the life of the sensor. -
Page 226: Caring For The Finger Id Sensor
It is recommended that you use a static discharge plate which is connected to a ground plane (contact Infinisource Accessory Sales for more information). You should always discharge the static electricity from your body before touching the fingerprint sensor. -
Page 227: Index
TimeForce Hardware Guide Index Accruals 94, 158 Cable Pinouts 208 Add Clock 9 Cable Specifications 207 Add Company 8 Card Number 125, 141 Add/Edit Clocks 9 Card Range 17, 24 Add/Edit Database Connection 7 Card Reader Types 15 Additional Clock Codes 12 CAT5 Cable 28, 107, 190, 210 Additional Clock Category 3 or 5 Shielded Twisted... - Page 228 Infinisource Clock Password 9, 66, 106 Connection Type, Wireless Clock Profile 115, 127 Settings 84 Clock Server 5, 103 Content (Finger Enrollment Clock Setup 149 Station) 199 Clocking In and Out 22 Contrast 98 ClockLink 3 Creating a Clock Profile 115, 127...
- Page 229 Model 11 Enrollment Station Utility Determining Your Hardware Login 197 Configuration 173 Enter SSID 83 Display Options 156 ETC 100 Model Clock 17 Door Security 48 ETC Clock Bell/Buzzer Download Punches 165 Installation 173 Downloading Your Time ETC Clocks 1...
- Page 230 Infinisource Installing the ClockLink Utility 3 Installing the Live Lookup Gateway 29, 31, 46, 83 Server 94 Global Security 124, 140, 149 Installing the Local ETC Time Global Timeout 156 Clock 19 ground terminal 176 Installing the Static Discharge ground wire 176...
- Page 231 TimeForce Hardware Guide Network Administrator 29 Network Interface Details 7 Key Click 47, 153 New Finger ID 149 Key Tones 153 keypad entry 47 On Demand Ethernet Settings 100 LCD Backlight 156 OnDemand Options 119, 131 Live Lookup Server 95, 97 Options 85 Local Area Network 29, 110 Other Punch Options 43,...
- Page 232 Infinisource proximity card reader 15 Send Date and Time to Time Punch Restrictions 156 Clock 165 Push Server IP 159 Serial Clock Troubleshooting 169 Serial Clocks 19, 27, 108, 207 Quality (Finger Enrollment serial port 108 Station) 199 Set Call Times 101...
- Page 233 TimeForce Hardware Guide Download 163 Time Offset 9 Setting Up the Clock Server 7 TimeForce Password 8 Show Settings 46, 84, 154 TimeForce Server 8 Software Installation (Finger TimeForce Username 8 Enrollment Station) 196 Troubleshooting (Finger SSID 31 Enrollment Station) 202 Standard Category 5 (CAT5) two wire phone cable 210 cable 28, 107, 190, 210...
- Page 234 Infinisource V800 / V850 On Demand Ether- WAIT/ERROR 22 net Clock 159 Whorl Finger Pattern 201 V800 Clock 15 WiPort NR 190 V850 Clock 16 wireless access point 31, 83 Valid Punch Times 93, 158 Wireless Settings 83 Velocity Clocks 2, 15, 105...
Need help?
Do you have a question about the ETC 100 and is the answer not in the manual?
Questions and answers